
Related Manuals for Areca ARC-8050T3-6


Summary of Contents for Areca ARC-8050T3-6
-
Page 1: Installation Guide
Thunderbolt™ Product ARC-8050T3 (4/6/8/12-bays Thunderbolt 3 RAID Storage) Installation Guide Version: 1.1 Issue Date: April, 2017... -
Page 2: Copyright And Trademarks
Copyright and Trademarks The information regarding products in this manual is subject to change without prior notice and does not represent a commitment on the part of the vendor, who assumes no liability or responsibility for any errors that may appear in this manual. All brands and trademarks are the properties of their respective owners. -
Page 3: Table Of Contents
Contents 1. Before You First Installing ............4 2. Summary of RAID Storage Setup Steps .........5 • For macOS ..............5 • For Windows ..............5 3. RAID Storage View ..............7 4. Locations of the Storage Component ........11 4.1 Drive Tray LED Indicators ..........11 4.2 LCD Panel LED Indicators .......... -
Page 4: Before You First Installing
INSTALLATION 1. Before You First Installing Thanks for purchasing the ARC-8050T3 as your RAID data storage. The following manual gives simple step-by-step instructions for installing and configuring the ARC-8050T3 RAID storage. Unpack Unpack and install the hardware in a static-free environment. ARC-8050T3 RAID storage is packed inside an anti-static bag between two sponge sheets. -
Page 5: Summary Of Raid Storage Setup Steps
3. Connect Thunderbolt cable. Step 2. Install the MRAID Software Package (Page 17) 1. Download the install_mraid installer from the website at “http://www.areca.com.tw/support/s_ thunderbolt/thunder bolt_mac.htm”. 2. Double-click on the install_mraid zipped file. 3. Double-click on the install_mraid icon on the Finder. - Page 6 INSTALLATION Step 2. Install the MRAID Software Package (Page 17) 1. Download the install_mraid installer from the website at “http://www.areca.com.tw/support/s_ thunderbolt/thunder bolt_win.htm”. 2. Double-click on the install_mraid zipped file. 3. Double-click on the “setup.exe” unzip file. 4. Follow the installer on-screen steps to complete the installa- tion.
-
Page 7: Raid Storage View
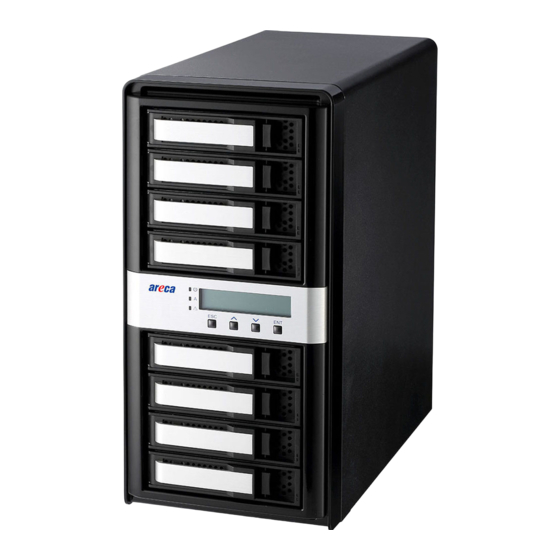
INSTALLATION 3. RAID Storage View The following diagram is the ARC-8050T3 4-bay RAID storage front view and rear view. Front View Rear View 1. Disk Activity LED 4. Thunderbolt3 (USB-C) Port1 2. Disk Fault / Link LED 5. Thunderbolt3 (USB-C) Port2 3. - Page 8 INSTALLATION The following diagram is the ARC-8050T3 6-bay RAID storage front view and rear view. Front View Rear View 1. Disk Activity LED 4. Thunderbolt3 (USB-C) Port1 2. Disk Fault / Link LED 5. Thunderbolt3 (USB-C) Port2 3. LCD Panel with Keypad 6.
- Page 9 INSTALLATION The following diagram is the ARC-8050T3 8-bay RAID storage front view and rear view. Front View Rear View 1. Disk Activity LED 4. Thunderbolt3 (USB-C) Port1 2. Disk Fault / Link LED 5. Thunderbolt3 (USB-C) Port2 3. LCD Panel with Keypad 6.
- Page 10 INSTALLATION The following diagram is the ARC-8050T3 12-bay RAID storage front view and rear view. Front View Rear View 1. Disk Activity LED 4. Thunderbolt3 (USB-C) Port1 2. Disk Fault / Link LED 5. Thunderbolt3 (USB-C) Port2 3. LCD Panel with Keypad 6.
-
Page 11: Locations Of The Storage Component
INSTALLATION 4. Locations of the Storage Component The following components come with LEDs that inform ARC-8050T3 RAID storage managers about the operational status. 4.1 Drive Tray LED Indicators Figure 1, Activity/Fault LED The following table describes the RAID storage disk drive tray LED behavior. -
Page 12: Lcd Panel Led Indicators
INSTALLATION 4.2 LCD Panel LED Indicators There are a variety of status conditions that cause the RAID stor- age panel monitoring LED to light. The front panel LCD comes with three (3) status-indicating LEDs. The LEDs on the front panel are defined, from top to bottom, Power, Busy, and Caution, as shown in Figure 2 and Figure 3. -
Page 13: Setting Up Raid Storage
INSTALLATION 5. Setting Up RAID Storage Setting up your ARC-8050T3 RAID storage involves these main steps: • Physically Install the RAID Storage and Drives • Install the MRAID Software • Configure RAID Volumes • Format RAID Volumes • Unmounting RAID Volumes Details about these steps are described in the following sections. - Page 14 INSTALLATION 3. After all drives are in the drive tray, slide all of them back into the ARC-8050T3 RAID storage and make sure you latch the drive trays. Figure 5, Sliding Drive Tray into Enclosure Step 2. Connecting RAID Storage to Thunderbolt Ports Thunderbolt connectors are provided on the back of the ARC- 8050T3 RAID storage for connecting the array to Thunderbolt host and next Thunderbolt devices.
- Page 15 INSTALLATION Figure 6, Connecting to Thunderbolt computer • Daisy Chain Topologies A single Thunderbolt technology daisy chain can have seven devices, including the computer. Connect the cable to one of the interface ports on the back of your ARC-8050T3 RAID stor- age and to your Thunderbolt capable computer.
- Page 16 INSTALLATION Step 3. Connecting Monitor Port (Optional) You can connect LAN port to the manager clinet system, if you want to configure and manage the RAID storage from the clinet system through out-of-band manager. • LAN Port Connection User can remote manage the RAID enclosure without adding any user specific software (platform independent) via standard web browsers directly connected to the 10/100Mbit RJ45 LAN port.
-
Page 17: Mac Users
5.2.1 Install the MRAID Software This section describes detailed instructions for installing the Areca Mac driver & utility for the ARC-8050T3 on your Apple Thunderbolt capable machine. You must have administrative level permissions to install macOS driver & utility. This can be done in just a few steps! 1. - Page 18 INSTALLATION 5. On the Choose Install Set screen, click on an icon to install special components and click on the "Next" button to continue. • Driver is required for the operating system to be able to inter- act with the ARC-8050T3 RAID storage. •...
- Page 19 Interface. You can set up and manage RAID storage inline. CLI performs many tasks at the command line. You can download CLI manual from Areca website. 6. On the Choose Alias Folder screen, click on an icon to choose where you like to create aliases and click on the "Next"...
- Page 20 INSTALLATION 8. A program bar appears that measures the progress of the driver installation. 9. When this screen shows, you have completed the driver installation and click on the "Next" button to continue.
-
Page 21: Configure Raid Volumes
INSTALLATION 10. After installation is completed, click on the "Done" button to reboot your computer in order to complete installation. 11. The ArcHTTP and ArcCLI are installed at the same time on ARC-8050T3. Once ArcHTTP and CLI have been installed, the ArcHTTP background task automatically starts each time when you start your computer. - Page 22 INSTALLATION • Method 1: McRAID Storage Manager From ArcHTTP Start McRAID Storage Manager – Browser Edition There is one “MRAID” icon showing on your desktop. Double- click on the “MRAID” icon to locate your ArcHTTP utility and CLI program file folder. When you double-click on the “ArcHTTP64”, it shows all RAID storages available on the system and create an individual RAID storage icon located on left column of the “ArcHTTP Con-...
- Page 23 INSTALLATION Click on the “Quick Create” in the main menu, your volume is automatically configured based on the number of disks in your system. You can create a RAID set associated with exactly one volume set. The user can change the Raid Level, Capacity, Initialization Mode, and Stripe Size.
-
Page 24: Format And Partition Raid Volumes
The LCD configuration is described in a separate manual: ARC-8050T3_LCD manual. You can download ARC-1009 (LCD Manual) from Areca website. The LCD provides a system of screens with areas for information, status indication, or menus. The LCD screen displays up to two lines at a time of menu items or other information. - Page 25 INSTALLATION Choose OS X Extended (Journaled) for the Format, and, for the Scheme, choose GUID Partition Map. You could also choose MS-DOS as the format, if you want to be able to use the drive on both a Mac and a PC. In that case, choose Mas- ter Boot Record for the Scheme.
-
Page 26: Make A Bootable Raid Volume
INSTALLATION If you want to adjust their sizes, you can do so by dragging the circles dividing the partitions, or by typing a size into the Size field. When you click “Apply”, Disk Utility erases the RAID storage and splits it into the number of partitions you have selected. -
Page 27: Unmounting Raid Volumes
INSTALLATION 5.2.5 Unmounting RAID Volumes To avoid possible data corruption, Areca recommends that ARC- 8050T3 RAID storages volume(s) be properly unmounted from the computer prior to turning off the RAID storage or safely removing the Thunderbolt interface cable. 1. Drag RAID storage volume(s) icon to the trash. The Trash will turn into an Eject arrow. -
Page 28: Windows Users
Follow the steps below to install the driver & utility for Windows. 1. Download the install_mraid installer from the website at “http://www.areca.com.tw/support/s_thunderbolt/thunder- bolt.htm”, the file name begins with “install_mraid” followed by the version control. 2. Double-click on the zipped file that comes from the website to unzip it. - Page 29 INSTALLATION 5. When the License Agreement screen appears, read and agree to the license information; then let the InstallShield Wizard guide you through the installation process. 6. On the Setup Type screen, use the settings to specify these things: and click on the “Next” button to continue.
- Page 30 • CLI (Command Line Interface) provides the functionality available in MRAID storage manager through a Command Line Interface. You can set up and manage RAID storage inline. CLI performs many tasks at the command line. You can download CLI manual from Areca website.
- Page 31 INSTALLATION 7. When you reach the installation page, click on the “Install” button to continue. 8. A program bar appears that measures the progress of the driver installation. When this screen completes, you have completed the MRAID installation. If you have no ARC-8050T3 RAID storage unit yet connected or powered on, a “MRAID Installer Information”...
-
Page 32: Configure Raid Volumes
INSTALLATION 10. The ArcHTTP and CLI are installed at the same time on ARC- 8050T3. Once ArcHTTP and CLI have been installed, the Arc- HTTP background task automatically starts each time when you start your computer. There is one MRAID icon showing on your “Programs”... - Page 33 INSTALLATION • Method 1: McRAID Storage Manager From ArcHTTP Start McRAID Storage Manager – Browser Edition Right-click on the “Start” menu and choose “Programs”. Double-click on the “MRAID” program icon to start the ArcHTTP utility (From the Start menu, choose Programs > MRAID >...
- Page 34 The LCD configuration is described in a separate manual: ARC-8050T3_LCD manual. You can download ARC-1009 (LCD Manual) from Areca website. The LCD provides a system of screens with areas for information, status indication, or menus. The LCD screen displays up to two lines at a time of menu items or other information.
-
Page 35: Format Raid Volumes
Windows Explorer. 5.3.4 Unmounting RAID Volumes To avoid possible data corruption, Areca recommends that ARC- 8050T3 RAID storages volume(s) be properly unmounted from the computer prior to turning off the RAID storage or safely... - Page 36 INSTALLATION To unmount ARC-8050T3 RAID storage from a Windows system: 1. Click on the "Safely Remove Hardware and Eject Media" icon in the notification area, at the lower right-hand side of your screen, and then, in the list of devices, choose the Thunder- bolt storage volume option that you want to remove.
-
Page 37: Specification
SPECIFICATION 6. Specification Controller Architecture • 1.2 GHz dual core ROC for RAID core and SAS microcode • 2GB on-board DDR3-1866 SDRAM with ECC protection • Redundant flash image for adapter availability • System status indication through LCD, LED and alarm buzzer RAID Features •... -
Page 38: Product Features
SPECIFICATION Product Features 12Gb/s SAS RAID Storages Model Name ARC-8050T3-4 ARC-8050T3-6 ARC-8050T3-8 ARC-8050T3-12 Form Factor Desktop 4-Bay Desktop 6-Bay Desktop 8-Bay Desktop 12-Bay Disk Port 12 x 6Gb/s SAS 12Gb/s SAS 12Gb/s SAS 12Gb/s SAS On-Board 1GB DDR3-800 2GB DDR3-1866...
Need help?
Do you have a question about the ARC-8050T3-6 and is the answer not in the manual?
Questions and answers