
Summary of Contents for Electroline Control Unit IV
- Page 1 Control Unit IV Reference Manual Publication Number: 529-0004 Ver.3 Product Version: 3.30 or higher Date: December 2001...
- Page 2 E-mail address: support@electroline.com Products and services To find out more about our products, visit our Web site at www.electroline.com or write to us at info@electroline.com. Warranty and repairs For warranty, repair or return information, please visit our Web site at www.electroline.com.
-
Page 3: Table Of Contents
Control Unit IV Reference Manual Contents About this manual........................vi Conventions........................vii 1. PRODUCT DESCRIPTION 1.1 General introduction ....................1-1 1.1.1 Carrier options ....................1-1 1.1.2 Compatibility with previous versions............. 1-2 1.1.3 Certifications ....................1-2 1.2 Roles ........................1-2 1.2.1 Subscriber tier management ................1-2 1.2.2 Return path monitoring................... - Page 4 Control Unit IV Reference Manual 3. SETUP 3.1 COM port characteristics ...................3-1 3.2 COM port protocols....................3-2 3.2.1 Terminal protocol....................3-2 3.2.2 Packet-switched protocols................3-2 3.3 Access levels......................3-3 3.3.1 Limited access ....................3-4 3.3.2 Full access .......................3-4 3.3.3 Logging off a session ..................3-5 3.4 Viewing the unit’s setup ....................3-6 3.5 Starting a setup session ....................3-7...
- Page 5 Control Unit IV Reference Manual 5.2.1 Adding expansion boards ................5-4 5.2.2 Removing or replacing the RAM Expansion Board........5-4 5.3 Transferring subscriber status data................5-6 5.3.1 Downloading subscriber statuses..............5-6 5.3.2 Uploading subscriber statuses ................ 5-7 5.4 Upgrading the Control Unit’s firmware..............5-10 5.4.1 Installing the upgrade program ..............
- Page 6 Figure 2-7: Connecting the Control Unit’s COM 3 port to a computer for setup ....2-14 Figure 5-1: Fuse holder removal....................5-1 Figure 5-2: Spare fuse holder....................5-1 Figure 5-3: Internal view of the Control Unit IV with a RAM expansion board ....5-3 Figure 5-4: RAM Expansion Board installation ..............5-5 Figure 5-5: Connection for programming................5-16 Figure B-1: Female DB-25 connector (COM 1 and COM 2) ..........
- Page 7 Control Unit IV Reference Manual Table 3-5: System types supported by each protocol............3-16 Table 3-6: Protocol variations..................... 3-17 Table 4-1: Scan time as a function of nominal capacity ............4-3 Table 6-1: Verification of status LEDs ................. 6-1 Table 6-2: Procedures for troubleshooting problems with the RF OUT port ....... 6-4 Table 6-3: Procedures for troubleshooting problems with the TEST OUT port....
-
Page 8: About This Manual
About this manual This reference manual contains all the procedures for installing, setting up, operating, maintaining and troubleshooting the Control Unit IV. In this manual, the term Control Unit refers to the Control Unit IV, unless otherwise specified. This section outlines the manual’s structure and sets out the typographical conventions used throughout this manual. -
Page 9: Conventions
Control Unit IV Reference Manual Conventions The following conventions are used in this manual: Symbol Meaning Menu options, field names, messages shown on screen. Bold Example: The message Starting autosave will appear on screen. Courier type Commands to be entered as is. -
Page 11: Product Description
PRODUCT DESCRIPTION... -
Page 13: General Introduction
Control Unit’s features. 1.1.1 Carrier options There are two types of Electroline FSK data carriers: dual FSK and single FSK. The data carrier type depends on the Control Unit’s modulator and demodulator. Control Units equipped with a dual FSK modulator and demodulator produce and demodulate dual FSK carriers at a fixed frequency. -
Page 14: Compatibility With Previous Versions
Control Unit IV Reference Manual 1.1.2 Compatibility with previous versions If you are upgrading to the Control Unit IV from a previous model, please note that the Control Unit IV is compatible with the Control Unit II and replaces the Control Unit III. If you are upgrading to firmware version 3.30 or higher from a previous version of the Control... -
Page 15: Figure 1-1: The Control Unit's Role In A Cable Tv Network
Control Unit IV Reference Manual Product Description Cable Network with Addressable Taps A p a r t m e n t building Cable Headend Subscriber drops Billing system RS-232 or LAN connection via an Ethernet-RS-232 bridge S T T Control Unit... -
Page 16: Return Path Monitoring
Product Description Control Unit IV Reference Manual 1.2.2 Return path monitoring When used in conjunction with a CLEARPath control software for locating sources of ingress, the Control Unit remotely switches CLEARPath modules (CPMs) and Test Point Selectors (TPS) according to the status it receives from the control software. For return path applications, the status can be a command to switch the CPM’s relay to the open position,... -
Page 17: Features
The Control Unit does not keep track of street addresses; it only stores the status information for each Electroline group-tap address. -
Page 18: Subscriber Capacity
32 K unit shipped to a cable operator contains all 32,768 addresses in its memory. You cannot modify the number of subscribers. Contact Electroline’s sales department if you would like to obtain a Control Unit with a larger capacity. Note that the time it takes to refresh the tap status of all subscribers in the network (i.e. -
Page 19: Redundancy System
Use this program only when you need to upgrade the firmware (see Chapter 5 for upgrade instructions). Normally, a firmware upgrade is only required if it has been recommended by Electroline’s technical support staff. In addition to software and firmware upgrades, the Control Unit’s hardware can be upgraded through the expansion slots on its main board (see section 1.4.2 for information on expansion... -
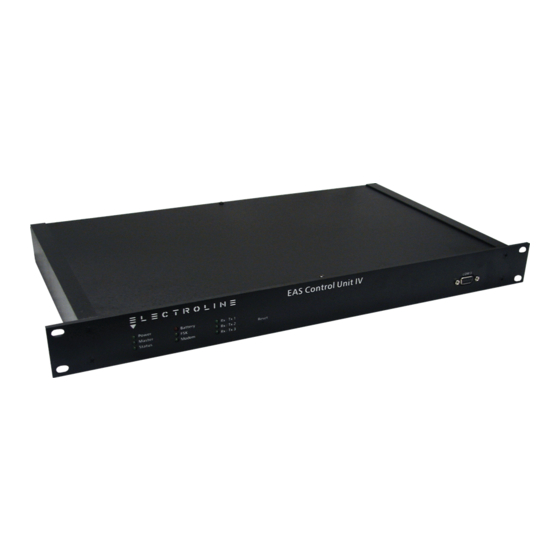
Page 20: Physical Characteristics
L E D s Reset button Setup port Figure 1-3: Front panel of the Control Unit IV Rear panel All cabling connections, except for the setup connection, are located on the rear panel: RF inputs and outputs, COM ports, proprietary backup system port, and power entry module. -
Page 21: Internal Features
F-type connectors for connecting standard 75-ohm coaxial cable. Note that the port BACKUP is not an RS-232 connector; only the Electroline redundancy cable should be connected to this port if you have a redundancy system. See Chapter 3 for more details on redundancy systems. - Page 22 (see Chapter 5). FSK modulator and demodulator There are two kinds of modulators that produce an FSK carrier used by the Electroline decoders deployed in the cable plant: dual FSK and single FSK. Control Unit’s with a dual FSK modulator modulate the control carriers on two frequencies in order to represent the binary elements of a data stream coming from the sequencer.
-
Page 23: Reference
For pin assignments on the RS-232 cables used with the Control Unit, see Appendix B. Contact your Electroline representative to obtain additional copies of this manual or to obtain manuals for other products that are used with the Control Unit. -
Page 25: Installation
INSTALLATION... -
Page 27: Handling
This can take up to four hours. For more information, contact Electroline to obtain specifications on the Control Unit’s operating and storage temperature range. -
Page 28: Mounting The Unit
Installation Control Unit IV Reference Manual 2.3 Mounting the unit For best RF performance and for maximum protection against the risk of electric shock, we strongly recommend that you mount the Control Unit in a properly grounded rack. 2.3.1 Hardware requirements •... -
Page 29: Setting Up The Host Computer
Control Unit IV Reference Manual Installation 2.4 Setting up the host computer This procedure sets up a computer so that you can establish a connection with the Control Unit. There are two main types of connection: one is for setup and the other is for data exchange. - Page 30 Installation Control Unit IV Reference Manual 3. In the Phone Number window, go to the Connect using field and select a communication port for the host computer that is not used by other devices. For example, select Direct to Com 2.
- Page 31 Control Unit IV Reference Manual Installation 5. To display the commands and instructions received during communication, use the File menu in the menu bar and select Properties. When the Properties window opens, select the Settings tab and click the button.
-
Page 32: Using The Workabout To Set Up The Control Unit
Workabout. Normally, the Workabout is used only to run the Electroline software, but it also includes a terminal emulation mode that can be used to access the Control Unit’s setup menu. Follow the instructions in this section to use the Workabout as a setup terminal. -
Page 33: Setting Up A Modem
If the host computer and the Control Unit are connected over a direct link, disregard this procedure. Note that if you are using a modem recommended by Electroline, contact the technical support department for detailed modem setup procedures. The following procedure is intended as a guideline for modem setup. -
Page 34: Cable Assemblies And Applications
Installation Control Unit IV Reference Manual 2.6 Cable assemblies and applications The Control Unit requires various cables, connectors and adapters to interface with a host computer, peripheral devices and measuring instruments. Figure 2-3 illustrates the main cables the Control Unit uses whether it is installed alone or with a backup unit. Figure 2-4 shows the cables that are used with a backup unit. -
Page 35: Connecting The Control Unit
Control Unit IV Reference Manual Installation 2.7 Connecting the Control Unit This section covers all the cabling instructions for the Control Unit, whether it is used alone or used with a backup unit in a redundancy system. Figure 2-5 shows the cabling diagram for a single Control Unit;... -
Page 36: Connecting The Control Unit To The Host Computer Or Modem
Installation Control Unit IV Reference Manual 2.7.1 Connecting the Control Unit to the host computer or modem To connect COM 1 or COM 2 to the host computer or modem, or to an Ethernet–RS-232 bridge, you will need the following equipment: Direct link •... -
Page 37: Connecting The Control Unit To The Catv Network
Control Unit IV Reference Manual Installation 2.7.2 Connecting the Control Unit to the CATV network The Control Unit transmits subscriber data to the CATV network from its RF output, which is connected to the headend’s main combiner. The FSK carrier will then be injected into the CATV network. -
Page 38: Connecting A Master Unit To A Backup Unit
Installation Control Unit IV Reference Manual 2.7.5 Connecting a master unit to a backup unit To connect a master unit to a backup unit, you must use the redundancy kit (see Figure 2-4), which includes a redundancy cable, a three-way ribbon cable and a synchronization cable. -
Page 39: Figure 2-6: Connections In A Redundancy System
Control Unit IV Reference Manual Installation Important: The master unit and the backup unit must have exactly the same setup and firmware version (see Chapter 3). Master Unit " M A S T E R " connector Coaxial jumper H e a d e n d... -
Page 40: Connecting The Control Unit For Setup
Installation Control Unit IV Reference Manual 2.7.6 Connecting the Control Unit for setup The COM 3 port is used to set up and upgrade the Control Unit’s firmware. It can also be used for troubleshooting. To connect the COM 3 port to the host computer or the Workabout, you must use an RS-232 cable with DB-9 connectors. -
Page 41: Setup
SETUP... -
Page 43: Com Port Characteristics
Control Unit IV Reference Manual 3. SETUP This chapter provides the information you need to set up the Control Unit. Each of the Control Unit’s various setup commands is explained along with practical examples. This chapter also provides an overview of the communication protocols that are supported on the Control Unit’s COM ports. -
Page 44: Com Port Protocols
The Control Unit supports several packet-switched protocols, as shown in Table 3-6 on page 3-17. For each protocol, one or more “flavors” (types) may be available. Electroline develops flavors to take into account variations in the protocols. For example, CSG 2T has several variations that modify the way it responds to different identification codes. -
Page 45: Access Levels
Control Unit IV Reference Manual Setup 3.3 Access levels There are two user access levels: limited access and full access. Users with limited access do not need a password. If you have limited access, you can use basic commands such as displaying the unit’s setup, and showing the status of one or more subscribers. -
Page 46: Limited Access
Setup Control Unit IV Reference Manual 3.3.1 Limited access Limited-access users can use all the commands in this section; no password is required. To view the list of commands available to a limited-access user once you are connected to a Control Unit: 1. -
Page 47: Logging Off A Session
Control Unit IV Reference Manual Setup 3. Type and press <Enter> to display the command menu. help CU4>help Terminal Protocol info Show system info time [hh:mm:ss] Read [set] time date [wkday-mth-day-yr] Read [set] date (Sun=1 & 2000=00) chkram Verify status RAM * tap <g,t>... -
Page 48: Viewing The Unit's Setup
Control Unit. The capacity is preset in the factory and cannot be changed. • The Control Unit IV’s identification number (CU4 ID) corresponds to the “Head-end code” that the previous model of the Control Unit uses. 529-0004 Ver.3... -
Page 49: Starting A Setup Session
3.5 Starting a setup session In order to make the Control Unit easier to install and use, Electroline sets up the unit in advance, according to the customer’s specifications. You can, however, modify some of the setup parameters. -
Page 50: Setup Procedure
Setup Control Unit IV Reference Manual 3.6 Setup procedure To start a setup session you must first establish a connection with the Control Unit. Follow the procedure for establishing a connection as explained in Chapter 2. The commands in this section require full-access privileges. Therefore, you must log on with a password. -
Page 51: Setting The Date
Control Unit IV Reference Manual Setup 3. To change the Control Unit’s time, type followed by the current time in the format time hh:mm:ss, and press <Enter>. Note that all users can display the time, but only full- access users can set the time. -
Page 52: Changing The Password
To access the setup screen: 1. At the CU4> prompt, type and press <Enter>. This command can only be used setup on COM 3 once you have entered your password. The Control Unit IV setup screen appears. CU4>setup Disconnecting COM 1 and COM 2... -
Page 53: Setting Up The Com Ports
Control Unit IV Reference Manual Setup 3.6.6 Setting up the COM ports Only the COM 1 and COM 2 parameters can be modified. COM 3 is used for setting up and troubleshooting the Control Unit. For this reason, you cannot modify this communication port’s settings. - Page 54 Setup Control Unit IV Reference Manual both units) with the same parameters. See section 3.7.1 on page 3-21 for the list of parameters that must be identical in both units. Transmission speed The recommended transmission speed for the Control Unit is 9600 bps (option 4). To modify the speed: 1.
-
Page 55: Table 3-4: Data Configurations Possible On Com Ports 1 And 2
Control Unit IV Reference Manual Setup Parity The following table shows the fields found in the Control Unit’s setup menus. The data shown in boldface type indicates the recommended values. These values are preset in the factory but can be modified. - Page 56 Setup Control Unit IV Reference Manual Data bits For the default values of the data bits, refer to Table 3-4 on page 3-13. To modify the data bits: 1. At the COM) prompt, type and press <Enter>. This will display the Data bits options and the current port settings.
- Page 57 Control Unit IV Reference Manual Setup 2. Type the number (1 to 3) that corresponds to the stop bit choice and press <Enter>. The new values are displayed, confirming the modification. COM 1=9600 bps, NO parity, 8 data bits, 2 stop bit(s), NO flow control, Protocol: Terminal, Flavor: Base 3.
-
Page 58: Table 3-5: System Types Supported By Each Protocol
Setup Control Unit IV Reference Manual Communication protocol For more information on the communication protocols, see section 3.2 on page 3-2. Once you have selected a protocol, you must also choose a flavor from the Flavor menu to complete the protocol. See the following section on flavors. -
Page 59: Table 3-6: Protocol Variations
Control Unit IV Reference Manual Setup Flavor A flavor is used with a protocol to take into account variations in a protocol. For example, CSG 2T has several variations that influence the way it responds to certain identification codes. The basic flavor of a protocol is called “Base” and the other flavors that have been developed are called “Ext A”, “Ext B”, etc. -
Page 60: Rf Watchdog Setting For A Single Control Unit
Setup Control Unit IV Reference Manual To modify the flavor: 1. At the COM) prompt, type and press <Enter>. This will display the Flavor options and the current port settings. COM)7 1-Base 2-Ext A 3-Ext B 4-Ext C ?-Display menu... -
Page 61: Setting The Control Unit's Id Code
Control Unit IV Reference Manual Setup To set the RF watchdog for a single Control Unit: 1. Go to the Control Unit IV setup screen menu (see section 3.6.5). At the SET) prompt, type and press <Enter>. The RF watchdog option is displayed. -
Page 62: Setting The Carrier Tag
To set the carrier tag: 1. In the Control Unit IV setup screen menu, select the option Carrier tag by typing press <Enter>. 2. At the prompt, type the new carrier tag (between 0 and 7) that will be associated with the carrier and press <Enter>. -
Page 63: Redundancy Systems
• carrier tag (see section 3.6.9 to set the tag) • number of subscribers (contact Electroline if this setting is not the same on both units) • tiering system type (contact Electroline if this setting is not the same on both units) •... -
Page 64: Activating The Redundancy Failure Notification
1. First log on with your password and type (3.6.5). setup 2. In the Control Unit IV setup screen menu, select the Toggle Redundancy Failure Notification option by typing at the SET) prompt, and then press <Enter>. If the feature was disabled, then this command switches it to ON; if the feature was already enabled, this command will switch it OFF. -
Page 65: Checking The Redundancy Diagnostic At Startup
Control Unit IV Reference Manual Setup 3.7.3 Checking the redundancy diagnostic at startup At startup, an automatic diagnostic of the redundancy chipset is performed. During normal startup of a master unit, the onscreen messages that appear in the redundancy monitoring system section should look like this: Control Unit IV 3.20... -
Page 66: Synchronizing The Master And Backup Units
Setup Control Unit IV Reference Manual time the <Enter> key is pressed if you are using the Terminal protocol and if the redundancy failure notification feature is enabled (see section 3.7.2). Each command that is processed by the master unit is also checked against the backup unit in a redundancy system. -
Page 67: Rf Watchdog Settings For Redundancy Systems
TEST OUT TEST IN To program the RF watchdog: 1. In the Control Unit IV setup screen menu, select the RF watchdog option by typing the SET) prompt and then pressing <Enter>. The following window appears: SET)6 Enter new RF watchdog preset: 254 2. -
Page 69: Subscriber Statuses
SUBSCRIBER STATUSES... -
Page 71: Opening A Session On The Control Unit
A subscriber address consists of up to seven digits, the first five being a group number and the last two being a tap number. Note that in the Electroline system, the tap number refers to an addressable port. The tap number can be from 1 to 64 in a one- or two-tier system (OBP), and from 1 to 16 in all multi-tier systems (more than two tiers). -
Page 72: Displaying Subscriber Statuses
Subscriber Statuses Control Unit IV Reference Manual OBP example Enter the following command to set the status to pay for a subscriber with the group/tap address 2033, 12. CU4>stap pay 2033,12 Group 2033 Tap 12 : pay Multi-tier example For a multi-tier system, enter a letter from a to h for the status. You can enter one or more of these values, for example a, afh or abcdefgh. -
Page 73: Setting The Tier Status Of A Group
Control Unit IV Reference Manual Subscriber Statuses Multi-tier example Enter the following command to display the status for a subscriber with the group/tap address 33, 7. CU4>tap 33,7 Group 33 Tap 7: abcgh 4.4 Setting the tier status of a group To set the tier status of one group, a set of groups, or all groups: 1. -
Page 74: Displaying A Group's Tier Status
Subscriber Statuses Control Unit IV Reference Manual OBP example Enter the following command to set the status of the subscribers in groups 455 to 457 to pay. You must enter the status (pay) followed by the first group number (455), then enter the total number of groups that you want the command to affect (3). - Page 75 Control Unit IV Reference Manual Subscriber Statuses OBP example Enter the following command to display the status for the subscribers in groups 344 and 345. You must enter the first group’s number (344) followed by the total number of groups you want to display (2).
-
Page 76: Sending An Immediate Group Command
Subscriber Statuses Control Unit IV Reference Manual Multi-tier example Enter the following command to display the status for the subscribers in group 32. You must enter the first group’s number (32) followed by the total number of groups you want to display (1). -
Page 77: Finding Subscribers By Tier Status
Control Unit IV Reference Manual Subscriber Statuses 4.8 Finding subscribers by tier status command allows you to find all subscribers with a specific status within one or find several groups. The unit will display all subscribers whose status matches the exact data you entered. -
Page 78: Finding A Subscriber's Tap Number
Subscriber Statuses Control Unit IV Reference Manual Multi-tier example For a multi-tier system, enter a, b, c, d, e, f, g and h for the status. You can enter one or more of these values, for example a, afh or abcdefgh. - Page 79 Control Unit IV Reference Manual Subscriber Statuses CU4>locate 1 Is the cable service working? (y/n/b) LOC> 3. Ask the person on the premises if the tap is set to pay. 4. If the answer is yes, type and press <Enter>. If not, type and press <Enter>.
-
Page 81: Maintenance
MAINTENANCE... -
Page 83: Hardware Maintenance
Control Unit IV Reference Manual 5. MAINTENANCE This chapter provides basic procedures for minor hardware maintenance, firmware upgrades, data uploads and downloads, and verifying the Control Unit’s setup. There are five main sections: 1. hardware maintenance 2. expansion slots 3. subscriber status transfers 4. -
Page 84: Replacing The Battery
Maintenance Control Unit IV Reference Manual 6. Remove the spare fuse from its compartment and place it in the main fuse holder. You should put a new fuse in the spare fuse compartment before putting the fuse holder back into the Control Unit. -
Page 85: Figure 5-3: Internal View Of The Control Unit Iv With A Ram Expansion Board
9. Restore the content of the Control Unit’s memory by uploading it (see section 5.3.2). 10. Reconnect the host computer. Jumpers P1 to P5 Battery RAM Expansion board Figure 5-3: Internal view of the Control Unit IV with a RAM expansion board 529-0004 Ver.3... -
Page 86: Expansion Slots
5.2.1 Adding expansion boards On the Control Unit IV, you can insert expansion boards in the free expansion slots on the motherboard to increase its memory or to enhance its features. Note that only expansion boards provided by Electroline can be installed in the Control Unit. -
Page 87: Figure 5-4: Ram Expansion Board Installation
Control Unit IV Reference Manual Maintenance 5. Using a Phillips head screwdriver, remove the two screws on the top panel of the Control Unit and slide the panel off the chassis. 6. Attach two plastic supports to the Control Unit’s motherboard by pressing the clip end of each support into the two -inch (5 mm) holes to the left of the central expansion slot. -
Page 88: Transferring Subscriber Status Data
Maintenance Control Unit IV Reference Manual 5.3 Transferring subscriber status data 5.3.1 Downloading subscriber statuses command tells the Control Unit to transmit the content of its RAM to download another computer in S-format for the requested group. You should capture this data in a text file using HyperTerminal, for example, to be able to perform an upload later. -
Page 89: Uploading Subscriber Statuses
Control Unit IV Reference Manual Maintenance 5.3.2 Uploading subscriber statuses The upload function is used with the download function to save and restore the Control Unit’s memory rapidly. The command prepares the Control Unit to receive an upload S-format data file sent by the host computer. If the unit does not receive a file in 30 seconds, it will display an error message and revert to its normal state (waiting for a command). - Page 90 Maintenance Control Unit IV Reference Manual 4. The ASCII setup window appears. In the Line delay field, type . Click to close this window, then return to the connection’s main window. 529-0004 Ver.3...
- Page 91 Control Unit IV Reference Manual Maintenance Transmitting the S-format data file To transmit an S-format data file from the host computer to the Control Unit: 1. Press <Enter> to display the CU4> prompt. 2. Type and press <Enter>. upload CU4>upload...
-
Page 92: Upgrading The Control Unit's Firmware
Before beginning the upgrade, make sure you have the following: • upgrade program for the Control Unit IV (EAS Control Unit IV Upgrade), installed on a PC (visit the Electroline Web site or contact the technical support department for the most recent version) •... -
Page 93: Running The Upgrade Program
Control Unit IV Reference Manual Maintenance 2. Click on the CU4UP icon in this menu. This starts the installation wizard, which guides you through the process of copying the program onto your computer. Follow the steps on screen to complete the installation. - Page 94 Maintenance Control Unit IV Reference Manual 4. The main window reappears. In the Options menu, select Safe Mode. A checkmark will appear next to this option when you are in safe mode. 5. In the File type box, click the radio button for the New File (.HEX) option. This file contains the firmware.
- Page 95 7. Locate and select the file 351-0084-<VER>.HEX (the firmware version may vary). To obtain the latest version of the Control Unit firmware, visit the Electroline Web site or contact the technical support department. Once you have located the file, click Warning: The Control Unit’s current setup will be overwritten with default values as soon as the...
-
Page 96: System Verifications
Maintenance Control Unit IV Reference Manual 5.5 System verifications 5.5.1 Monitoring the status LEDs The LEDs on the Control Unit’s front panel indicate whether the unit is working properly. On all units that have been cabled correctly, the , and... -
Page 97: Resetting The Control Unit
Control Unit IV Reference Manual Maintenance 2. To check the additional RAM (expansion board or additional memory installed on the motherboard), type and press <Enter>. This command is only used when chkram 1 additional RAM is installed. The results will be similar to the Control Unit’s RAM test results, except for the number of bytes that are processed. -
Page 98: Changing The Modulator Or Demodulator Frequency
Unit’s modulator and demodulator can be reprogrammed if needed. This section provides programming requirements as well as instructions on how to connect the Workabout for programming. Refer to the Electroline Addressable System Programmer/Monitor for the Workabout (EAS-PMW) User Guide for more detailed programming instructions for single FSK modulators and demodulators. - Page 99 The modulator and the demodulator frequency of a Control Unit with a dual FSK carrier cannot be programmed. 5. See the Electroline Addressable System Programmer/Monitor for Workabout (EAS-PMW) User Guide for instructions on modulator/demodulator frequency programming. Note that the frequency has to be within the Control Unit’s range (range appears next to the port on the unit’s rear panel) and the modulator and...
-
Page 101: Troubleshooting
TROUBLESHOOTING... -
Page 103: Table 6-1: Verification Of Status Leds
3. Make sure that a discharged battery is not causing the problem (see Chapter 5 for battery replacement). If the battery is working properly, note the errors identifying the defective sub-system as the Control Unit boots, and contact Electroline’s technical support department. See section 6.9 for a list of error messages. -
Page 104: Checking The Power And Battery
2. If there is still no power, the Control Unit’s fuse may be blown. Replace the burnt fuse with the spare fuse (see Chapter 5). 3. If the problem persists, contact Electroline’s technical support department. • If the Control Unit’s... - Page 105 LED should now be lit, which indicates that the sequencer is working properly. • If the LED is still off, then return the Control Unit to Electroline for repairs. • If the LED is lit, continue troubleshooting the unit to test the modulator and demodulator.
-
Page 106: Table 6-2: Procedures For Troubleshooting Problems With The Rf Out Port
2. If you are sure that there is no signal on the master unit’s RF output, switch to the backup unit, if there is one, and contact Electroline’s technical support department. This situation requires immediate service since the addressable taps are not receiving status messages from this Control Unit. -
Page 107: Table 6-3: Procedures For Troubleshooting Problems With The Test Out Port
If the problem persists, then the addressable taps are not receiving status messages from this Control Unit. Switch to the backup unit, by shutting off the master unit and rebooting the backup unit, and contact Electroline’s technical support department. -
Page 108: Checking Communications
5. If the ports are set up properly, make sure that the host computer’s port is not being used by another application or device. You may need to reboot Windows to free up the computer’s ports. 6. If you are still unable to establish a communications link, contact Electroline’s technical support department. 529-0004 Ver.3... -
Page 109: Modems
2. If your modem is working, check the communication port settings on the Control Unit and on the modem. The Control Unit’s communication port setup (COM 1 or COM 2) must be the same as the modem’s setup (contact Electroline for details on modem setup). Specifically, check the following: •... -
Page 110: Troubleshooting Redundancy System Errors
If the redundancy cable is not connected properly, communication problems may occur, such as collisions, between the Control Unit and the host computer. Check the redundancy cable. If the problem persists, contact Electroline’s technical support department. 529-0004 Ver.3... -
Page 111: Rf Ports In A Redundancy System
Control Unit IV Reference Manual Troubleshooting COM 2 In a redundancy system, both Control Units are connected together on COM 2 in order to synchronize the content of their internal subscriber status database. Only the backup unit receives data on this COM port. It stores the same information as the master unit so that if an error occurs and the two units switch roles, then the backup unit will be up to date. -
Page 112: Redundancy Circuitry
• If there is an error with the redundancy system, note any messages or warnings that appear on screen or the codes sent to the host computer, and use the corresponding procedures in sections 6.4.5 to 6.4.7 to correct the problem. 3. If the problem persists, contact Electroline’s technical support department. 6-10 529-0004 Ver.3... -
Page 113: Master Leds
LEDs are still lit, shut off the backup unit (check the redundancy cable MASTER to identify the backup unit) and contact Electroline’s technical support department. 6.4.5 Redundancy system warnings at startup This section shows the redundancy system messages at startup (or by typing the info command) on the master and backup units. - Page 114 Troubleshooting Control Unit IV Reference Manual 3. After you restart the units: • If no warning appears, log on to COM 3 of the unit that was the master before the units were powered off (see step 1). Synchronize the data in both units by using the...
- Page 115 Repeat the tests on the other unit. If the units work, reconnect them and upload subscriber status information from the most recent backup copy (see Chapter 5) or from the billing system. 3. If the problem persists, this situation requires immediate attention. Contact Electroline’s technical support department for assistance. 529-0004 Ver.3...
-
Page 116: Redundancy System Toggle Warning
3. Repeat steps 1 and 2 on the other Control Unit. 4. If no system problem is detected, restart the units (see section 6.4.3). 5. If the problem persists, contact Electroline’s technical support department. 6.4.7 Redundancy system synchronization errors In terminal mode, the Control Unit will notify the user if both units in a redundancy system are not properly synchronized or if the units cannot be synchronized due to a hardware problem. -
Page 117: Troubleshooting Subscriber Status Errors
(see Chapter 5). When the 30-second delay expires, the timeout message appears. 4. If you are still unable to upload data, contact Electroline’s technical support department. Note that updating subscriber statuses requires a long processing time. While the Control Unit is processing the new data, the CPU cannot receive other requests. -
Page 118: Tap Commands
4. If you still cannot set a tap or a group of taps to a tier, check the FSK carrier (see section 6.2), and check the addressable tap’s programming. 5. If the problem persists, contact Electroline’s technical support department. 6.5.3 Subscriber status errors Subscriber has status XXX If the status “XXX”... - Page 119 Control Unit IV Reference Manual Troubleshooting Subscriber is not receiving the right service If the subscriber is not receiving the correct service, use this procedure to verify the information in the Control Unit and the billing system. 1. Check the status of the subscriber in the Control Unit by using the command (see Chapter 4) and note it.
-
Page 120: Troubleshooting Setup Errors
Control Unit’s battery may be discharged. Replace the battery (see Chapter 5) and set the unit’s time and date (see Chapter 3). 4. If you are still unable to set up the Control Unit, contact Electroline’s technical support department. -
Page 121: General Errors
Note that if you leave the jumper in position 1-2, the Control Unit will not execute any commands other than upgrade commands. 5. If you still cannot upgrade the Control Unit, contact Electroline’s technical support department. 6.8 General errors The Control Unit may appear to be experiencing errors that are not related to a specific system. -
Page 122: Error Messages
Control Unit boots, and contact Electroline’s technical support department. All the LEDs are flashing. All the LEDs may flash when the redundancy cable is disconnected or not properly plugged in. Check the cable. If the problem persists, contact Electroline’s technical support department. 6.9 Error messages This section contains an alphabetical list of error messages that may appear when you are using the Control Unit. - Page 123 Control Unit IV Reference Manual Troubleshooting Backup response error This message may appear in a redundancy system when the backup unit and the master unit respond differently to the same command. See sections 6.4.5 to 6.4.7 to troubleshoot redundancy system problems. Refer to Chapter 3 for information on how to set up a redundancy system.
- Page 124 Troubleshooting Control Unit IV Reference Manual Invalid time This message appears when the Control Unit’s real-time clock has lost its settings. See section 6.6 to troubleshoot setup errors. Refer to Chapter 5 for battery replacement instructions. Refer to Chapter 3 for instruction on how to set the unit’s time.
- Page 125 GLOSSARY...
-
Page 127: Abbreviations
CU IV Control Unit IV data circuit-terminating equipment data terminal equipment data terminal ready Electroline Addressable System EAS CU IV Electroline Addressable System Control Unit IV frequency-shift keying light-emitting diode off-basic-pay random access memory Test Point Selector 529-0004 Ver.3... -
Page 128: Terms
Cable service that cannot be combined with another service. For example, either basic or pay service, not both, is authorized for a given subscriber. Part of the Electroline address. A number assigned to a set of group subscriber connections so that the decoder can identify them. - Page 129 See also redundancy system. In the Electroline addressable system, two identical Control redundancy system Units that are cable together in order to improve operational reliability.
- Page 130 Definition In return path monitoring, a tap is an input on a Test Point Selector or a CLEARPath module. Part of the Electroline address. A number assigned to a tap number subscriber connection, a CLEARPath module or a TPS input.
- Page 131 CABLE ASSEMBLIES...
-
Page 133: Pinout On Com Ports
Control Unit IV Reference Manual B. CABLE ASSEMBLIES This appendix covers the pin assignment on the cable assemblies that come with the Control Unit. It also shows the pinout of the Control Unit’s three communication ports and its backup port. Refer to the tables in each section for a description of the signals and the direction of the signal flow. -
Page 134: Pinout For Com 3 Port
Cable Assemblies Control Unit IV Reference Manual B.1.2 Pinout for COM 3 port Pin 1 is the rightmost pin on the top row of the female connector. The pins are numbered from right to left and from top to bottom, in accordance with the standard numbering system for female connectors. -
Page 135: Cables
Control Unit IV Reference Manual Cable Assemblies B.2 RS-232 cables B.2.1 Cable between the Control Unit and a host computer (DCE to DTE) This section covers the cable assemblies that are used for RS-232 communications between DCE and DTE devices. -
Page 136: Table B-4: Rs-232 Cable With Male And Female Db-9 Connectors
Cable Assemblies Control Unit IV Reference Manual RS-232 cable with 9-pin connectors Note that COM 3 is a female DB-9 connector, wired as a DCE device. If a DTE device such as a computer is connected to this port, use an RS-232 cable to ensure that the signals shown in Table B-4 are assigned to the correct pins. -
Page 137: Cable Between The Control Unit And A Modem (Dce To Dce
In a redundancy system, you must use a null modem cable on COM 2 in order to connect the two Control Units to each other. This cable, with DB-25 connectors, is provided by Electroline and is used to synchronize the two units. Null modem cable with 25-pin connectors (crossover) Note that COM 1 and COM 2 are female DB-25 connectors, wired as DCE devices. -
Page 138: Cable Assembly For Redundancy Systems
The Control Unit’s port is not an RS-232 port. Therefore, you must use a special BACKUP redundancy cable provided by Electroline so that the two Control Units will operate correctly in a redundancy system. The redundancy cable used on the... -
Page 139: Index
Control Unit IV Reference Manual Index Abbreviations ........A-1 modem setup ........6-7 Access power and battery......6-2 access denied (message) ..3-11, 6-18 programming information ....5-14 access level ........3-4 RAM content........5-14 log on ..........3-8 redundancy circuitry.......6-10 password ..........3-4 redundancy system ......6-8 Adapters ..........2-8 RF ports in a redundancy system ..6-9... - Page 140 Index Control Unit IV Reference Manual setpw..........3-10 DCE to DCE connection ....B-5 setseq ..........4-6 DCE to DTE connection ....B-3 setup..........3-10 Default password......3-3, 3-8 sgrp ..........4-3 Default settings........3-20 stap........... 4-1 Default state (definition) ....A-2 sync..........
- Page 141 Control Unit IV Reference Manual Index Frequency........See FSK firmware upgrade program.....5-10 Front panel ........1-7, 1-8 rack mounting........2-2 tools..........2-2 data carrier ........1-1 Invalid definition......... A-1 date ..........6-18 LED..........6-1 format ..........6-15 modulator types........1-1 time..........6-18 modulator/demodulator....1-10 Labeling..........1-1 program frequency ......5-16 LED ........5-14, 6-19, 6-20 relative level........2-11...
- Page 142 ........5-14 troubleshooting........ 6-2 modulator/demodulator frequency.5-17 Monitoring status LEDs....5-14 Protocol Mounting..........2-2 COM port.........3-2 Multiple Control Unit IV access..3-19 CSG.........2-9, 3-16 Multi-tier mode........3-6 ICOR........2-9, 3-16 Multi-tier system......... 1-5 NTMF ........2-9, 3-16 No backup unit present ..... 3-24 packet-switched .......3-2...
- Page 143 Control Unit IV Reference Manual Index Refresh (subscriber status) ....4-1 subscriber status .......4-1 Removing RAM Expansion Board ..5-4 time...........3-8 Replacing ....See also Maintenance Setup........2-14, 3-1, 3-8 battery ..........5-2 carrier tag ........3-20 fuse...........5-1 changing the password ....3-10 RAM Expansion Board....5-4 COM ports........3-11...
- Page 144 Index Control Unit IV Reference Manual Status LED is flashing ...... 6-20 Timeout encountered......6-15 Status not recognized ......6-16 Toggle redundancy failure notification 3-22 Stop bits ..........3-14 Tools required (installation)....2-2 Subscriber TPS............. A-1 capacity..........1-6 Transmission speed ......3-12 find........... 4-7 Troubleshooting ..See also Checking...
-
Page 145: Manual Revision Record
Control Unit IV Reference Manual Manual Revision Record Revision Pages modified Description 914-0034-100 ---- First release of document 529-0004 Ver.1 New number 529-0004 Ver.2 Update for new hardware and firmware features 529-0004 Ver.3 Update for new hardware and firmware features (firmware version 3.30)
Need help?
Do you have a question about the Control Unit IV and is the answer not in the manual?
Questions and answers