Advertisement
Quick Links
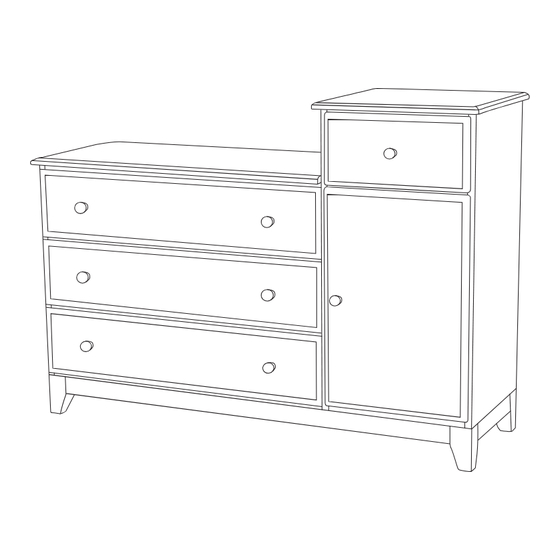
M4759 Emily II Combo Dresser KD Version
WARNING!
!
READ ALL INSTRUCTIONS BEFORE USE OF THE COMBO DRESSER.
!!PLEASE READ!!
Assembly of this furniture is easier with two people. Assemble furniture
on debris free carpets or on the enclosed foam sheets to prevent
scratching of finish. Using any
power tools to assemble
this furniture may potentially
strip the wood.
DO NOT OVERTIGHTEN
SCREWS.
DO NOT USE THE
COMBO DRESSER IF IT
IS DAMAGED OR
BROKEN.
Keep instructions
for future reference.
(H1) 1-1/8" Machine Bolts x 39
(H5) Knobs x 8
(H6) Hinges x 2
(H11) Support Bars
Fasteners x 6
(H12) Knob Screws x 8
revised 08-2009
HARDWARE
Tools required: Phillips screwdriver, Flat-head screwdriver.
(H2) 2" Machine Bolts x 4
(H7) Hinges
Screws x 8
(H13) Right Panel Glide - Quantity: 4
(H14) Left Panel Glide - Quantity: 4
(H3) Cam Bolts x 8
(H8) Small Wood
(H9) 1-1/4" Wood
Screws x 96
Screws x 16
(H15) Right Drawer Glide - Quantity: 4
(H16) Left Drawer Glide - Quantity: 4
(H4) Cam Lock x 8
(H10) Dowels x 4
Advertisement

Subscribe to Our Youtube Channel
Related Manuals for Million Dollar Baby m4755


Summary of Contents for Million Dollar Baby m4755
- Page 1 M4759 Emily II Combo Dresser KD Version WARNING! READ ALL INSTRUCTIONS BEFORE USE OF THE COMBO DRESSER. !!PLEASE READ!! Assembly of this furniture is easier with two people. Assemble furniture on debris free carpets or on the enclosed foam sheets to prevent scratching of finish.
- Page 2 PARTS (D) Large Top (C) Left Panel (B) Right Panel (A) Center Panel (H) Back (G) Back Panel Panel (Flat) (Tall) (E) Small Top (F) Shelves x 2 (I) Legs x 4 (K) Small Top (M) Small Bottom (L) Small Center (P) Door Support Frame Support Frame...
- Page 3 STEP 1 Opposite side of panel Attach right and left panel glides H13 and H14 using wood screws H8 as illustrated. (C) Left Panel (A) Center Panel (B) Right Panel STEP 2 Use machine bolts H1 to attach bottom support frames J and M to the base panel (N).
- Page 4 STEP 3 Use machine bolts H1 to attach large top support frame (J) to left (C) and center panel (A). Use machine bolts H1 to attach small top support frame (K) and small center support frame (L) to right (B) and center panel (A).
- Page 5 STEP 5 Attach hinges H6 to the door (P) to right panel (B) using wood screws H7. Adjust and tighten screws as illustrated. Use knob screw H12 to attach (P) Door knob H5 to door. (B) Right Panel STEP 6 Secure back panel G and H to the final assembly using wood screws H8.
- Page 6 Left Drawer Panel Right Drawer Drawer Panel Front Panel Bottom Board Use knob screw H12 to attach knob H5 to drawer front. Align drawer glide H15 and H16 to panel glide H13 and H14. Insert drawers into assembled dresser and your dresser is now ready for use. IMPORTANT: As with all infant and baby furniture, it is important to check fasteners, screws and bolts periodically for tightness.
Need help?
Do you have a question about the m4755 and is the answer not in the manual?
Questions and answers