Table of Contents
Advertisement
Quick Links
Save This Manual for Future Reference
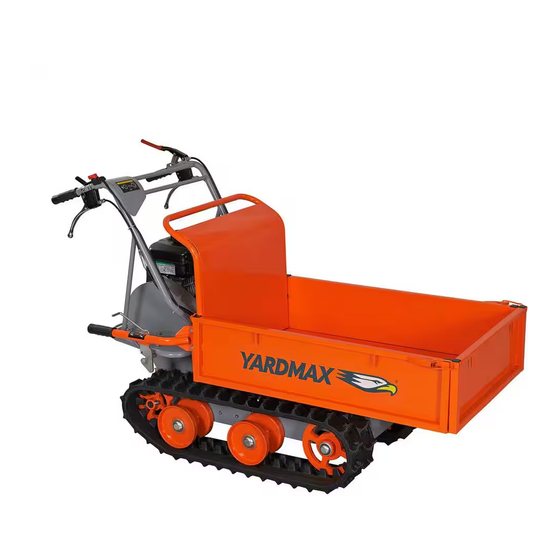
Power Trackbarrow
Operator's Manual
MODEL NUMBER
YD8203
SERIAL NUMBER
PURCHASE DATE
Both model number and serial
number may be found on the
main label.
(See Page 2, Figure 1)
You should record both of them
in a safe place for future use.
FOR YOUR SAFETY
READ AND UNDERSTAND THE ENTIRE MANUAL BEFORE OPERATING MACHINE
Tame the Great Outdoors
TM
Advertisement
Table of Contents

Related Manuals for YARDMAX YD8203


Summary of Contents for YARDMAX YD8203
- Page 1 Save This Manual for Future Reference Power Trackbarrow Operator’s Manual MODEL NUMBER YD8203 SERIAL NUMBER PURCHASE DATE Both model number and serial number may be found on the main label. (See Page 2, Figure 1) You should record both of them in a safe place for future use.
-
Page 2: Table Of Contents
Up for the job? YARDMAX is. When looking for outdoor power equipment (OPE) to get the job done right, at the right price, YARDMAX delivers the perfect combination of performance and practicality. YARDMAX has a solution that’s right for you. - Page 3 Engine exhaust, some of its constituents, and certain product components contain or emit chemicals known to YARDMAX reserves the right to discontinue, change, the state of California to cause cancer and birth defects and improve its products at any time without notice or other reproductive harm.
-
Page 4: Specifications
SUPPORT Have questions about your YARDMAX equipment? Call us at 844-YARDMAX, email us at support@yardmax.com, or contact us via your favorite social media site. SPECIFICATIONS Model number YD8203 Engine briggs & Stratton Displacement 208 cc Start Type Recoil load Capacity... -
Page 5: Symbols
Mini Tracked Dumper Operator’s Manual » SYMBOLS The rating plate on your machine may show symbols. These represent important information about the product or instructions on its use. Keep your hands clear from all rotating Read these instructions carefully. parts. Wear eye protection. -
Page 6: Safety
SAFETY GENERAL SAFETY RULES Stay alert, watch what you are doing, and use common sense UNDERSTAND YOUR MACHINE when operating the machine. Read this manual and labels affixed to the machine to understand its limitations and potential hazards. Do not overreach. Do not operate the machine while barefoot or when wearing sandals or similar lightweight footwear. - Page 7 Mini Tracked Dumper Operator’s Manual » Do not tamper with the engine in an effort to get it to run at loosen the fuel tank cap slowly to relieve any pressure in the tank. higher speeds. The maximum engine speed is preset by the Never overfill the fuel tank.
-
Page 8: Unpacking The Container
UnPACKInG THE COnTAInER Use the screwdriver and hammer to open all the side locks. (See Figure 2a) Figure 2a Remove all the plywood plates (Figure 2b), and remove all the loose parts on the bottom pallets. Figure 2b Unpacking the Container YD8203PM01 - 1703... -
Page 9: Contents Supplied
Mini Tracked Dumper Operator’s Manual » COnTEnTS SUPPlIED Your YARDMAX tracked dumper comes partially assembled and contains the following: HARDWARE KIT 1. Main Machine 12. Hardware Kit, Including 2. Handlebar Assembly M10 × 20 × 4 3. Tipping Handle M8 × 25 ×... -
Page 10: Assembly
ASSEMblY This trackbarrow was partially assembled at the factory. To assemble your machine and the optional plow blade follow the below instructions. HANDLES Mount the handle frame assembly to the frame, and secure with M10X20 bolts, washers and nuts at the front, and M8X25 bolts, washers and nuts at the rear. - Page 11 Mini Tracked Dumper Operator’s Manual » FRONT PANEL & EXTENDABLE LEFT/RIGHT SIDE GAS SPRING Unlock the jam nut and loosen the l pins. no need to remove the lift up the hopper and insert a support rod for safety purpose. l pins.
- Page 12 2. Position the pivot bracket inside the mounting bracket and 6. Secure the support bracket into the control lever with pin align with mounting bracket holes. Secure with M20×95 10x60 and bridge clip. (See Figure 8d) hex bolt, washers and nut. (See Figure 8b) Handle Grip Control Lever M20×95...
-
Page 13: Know Your Machine
Mini Tracked Dumper Operator’s Manual » KnOW YOUR MACHInE FEATURES AND CONTROLS Engine ON/OFF Switch Throttle Control Right Steering Lever Clutch Control Lever Left Steering Lever Gear Selection Lever Hopper Gearbox Track Gas Spring Assistance Know Your Machine YD8203PM01 - 1703... - Page 14 Recoil Starter Handle Throttle Control Choke Control Fuel Shut-Off Valve GEAR SELECTION LEVER ENGINE ON/OFF SWITCH The engine switch has two positions. OFF - engine will The gear selection lever has 4 positions: 3 forward not start or run. On - engine will start and run. speeds and 1 reverse.
-
Page 15: Operation
Mini Tracked Dumper Operator’s Manual » OPERATION ADD OIL TO ENGINE IMPORTANT: DO NOT OVERFILL! This equipment and/or its engine may include The engine is shipped without oil. Do not start the evaporative emissions control system components, engine before adding oil. Please refer to your engine required to meet EPA and/or CARB regulations, that manual for the proper grade of oil to add. - Page 16 Avoid sharp turns and frequent changes of direction while driving on rough, hard terrains full of sharp, uneven points with a high degree of friction. FAST SLOW 4. Move the throttle lever slightly Even though the unit has rubber tracks, remember to be careful to the FAST speed.
-
Page 17: Maintenance
Mini Tracked Dumper Operator’s Manual » MAInTEnAnCE Maintaining your YARDMAX power trackbarrow will ensure long 1. loosen the jam nut by turning it counter clockwise life to the machine and its components. with 10mm wrench. (see Figure 9, Illustration 1) 2. - Page 18 REPLACING DRIVE BELT Adjustment Nut Remove belt covers as shown and pull out the belt. (See Figure 11) Jam Nut Jam Nut Lock Nut Lock Nut Belt Cover Adjustment Nut Jam Nut M8×20 (×3) Lock Nut Figure 10a If the above adjustment does not create enough cable tension, follow the steps below: 1.
- Page 19 Mini Tracked Dumper Operator’s Manual » If the distance is greater, proceed as follows. 1. Use the tipping handle to tip the hopper and set it on blocks or supports rated for the weight of the box. 2. loosen locknut A. Oil Filler 3.
- Page 20 4. Pull out the whole track. (See Figure 14c) Support Rod Danger Area Figure 14c Support Object When removing or installing the tracks, be careful not to get your fingers caught between the track and pulley. Figure 14a ENGINE MAINTENANCE 3.
-
Page 21: Storage
Mini Tracked Dumper Operator’s Manual » STORAGE If the power trackbarrow will not be used for a period longer than Do not use strong detergents or petroleum based 30 days, follow the steps below to prepare your unit for storage. cleaners when cleaning plastic parts. -
Page 22: Troubleshooting
TROUblESHOOTInG Problem Cause Remedy 1. Attach spark plug wire securely to spark plug 1. Spark plug wire is disconnected 2. Fill with clean, fresh gasoline 2. Out of fuel or stale fuel 3. Engine and Fuel valve must be in On 3. -
Page 23: Parts Diagram
Mini Tracked Dumper Operator’s Manual » PARTS DIAGRAM Parts Diagram YD8203PM01 - 1703... - Page 24 Gearbox Dumper Parts Diagram YD8203PM01 - 1703...
-
Page 25: Parts List
Mini Tracked Dumper Operator’s Manual » PARTS LIST Description Description Description Tensioner Pulley Cable 37 Tensioner Pulley bracket 73 Track 180×60 Safety Control Handle 38 Engine 74 Axle Head Cover(42) Screw M6×16 39 Key 4.7×33 75 Circlip 42 Screw M5×20 40 belt Protect Frame 76 bear 61905-2RS nut M5... -
Page 26: Yd8203Pm01
Description Description Description 110 Gear 138 bearing 6303 166 Spring Gasket 111 bearing 6302 139 Gear II-5 167 Steel ball 5 112 Gearshift Fork Guide Pin 140 Gear II-4 168 Circlip 58 113 Spring 141 Gear II-3 169 Output Gear 114 Steel ball 6 142 Gear II-2 170 Intermediate Joint bush... - Page 27 Mini Tracked Dumper Operator’s Manual » Plow Blade (Optional) OPTIONAL PLOW BLADE Description Description Description bolt M8×35 14* bolt M12×40 27* bolt M8×40 Shave Plate 15* Washer12 28* Adjusting Rod Weldment A Rubber Plate 16* Washer12 29* Handle Sleeve 28 blade Weldment 17* Washer10 30* limiter Rod Wedment...
- Page 28 Tame the Great Outdoors 1850 W Winchester Rd, Suite 106 Libertyville, IL 60048 844-YARDMAX info@yardmax.com (844-927-3629)
Need help?
Do you have a question about the YD8203 and is the answer not in the manual?
Questions and answers