Table of Contents
Advertisement
Quick Links
FB250 User Equipment User's Guide
Chapter 1 - Introduction
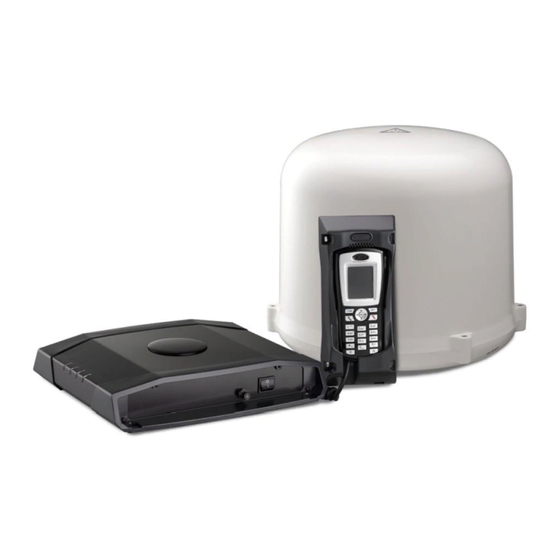
The FB250 User Equipment (UE) is a maritime broadband system, providing simultaneous high-speed
data and voice communication via satellite through the Inmarsat FleetBroadband system
Applications include:
Internet browsing
E-mail
Phone and fax services
Large file transfers
Video conferencing and Streaming
Features and interfaces
The FB250 FleetBroadband UE offers the following features and interfaces:
Simultaneous voice and data communication over FleetBroadband
Full duplex, single or multi-user, up to 284 kbps
Support for streaming IP at: 32, 64, 128 kbps
Standard Voice (AMBE+2, 4.0 kbps)
Fax/High Quality Voice (64kbps, A-law PCM)
4 LAN ports [with 2 ports supporting Power over Ethernet (PoE)] for computers, routers,
access points, IP handsets etc.
2 Standard RJ11 Phone/Fax ports for standard phones, fax machines or analog modems
Expansion slot (supporting 1 voice port and 1 LAN port)
Built-in Web Console allowing you to manage your phone book, messages and calls, and
customize the terminal to your specific needs
Input power: 10.5 V - 32 V DC (14 A - 5.5 A)
1
Advertisement
Table of Contents

Related Manuals for Satlink FB250

Summary of Contents for Satlink FB250
- Page 1 FB250 User Equipment User’s Guide Chapter 1 - Introduction The FB250 User Equipment (UE) is a maritime broadband system, providing simultaneous high-speed data and voice communication via satellite through the Inmarsat FleetBroadband system Applications include: Internet browsing E-mail Phone and fax services...
- Page 2 The FB250 ADU is a medium size, maritime FleetBroadband Class 9 antenna. FB250 FleetBroadband BDU (Below Deck Unit) The BDU is the controlling unit for the FB250 FleetBroadband system. It contains all user interfaces, LED indicators and stores configuration data.
- Page 3 FB250 User Equipment User’s Guide The built-in Web Console is used for easy configuration and daily use. The Web Console is accessed from a computer connected to the terminal, using an Internet browser. No installation of software is needed. For more information, see Chapter 4, Using the Web Console.
- Page 4 FB250 User Equipment User’s Guide o SIM card The UE has a SIM (Subscriber Identity Module) card slot located at the rear connector panel behind a small cover plate. The UE requires a dedicated FleetBroadband SIM card to access the FleetBroadband network and configure the settings of the UE.
- Page 5 2. Type http://192.168.1.35 in the Address field and press Enter. The Login screen appears. 3. Type in SABRE™1 in the Username field and satlink in the password field. Click OK. 4. The FB250 System Web Console will appear on your screen.
- Page 6 SATLINK FB250 System User’s Guide Menu Overview Setup Phone Data Settings Terminal Info Phonebook Compose Connection Language Satellite Selection Call History Inbox Primary Profiles Terminal Info Emergency Sent Secondary Profiles Terminal Draft Port Forwarding Ethernet Settings Telephony Misc Support Status Indicators Orange indicates the item is activated.
- Page 7 SATLINK FB250 System User’s Guide Viewing Terminal Information 1. Click 2. Click Terminal Info to view the FB250 System terminal information. The terminal information is displayed according to the Antenna Pointing mode Signal Indicates the signal strength during antenna pointing. (Adjust the antenna to ensure that the signal strength is at least 45dBHz.)
- Page 8 SATLINK FB250 System User’s Guide Satellite Selection 1. Click 2. Click Satellite Selection to view the visible satellites. The visible satellites will be displayed for your selection. It also displays the satellite information that your antenna is locked on to.
- Page 9 Allow you to view, add, edit and delete entries on your Phonebook list. You can make calls or send SMS directly from your Phonebook entries. The Phonebook entries can be stored on the SIM card or the FB250 Systemterminal. Call History To check on the history log of calls made and received.
- Page 10 View option The View option allows you to view the Phonebook entries from the different storage locations. From the drop-down menu, select: To view the entries stored in the SIM card and FB250 Systemterminal. SIM only To view the entries stored in the SIM card.
- Page 11 SATLINK FB250 System User’s Guide Follow these steps to edit a Phonebook entry: 1. Select the entry from the Phonebook list. 2. Click Edit. 3. Proceed to change the Name and/or Phone number. 4. Click Apply. Follow these steps to delete a Phonebook entry: 1.
- Page 12 SATLINK FB250 System User’s Guide Call History View option The View option allows you to view the Phonebook entries from the different storage locations. From the drop-down menu, select: To view the list of the dialled, received and missed calls.
- Page 13 SATLINK FB250 System User’s Guide Emergency Follow these steps to make an Emergency call: 1. Select the number from the list. 2. Click Call. The Emergency console switches over to the Dialler console. 3. Press the Offhook button on the PSTN corded (analog) phone.
- Page 14 SATLINK FB250 System User’s Guide SMS Menu SMS menu provide the following options: Compose To compose and send text messages. Simply enter a mobile number, type your message and click Send. Inbox Shows the details (Sender information, Message, Date and Time stamp) of all SMS received.
- Page 15 SATLINK FB250 System User’s Guide Compose Follow these steps to compose a new SMS: 1. Enter the receiver’s phone number in the Phone no. field or click the Phonebook icon if the receiver’s number is listed in the Phonebook 2. Type the message in the text editor box.
- Page 16 SATLINK FB250 System User’s Guide Inbox Shows the details (Sender information, Message, Date and Time stamp) of all SMS received. Follow these steps to reply a SMS: 1. Click on a SMS to select it. The selected SMS will be highlighted in light blue.
- Page 17 The Inbox console switches over to the Dialler console. Note: Ensure the PSTN corded (analog) phone is connected to the FB250 SystemRJ11 port. 3. Press the Offhook button on the PSTN corded (analog) phone, and click Dial. Follow these steps to delete a single SMS from the Inbox list: 1.
- Page 18 2. Click Call. The Sent console switches over to the Dialler console. Note: Ensure the PSTN corded (analog) phone is connected to the FB250 SystemRJ11 port. 3. Press the Offhook button on the PSTN corded (analog) phone, and click Dial.
- Page 19 SATLINK FB250 System User’s Guide Follow these steps to delete a single SMS from the Sent list: 1. Click on a SMS to select it. The selected SMS will be highlighted in light blue. 2. Click Delete. 3. Click OK to confirm or click Cancel to abort deleting the SMS.
- Page 20 2. Click Call. The Draft console switches over to the Dialler console. Note: Ensure the PSTN corded (analog) phone is connected to the FB250 SystemRJ11 port. 3. Press the Offhook button on the PSTN corded (analog) phone, and click Dial.
- Page 21 SATLINK FB250 System User’s Guide Follow these steps to delete a SMS from the Draft list: 1. Click on a SMS to select it. The selected SMS will be highlighted in light blue. 2. Click Delete. 3. Click OK to confirm or click Cancel to abort deleting the SMS.
- Page 22 SATLINK FB250 System User’s Guide Data Menu Data menu provide the following options: Connection Primary Profiles Secondary Profiles Port Forwarding Settings...
- Page 23 SATLINK FB250 System User’s Guide Connection To activate the default profile, click Activate Default Profile. The PDP context will be activated. When connected, APN and IP Address details will be displayed. You can proceed to use the Internet features. To disconnect the data connection, click Disconnect.
- Page 24 SATLINK FB250 System User’s Guide Primary Profiles Primary profiles define the connection type. You can select from a list of profiles to be the default primary profile and connection type. From Profile 4 to Profile 10, you can create your own customized primary profile.
- Page 25 SATLINK FB250 System User’s Guide IP Configuration By default, the Dynamic IP Address is selected. Follow these steps to use Static IP Address: 1. Select Static IP Address and enter the IP Address in the space provided. 2. Check the Header Compression checkbox if it is required to use Header Compression.
- Page 26 SATLINK FB250 System User’s Guide Secondary Profiles Secondary Profiles setting is used mainly for Streaming connection. You can select from a list of secondary profiles to be used during streaming connection. From Profile 7 to Profile 10, you can create your own customized secondary profile.
- Page 27 (For example, the user expecting HTTP, the port is 80). 3. Enter the Destination IP Address. (For example, the IP Address of the PC that is connected to the FB250 SystemTerminal). 4. Select the Protocol type: TCP (for HTTP, it will be TCP) 5.
- Page 28 SATLINK FB250 System User’s Guide Settings You can select the Ethernet mode to be used data connection. Follow these steps to select the Ethernet mode: 1. Select the mode to be used during the data connection. 2. Check the Auto PDP Context Activation checkbox if it is required to use Auto PDP Context Activation.
- Page 29 SATLINK FB250 System User’s Guide Settings Menu Click the following tabs to view and edit the configuration settings for the FB250 Systemterminal.: Language Terminal Info Terminal Ethernet Telephony Audio ATCmd Support About...
- Page 30 (only when a SIM card is inserted) and Subscriber number. Terminal Select Auto or Manual to power up the FB250 System terminal when power is supplied via the AC/DC power adaptor. Auto Power On: FB250 Systemterminal will automatically power up when power is supplied via the AC/DC power adaptor.
- Page 31 SATLINK FB250 System User’s Guide Click DHCP to view and edit the DHCP settings. Click Update to allow the settings to take effect. Click Mac Filtering to view and edit the DHCP settings. Click Update to allow the settings to take effect.
- Page 32 SATLINK FB250 System User’s Guide Terminal PIN Click Terminal PIN to configure the Terminal PIN settings. Select Disabled if you do not need to set the Terminal PIN. Select Enabled to set the terminal PIN. Enter the PIN number in the Enter PIN filed and click Update PIN.
- Page 33 SATLINK FB250 System User’s Guide SIM PIN2 Click SIM PIN2 to configure the SIM PIN2 settings. Select Disabled if you do not need to set the SIM PIN2. Select Enabled to set the SIM PIN2. Enter the PIN number in the space provided and click Update PIN.
- Page 34 SATLINK FB250 System User’s Guide SIM Lock Click SIM Lock to configure the SIM Lock settings. Select Disabled if you do not need to set the SIM Lock. Select Enabled to set the SIM Lock. Enter the PIN number in the space provided and click Update PIN.
- Page 35 SATLINK FB250 System User’s Guide Corporate PIN Click Corporate PIN to configure the Corporate PIN settings. Select Disabled if you do not need to set the Corporate PIN. Select Enabled to set the Corporate PIN. Enter the PIN number in the space provided and click Update PIN.
- Page 36 Click Reboot to reboot the FB250 Systemterminal. To perform a Factory Reset, enter the Security code 0000 and click Factory Reset. The settings of the FB250 Systemterminal will be reset to the default settings. Support Display information of the support telephone number, support email address, Support URL and...
- Page 37 SATLINK FB250 System User’s Guide Chapter 5 - The Inmarsat BGAN System What is BGAN? The Broadband Global Area Network (BGAN) is a mobile satellite service that offers high-speed data up to 492 kbps and voice telephony. BGAN enables users to access e-mail, corporate networks and the Internet, transfer files and make telephone calls.
- Page 38 A high quality connection which can be used for Premium Voice, G3 fax or analog modems. The signal is uncompressed 3.1 kHz audio, which allows for optimum voice quality. Note: The BGAN system only supports one CS call at a time per FB250 FleetBroadband system.
- Page 39 Not supported Not supported Standard IP Up to 284 kbps Up to 284 kbps Up to 284 kbps Streaming 32, 64 kbps 32, 64, 128 kbps 32, 64, 128 kbps Note: The FB250 FleetBroadband system is a FleetBroadband Class 9 system.
- Page 40 Computer with analog modem Standard Voice Analog telephone Primary Handset Packet Data multi-user Computer Switched Data single-user Computer Computer with Web Console *Notes: For FB250 FleetBroadband: UDI data is not available. In low elevations (< 20°), 3.1 kHz Audio is not available.
- Page 47 FCC CAUTION: Any Changes or modifications not expressly approved by the manufacturer could void the user's authority, which is granted by FCC, to operate this fleet broadband satellite communication system SATLINK FB250.
- Page 48 SATLINK FB250 System User’s Guide Declaration of Conformity: SATLINK S.L Avda.de Ia Industria , 53-Nave 7, Poligono Industria de Alcobendas 82108-Alcobendas Madrid , Spain, declares under our sole responsibility that the Product, brand name as SATLINK and model:SATLINK FB250 Fleetbroadband satellite communication system equipment to which this declaration relates, is in conformity with the following standards and/or other normative documents: ETSI EN 301444, IEC 60945:2002 / EN 60945: 2002, ITU-R M.1480, IEC 60950-1 AND...
- Page 49 On the FB250 FleetBroadband System, the minimum safety distance on the focal line to the antenna panel is 0.6 m, based on a radiation level of 10 W/m2. The radiation level is 100 W/m2 at a distance of 0.2 m from the antenna panel.
- Page 50 SATLINK FB250 System User’s Guide All cables for the FB250 FleetBroadband system are shielded and should not be affected by magnetic fields. However, try to avoid running cables parallel to AC wiring as it might cause malfunction of the equipment.
- Page 51 SATLINK FB250 System User’s Guide Release date: 08 July 2009 Information in this document is subject to change without notice and does not represent a commitment on the part of SATLINK S.L SATLINK S.L Avda.de Ia Industria,53-Nave 7 Poligono Industrial de Alcobendas 28108-Alcobendas, Madrid Spain.
Need help?
Do you have a question about the FB250 and is the answer not in the manual?
Questions and answers