Table of Contents
Advertisement
Advertisement
Table of Contents

Related Manuals for yemenren R3


Summary of Contents for yemenren R3
- Page 1 R3-USER MANUAL R3-使用説明書...
- Page 2 CONTENTS CHAPTER I PRODUCT INTRODUCTION --------P CHAPTER II START TO USE --------P CHAPTER III PRODUCT SPECIFICATION --------P18 CHAPTER IV FREQUENTLY ASKED QUESTIONS --------P19...
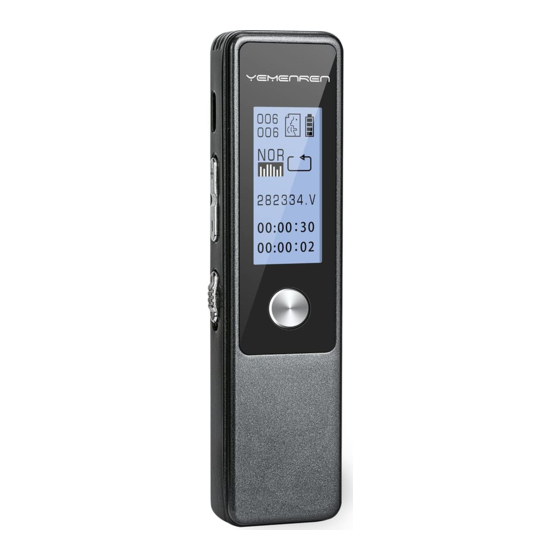
- Page 3 CHAPTER I PRODUCT INTRODUCTION PRODUCT EXTERIOR AND KEY FUNCTION DIAGRAM KEY NAMES AND FUNCTIONS Name Function Power Power on/off (When Charging , please Power on the recorder) Play key 1. Play/Suspend 2. Power on/off 3.Confirm...
- Page 4 Record Key 1. Record 2. Save the recording Menu Key 1. Enter main menu/file playing setting 2. Return 3. Switch between recording playing and music playing interface; 5, 6 Volume+/- 1. Volume plus and minus 2. Delete documents 1.Switch to 7, 8 Select Key previous...
- Page 5 CHAPTER II START TO USE I. POWER ON/OFF AND CHARGE POWER ON/OFF • Power on: switch Power Key to “ON” position to power on the recorder. • Power off: switch Power Key to “OFF” position to power off the recorder. •...
- Page 6 IN CHARGING: the battery icon is in a changing state, with "Start Charging" displayed FULLY CHARGED: the battery icon does not change, with "Charging completed" displayed METHOD 2 Charge the recorder by computer (make sure the "Power Key" is at the "ON" position): IN CHARGING: the battery icon at the top right corner is in a changing state;...
- Page 7 III. PLAY RECORDING FILE PLAY RECORDING FILE Mode I: Each time after recording is finished and saved as recording files, directly press "Play Key" to play the newly- saved recording file. The user can also select the recording file to play by pressing ◀◀...
- Page 8 A-B REPEAT OPERATION a) Press "Menu Key" when the recording file is being played, and A-B icon will appear on the screen, with A flickering. Select A. b) Press "Menu Key" again, and A-B icon will appear on the screen, with B flickering.
- Page 9 IV. PLAY MUSIC FILE DOWNLOAD MUSIC FILE Connect the recorder with a PC through the prepared USB cable, and then the recorder can serve as a removable disk. Users can save music files into the removable disk from : NOTE 1.Do not save music files in the “Record”...
- Page 10 LOOP PLAYBACK When music file/recording file is played, long press "Menu Key" to enter settings, press ◀◀ /▶▶ to select loop playback, press "Play Key" to enter, press ◀◀ /▶▶ to select repeat one/repeat all/normal/random , and press "Play Key" to save the setting. EQUALIZE When music file/recording file is played, long press "Menu Key"...
- Page 11 VI. SETTING RECORD SET In any standby status, Long press "Menu Key" to enter system setting. Press ◀◀ /▶▶ to select “record set”, press "Play Key" to enter the setting, and the setting includes the following sub items: -RECORDING TYPE: recording quality includes five levels (384Kbps, 192Kbps, 128Kbps, 64Kbps and 32Kbps);...
- Page 12 If the voice around is lower than certain volume, suspend recording to save space for users; SUGGEST not using such function under important conditions -VOR LEVEL Press ◀◀ /▶▶ to select the VOR level, and press “Play key” to enter. The VOR level is divided into 35 levels.
- Page 13 -RECORD SUBSECTION Press◀◀/▶▶to select “Record Subsection” setting, press "Play Key" to enter, press ◀◀ /▶▶ to select segmentation period, and press "Play Key" to confirm; If the segmentation period is 60min, the recording will be saved to generate a 60min recording file every 60 minutes till the end of the recording.
- Page 14 TIME SETTINGS Long press "Menu Key" to enter system setting, press ◀◀ /▶▶ to select time setting, press "Play Key" to enter, press ◀◀/▶▶ to select the position to set. (YY/MM/DD, HH/MM/SS), press "Volume +/-" to adjust to the correct time, and press "Play Key" to save the setting.
- Page 15 system setting, press ◀◀ /▶▶ to select "Storage" and press "Play Key" to enter; Tools-TIMING RECORDING Long press "Menu Key" to enter system setting, press ◀◀/▶▶ to select tool, press "Play Key" to enter, press ◀◀ /▶▶ to select timing recording, press "Play Key"...
- Page 16 Tools-PASSWORD SWITCH Long press "Menu Key" to enter system setting, press ◀◀ /▶▶ to select tool, press "Play Key" to enter, press ◀◀ /▶▶ to select password switch, press "Play Key" to enter, press ◀◀ /▶▶ to select password off/on, and press "Play Key"...
- Page 17 WARM PROMPT: If the recorder password switch is started, but the password is forgotten, operate as per the following steps. In case the password is forgotten, input (9999), and then long press "Menu"; at the moment, the password is reset and restored to the original password (0000)
- Page 18 AUTO POWER OFF long press "Menu Key" to system setting, press ◀◀ /▶▶ to select "Auto power off", press "Play Key" to enter, press ◀◀ /▶▶ to select power off for close/1min/5min/10min/30min/60min, and press "Play Key" to save the setting. If 5min is selected, it indicates the recorder will be powered off automatically without any operation after five minutes;...
- Page 19 CHAPTER III PRODUCT SPECIFICATION PRODUCT SPECIFICATION ITEM SPECIFICATION Content 8GB (Below is the capacity maximum recording duration corresponding to different recording quality conditions under 8GB capacity) 384KBPS 192KBPS 128KBPS 140h 64KBPS 280h 32KBPS 576h Battery 300mAh capacity 96*64 Graphic LCD Headphone 3.5mm jack...
- Page 20 CHAPTER IV FREQUENTLY ASKED QUESTIONS AND SOLUTIONS 1.RECORDING FILE CANNOT BE FOUND AFTER RECORDING? Method1: Format the device with its own format function--“Format” Method2: In the Windows System: Connect the voice recorder onto the computer through the USB cable, and format the recorder on the computer.
- Page 21 2.WHY IS THERE SOME NOISE IN THE RECORDING? Generally, it's difficult for any sound device to achieve the effect of no noise. Therefore, noise is a relative term. In addition, the noise can also be reduced by adjusting the recorder denoise level appropriately.
- Page 22 First check whether "Power Key" is located at the "ON" position; Charge the recorder, and then have a try after a period; If the problem remains unsolved, please contact us through support.us@yemenren.net , we will answer questions for you at any time;...
- Page 23 PRECAUTIONS 1. Please read the user manual carefully before using this recorder 2. Please backup recording files to your computer often to avoid accidents. 3. Make sure the power key is switched to the "ON" position during charging. 4. Do not use the recorder where electronic products are forbidden (like on aircraft).
Need help?
Do you have a question about the R3 and is the answer not in the manual?
Questions and answers