Advertisement
Available languages
Available languages
Table of Contents
- 1 Safety Guidelines - Definitions
- 2 Important Safety Instructions
- 3 Jump-Starter
- 4 Care and Maintenance
- 5 Troubleshooting
- 6 Service Information
- 7 Specifications
- 8 Cuidado y Mantenimiento
- 9 Detección de Problemas
- 10 Especificaciones
- 11 Información de Servicio
- 12 Un Año de Garantía Limitada
- Download this manual
PPRH7DS_PPRH7DSG_ManualENSP_063017.indd 20-1
20
PROFESSIONAL DIGITAL POWER STATION
INSTRUCTION MANUAL
FUENTE DE ENERGÍA DIGITAL PROFESIONAL
MANUAL DE INSTRUCCIÓN
SAVE THIS INSTRUCTION MANUAL FOR FUTURE REFERENCE.
CONSERVE ESTE MANUAL PARA FUTURAS CONSULTAS.
© 2017 Baccus Global LLC
Boca Raton, FL 33432
(877) 571-2391
PPRH7DS / PPRH7DSG
English
page 5
Español
pagina 12
BC
6/30/2017 12:22:53 AM
Advertisement
Table of Contents

Related Manuals for Stanley FatMax PPRH7DS

Summary of Contents for Stanley FatMax PPRH7DS
- Page 1 PPRH7DS / PPRH7DSG PROFESSIONAL DIGITAL POWER STATION INSTRUCTION MANUAL FUENTE DE ENERGÍA DIGITAL PROFESIONAL MANUAL DE INSTRUCCIÓN English page 5 Español pagina 12 SAVE THIS INSTRUCTION MANUAL FOR FUTURE REFERENCE. CONSERVE ESTE MANUAL PARA FUTURAS CONSULTAS. © 2017 Baccus Global LLC...
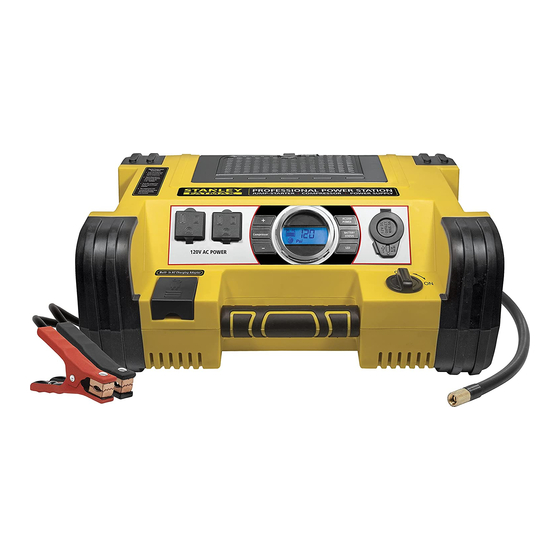
- Page 2 FEATURES FEATURES CARACTERÍSTICAS 1. Built-in 120 volt AC charger (under protective cover) 1. Cargador de CA de 120 voltios incorporado (bajo cubierta protectora) CARACTERÍSTICAS 2. Rubber grip handle 2. Manija de goma 3. Jump-starter power switch 3. Interruptor del puente auxiliar de arranque 4.
-
Page 3: Safety Guidelines - Definitions
SPECIFIC SAFETY INSTRUCTIONS FOR JUMP • Use of accessories and attachments. The use of any accessory or attachment • Never allow battery acid to come in contact with this unit. This device complies with part 15 of the FCC rules. Operation is subject to the following two not recommended for use with this appliance could be hazardous. -
Page 4: Jump-Starter
VIEWING BATTERY STATUS Have plenty of fresh water and soap nearby in case battery acid contacts skin. 2. Charge for approximately 40 hours or until the battery icon shows 4 solid bars. WARNING: TO REDUCE THE RISK OF INJURY OR PROPERTY DAMAGE: 3. -
Page 5: Care And Maintenance
USB CHARGING PORT CARE AND MAINTENANCE • When using a rechargeable device, monitor its temperature for the initial ten 2. Press the compressor power button. A beep will sound and the backlit LCD minutes of use to determine if it produces excessive heat. screen will display the following: The USB charging port is under the same protective cover as the 12 volt DC outlet. -
Page 6: Service Information
Portable compressor will not inflate • Use la vestimenta adecuada. No use ropas holgadas o joyas. Pueden atascarse • Make sure the compressor power button has been pressed to turn the compressor on. Este dispositivo cumple con la parte 15 de las normas de la Comisión Federal de en las piezas en movimiento. - Page 7 placa. En caso de duda, utilice el calibre inmediatamente superior. Cuanto menor es • Almacene siempre las pinzas de la batería cuando no se usa. Nunca toque las INTRODUCCIÓN PRECAUCIÓN – PARA REDUCIR EL RIESGO DE LESIONES O DAÑO A LA el número de calibre, más grueso es el cable.
- Page 8 VIENDO EL ESTADO DE LA BATERÍA LUZ DE ÁREA LED apagará y la pantalla LCD mostrará lo siguiente para indicar que la unidad se retroiluminada demostrará que lo que sigue para indicar la unidad está listo está cargando: para jump-start: Para comprobar el nivel de carga de la batería de la unidad, pulse el botón del botón de La luz de área LED incorporada del tres LEDs es controlada por el...
-
Page 9: Cuidado Y Mantenimiento
PUERTO DE CARGA DEL USB por conmutación y lineales utilizadas en equipos electrónicos, transformadores y puede sobrecalentar. En este caso, el compresor se apagará automáticamente. 4. Siga los pasos 2 a 6 los “que inflan neumáticos o los productos con de la motores pequeños. -
Page 10: Especificaciones
El enchufe accesorio de la CC de 12 voltios no accionará la aplicación Por favor completar la tarjeta de registro del producto dentro de un plazo de 30 • Cerciórese de que el aplicación no dibuje más de 5 amperios. días a partir de la fecha de compra y remitir a: Baccus Global LLC, One City Centre, • Compruebe que la unidad tiene una carga completa. - Page 11 PPRH7DS_PPRH7DSG_ManualENSP_063017.indd 20 6/30/2017 12:22:57 AM...
Need help?
Do you have a question about the PPRH7DS and is the answer not in the manual?
Questions and answers
Need a compressor for Stanley fatmax model PPRH7DS
The Stanley FatMax model PPRH7DS includes a built-in air compressor, so it does not require a separate compatible compressor.
This answer is automatically generated
How to recharge inverter
To recharge the Stanley PPRH7DS inverter:
1. Lift the AC cover on the front of the unit near the handle.
2. Connect an extension cord to the built-in AC adapter.
3. Plug the other end of the extension cord into a live 120V AC wall outlet.
4. Recharge until all battery status LEDs illuminate.
5. Once fully charged, disconnect the extension cord.
This answer is automatically generated
Does this unit have a charging adapter? How can I recharge for mobile usage?