Table of Contents
Advertisement
Advertisement
Table of Contents

Related Manuals for Connevans Sonumaxx 2.4


Summary of Contents for Connevans Sonumaxx 2.4
- Page 1 Connevans.info Solutions to improve the quality of life This product may be purchased from Connevans Limited DeafEquipment.co.uk secure online store at www.DeafEquipment.co.uk...
- Page 2 Scope of delivery Underchin- or pocket receiver Audio Cable (both ends with 3,5 Transmitter mm stereo plug) Polymer Lithium Rechargeable Battery 6,3 mm to 3,5 mm Adapter Plug x 2 pieces External Microphone AC/DC Adapter TOSlink cable RCA Adapter Cable 10 neck loop Warranty card (not depicted) 14 English...
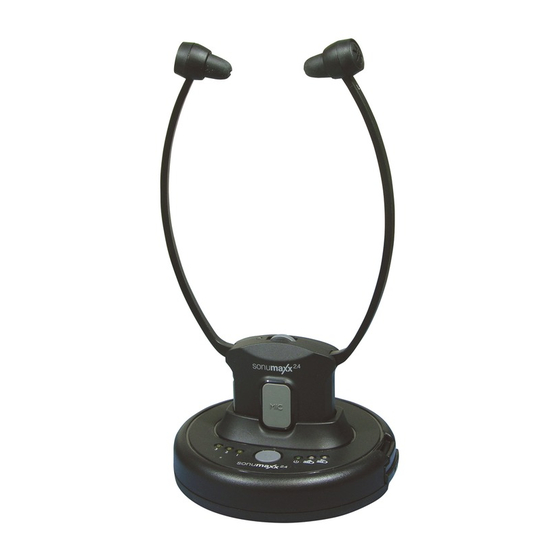
- Page 3 Controls: Receiver Front: Pocket receiver Underchin receiver Back: Underchin receiver Pocket receiver Adjustable Earbuds Power On/Off Switch 3,5 mm earphone jack (pocket recei- Microphone ver only) Sound Balance Control (Left/Middle/Right) Volume Control Battery LED Indicator of Power/Signal 10 Belt Clamp (pocket receiver only) MIC Button for verbal communication English 15...
- Page 4 Controls: Transmitter Front Back Charging Cradle Spare Charging Slot LED Indicator of Tone Clarity DC In Tone adjustment button 3.5mm Audio In Socket LED Indicator of Power/Signal 10. Audio / Optical input selector switch LED Charging Indicator for Main Battery 11.
- Page 5 Features - 2.4GHz Digital Hopping System Technology - Charging bay - Automatic shutoff, if no audio comes in - Communication function - Fast recharge - Easy-to-change spare battery - External microphone for environmental audio pickup. - Sound balance adjustment - Tone adjustment Installation: Transmitter 1.
- Page 6 18 English...
- Page 7 The green power indicator LED will blink as soon as you have connected the power adapter to the electrical outlet, when the audio signal is detected from the audio source, and the green LED indicator will glow constantly. Receiver Insert a battery into the receiver with correct polarity. Ilustration example: Underchin receiver Operation 1.
- Page 8 Charging the batteries 1. Select the On/Off Switch in the headset receiver to OFF position. 2. Place the headset receiver on the transmitter, make sure the charge contact touches the charge pins on the Transmitter. 3. The charging process starts automatically. LED indicator of main battery then glows in red constantly.
- Page 9 Communication feature: The sound of the transmission can be interrupted at any time, for example to talk to a person in the same room. Press the MIC-button of the receiver once. The receiver‘s inbuilt micro- phone will now register the surrounding sounds and amplifies them. The volume can be adjusted with the volume control.
- Page 10 Troubleshooting: No sound: - Ensure that the mains adapter is pushed fully into the power outlet and that its cable is properly connected to the DC IN connector on the transmitter. - The charge level of the headset receiver battery may be too low. Recharge the battery or replace it with a fully charged battery.
- Page 11 Warranty Disposal of used electric and elec- tronic units (applicable in the coun- Should a malfunction occur despite the unit tries of the Euro pean Union and oth- having been set up and operated correctly, er Euro pean countries with a separate col- please contact your dealer or the manufac- lection system).
- Page 12 Specifications Transmission mode: Digital Hopping System Carrier frequency: 2.4GHz ISM BAND l Operating voltage: Transmitter : 5V 550mA Receiver : 3.7 V, 350 mA Lithium Polymer Battery Frequency response: 30 Hz – 20 KHz Distortion: <0.5% Signal-to-noise ratio: >75 dB Range: Up to 25 meters (open area) This device complies to the following EU directives:...
Need help?
Do you have a question about the Sonumaxx 2.4 and is the answer not in the manual?
Questions and answers
comment installer le microphone externe
To install the external microphone for the Connevans Sonumaxx 2.4:
1. Connect the power adapter to the DC IN socket on the transmitter’s rear panel.
2. Plug the power adapter into an electrical outlet.
3. Use the external microphone to pick up environmental audio by connecting it to the appropriate microphone input on the transmitter.
4. Shift the input selector switch to the microphone input setting.
This setup ensures that the external microphone captures sound for transmission.
This answer is automatically generated