
Related Manuals for LazyMan A4TS


Summary of Contents for LazyMan A4TS
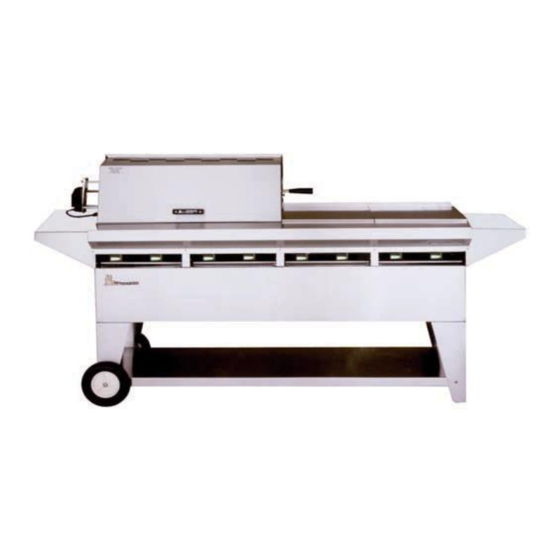
- Page 1 LazyMan Gourmet Grills USE AND CARE GUIDE OPEN HEARTH SERIES GRILLS ELITE SERIES GRILLS...
- Page 2 WARNING READ THIS MANUAL CAREFULLY and completely before using your grill to reduce the risk of: 1. Fire 2. Burn hazard, personal injury, or property damage 3. Burned food or unpleasant cooking experiences 4. Unapproved installation or servicing THIS PRODUCT IS DESIGNED FOR OUTDOOR USE ONLY. Improper installation, adjustment, alteration, service, or maintenance can cause property damage, injury, or death.
- Page 3 THIS MANUAL MUST REMAIN WITH THE PRODUCT OWNER FOR FUTURE REFERENCE. To obtain replacement parts or service, contact: LazyMan Inc. 560 Independence Street, Belvidere, NJ 07823 Customer Service (908) 475-5315 (800) 475-1950...
-
Page 4: Table Of Contents
Checklists…………………………………………………………………………………………..……...12 Grill Controls……………………………………………………………………………………………..14 Lighting Your Grill……………………………………………………………………………………...14 Cooking on Your grill………………………………………………………………………………….16 Using the Optional Rotisserie System………………………………………………………..17 Special Addendum for A1TS/B60 or Grills with Big 60 Power Burner………...20 Cooking Temperature Chart………………………………………………………………………21 Cleaning Your Grill………………………………………………………………………………………..22 Troubleshooting……………………………………………………………………….………………..26 Exploded View Parts Lists…………………………………………………………………….……….29 LazyMan Warranty Information…………………………………………………………………...34... -
Page 5: Important Safety Precautions
IMPORTANT SAFETY PRECAUTIONS 1. The LazyMan Elite and Open Hearth Series grills arrive nearly fully assembled and require only minor assembly steps. Assure that ALL packaging materials have been removed before attempting to light the appliance. This includes removing all shipping tie wraps, zip ties and cardboard. Remove the cooking grates and look for ALL internal packaging materials INSIDE the grill. -
Page 6: Built-In Grill Application Requirements And Cutouts
BUILT-IN APPLICATION REQUIREMENTS AND CUTOUTS Cut-Out Dimensions Grill Model Dim ‘A’ Dim ‘B’ Dim ‘C’ A4TS or A4TS/SS 65-1/2” 21” 7” A3TS or A3TS/SS 49-1/4” 21” 7” A2TS or A2TS/SS 33” 21” 7” A1TS or A1TS/SS 16-3/4” 21” 7” A1TS/B60 16-3/4”... - Page 7 BUILT-IN APPLICATION REQUIREMENTS AND CUTOUTS Cut-Out Dimensions Grill Model Dim ‘A’ Dim ‘B’ Dim ‘C’ A4TS or A4TS/SS 65-1/2” 21” 7” A3TS or A3TS/SS 49-1/4” 21” 7” A2TS or A2TS/SS 33” 21” 7” A1TS or A1TS/SS 16-3/4” 21” 7” A1TS/B60 16-3/4”...
-
Page 8: Open Hearth Series Island Installations
INSTALLATION METHOD #1- USING NG GAS: After the island has been constructed and built per the previous cutout recommendations and guidelines (method #1), it’s now time to install the LazyMan ATS Series Open Hearth grill into the island. The above diagram shows a typical Natural Gas installation where the gas piping is routed through the back of the island and externally to the gas source. - Page 9 This grill is also shipped with an NG regulator (for natural gas grills) and an LP regulator with hose for grills set up for liquid propane. NOTE: If you have a grill set up for NG gas type, and it is equipped with a 3/8 NPT Elbow, then a 3/8 male to 1/2 female straight conversion fitting will be required.
- Page 10 (Liquid Propane), then you have received an LP regulator and hose with your grill. If you plan to attach the grill directly to a bulk propane tank, then you cannot use the supplied hose. You must obtain a regulator from LazyMan Inc. Please order P/N 10099.
- Page 11 INSTALLATION METHOD #2- USING NG GAS: After the island has been constructed and built per the previous cutout recommendations and guidelines (method #2), it’s now time to install the LazyMan ATS Series Open Hearth grill into the island. If the gas piping is to be run INTERNALLY ((inside the island) then there must be hollow space below the grill for the gas pipe routing.
-
Page 12: Freestanding Elite Series Grill Considerations
Propane), then you have received an LP regulator and hose with your grill. If you plan to attach the grill directly to a bulk propane tank, then you cannot use the supplied hose. You must obtain a regulator from LazyMan Inc. Please order P/N 10099. -
Page 13: Gas Connections
If it is desired to convert to a 135,000 different type of gas, a gas conversion kit 123,000 must be obtained from LazyMan Inc. or from one of its dealers, and must be 115,000 installed by a qualified technician. - Page 14 It is assembly or use any other assembly other possible for the valve to be partially open than the one supplied with your LazyMan without releasing gas, but, as soon as the grill. regulator is connected, gas can leak from Do not attempt to use a 5LP-A equipped the connection.
-
Page 15: Final Checks
GAS CONNECTIONS To purge, make sure all grill controls are in the “OFF” position. Make sure the LP cylinder valve is turned ‘OFF’. Turn one or more of the grill burner valves to ‘ON’. This releases pressure in the For LP, turn the cylinder valve knob one system. -
Page 16: Operation Of Your Grill
OPERATION OF YOUR GRILL INTRODUCTION If you are using a freestanding grill, this condition can also be remedied by moving Outdoor grills create more heat than the grill to a new location, such that the interior kitchen cooking ranges and are able wind does not enter from the rear. - Page 17 OPERATION OF YOUR GRILL AT EACH NEW SEASON: 5. Connections to any Propane cylinder, if being used, have been leak tested. At the start of each new grilling season, the grill should be inspected. Remove the 6. The valve on a Propane cylinder, if being weather cover and cooking grates.
-
Page 18: Grill Controls
OPERATION OF YOUR GRILL ATS/ACC SERIES GRILL CONTROLS Cooking Grates Manifold Elbow Valve Levers Manifold Stubbed End (8 shown here) Drip Pans (4 shown here) piping and gas flow. LIGHTING YOUR GRILL Make sure all control levers for the grill are in the ‘OFF’... - Page 19 OPERATION OF YOUR GRILL The gas will begin flowing through the burner and up through the Lava Rock. The burner should ignite after only a few seconds. If, after 5 seconds, the burner DOES NOT light, then turn the valve OFF and wait 5 minutes for the unburned gas to TO LIGHT YOUR GRILL: dissipate.
-
Page 20: Cooking On Your Grill
OPERATION OF YOUR GRILL 450°. This indicates that your grill is USE EXTREME CAUTION WHEN LIGHTING getting too hot and may cause damage to the grill. When grilling with the hood Use the lighting instructions found on the closed, most grilling can be done with previous pages to continue. -
Page 21: Using The Optional Rotisserie System
The high powered burners used in your directly on the cooking grates. With rotisserie LazyMan Open Hearth and Elite Series grills are cooking, the food product is mounted to a capable of creating a very large range of heat ‘spit’... - Page 22 OPERATION OF YOUR GRILL PROCEEDURE Slide the pointed end of the spit rod into the square receptacle of the motor. The components to the optional rotisserie system are: -Rotisserie motor -Motor Holding Bracket -Spit Rod -Spit Forks Slide the motor into place over the Motor Holding Bracket.
- Page 23 OPERATION OF YOUR GRILL the meat product, and the basting pan is in place, light the first burner using the LIGHTING INSTRUCTIONS found on the previous pages. Continue by lighting all other burners. If you are using a partial hood, then light only those burners found under the hood portion.
-
Page 24: Special Addendum For A1Ts/B60 Or Grills With Big 60 Power Burner
Ring Ring Ring Levers (4) Example shown above is the LazyMan Model to start the procedure again. Once the center A3TS/SS/B60 which has three cooking zones burner is lit, the middle burner should be lit by but the far left zone has been changed from using the ‘crosslighting’... -
Page 26: Cleaning Your Grill
CLEANING YOUR GRILL CLEANING THE DRIP PAN Similar to cleaning the main grill The LazyMan Model A Series grill products components, the longer you wait to clean have been built with the finest grade of 304 the Drip Pan(s), the harder it will be to stainless steel available. - Page 27 CLEANING YOUR GRILL CLEANING THE GRATES (away from you) to allow the front of the burner to slide off from the valve orifice. Carefully It is best to clean the Grates after each use by remove the burner from the grill and tilt the using a commercially available brass grate open end of the burner over a trash can to cleaning brush.
- Page 28 CLEANING YOUR GRILL SPECIAL CLEANING FOR A1TS/B60 AND GRILLS (like steel wool) is NOT recommended since WITH BIG 60 BURNER portions of the steel fibers can remain on the supports. CLEANING THE BURNER NOTE: in some cases, depending on the option, If your grill is equipped with a BIG 60 side power a heavy duty bar grate is supplied with the Big burner, then periodically you should perform a...
- Page 29 CLEANING YOUR GRILL from the venturi openings. The INSIDE of the Remove the complete Top Pan or top Grate burner can be cleaned by flushing it out with a from the grill body. Reach under the rear of the garden hose. Be sure the burner is completely burner and locate the 1/4-20 nut which secures dry before re-installing.
-
Page 30: Troubleshooting
Please check the more common and more obvious functions before further attempting supplied? The type of fuel your grill to troubleshoot your LazyMan Model A was built for (NG or LP) can be found Series appliance, and before you call for on the label at the right rear of the service. - Page 31 The hose and regulator assembly expect from your kitchen range. MUST be the hose that has been supplied with your LazyMan appliance. 2. Do not line ANY portion for the appliance with aluminum foil. This will disrupt air flow 7.
- Page 32 TROUBLESHOOTING insufficient heat. Note that as the appliance IF YOU SMELL OF GAS interior becomes dusty or greasy, a yellow 1. If you smell gas while the appliance is lit, tip may appear at the tip of a blue flame. IMMEDIATELY TURN OFF ALL BURNERS AND This is normal.
-
Page 33: Exploded View Parts Lists
MODEL A1 TS A022 PARTS LIST/DESCRIPTION: A001 Set Permanent Coals A022 Cooking Grate, Hot Rod A003SS Stainless Steel Burner Tube A001 or A003 Steel Burner A004 Valve w/handle A004BH Knob Only A005-1 Pipe Manifold A003 A006 Broiler Body A006T-1 Stainless Front Trim Piece A007 Burner Insert Pan A009 Drip Pan A007... - Page 34 MODEL A2 TS PARTS LIST/DESCRIPTION: A022 A001 Set Permanent Coals A022 Cooking Grate, Hot Rod A003SS Stainless Steel Burner A0014 Tube or A003 Steel Burner A004 Valve w/handle A004BH Knob Only A005-2 Pipe Manifold A001 A006-2 Broiler Body A006T-2 Stainless Front Trim Piece A007-1 Burner Insert Pan A008 Trim Cap A009 Drip Pan...
- Page 35 MODEL A3 TS PARTS LIST/DESCRIPTION: A001 Set Permanent Coals A3 CC OR A3 TS INSERT PAN ID A022 Cooking Grate, Hot Rod A003SS Stainless Steel Burner Tube or A003 Steel Burner A004 Valve w/handle A022 A004BH Knob Only A005-3 Pipe Manifold A006-3 Broiler Body A006T-3 Stainless Front Trim Piece A001...
- Page 36 MODEL A4 TS PARTS LIST/DESCRIPTION: A001 Set Permanent Coals A022 Cooking Grate, Hot Rod A003SS Stainless Steel Burner Tube or A003 Steel Burner A004 Valve w/handle A004BH Knob Only A005-4 Pipe Manifold A006-4 Broiler Body A022 A006T-4 Stainless Front Trim Piece A001 A007-1 Burner Insert Pan A007-2 Burner Insert Pan...
- Page 37 MODEL A1 TS/60 6004-SS 6004-SS FINGER GRATE SET OF 4 6005-1 GRATE SUPPORT PAN 6004 60,000 BTU BURNER A006T -1-60 FRONT TRIM 6009 FRONT LABLE 6002 KNOBS SET OF 3 A009 DRIP PAN 6003 PIPE MANIFOLD 6001-V VALVES SET OF 3 6005-1 6006/TS CHASSIS 6004...
-
Page 38: Lazyman Warranty Information
(10) year warranty. This warranty covers the listed parts against defects or failure under normal usage. LazyMan Manufacturing, Inc. will repair or replace, at its discretion, any part which fails or is found to be defective during the warranty. They warranty excludes surface corrosion, scratches, and discoloration which may occur during regular use. - Page 39 (800) 475-1950. Be prepared to furnish the following information: Purchaser’s name, model and serial number of the grill, date of purchase, and the accurate description of the problem. LazyMan Manufacturing Inc. will not pay for service calls for correcting an installation problem. Owner shall be responsible for proper installation, providing normal care and maintenance, providing proof of purchase upon request, and making the grill accessible for service.
Need help?
Do you have a question about the A4TS and is the answer not in the manual?
Questions and answers
The grill loses propane after about 1/2 hour of use and doesn’t want to fire up again I changed the regulator and that did not help
The LazyMan A4TS grill may lose propane after 30 minutes of use and fail to ignite again due to one or more of the following:
1. Overheating of the regulator: Prolonged use can cause the regulator to overheat and restrict gas flow.
2. Improper regulator setup: If the grill was converted from Natural Gas (NG) to Liquid Propane (LP), using more than one regulator or failing to remove the NG regulator can restrict gas flow.
3. Gas buildup and safety shutoff: If the grill fails to ignite within 5 seconds, the control should be turned off and gas allowed to dissipate for 5 minutes to prevent ignition failure.
4. Airflow disruption: Wind or poor burner seating can cause flame disruption, leading to heat loss and ignition issues.
5. Clogged or dusty burners: Yellow flames may indicate lack of air or dirty burners, reducing heat and ignition reliability.
Proper setup, ventilation, and maintenance are necessary to prevent these issues.
This answer is automatically generated