Table of Contents
Advertisement
Advertisement
Table of Contents

Related Manuals for LazyMan LM210-28


Summary of Contents for LazyMan LM210-28
- Page 1 LazyMan Gourmet Grills USE AND CARE GUIDE LM210-28 LM210-40 SERIES...
- Page 2 WARNING READ THIS MANUAL CAREFULLY and completely before using your grill to reduce the risk of: 1. Fire 2. Burn hazard, personal injury, or property damage 3. Burned food or unpleasant cooking experiences 4. Unapproved installation or servicing THIS PRODUCT IS DESIGNED FOR OUTDOOR USE ONLY. Improper installation, adjustment, alteration, service, or maintenance can cause property damage, injury, or death.
- Page 3 Never remove the grounding prong from an electrical cord, or use this product with an ungrounded 2-prong adaptor. THIS MANUAL MUST REMAIN WITH THE PRODUCT OWNER FOR FUTURE REFERENCE. To obtain replacement parts or service, contact: LazyMan Inc. 560 Independence Street, Belvidere, NJ 07823 Customer Service (908) 475-5315 (800) 475-1950...
-
Page 4: Table Of Contents
Operation of Your Grill……………..………………………………………………………………….11 Introduction……………………………………………………………….……………………………11 Checklists…………………………………………………………………………………………………11 Lighting Your Grill………………………………………………………………………………..…..13 Manual Lighting…………………………………………………………………………………….…14 Preheating…………………………………………………………………………………………….…15 Direct Heat vs Indirect Heat…………………………………………………………………..16 Using the Optional Rotisserie System………………………………………………….…..16 Cooking Temperature Chart………………………………………………………………….…19 Cleaning Your Grill……………………………………………………………………………………..20 Troubleshooting………………………………………………………………………………………….22 Replacing the Electronic Igniter……………………………………………………………………26 Exploded View Parts Lists……………………………………………………………………………..27 LazyMan Warranty Information……………………………………………………………………29... -
Page 5: Important Safety Precautions
Failure to follow this instruction can result in back or other personal injuries. 16. The LazyMan LM210 Series grills arrive nearly fully assembled and require only minor assembly steps. Assure that ALL packaging materials have been removed before attempting to light the grill. This includes removing all shipping tie wraps, zip ties, cardboard, and the accessory carton. -
Page 6: Built-In Grill Application Requirements And Cutouts
BUILT-IN APPLICATION REQUIREMENTS AND CUTOUTS All LazyMan grills are manufactured to very tight tolerances. To ensure the best possible fit, however, it is best to purchase and have the grill available for the contractor BEFORE constructing a new island. As a guideline, prepare your island cutout per the dimensions found in the chart above. - Page 7 STAINLESS STEEL INSULATION KITS: SSIK-20- Insulation Kit for LM210-20 SSIK-28- Insulation Kit for LM210-28 SSIK-30- Insulation Kit for LM210-30 SSIK-40- Insulation Kit for LM210-40 The LM210 Series grill is designed to be placed in an island cutout that has a bottom in the cutout. The grill rests inside and on the bottom of the cutout.
-
Page 8: Electrical Hook-Up (Built-In Models)
The island/ enclosure should have ventilation holes to prevent gas build-up in the event of a leak. See “Built-In Application Requirements and Cutouts Diagram” for recommended cutouts. The MINIMUM vent size is 10” x 10” or an equivalent rectangular size creating 100 square inches in three places on the island enclosure. The deck ledges need to flat and level to prevent uneven burner flames and soot build-up inside the grill. -
Page 9: Built-In Grill Island Installation
INSTALLATION- USING NG GAS: After the island has been constructed and built per the previous cutout recommendations and guidelines, it’s now time to install the LazyMan 210 Series grill into the island. The above diagram shows a typical Natural Gas installation where the gas piping is routed through the back of the island and externally to the gas source. - Page 10 LP regulator and hose with your grill. If you plan to attach the grill directly to a bulk propane tank, then you cannot use the supplied hose. You must obtain a regulator from LazyMan Inc. Please order P/N 10099.
-
Page 11: Gas Connections
If it is desired to convert to a 135,000 different type of gas, a gas conversion kit 123,000 must be obtained from LazyMan Inc. or from one of its dealers, and must be 115,000 installed by a qualified technician. - Page 12 It is assembly or use any other assembly other possible for the valve to be partially open than the one supplied with your LazyMan without releasing gas, but, as soon as the grill. regulator is connected, gas can leak from Do not attempt to use a 5LP-A equipped the connection.
-
Page 13: Final Checks
GAS CONNECTIONS Make sure all grill controls are in the “OFF” position. Make sure the LP cylinder valve is turned ‘OFF’. Turn one or more of the grill burner valves to ‘ON’. This releases pressure in the For LP, turn the cylinder valve knob one system. - Page 14 GAS CONNECTIONS BURNER FLAME-AIR SHUTTER ADJUSTMENT Begin by completely removing the drip pan and setting it aside. For the best view of the Air flow that enters the burner is controlled burners, remove the cooking grates and the by the ‘Air Shutter’. Each burner is installed, ‘Broilrite’...
-
Page 15: Operation Of Your Grill
OPERATION OF YOUR GRILL INTRODUCTION If you are using a freestanding grill, this condition can also be remedied by moving Outdoor grills create more heat than the grill to a new location, such that the interior kitchen cooking ranges and are able wind does not enter from the rear. - Page 16 OPERATION OF YOUR GRILL toothpick as it can break off and clog the hole. As a final check, inspect all hoses and gas lines for any evidence of damage. By following these procedures, you can keep your outdoor grill operating like new for years to come.
-
Page 17: Lighting Your Grill
For Natural Gas (NG) grills, turn the main diagram and for LM210-28, it is located in gas control valve to ON. The valve is ON the CENTER. For the LM210-40, it is located when the valve lever is in line and parallel on the FAR RIGHT. -
Page 18: Manual Lighting
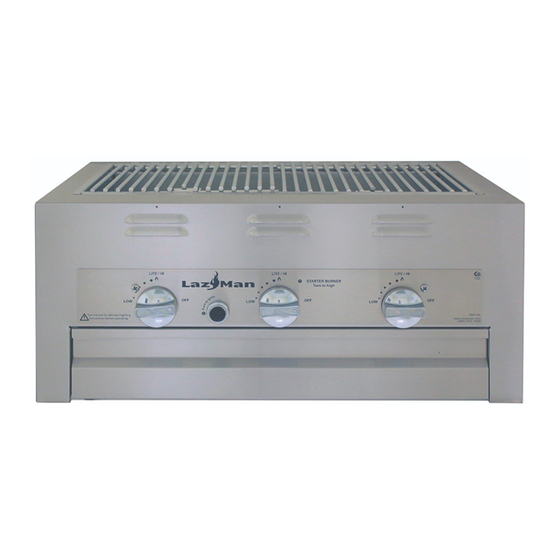
ADJACENT burner to HIGH. Wait a cooking hamburgers and vegetables. few seconds and the burner will ignite. For the LM210-28, after the LOW SETTING- Use this setting for all smoke LEFT burner is lit, then proceed to cooking, rotisserie cooking, and for cooking light the RIGHT burner. -
Page 19: Preheating
The high powered burners used in your rates time to properly and evenly warm up. LazyMan LM210 grill are capable of creating a very large range of heat intensities. By varying the number of burners used, the... -
Page 20: Direct Heat Vs Indirect Heat
OPERATION OF YOUR GRILL DIRECT HEAT directly on the cooking grates. With rotisserie cooking, the food product is ‘Direct Heat’ is also known as ‘Radiant mounted to a ‘spit’ rod held in place with Heat’. This type of heat occurs when the ‘forks’. - Page 21 OPERATION OF YOUR GRILL PROCEEDURE Slide the motor into place over the Motor Holding Bracket. Plug the motor power cord into the intended 120V outdoor outlet. Remove the warming rack from the rear interior of the grill. Place the other end of the spit rod into its cradle at the right side of the grill.
- Page 22 OPERATION OF YOUR GRILL the meat product, and the basting pan is in place, light the starting burner and then all other burners to warm up the grill. Use the ‘Lighting Procedure’ instructions found on the previous pages. After the grill is warm, the appropriate burners can be left ON, and the burners not needed can be turned OFF.
-
Page 24: Cleaning Your Grill
CLEANING YOUR GRILL DO NOT use solvents on the grill label. CLEANING THE DRIP PAN Your LazyMan LM210 Series grill has been built with the finest grade of 304 stainless Similar to cleaning the main grill steel available. All exterior surfaces feature... - Page 25 CLEANING YOUR GRILL grate brush to clear all grease and debris. the rear and off of the valve orifice at the Dipping the brush in hot water can also front, and lift straight up and out. Work expedite the process and make it easier to over a trash can and turn the burner over to remove the grease.
-
Page 26: Troubleshooting
Please read and follow the steps carefully to assure that there have not been oversights in troubleshooting your LazyMan grill. If you have exhausted the troubleshooting steps, OR if you are simply not comfortable working on your grill, you can contact the LazyMan Customer Service team and they will be glad to assist you. - Page 27 ‘starter’ burner control knob (CENTER outer button assembly counterclockwise to remove cap. Replace the battery with a new burner for LM210-28, and FAR RIGHT burner for LM210-40). Note: if you can battery, replace the cap, and try the ignition again.
- Page 28 The hose reads around 350 degrees before cooking. and regulator assembly MUST be the hose that has been supplied with your LazyMan Do not line ANY portion for the grill with grill. aluminum foil. This will disrupt air flow and cause the grill to burn too low OR too high.
- Page 29 TROUBLESHOOTING YELLOW BURNER FLAMES SHUT OFF THE MAIN FUEL SUPPLY. IF EQUIPPED WITH A HOOD, OPEN THE HOOD A yellow flame from the burners indicates a AND EXTUINGUISH ANY OPEN FLAMES. lack of air entering the burner. This can also Perform a leak test per the instructions contribute to low or insufficient heat.
-
Page 30: Replacing The Electronic Igniter
Loosen the locking nuts that secure the If you need further assistance, call the electrode to the collector box. Remove the LazyMan Customer Service team at: INSIDE nut completely. Separate the electrode from the collector box. (908) 475-5315 (800) 475-1950... -
Page 33: Lazyman Warranty Information
(excluding ignitor and collector box), to be free from defects in materials and workmanship under normal residential use for a period of five (5) years from the original date of purchase. LazyMan Manufacturing, Inc. will repair or replace, at its discretion, any part which fails or is found to be defective during the warranty. They warranty excludes surface corrosion, scratches and discoloration which may occur during regular use. - Page 34 Purchaser’s name, model and serial number of the grill, date of purchase, and the accurate description of the problem. LazyMan Manufacturing Inc. will not pay for service calls for correcting an installation problem. Owner shall be responsible for proper installation, providing normal care and maintenance, providing proof of purchase upon request, and making the grill accessible for service.
Need help?
Do you have a question about the LM210-28 and is the answer not in the manual?
Questions and answers