
Related Manuals for Marra Forni Rotator 90

Summary of Contents for Marra Forni Rotator 90
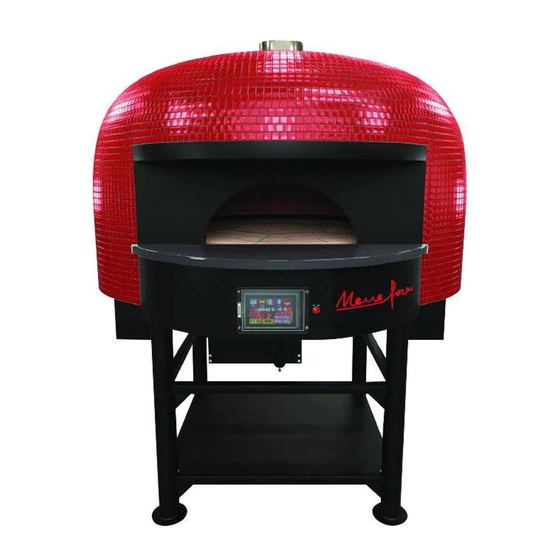
- Page 1 Owner’s Manual ROTATOR 10310 Southard Drive I Beltsville, MD 20705 I www.marraforni.com I 888.239.0575 Updated April 2017...
- Page 2 DO NOT THROW THIS MANUAL AWAY. REVIEW WARRANTY BEFORE INSTALLING OVEN.
-
Page 3: Table Of Contents
Manual Contents UL, CSA, ETL & CE FACT SHEET................4 Warnings......................5 Lifting and Moving Your Oven................6 Clearances and Requirements................7 Oven Installation....................8 Ventilation......................9 Gas Specifications....................10 Guidelines for Oven Use..................11 Operation Instructions..................12 Controller Console - Default Screen..............14 Controller Console - Language, Time, and Date Setup........15 Intro to Curing......................16 Controller Console - Start Curing Process............17 Controller Console - Confirm Curing..............18... -
Page 4: Ul, Csa, Etl & Ce Fact Sheet
UL’s safety culate industrial products freely within the internal standards. If a Marra Forni product is UL listed, you market of the European Union. The CE mark certi- know it has passed UL’s stringent tests for electrical fies that the products have met E.U. -
Page 5: Warnings
Thank You for Purchasing a Marra Forni Oven Our Rotator ovens are available in three different standard sizes: 110cm,130cm, and 150cm. Ovens are avail- able outside of these dimensions (by custom order) to suit your restaurant’s needs. This oven has been exten- sively tested and approved by the ETL, NSF, and CE. -
Page 6: Lifting And Moving Your Oven
Lifting and Moving Your Oven IMPORTANT: Only trained professionals using the proper machinery and handling equipment should lift and move the oven. Damage to the appliance, voiding of warranty, and personal injury may occur due to improper handling. Forklift ovens from sides. For Model 90, pick up from center crossbars. a. -
Page 7: Clearances And Requirements
Important Information/Clearances and Requirements Clearances combustible/non-combustible Gas Requirements construction: Combustibles: • Gas connections 3/4” NPT per burner, quick Sides: 2” disconnect gas hose must be used. Back: 2” • 84,000 BTU’s per burner. Non-Combustibles: Europe Sides: 0” • Gas connections 3/4” NPT per burner, quick Back: 0”... -
Page 8: Oven Installation
Oven Installation OVENS MUST ONLY BE INSTALLED ON SITE BY control is preset at the factory before shipping. AUTHORIZED PROFESSIONALS. 4. Connect a 3/4” gas supply to oven. On all thread- ed joints, be sure to use a pipe joint compound that 1. -
Page 9: Ventilation
300°F is required for the power ventilator. building heating appliance duct. *Refer to Marra Forni instructions for specific Direct *Type I Exhaust hood standards for ventilation Venting installation requirements. A field-built duct,... -
Page 10: Gas Specifications
Local/National manual shutoff valve during any pressure testing of codes. Marra Forni recommends submission of the gas supply piping system at test pressure equal venting plans to local code authorities BEFORE to or less than 1/2 psi (3.5 kPa). -
Page 11: Guidelines For Oven Use
5. Use only non-combustible hearth tools and cook- removed. ing implements inside the oven (we offer an entire line of Marra Forni pizza making tools). 4. Keep a gas fire-rated fire extinguisher close to the oven at all times. Ensure that all personnel and supervisors are aware of its location and use, as well as what to do in case of a fire emergency. - Page 12 Operation Instruction Operation area might be a brightly lit, well ventilated area. If light and ventilation are not substantial, provide for additional appliances. !!! WARNING DO NOT OPERATE WITHOUT REMOVABLE MOTOR BOX PANEL. NEVER OPEN MOTOR BOX. !!! WARNING HOT WHILE IN OPERATION. KEEP CHILDREN, PETS, CLOTHING AND FURNITURE AWAY.
-
Page 13: Operation Instructions
Operation Instructions Rotator Series Emergency Stop ON/OFF Button-Turns oven ON/OFF. Control Box-Controls oven functions. -
Page 14: Controller Console - Default Screen
Controller Console - Default Screen Rotator Series MARRA FORNI Light: 0Sec Home Button - Promts user to Select Mode Screen Technical Service Button Marra Forni Welcome Screen... -
Page 15: Controller Console - Language, Time, And Date Setup
Controller Console - Language, Time, and Date Setup Light: English Button-Sets language to English Spanish Button-Sets language to Spanish Italian Button-Sets language to Italian French Button-Sets language to French German Button-Sets language to German Time/Date Button-Sets Time/Date... -
Page 16: Intro To Curing
Intro to Curing Curing is necessary to ensure that your oven is free of moisture. The interior of the oven will appear dry upon arrival, but there is still a small amount of moisture in the bricks and mortar. If you neglect to cure your oven, the oven will become damaged during use. -
Page 17: Controller Console - Start Curing Process
Controller Console - Start Curing Process Start Curing Process Button - Press Start Curing Process to commence the 5-day curing process. Curing is necessary to ensure that your oven is free of moisture. The interior of the oven will appear dry upon arrival, but there is still a small amount of moisture in the bricks and mortar. -
Page 18: Controller Console - Confirm Curing
Controller Console - Confirm Curing Yes Button-Confirms No Button-Aborts curing process and initiates curing process. -
Page 19: Controller Console - Curing: Day 1 - 5
Controller Console - Curing:Day 1-5 Day1 thru 5-Curing screen. The oven will automati- cally and set temperature for five day curing process. Small cracks appear during curing. These are to be expected and DO NOT affect oven performance and durability. Please note that the amount of oil may drop, there is no need to adjust the oil, a decreased quantity is normal. -
Page 20: Controller Console - Select Mode
Controller Console - Select Mode Default Recipe Button- This button directs you to Manual Mode Button- default recipes provided Directs user to manual by Marra Forni. mode. User Recipe Button-Directs user to page where the user Settings Button-Directs user to customizes recipes. -
Page 21: Controller Console - Default Recipe
Controller Console - Select Mode: Default Recipe Confirm Command Button-Con- firms recipe chosen. Rotate Stop Button-Brings cooking deck to a complete stop. Reverse/Forward Button-Changes direction of deck rotation. Confirm Command Button-Confirms recipe cho- sen. Recipe 1 Button-Recipe 1 includes preset temp and rotate time. Recipe 2 Button-Recipe 2 includes preset temp and rotate time. -
Page 22: Controller Console - User Recipe
Controller Console - User Recipe Blank Recipe Button-Recipe to be created. Create Recipe Button-Creates a new customized recipe and prompts user to recipe setup screen. - Page 23 Controller Console - User Recipe Load Page Button-Loads new recipe to user recipe menu. Set Temperature Button-Allows user to set temperature for new recipe. Deck Speen Button-Allows user to set deck speed for new recipe. Recipe Name Button-Creates custom- ized recipe name. Customized Recipe complete.
- Page 24 Controller Console - User Recipe Customized Recipe complete. Once recipe is created, recipe will automatically be added to your recipe menu. User has the capability of creating sixteen customized recipes.
-
Page 25: Controller Console - Manual Mode
Controller Console - Manual Mode High/Low Flame Indicator-Indi- cates if burners are on Hgh/Low flame plete stop. Burner ON/OFF-Button for left and right burner,turns burners ON/OFF. Temperature Button-Increases and decreases oven temperature. Auto ON/OFF Button-Automatically turns oven on or off. Reverse/Forward and RPM Button-Reverse/Forward button changes direction of deck rotation. -
Page 26: Specifications
Specifications Model Minimum Maximum Gas Pressure Diameter Maximum Motor Design Primary Shipping Number Firing Firing Connection Required Natural Nozzle Certification Safety Weight Rating* Rating* Pipe Size or Propane Nozzle Insertion Depth MFB200 70,000* 200,000* 3 /4" NPT 6.0" to 14.0" 4.0"... -
Page 27: Electrical Specifications
Electrical Specifications Electrical diagrams are located behind control panel and inside motor box, under the oven. -BURNER DIAGRAM !!! WARNING - ELECTRICAL GROUNDING INSTRUCTIONS This appliance must be electrically grounded in accordance with local codes, or in the absence of local codes, with the National Electrical code, ANSI/NFPA 70, or the Canadian Electrical code, CSA C22.1 as applicable DO NOT OPEN OVEN CONSOLE OR GAS CONSOLE. -
Page 28: Electrical Specifications
Electrical Specifications -MOTOR BOX... -
Page 29: Electrical Specifications
Electrical Specifications -ROTATE CONTROL... -
Page 30: Operations, Cleaning, Maintenance
FOR NO REASON SHOULD THE BOX MOTOR AND/OR CONTROLLER CONSOLES BE OPENED. MARRA FORNI AND ITS REPRESENTATIVES ARE NOT RESPONSIBLE FOR DAMAGES CAUSED BY NON-AUTHORIZED OPERATIONS. In case of breakage or malfunction, contact the Marra Forni Representative to perform maintenance and repairs. WARRANTY Please see the warranty certificate to know all conditions. - Page 31 Burner Cleanout Instructions THIS PROCEDURE SHOULD NOT TAKE MORE THAN 1 HOUR 1. Turn off the Oven by unplugging the appliance 2. Turn off Main Gas Supply 3. Disconnect Burner Cable from Control Cable (See Picture #1) 4. Disconnect Burner from Gas Hard Pipe or Flex Hose/Quick Disconnect 5.
-
Page 32: Troubleshooting
9. Light the end of a piece of paper on fire and hold over the burner to light the oven. Use this process to light the oven until you are able to call Marra Forni and be issued a replacement burner. -
Page 33: Warranty
Note: Electrical and Flame Checks Must Be Made In The Order Listed 1. Check status of electronic burner control diagnostic control and one IND wire goes to the line power outside of indicator LED. the blower motor (White and Blue wires for 115V, White and A. - Page 35 Verace Pizza Neapolitana, all of the American Pizza Team, Whole Foods, and the Tony Gemignani School of Pizza. 6. Marra Forni forked dough mixers “fold” the dough rather than mixing it. This prevents the dough from becoming heated from the friction of being mixed, guaranteeing you a “cleaner” dough and a fresher-tasting end result.
- Page 36 10310 Southard Drive I Beltsville, MD 20705 I www.marraforni.com I 888.239.0575 Updated April 2017...
Need help?
Do you have a question about the Rotator 90 and is the answer not in the manual?
Questions and answers