
Related Manuals for Bio Bronpi HYDROPOLAR-21

Summary of Contents for Bio Bronpi HYDROPOLAR-21
- Page 1 USER MANUAL BOILERS PELLET-OLIVE STONE Electronic regulation of boilers and installation elements (heating circuits and Sanitary Hot Water...
-
Page 2: Table Of Contents
INDEX Index ............................................2 Symbol Description ........................................4 Safety Recommendations ....................................... 4 3.1 Safety Devices ..........................................4 Technical Features ........................................7 Fuels ............................................9 5.1 Pellet ..............................................9 5.2 Olive Stone ............................................ 10 Start-up ............................................ 10 Display ............................................. 12 7.1 Display General Information ....................................12 7.2 Functions of the Display's Buttons .................................. - Page 3 7.6.4 Switching-off Failure during Working Phase ............................32 7.6.5 Pressure Alarm ........................................33 7.6.6 Damaged Smoke Extraction Fan Alarm ..............................33 7.6.7 Worm Gear Failure Alarm ..................................... 34 Maintenance and Care......................................36 8.1 Burner Cleaning ........................................... 36 8.2 Scraper Use ........................................... 36 8.3 Ash Pan Cleaning ........................................
-
Page 4: Symbol Description
Symbol Description This symbol highlights those parts of the text that try to avoid mistakes when handling the boiler. The omission of these instructions could cause material damages and harm your health in case of wrong handling. This symbol highlights those parts of the text that try to help with a better understanding of the boiler regulation or the heating circuit. - Page 5 Ignition Failure If it does not appear a flame during the ignition process, the equipment will show in the display the message “IGNITION FAILURE.” If you try again to ignite the machine, the display will show the message “WAITING COOLING.”...
- Page 6 In the event of an overheating of the internal part of the tank, this device blocks the operation of the boiler. The restart needs to be done manually, dismantling its black protection and pressing the white switch. This manual restoration needs to be done by an authorised technician (Picture 3.) The restoration of the 80 ºC safety device is not included in the warranty unless the support service demonstrates a faulty component.
-
Page 7: Technical Features
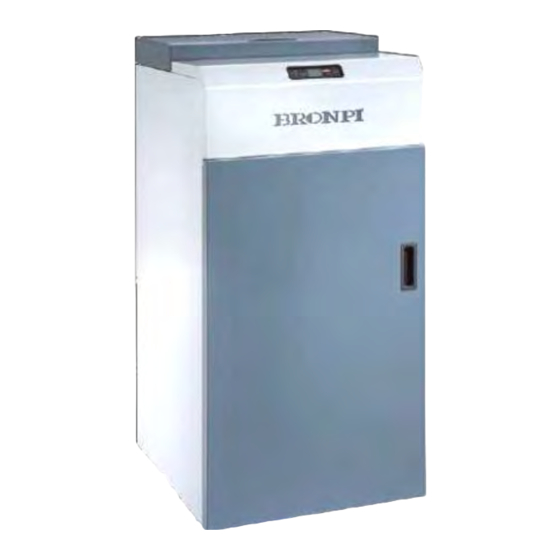
Picture 1 Picture 2 Picture 3 Picture 4 Technical Features HYDROPOLAR-21 HYDROARTICA-27 HYDROARTICA-34 Characteristics Olive Olive Olive Pellet... - Page 8 Minimum fuel consumption Kg/h Maximum fuel consumption Kg/h Tank capacity (Kg) Minimum/maximum power autonomy (h) 32 / 9,8 53 / 16 40 / 13 Recommended draw at maximum usable power ± 12 ± 12 ± 12 ± 12 ± 12 ±...
-
Page 9: Fuels
Fuels In order to guarantee a proper combustion, it is necessary to fulfill all quality standards in all fuels. The use of fuels in disagreement with the specifications mentioned below implies the cancellation of the warranty and the responsibility bounded to the product. If you use fuels according to the present specification, we guarantee an impeccable working and good performance values of the installation. -
Page 10: Olive Stone
5.2. Olive stone Humidity: The level of humidity in the pit should be between 6 and 8%. If the fuel does not have the appropriate humidity it could generate some oils during the combustion. This will make the chambers of the stove get dirty and it generates corrosion. - Page 11 Combustion chamber control Combustion chamber door Combustion chamber Please check that there are no objects inside the combustion chamber and place inside the appropriate burner for the chosen working mode of the boiler as it is shown in the following pictures. Note that the incorrect placement of the burner may cause problems in the combustion.
-
Page 12: Display
o It is advisable to install an automatic switch. o Compare the machine nameplate data with the data calculated from your power network. Display 7.1. Display General Information The display shows information about the boiler performance. Once you access the menu, you can get different types of screen and adjust the available configuration according to the level of access. -
Page 13: Functions Of The Display's Buttons
Picture 2 shows the layout of the messages during the programming or configuration of the working parameters. Particularly: The screen area saying “VALUE” shows the value that we introduce. The screen area saying “MENU LEVEL” shows the current menu level. Check “menu” section. VALUE MENU LEVEL 08:10... -
Page 14: Menu
Temperature ON/OFF Decreases the ambient thermostat temperature value. Access the menu. MENU Access the following level in the submenu. Menu (Set) Confirms the selected value and move to the following option PROGRAMMING in the menu. It switches on or off the boiler during 2 seconds, as WORKING appropriate. -
Page 15: Menu 1. Choosing Fuel
06- Year Year 04 – Programme adjustment See chapter 7.3.5 of this manual 05 – Select language 01 - Italian 02 - French 03 - English 04 - German 05 - Portuguese 06 - Spanish 06 – Stand-by mode On/Off 07 –... -
Page 16: Menu 2. Summer/Winter Mode
MENU LEVEL Menu 01 TYPE 1 FUEL DIALOGUE 7.3.3 Menu 2. Summer/Winter Mode This menu has two options: “SUMMER” and “WINTER.” In the event of selecting the “winter” mode we need to take into account that the boiler will allow us to use simultaneously the heating system together with the SHW (Sanitary Hot Water) heating system. -
Page 17: Menu 3. Set Up Clock
7.3.4 Menu 3. Set up Clock It sets up the time and date. The card has a lithium battery that allows the clock to work during 3/5 years. Menu 03 SET UP CLOCK 7.3.5 Menu 4. Programme Setting IMPORTANT: Before proceeding to set up the boiler, please check that the time and the date shown are correct;... -
Page 18: Sub-Menu 04.02. Daily Programme
M - 4 - 1 - 01 HABILITA CRONO In the upper left margin it is shown, by default, the word “OFF”; however, by pressing buttons no.1 or no.2 we should be able to change it to “ON” mode in order to inform the boiler that we are trying to introduce some of the three programmes: daily, weekly or weekend. - Page 19 By pressing just once button no.3 we gain access to the daily programming submenu of the boiler and, by default, it will show the following screen: M - 4 - 2 - 01 DAILY PROGRAMME We need to change the option OFF to ON by pressing buttons no. 1 or no. 2 so that we confirm to the machine that we have selected the daily programme: M - 4 - 2 - 01 DAILY...
- Page 20 By pressing buttons no. 1 and no. 2 we modify the value “OFF” and we set the time of the first start: 09:00 09:00 M - 4 - 2 - 02 M - 4 - 2 - 02 START 1 In this same way we can proceed to set the first time to stop: M - 4 - 2 - 03 STOP 1...
-
Page 21: Sub-Menu 04.03. Weekly Programme
In order to set up the values of the second time to start and stop, we need to follow the same steps as before: 20:30 M - 4 - 2 - 04 START 2 23:00 M - 4 - 2 - 05 STOP 2 After this we have already set up the daily programming of the boiler with 2 hours to start and 2 to stop. - Page 22 By pressing only once button no. 3, we access to the weekly programme sub-menu of the boiler and, by default, it will show up the following screen: M - 4 - 3 - 01 WEEKLY PROGRAMME We need to change option “OFF” with “ON” by pressing buttons no.1 and no.2. This way we are confirming that the weekly set up has been selected: M - 4 - 3 - 01 WEEKLY...
-
Page 23: Sub-Menu 04.04. Weekend Programme
After this, we need to select the activation or deactivation of each programme depending on the day of the week, for example: Programme 1: Monday (ON), Tuesday (ON), Wednesday (OFF), Thursday (OFF), Friday (ON), Saturday (ON), and Sunday (OFF.) Programme 2: Monday (OFF), Tuesday (OFF), Wednesday (ON), Thursday (OFF), Friday (OFF), Saturday (ON), and Sunday (ON.) Programme 3: Monday (OFF), Tuesday (ON), Wednesday (ON), Thursday (ON), Friday (ON), Saturday (ON), and Sunday (OFF.) - Page 24 M - 4 - 4 WEEKEND PROGRAMME We need to confirm the access to this programme by pressing button no.3 “SET” and it should show up the following screen: M - 4 - 4 - 01 START PROG - 1 We modify the value “OFF”...
-
Page 25: Menu 5. Select Language
7.3.6 Menu 5. Select Language It allows selecting the languages between those available (Italian, French, English, German, Portuguese, and Spanish.) MENU LEVEL Menu 05 SPANISH LANGUAGE DIALOGUE 7.3.7 Menu 6. Stand-by Mode When the “Stand-by Mode” is “OFF” the boiler will work depending on the water temperatura set selected. -
Page 26: Menu 7. Sound Mode
17:43 54 ºC WAITING DEMAND 7.3.8 Menu 7. Sound Mode By activating this modality, the boiler will emit a sound when the system detects a fault and goes into the alarm state. 7.3.9 Menu 8. Initial Load When the boiler is OFF and cold we can make a pellet pre-load during a period of time previously set by the manufacturer. -
Page 27: Menu 9. Boiler State
7.3.10 Menu 9. Boiler State It shows up the current state of the boiler and provides information about the devices connected. TIME 1 REMAINING TIME 10” 82’ R. ALARM 30 STATE STATE OPERATIONAL STATE ALARM DELAY STATE OF THE HEAT EXCHANGER 2&3 SMOKE EXTRACTION SPEED SMOKE TEMPERATURE INSTANT POWER... -
Page 28: User Mode
OPERATIONAL STATE ASPIRATION FAILURE STATE ALARM IN PROCESS User Mode Below is a description of the display normal operation according to the available fonctions. Before the ignition of the boiler, the display shows the following screen: HOUR DIALOGUE WATER TEMPERATURE 14:24 36 ºC 7.4.1... -
Page 29: Boiler In Operation
7.4.2 Boiler in Operation Once the smoke temperature set has been reached, the boiler is working. First of all, it will be in the state “Fire Present” and this will last just a few minutes before considering the boiler totally ignited. In this moment, the display will show the message “Work.”... -
Page 30: Water Temperature Reaches Temperature Fixed By The User
7.4.4 Water Temperature Reaches Temperature Fixed by the User HOUR DIALOGUE WATER TEMPERATURE 14:24 65 ºC MODULATION WORK In the same way as in the room temperature, if the Stand-by mode is ON, once the water temperature reaches the temperature set by the user plus a differential, the boiler will be automatically turned off. In this moment, the boiler will be on hold until the water temperature falls to the set temperature minus a differential. -
Page 31: Turning Off The Boiler
7.4.6 Turning off the Boiler To turn the boiler off we just need to press button 4 for a few seconds. Once it has been turned off, the boiler will start the final cleaning stage, in which the pellet/olive pit supply stops and the smoke extractor will be working to the maximum speed. -
Page 32: What Happens If
HOUR DIALOGUE WATER TEMPERATURE 14:35 54 ºC WAITING COOLING What happens if…? 7.5.1 The Fuel Does not Light In the event of a start-up failure, the display will show up an alarm as follows: HOUR DIALOGUE WATER TEMPERATURE 14:35 54 ºC IGNITION FAILURE In order to deactivate the alarm, please press button 4 and the boiler will be back to normal. -
Page 33: Power Supply Failure (Black Out)
7.5.2 Power Supply Failure (Black Out) In the event of a power supply cut-off, when the boiler restarts up it goes straight to the Final Cleaning stage until the boiler temperature reaches the appropriate cooling temperature. Once the final cleaning has finished, the boiler will turn off until the user ignite it again. -
Page 34: Smoke Temperature Excess Alarm
7.6.2 Smoke Temperature Excess Alarm It goes off when the probe detects a smoke temperature higher than 220°C; therefore the display shows the following message: 14:24 35 ºC ALARMA TEMP. HUMOS During the alarm state, the boiler will be in the turn-off stage. 7.6.3 Ignition Failure Alarm It goes off when the start-up stage does not run properly. -
Page 35: Pressure Alarm
7.6.5 Pressure Alarm Circuit hydraulic pressure It goes off when the pressure transducer detects a wrong pressure, either lower than 0.4 bars or higher than 2.5 bars. The system does automatically interrupt the pellet supply and the display will show up in the screen an alarm. Right after, the turn-off stage is activated. -
Page 36: Worm Gear Failure Alarm
7.6.7 Worm Gear Failure Alarm It goes off in the event of the endless breakdown. If this happens, the boiler stops and the display will show up the following alarm. Right after, the turn-off stage will be immediately activated. AL b YESNFÍN ERROR Alarm Code... -
Page 37: Maintenance And Care
draw excess, fuel type.) The combustion chamber Verify that the chamber is hermetic : check AL 8 DEPRESSION is on depression. locks, gaskets… etc. Check that the gas installation is correct (excess of horizontal sections, elbow joint, etc). Possible fuel blockage. -
Page 38: Ash Pan Cleaning
Use a vacuum to get rid of the ashes in the burner. Hoover the ashes which are inside the burner place. 8.2. Use of the Scraper A clean smoke chamber guarantees a constant thermal performance during a long time. This type of maintenance should be done, at least, once a day. - Page 39 After cleaning the boiler, the chimney, and the exhaust stack pipe and having got rid of the ashes and other residues, please close the boiler’s door and the corresponding settings. It is advisable to clean up the exhaust stack pipe, at least, once a year. Meanwhile, please check the status of the joint because in the event of not being absolutely complete (that is, if they do not fit the door) they do not guarantee a proper performance of the machine! It would be, then, necessary to replace them.
-
Page 40: Sanitary Hot Water Tank
CLEANING TASKS Move away the burner from the compartment and clean up the holes using the poker provided. Hoover the ashes with a vacuum. Hoover the ashes settled in the burner compartment. Scrapers cleaning. Empty the ash pan or hoover the ashes compartment when necessary. - Page 41 therefore, it stops the transmission to the heating circuit until the first one has reached the point of demand. The installer or Technical Assistance Service, during the ignition of the boiler and inside the technical menu (MENU 10), will have to choose the power (1, 2, 3, 4 or 5) that the boiler must have under the hot sanitary water demand according to the power of the heat exchanger.
-
Page 42: General Measurements
General Measurements Measurements in milimeters HYDROPOLAR-21... - Page 43 HYDROARTICA-27 HYDROARTICA-34...
-
Page 44: Maintenance
Maintenance Date Comments Adopted Solution... - Page 45 Date Comments Adopted Solution...
- Page 46 Please, do not hesitate to contact your dealer for further information.
Need help?
Do you have a question about the HYDROPOLAR-21 and is the answer not in the manual?
Questions and answers