Table of Contents
Advertisement
Available languages
Available languages
Advertisement
Chapters
Table of Contents

Related Manuals for Dorr SnapShot Mini Black


Summary of Contents for Dorr SnapShot Mini Black
- Page 1 SnapShot Mini 12 MP HD & SnapShot Mini Black 12 MP HD Wild- & Überwachungskamera | Game & Surveillance Camera BEDIENUNGSANLEITUNG INSTRUCTION MANUAL NOTICE D‘UTILISATION MANUALE D‘ISTRUZIONI doerrfoto.de...
-
Page 3: Table Of Contents
BEDIENUNGSANLEITUNG SNAPSHOT MINI 12MP HD & SNAPSHOT MINI BLACK 12MP HD Wild- & Überwachungskamera VIELEN DANK, dass Sie sich für ein Qualitätsprodukt aus dem Hause DÖRR entschieden haben. Bitte lesen Sie vor dem ersten Gebrauch die Bedienungsanleitung und die Sicherheitshinweise aufmerksam durch. Bewahren Sie die Bedie- nungsanleitung zusammen mit dem Gerät für den späteren Gebrauch auf. -
Page 4: Sicherheitshinweise
01 | SICHERHEITSHINWEISE Ihre Kamera verfügt über ein wetterfestes Schutzgehäuse nach Schutzklasse IP54 (staub- und spritzwassergeschützt) und ist somit für den • Einsatz im Freien geeignet. Schützen Sie Ihre Kamera trotzdem vor extremen Wetterbedingungen und direkter Sonneneinstrahlung. Verwenden Sie ausschließlich frische Markenbatterien desselben Typs und Herstellers. Beim Einlegen der Batterien auf die richtige Polung •... -
Page 5: Produktbeschreibung
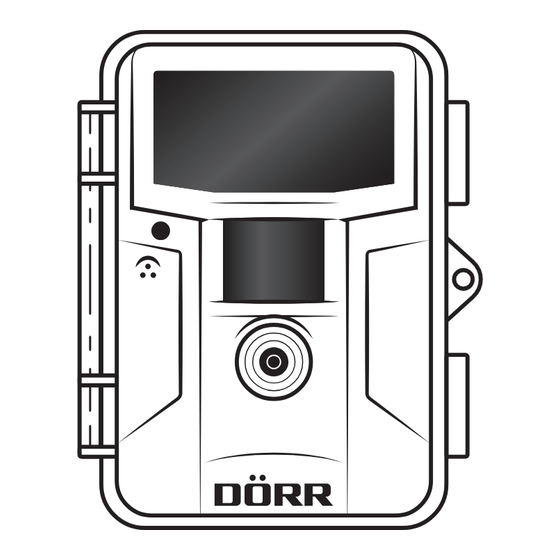
Anzeige von Datum, Uhrzeit, Temperatur, Batteriestatus und Mondphase auf jedem Bild • Extrem robustes wetterfestes Gehäuse nach Schutzklasse IP54 • Nahezu unsichtbarer Infrarot Blitz mit 24 LEDs SnapShot Mini: • SnapShot Mini Black: Unsichtbarer Infrarot Blitz mit 40 BLACK VISION LEDs • 05 | TEILEBESCHREIBUNG Infrarot Blitz Menü Taste... -
Page 6: Erste Inbetriebnahme
06 | ERSTE INBETRIEBNAHME 1. Ö nen Sie die Kamera an den seitlichen Spannverschlüssen (5). 2. Kontrollieren Sie, ob der Schieberegler (12) auf Position OFF (Aus) steht. ACHTUNG: Bei allen Aktionen, wie Batterien einlegen, SD Karte wechseln, muss die Kamera ausgeschaltet sein (12 = o Position). Es können sonst Schäden an der Kamera entstehen! 3. -
Page 7: Einstellungen & Funktionen
08 | EINSTELLUNGEN & FUNKTIONEN MODUS Durch Drücken der Pfeiltasten (10) oder wählen Sie zwischen FOTO (Bildaufnahme), VIDEO (Videoaufnahme) und der kombinierten FOTO+VIDEO (Bild- und Videofunktion). Im FOTO+VIDEO Modus macht Ihre Kamera ein Bild und direkt im Anschluss ein 10 Sek. Video. Durch Drücken der OK Taste (11) wird die gewählte Einstellung gespeichert. - Page 8 Timer 1 Stop Stoppuhrzeit für Zeitfenster 1 festlegen: Durch Drücken der Pfeiltasten (10) oder wählen Sie die Stunde. Durch Drücken der Pfeiltaste (10) gelangen Sie in das Minutenfeld. Mit den Pfeiltasten (10) oder wählen Sie die Minuten. z.B. 23.10 Timer stoppt um 23.10 Uhr Durch Drücken der OK Taste (11) wird die gewählte Zeit gespeichert.
- Page 9 TV-AUSGANG Wenn Sie Ihre Bilder und Videos auf einem USB-fähigen TV Gerät anschauen möchten, verbinden Sie das mitgelie- ferte USB Kabel mit dem Mini-USB Anschluss der Kamera (15) und dem TV Gerät. Durch Drücken der Pfeiltasten (10) oder wählen Sie zwischen PAL oder NTSC. Durch Drücken der OK Taste (11) wird die gewählte Einstellung gespeichert.
-
Page 10: Testaufnahmen
09 | TESTAUFNAHMEN Im SETUP Modus (Schieberegler (12) auf Position SETUP) kann ein Test Foto oder Video ausgelöst werden und direkt eingesehen werden. Zum Auslösen des Testfotos drücken Sie die Pfeiltaste (10) . Durch Drücken der OK Taste (11) wird das Test Foto angezeigt. Um ein Testvideo zu machen, drücken Sie die Pfeiltaste (10) um in den Videomodus ( ) zu gelangen. -
Page 11: Kontrolle Der Kamera
13 | KONTROLLE DER KAMERA Zur Kontrolle, ob Bilder gemacht wurden, gibt es verschiedene Möglichkeiten. 1. Ö nen Sie die Kamera und schalten Sie sie zunächst aus. Nach einer kurzen Pause (1-2 Sek.) schieben Sie den Schieberegler (12) auf Position SETUP. -
Page 12: Technische Daten
15 | TECHNISCHE DATEN MODELL SNAPSHOT MINI SNAPSHOT MINI BLACK Artikel Nr 204504 204505 24 Hochleistungs-Infrarot LEDs 850nm 40 Hochleistungs-Black Vision LEDs 940nm ca. 15 m (automatische Anpassung) ca. 15 m (automatische Anpassung) Blitzreichweite Bildsensor 2 MP Sensor der neuesten Generation 2 MP Sensor der neuesten Generation Bildaufl... -
Page 13: Weee, Rohs, Ce Zeichen
17 | WEEE, ROHS, CE ZEICHEN BATTERIE/AKKU ENTSORGUNG Batterien sind mit dem Symbol einer durchgekreuzten Mülltonne gekennzeichnet. Dieses Symbol weist darauf hin, dass leere Batterien oder Akkus, die sich nicht mehr aufl aden lassen, nicht im Hausmüll entsorgt werden dürfen. Möglicherweise enthalten Altbatterien Schadsto e, die Schaden an Gesundheit und Umwelt verursachen können. - Page 14 INSTRUCTION MANUAL SNAPSHOT MINI 12MP HD & SNAPSHOT MINI BLACK 12MP HD Game & Surveillance Camera THANK YOU for choosing this DÖRR quality product. Please read the instruction manual and safety hints carefully before fi rst use. Keep this instruction manual together with the device for future use.
-
Page 15: Safety Hints
01 | SAFETY HINTS Your camera is fitted with a weatherproof housing according to protection class IP54 (dust and splash waterproof). So the camera can be used • outdoors. Nevertheless protect the camera from extreme weather conditions and direct sunlight. Make sure to use fresh batteries of the same type and brand only. -
Page 16: Product Description
Displays date, time, temperature, battery status and moon phase on every image • Robust and weatherproof housing according to IP54 • Almost invisible infrared flash with 24 LEDs SnapShot Mini: • SnapShot Mini Black: Invisible infrared flash with 40 BLACK VISION LEDs • 05 | NOMENCLATURE Infrared fl ash Menu button Battery compartment ¼... -
Page 17: First Use
06 | FIRST USE 1. Open the camera releasing the lateral tension locks (5). 2. Make sure that the slide control (12) is on OFF position. CAUTION: To avoid camera damages always make sure that camera is switched o (12=OFF) when inserting batteries or changing SD card. 3. -
Page 18: Settings & Functions
08 | SETTINGS & FUNCTIONS MODE Press the arrow buttons (10) or to select between PHOTO (image), VIDEO (video recording) or P+V (combined photo video function). Using the combined photo video function, your camera will take a photo and directly afterwards a 10 second video sequence. - Page 19 Timer 1 Stop Determine stop of activity for 1st time frame. Press the arrow buttons (10) or to select the hours. Press the arrow button (10) to switch to minutes. Press the arrow buttons (10) to select the minutes. e.g. 23.10 Timer stops at 23:10 o’clock. To save your settings press the OK button (11).
-
Page 20: Test Recordings
LANGUAGE Select the menu language. Press the arrow buttons (10) or to select between English, German, French. To save your settings press the OK button (11). FORMAT This function deletes all fi les from the SD card and re-formats the memory card. CAUTION: Make sure that you do not need the fi... -
Page 21: Mounting The Camera
10 | MOUNTING THE CAMERA Pull the supplied mounting strap through the eyelet (21) on camera rear side and mount the camera to a tree, pole or any suitable object. Do not fi x the belt fi nally at this stage. The optimum distance to the object is between 3 to 10 meters. Larger distances are also possible, however with less reliability of motion sensor. -
Page 22: Camera Inspection
13 | CAMERA INSPECTION There are various possibilities to check if images have been taken. 1. Open the camera and switch it o . After 1 to 2 seconds switch the slide control (12) to SETUP mode. On the LCD display you can see the starting image. -
Page 23: Technical Specifi Cations
15 | TECHNICAL SPECIFICATIONS MODEL SNAPSHOT MINI SNAPSHOT MINI BLACK Item Number 204504 204505 24 High Performance LEDs 850nm 40 High Performance Black Vision LEDs 940nm approx. 15 meters (automatic adaptation) approx. 15 meters (automatic adaptation) Flash Range Image Sensor... -
Page 24: Weee, Rohs, Ce Marking
17 | WEEE, ROHS, CE MARKING DISPOSAL OF BATTERIES/ACCUMULATORS Batteries are marked with the symbol of a crossed out bin. This symbol indicates that empty batteries or accumulators which can no longer be charged, should not be disposed of with household waste. Waste batteries may contain harmful substances that can cause damage to health and to the environment. - Page 25 NOTICE D'UTILISATION SNAPSHOT MINI 12MP HD & SNAPSHOT MINI BLACK 12MP HD Caméra pour l’observation du gibier et de surveillance NOUS VOUS REMERCIONS d’avoir choisi un produit de qualité de la société DÖRR. Afi n d’apprécier pleinement cet appareil et de profi ter au mieux de ses fonctions, nous vous recommandons de lire soigneusement les inst- ructions et les consignes de sécurité...
-
Page 26: Consignes De Sécurité
01 | CONSIGNES DE SECURITE Votre caméra dispose d’un boitier résistant aux intempéries selon l’indice de protection IP54 (protégée contre les poussières et protégée • contre les projections d‘eau de toutes directions) et est par conséquent appropriée pour une utilisation à l’extérieur. Veuillez protéger votre caméra contre les conditions météo extrêmes et contre l’exposition directe au soleil. -
Page 27: Description Du Produit
Boîtier extrêmement robuste résistant aux intempéries avec indice de protection IP54 • SnapShot Mini: Flash infrarouge presque invisible avec 24 ampoules LEDs • SnapShot Mini Black: Flash infrarouge invisible avec 40 ampoules LEDs BLACK VISION • 05 | NOMENCLATURE Infrarouge fl ash... -
Page 28: Première Mis En Service
06 | PREMIÈRE MIS EN SERVICE 1. Ouvrir l’appareil au moyen des fermetures de tension (5). 2. Assurez-vous que l‘interrupteur marche/arrêt (12) est en position OFF. ATTENTION: L’appareil photo doit être éteint (12=position OFF) pendant toutes les opérations comme insertion de piles, changement de carte mémoire. -
Page 29: Réglages Et Fonctions
08 | REGLAGES ET FONCTIONS MODE Avec les touches directionnelles (10) ou vous pouvez choisir entre PHOTO, enregistrement VIDÉO et fonction com- binée PHOTO/VIDÉO. Dans le cas de la fonction combinée PHOTO/VIDÉO votre caméra fait une prise de vue et après un vidéo de 10 secondes de durée. - Page 30 Timer 1 Stop Fixer la fi n de travail pour fenêtre de temps 1. Avec les touches directionnelles (10) ou vous pouvez choisir l’heure. Avec la touche directionnelle (10) vous pouvez changer dans le champ des minutes. Avec les touches directionnelles (10) ou vous pouvez choisir les minutes. Par exemple : 23:10 l'heure de fi...
- Page 31 SORTIE TV Ici on sélectionne le format du signal de sortie de télévision (PAL ou NTSC). Cela ne sera nécessaire que dans le cas où vous souhaitez connecter la caméra avec un appareil de télévision. Pour cela vous devez connaitre le type de format de votre appareil de télévision.
-
Page 32: Prise De Vue De Test
09 | PRISE DE VUE DE TEST Dans le mode SETUP (mettre l’interrupteur marche/arrêt (12) dans la position SETUP) une prise de vue photo ou vidéo peut être déclenchée manuellement. Avec la touche directionnelle (10) vous pouvez prendre une prise de vue de test. Avec la touche OK (11) vous pouvez voir la prise de vue. Pour une vidéo de test appuyez la touche directionnelle (10) pour accéder au mode vidéo ( Avec la touche directionnelle (10) vous pouvez démarrer la vidéo de test. -
Page 33: Contrôle De La Caméra
13 | CONTROLE DE LA CAMERA Il y a plusieurs possibilités de contrôler si les prises de vue ont été faites avec succès. 1. Ouvrir l’appareil et l’éteindre-après une brève pause (1-2 secondes) commuter l‘interrupteur marche/arrêt (12) en position SETUP. Sur l’écran apparaît la première vue. -
Page 34: Caractéristiques Techniques
15 | CARACTÉRISTIQUES TECHNIQUES MODÈLE SNAPSHOT MINI SNAPSHOT MINI BLACK Article n° 204504 204505 24 ampoules LED d’haute performance 40 ampoules LED d’haute performance infrarouge 850nm Black Vision 940nm Portée du fl ash environ 15 mètres (réajustement automatique) environ 15 mètres (réajustement automatique) Capteur d‘image... -
Page 35: Deee, Rohs, Marquage Ce
17 | DEEE, ROHS, MARQUAGE CE GESTION DES DÉCHETS DE PILES ET D'ACCUMULATEURS Les piles sont marquées avec un symbole d’une poubelle barrée. Ce symbole indique que les piles et batteries rechargeables usagées ne doivent pas être traitées comme de simples déchets ménagers. Les piles et batteries peuvent contenir des substances dangereuses qui ont des conséquences négatives sur l’environnement et sur la santé... - Page 36 MANUALE D'ISTRUZIONI SNAPSHOT MINI 12MP HD & SNAPSHOT MINI BLACK 12MP HD Fotocamera da caccia e sorveglianza GRAZIE per aver scelto questo prodotto di qualità DÖRR. Si prega di leggere il manuale d’istruzioni e i suggerimenti sulla sicurezza accuratamente prima dell'uso. Conservare il manuale d’istruzioni insie- me con il dispositivo per un uso futuro.
-
Page 37: Suggerimenti Per La Sicurezza
01 | SUGGERIMENTI PER LA SICUREZZA La fotocamera è dotata di una custodia impermeabile resistente alle intemperie secondo la classe di protezione IP54 (anti-polvere e imper- • meabile). Così la fotocamera può essere utilizzato all‘esterno). Tuttavia la fotocamera deve essere protetta da condizioni meteorologiche estreme e dalla luce diretta del sole. -
Page 38: Descrizione Del Prodotto
Robusta e con una custodia resistente all’intemperie secondo norme IP54 • SnapShot Mini: Flash a infrarossi quasi invisibile con 24 LEDs • Flash a infrarossi invisibile con 40 BLACK VISION LEDs SnapShot Mini Black: • 05 | NOMENCLATURA Flash a infrarossi Display LCD... -
Page 39: Preparazione All'utilizzo
06 | PREPARAZIONE ALL'UTILIZZO 1. Aprite la fotocamera utilizzando i ganci a tensione laterali (5). 2. Controllare che la fotocamera sia spenta e il pulsante di alimentazione (12) su OFF. ATTENZIONE: Per evitare di danneggiare la fotocamere assicuratevi sempre che la fotocamera sia spenta e il pulsante di alimentazione (12) su OFF, prima di inserire le batterie o la scheda di memoria SD. -
Page 40: Impostazioni & Funzioni
08 | IMPOSTAZIONI & FUNZIONI MODE Premere il pulsante freccia (10) o per selezionare tra PHOTO, registrazione VIDEO o la funzione P+V photo e video (Modalità) combinati. Utilizzando la funzione foto video combinati, la fotocamera scatterà una foto e subito dopo registrerà un video dalla durata di 10 secondi. - Page 41 Timer 1 Stop Determinare fi ne attività del 1 ° tempo di attivazione. Premere il pulsante freccia (10) o per selezionare le ore. Premere la pulsante freccia (10) per passare al campo per i minuti. Premere il pulsante freccia (10) o per selezionare i minuti. Per esempio 23:10 Fine alle 23.10 h.
-
Page 42: Test Filmato
FORMAT Questa funzione elimina tutti i fi le dalla scheda SD e formatta la scheda di memoria. (Formattare) ATTENZIONE: Assicurarsi che non vi siano fi le necessari sulla scheda SD, prima di iniziare la formattazione! Premere il pulsante freccia (10) o per selezionare "Si". Per avviare la formattazione confermare con il pulsante OK (11). -
Page 43: Montaggio Della Fotocamera
10 | MONTAGGIO DELLA FOTOCAMERA Montare la fotocamera con la cinghia in dotazione su un albero o palo o qualsiasi altro oggetto adatto . Non fi ssare la cintura in maniera defi nitiva in questa fase. Assicurarsi che la fotocamera non si muove con il vento. La distanza ottimale all'oggetto è compresa tra 3 e 10 metri. Teorica- mente, distanze più... -
Page 44: Controllo Della Fotocamera
13 | CONTROLLO DELLA FOTOCAMERA Ci sono varie possibilità per verifi care se sono state scattate le foto. 1. Aprire la fotocamera e spegnerla. Dopo circa 1 o 2 secondi impostare il pulsante di alimentazione (12) su SETUP. Sul display LCD si può vedere l'immagine di partenza. -
Page 45: Specifi Che Tecniche
15 | SPECIFICHE TECNICHE MODELLO SNAPSHOT MINI SNAPSHOT MINI BLACK Numero di serie 204504 204505 24 LED Ad prestazioni elevate 850nm 40 LED Nero Vision Ad prestazioni elevate 940nm circa. 15 metri (adattamento automatico) circa.15 metri (adattamento automatico) Raggio di azione del fl ash... -
Page 46: Raee, Rohs, Ce Simboli
17 | RAEE, ROHS, CE SIMBOLI SMALTIMENTO DI BATTERIE/ACCUMULATORI Le batterie sono contrassegnati con il simbolo di un bidone barrato. Questo simbolo indica che le batterie e gli accumulatori che non possano più essere ricaricate o utilizzate, non devono essere smaltiti insieme ai rifi uti domestici. Le batterie possono contenere sostanze nocive che possono causare danni alla salute e all'ambiente. - Page 48 doerrfoto.de...
Need help?
Do you have a question about the SnapShot Mini Black and is the answer not in the manual?
Questions and answers