Advertisement
Quick Links
SHORT TERM CONFIDENTIAL
V
ADDIO
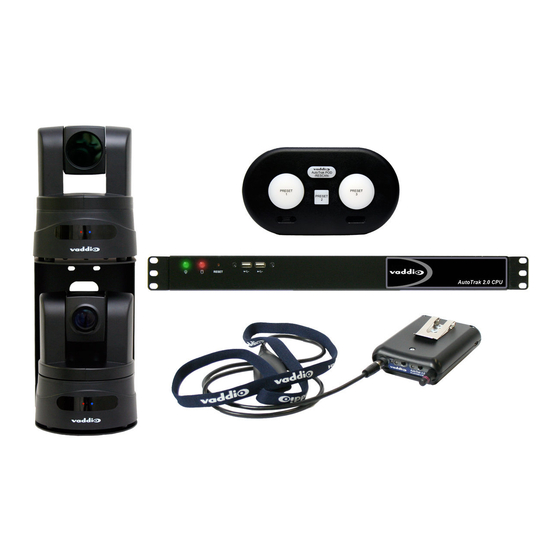
Camera Tracking System
Featuring Automatic Pan/Tilt/Zoom Camera Tracking
Part Numbers:
AutoTrak 2.0
Camera Tracking System: North America
999-7250-000: AutoTrak 2.0-Dual HD-18 Kit with Quick-Connect
DVI/HDMI Interface-North America
999-7260-000: AutoTrak 2.0-HD-18 & HD-20 Kit with Quick-Connect
DVI/HDMI Interface-North America
AutoTrak 2.0
Camera Tracking System: International
999-7250-001: AutoTrak 2.0-Dual HD-18 Kit with Quick-Connect
DVI/HDMI Interface-International
999-7260-001: AutoTrak 2.0-HD-18 & HD-20 Kit with Quick-Connect
DVI/HDMI Interface-International
Optional:
EasyTalk AutoTrak 2.0 Wireless Audio Interface:
998-7230-000: EasyTalk AutoTrak 2.0 Wireless Audio Interface-North
America
998-7230-001: EasyTalk AutoTrak 2.0 Wireless Audio Interface-
International
©2012 Vaddio - All Rights Reserved. AutoTrak 2.0 with EasyTalk Wireless Audio Interface - Document Number 342-0382 Rev. A
™ A
UTO
I
NSTALLATION AND
T
2.0
RAK
U
G
SERS
UIDE
Advertisement

Related Manuals for VADDIO AutoTrak 2.0

Summary of Contents for VADDIO AutoTrak 2.0
- Page 1 EasyTalk AutoTrak 2.0 Wireless Audio Interface: 998-7230-000: EasyTalk AutoTrak 2.0 Wireless Audio Interface-North America 998-7230-001: EasyTalk AutoTrak 2.0 Wireless Audio Interface- International ©2012 Vaddio - All Rights Reserved. AutoTrak 2.0 with EasyTalk Wireless Audio Interface - Document Number 342-0382 Rev. A...
- Page 2 SHORT TERM CONFIDENTIAL AutoTrak 2.0 Camera Tracking System Inside Front Cover - Blank ©2012 Vaddio - All Rights Reserved. AutoTrak 2.0 Camera Tracking System - Document Number 342-0382 Rev. A Page 2 of 47...
-
Page 3: Intended Use
Reference camera) is between 12’ (3.65m) and up to 40’ (12.2m). System positioning is critical for proper and consistent operation. The AutoTrak 2.0 can be installed as a standalone system or can be used in conjunction with myriad Vaddio Presenter controlled solutions including AutoPresenter™, PresenterPOD™, ControlVIEW XHD™, TouchVIEW™, AutoVIEW™... - Page 4 One (1) *HD-18 PTZ Camera with AutoTrak 2.0 Software preloaded – IR Reference Camera One (1) 37mm female lens ring adapter for HD-18 attached to HD-18 Camera ©2012 Vaddio - All Rights Reserved. AutoTrak 2.0 Camera Tracking System - Document Number 342-0382 Rev. A Page 4 of 47...
- Page 5 “VISCA” type control normally used in the stock HD-18 PTZ Camera. The HD-18 cameras will work with the Vaddio IR Remote but is recommended that the PTZ positions of the camera be set with the AutoTrak 2.0 Software. The HD-18 AutoTrak 2.0 cameras will not work with any other controller besides AutoTrak 2.0 at this time.
- Page 6 Antenna: 1” (25.4mm) RP-SMA straight antenna to transmit RF wireless audio at 2.4 GHZ utilizing Adaptive Frequency Hopping (AFH) from the integrated unidirectional microphone element. ©2012 Vaddio - All Rights Reserved. AutoTrak 2.0 Camera Tracking System - Document Number 342-0382 Rev. A Page 6 of 47...
- Page 7 Note: Radio link operates up to 100 feet line of sight of the AutoTrak 2.0 Wireless Audio Interface. System Power: To use the Belt Pack or IR Lanyard, turn the SYSTEM POWER switch to the on position and the LED will illuminate.
- Page 8 Procedure for Belt Pack Pairing with the AutoTrack 2.0 Wireless Audio Interface: Note: If the AutoTrak 2.0 System and the Optional AutoTrak 2.0 Wireless Audio Interface are ordered at the same time for delivery, the Belt Pack will be paired with the AutoTrak 2.0 Wireless Audio Interface at the factory.
- Page 9 ④ ⑤ ⑥ ⑦ 1) Power ON/OFF: This switch turns the power for the AutoTrak 2.0 Wireless Audio Interface on or off. To use, push the power button until the blue LED is lit and the system is ready for operation.
- Page 10 Enable/Disable Speaker EQ Filter USB Conference Mode (Skype-type PC applications) Baud Rate Selection: 9600-Off/38.4K-On Disable Radio (1-Off) Not Used ©2012 Vaddio - All Rights Reserved. AutoTrak 2.0 Camera Tracking System - Document Number 342-0382 Rev. A Page 10 of 47...
- Page 11 12) Make sure that the Mic Mute LED on the front panel is not lit. 13) Adjust the mic volume by moving the Audio Level potentiometer until the desired output level is reached. ©2012 Vaddio - All Rights Reserved. AutoTrak 2.0 Camera Tracking System - Document Number 342-0382 Rev. A Page 11 of 47...
- Page 12 Lanyard, Belt Pack and Audio Interface as a wireless mic only. If switch 6 is activated, the system will not track the lanyard. ©2012 Vaddio - All Rights Reserved. AutoTrak 2.0 Camera Tracking System - Document Number 342-0382 Rev. A Page 12 of 47...
- Page 13 Balanced Line Level (on XLR +4dBu) or Unbalanced Line Level (on RCA -10dBV) Keyboard & Mouse Sound System ©2012 Vaddio - All Rights Reserved. AutoTrak 2.0 Camera Tracking System - Document Number 342-0382 Rev. A (Not Included) Page 13 of 47...
- Page 14 Balanced Line Level (on XLR +4dBu) or AutoTrak 2.0 CPU Unbalanced Line Level (on RCA -10dBV) Keyboard & Mouse Sound System ©2012 Vaddio - All Rights Reserved. AutoTrak 2.0 Camera Tracking System - Document Number 342-0382 Rev. A (Not Included) Page 14 of 47...
- Page 15 Please mark and test the cables prior to termination. Please do not connect these cameras up to the Quick-Connect systems using the “guess/trial and error” method. ©2012 Vaddio - All Rights Reserved. AutoTrak 2.0 Camera Tracking System - Document Number 342-0382 Rev. A Page 15 of 47...
- Page 16 Connect the 1 Cat-5e cable (up to 100’/30.5m not supplied) to the AutoTrak 2.0 Quick-Connect Box 998- 1105-020 to the RJ-45 port labeled “AutoTrak 2.0”. This Cat-5e cable is terminated at the head end to the other Quick-Connect Box (998-1105-001) RJ-45 connector.
- Page 17 7) Plug the composite video from the IR Reference Camera back into the middle yellow RCA-F jack on the back of the AutoTrak 2.0 CPU. ©2012 Vaddio - All Rights Reserved. AutoTrak 2.0 Camera Tracking System - Document Number 342-0382 Rev. A Page 17 of 47...
- Page 18 AutoPresenter 6x1 Seamless switcher and Automated Camera Preset Controller. A later section explains the connectivity and set-up when using these devices together. ©2012 Vaddio - All Rights Reserved. AutoTrak 2.0 Camera Tracking System - Document Number 342-0382 Rev. A Page 18 of 47...
- Page 19 The lanyard was placed earlier at a specific central location and height and distance from the cameras in previous steps. ©2012 Vaddio - All Rights Reserved. AutoTrak 2.0 Camera Tracking System - Document Number 342-0382 Rev. A Page 19 of 47...
- Page 20 Using the AutoTrak 2.0 as an Input to the AutoPresenter for Camera Presets (If the AutoTrak 2.0 and AutoPresenter are not being used together in a system – skip this section) AutoTrak 2.0 Tracking Camera presets require configuration in both AutoTrak 2.0 and AutoPresenter.
- Page 21 1) In the AutoPresenter Menus, select the menu item “AutoTrak 2.0 Input” and select which input (1-6) to which the AutoTrak 2.0 will be connected. This way up to six (6) trigger inputs, between 1 and 72, can be dedicated to preset positions for the AutoTrak 2.0 Tracking Camera. These presets can be incorporated into the system and use the Vaddio trigger devices such as PresenterPOD, StepVIEW mats, AutoVIEW IR Sensors, MicVIEW push to talk mics or TouchVIEW RF buttons.
- Page 22 AutoTrak 2.0 Camera Tracking System 3) As an example, if the AutoPresenter video input for the AutoTrak 2.0 is Input 6, the AutoTrak 2.0 preset is #1 which is triggered by input trigger #4 with a trigger device. Then anytime the presenter trigger input #4, the AutoPresenter will switch to Input 6 and the AutoPresenter will communicate to the AutoTrak 2.0 which will send the Tracking Camera to go to Preset #1.
- Page 23 All Menu Screen Shots and Control Descriptions: Tracking/Main Page Control Action Description Pause/Resume Button Click/Press Stop/Interrupt tracking Shutdown Button Click/Press Close/Shutdown system ©2012 Vaddio - All Rights Reserved. AutoTrak 2.0 Camera Tracking System - Document Number 342-0382 Rev. A Page 23 of 47...
- Page 24 Click/Press and hold Direct Reference Zoom In (Tele) Button Camera Control Zoom Wide Click/Press and hold Direct Reference Zoom Out (Wide) ©2012 Vaddio - All Rights Reserved. AutoTrak 2.0 Camera Tracking System - Document Number 342-0382 Rev. A Page 24 of 47...
- Page 25 Click/Press Up/Down Select AutoTrak 2.0 preset index (1- AutoPresenter Presets - Trigger: # Click/Press Up/Down Select AutoPresenter Trigger( 1-72) ©2012 Vaddio - All Rights Reserved. AutoTrak 2.0 Camera Tracking System - Document Number 342-0382 Rev. A Page 25 of 47...
- Page 26 Save Button Click/Press Save Pan/Tilt Speeds Pause/Resume Button Click/Press Pause or Return to Tracking Shutdown Button Click/Press Close/Shutdown system ©2012 Vaddio - All Rights Reserved. AutoTrak 2.0 Camera Tracking System - Document Number 342-0382 Rev. A Page 26 of 47...
- Page 27 Click Up/Down Reference camera tilt angle, in degrees Projection Time Click Up/Down Tracking speed adjustment where higher value reduces speed. ©2012 Vaddio - All Rights Reserved. AutoTrak 2.0 Camera Tracking System - Document Number 342-0382 Rev. A Page 27 of 47...
- Page 28 Loads previously saved settings Save Button Click/Press Saves tuning settings for IR Reference Camera Click/Press Pause or Return to Tracking Pause/Resume ©2012 Vaddio - All Rights Reserved. AutoTrak 2.0 Camera Tracking System - Document Number 342-0382 Rev. A Page 28 of 47...
- Page 29 Value, in degrees, to adjust reference location used to move Tracking Camera. (FOR USE ONLY WITH SIDE BY SIDE CAMERA ©2012 Vaddio - All Rights Reserved. AutoTrak 2.0 Camera Tracking System - Document Number 342-0382 Rev. A Page 29 of 47...
- Page 30 AutoTrak 2.0 parameters to local or flash drive Click/Press Opens dialogue box to allow user to export (store) current AutoTrak Import Parameters ©2012 Vaddio - All Rights Reserved. AutoTrak 2.0 Camera Tracking System - Document Number 342-0382 Rev. A Page 30 of 47...
- Page 31 AutoTrak 2.0 parameters to local or flash drive Click/Press Opens dialogue box to allow user to export (store) current Import Parameters ©2012 Vaddio - All Rights Reserved. AutoTrak 2.0 Camera Tracking System - Document Number 342-0382 Rev. A Page 31 of 47...
- Page 32 Lanyard but this reduces the overall capture size and will force a reduction in the ‘Search Pan Speed’ and an increase of the ‘Projection Time’ parameters to allow ©2012 Vaddio - All Rights Reserved. AutoTrak 2.0 Camera Tracking System - Document Number 342-0382 Rev. A Page 32 of 47...
- Page 33 WallVIEW HD-18 to receive IR signals from the IR remote control supplied with the camera. 4) Power Light: ©2012 Vaddio - All Rights Reserved. AutoTrak 2.0 Camera Tracking System - Document Number 342-0382 Rev. A A blue power light is illuminated when the Page 33 of 47...
- Page 34 A rotary switch allows the user to choose the component HD output video resolution and format. See Page 31 for additional information on switch settings. 8) 12 VDC Input NOTE: The power input is not used with the AutoTrak 2.0 system. This is only used on the standard, ClearVIEW HD-18 camera. 9) YPbPr Video Output: Component HD video is fed through the DB-15 connector.
- Page 35 These switch settings must be set in accordance with the peripherals used in the system. For the AutoTrak 2.0, the required settings are noted. On the bottom of the camera there is a label that defines the 10-positon dip switch functions and the rotary HD/YPbPr Video Select switch.
- Page 36 IR Out: The IR output is returned to the Quick-Connect on the RS-232 RJ-45 jack on the back of the camera. Leave this switch in the ON position on both HD-18 cameras for use with AutoTrak 2.0. When this switch is in the ON position, the IR Remote is overridden.
- Page 37 Vaddio Customer Service: Vaddio will test, repair, or replace the product or products without charge if the unit is under warranty and is found to be defective. If the product is out of warranty, Vaddio will test then repair the product or products.
- Page 38 Products Not Under Warranty: Payment arrangements are required before outbound shipment for all out of warranty products. *Vaddio manufactures its hardware products from parts and components that are new or equivalent to new in accordance with industry standard practices. Other General Information: Care and Cleaning Do not attempt to take this product apart at any time.
- Page 39 Operation is subject to the following two conditions: (1) This device may not cause interference, and (2) This device must accept any interference including interference that may cause undesired operation of the device. ©2012 Vaddio - All Rights Reserved. AutoTrak 2.0 Camera Tracking System - Document Number 342-0382 Rev. A Page 39 of 47...
- Page 40 This equipment has been tested and found to comply with the limits for a digital device, pursuant to ©2012 Vaddio - All Rights Reserved. AutoTrak 2.0 Camera Tracking System - Document Number 342-0382 Rev. A Page 40 of 47...
- Page 41 EN 61000-4-8: 2010 Power Frequency Magnetic Field EN 61000-4-11: Second Edition: 2004 Test not applicable to this device. ©2012 Vaddio - All Rights Reserved. AutoTrak 2.0 Camera Tracking System - Document Number 342-0382 Rev. A Page 41 of 47...
- Page 42 EN 61000-4-8: 1993 + Amendment A1: 2001 Power Frequency Magnetic Field EN 61000-4-11: Second Edition: 2004 Voltage Dips, Interrupts and Fluctuations ©2012 Vaddio - All Rights Reserved. AutoTrak 2.0 Camera Tracking System - Document Number 342-0382 Rev. A Page 42 of 47...
- Page 43 EN 61000-4-8: 1993 + Amendment A1: 2001 Power Frequency Magnetic Field EN 61000-4-11 Second Edition: 2004 Voltage Dips, Interrupts and Fluctuations ©2012 Vaddio - All Rights Reserved. AutoTrak 2.0 Camera Tracking System - Document Number 342-0382 Rev. A Page 43 of 47...
-
Page 44: Appendix 1: Hd-18 Connector Information
Set the Tracking Camera position and store the preset. Recall the preset with the commands above. The Preset OFF command must be issued to return to active tracking. ©2012 Vaddio - All Rights Reserved. AutoTrak 2.0 Camera Tracking System - Document Number 342-0382 Rev. A Page 44 of 47... - Page 45 AutoTrak 2.0 HD-18 PTZ Camera Dimensions Optional AutoTrak 2.0 System Cart In order to put the system within 30’ to 40’ of the presenter in larger auditoriums, an AutoTrak 2.0 System Cart system is recommended. The Vaddio Edge series carts are built to be robust, portable and extremely strong.
- Page 46 ©2012 Vaddio - All Rights Reserved. AutoTrak 2.0 Camera Tracking System - Document Number 342-0382 Rev. A ©2011 Vaddio - All Rights Reserved. Reproduction in whole or in part without written permission is prohibited. Specifications and pricing are subject to Page 46 of 47 change without notice.
- Page 47 SHORT TERM CONFIDENTIAL AutoTrak 2.0 Camera Tracking System ©2012 Vaddio - All Rights Reserved. AutoTrak 2.0 Camera Tracking System - Document Number 342-0382 Rev. A Page 47 of 47...
Need help?
Do you have a question about the AutoTrak 2.0 and is the answer not in the manual?
Questions and answers