Sign In
Upload
Download
Table of Contents
Contents
Add to my manuals
Delete from my manuals
Share
URL of this page:
HTML Link:
Bookmark this page
Add
Manual will be automatically added to "My Manuals"
Print this page
×
Bookmark added
×
Added to my manuals
Manuals
Brands
Kinesis Manuals
Keyboard
KB600
User manual
Kinesis KB600 User Manual
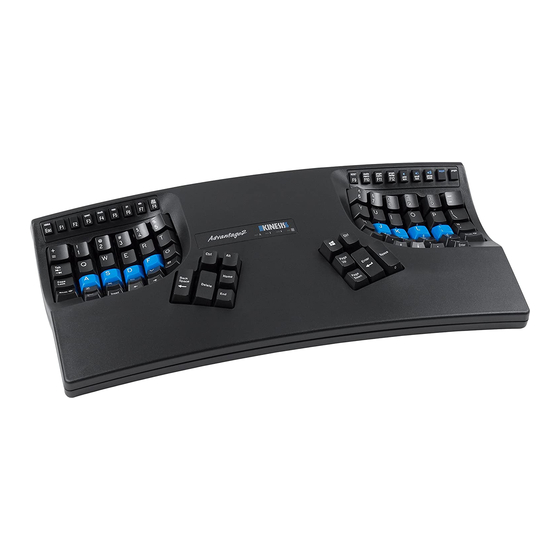
Advantage2 series contoured keyboard
Hide thumbs
Also See for KB600
:
User manual
(54 pages)
,
Quick start manual
(4 pages)
1
2
3
Table Of Contents
4
5
6
7
8
9
10
11
12
13
14
15
16
17
18
19
20
21
22
23
24
25
26
27
28
29
30
31
32
33
34
35
36
37
38
39
page
of
39
Go
/
39
Contents
Table of Contents
Bookmarks
Table of Contents
Table of Contents
1 Read Me First
Health and Safety Warning
Preserving Your Warranty Rights
Quick Start Guide
Read this User's Manual
Advanced Users: Read this before Copying or Sharing Layout Files
2 Introduc on to the Advantage2 Keyboard
Geometry and Key Groupings
Introduc on to the Smartset Programming Engine
Ergonomic Design and Features
3 Installa on and Setup
Compa Bility
Connec Ng Your Keyboard for the First Time
Connec Ng an Op Onal Foot Pedal
In the Box
4 0 GeNg Started
Posi Oning and Work Area Setup
Adap on Guidelines
Getting Started
If You Are Injured
5 Ini Ally Configuring Your Keyboard 13 5.1 Default QWERTY Layout
Alternate Onboard Dvorak Layout
Thumb Key Mode Selec On: Windows, Mac & PC
Func on Keys
Function Keys
Mul Media Keys
Mac Usage & Special Considera Ons
Interna Onal Usage
Multimedia Keys
6 Basic Onboard Programming Tools
Status Report
Ac Vate QWERTY Layout
Ac Vate Dvorak Layout
Mac Thumb Key Mode
PC Thumb Key Mode
Windows Thumb Key Mode
Disable (Enable) Key Clicks
Disable (Enable) Special Ac on Tones
So Reset
Set Macro Playback Speed (0, 1-9)
Program/Record a Macro
Remap a Key
Keypad Layer (Aka the "Embedded Layer")
7 Power User Tools
Global Macro Playback Speed Adjustment
Hard Reset
Power User Mode
Opening the "KINESIS-KB" V-Drive
V-Drive Contents
Crea Ng Hotkey Layouts
Ac Va Ng a Hotkey Layout
Direct Edi Ng" of Layout Files
Basic Syntax Examples
Advanced Macro Tools
Status Report Custom Playback
8 Firmware Updates
9 Keyboard Care and Maintenance
Keyboard Suddenly Stops Working
Reforma Ng and Condi Oning the V-Drive
Cleaning Precau Ons
Keycap Removal and Reloca on
10 Technical Support, Repairs, & Returns
11 Accessories & Upgrades
12 Warranty
13 Appendix
Map of Key Loca on Tokens and DIC Onary of Key Ac on Tokens
History of Kinesis Contoured Keyboards
Ergonomic Guidelines
Advertisement
Quick Links
1
Quick Start Guide
2
Remap a Key
3
Opening the "Kinesis-Kb" V-Drive
Download this manual
See also:
User Manual
Contoured Keyboard Family
USER'S MANUAL
KB605
KB600
Proudly designed and hand-assembled in the USA
Cherry Low-Force
SmartSet™
Mac/Windows/PC
Contoured
Mechanical Keyswitches
Programming Engine
Switchable
Keyboard™
Table of
Contents
Previous
Page
Next
Page
1
2
3
4
5
Advertisement
Table of Contents
Need help?
Do you have a question about the KB600 and is the answer not in the manual?
Ask a question
Questions and answers
Related Manuals for Kinesis KB600
Keyboard Kinesis KB600 User Manual
Professional-grade ergonomic keyboard with mechanical keyswitches (54 pages)
Keyboard Kinesis Advantage2 Quick Start Manual
E2 keyboard with the smartset programming engine (4 pages)
Keyboard Kinesis Advantage KB500USB User Manual
Usb contoured keyboard (mac/pc switchable) (4 pages)
Keyboard Kinesis Advantage Brief User's Manual
Usb contoured keyboard (4 pages)
Keyboard Kinesis KB950 User Manual
(19 pages)
Keyboard Kinesis KB600-de Quick Start Manual
Advantage2 series keyboard with the smartset programming engine (4 pages)
Keyboard Kinesis KB133PC User Manual
Ergonomic keyboard family (40 pages)
Keyboard Kinesis Freestyle Pro KB900 Series User Manual
(19 pages)
Keyboard Kinesis Evolution KB450PC User Manual
Fully adjustable keyboard (9 pages)
Keyboard Kinesis Evolution KB410PC User Manual
Fully adjustable keyboard (10 pages)
Keyboard Kinesis KB800PB-BT Manual
Multichannel bluetooth keyboard (4 pages)
Keyboard Kinesis Evolution KB430PC User Manual
Adjustable keyboard (8 pages)
Keyboard Kinesis Form KB100-W User Manual
Split touchpad keyboard (11 pages)
Keyboard Kinesis mWave KB150M-TAC User Manual
Keyboard for mac (11 pages)
Keyboard Kinesis mWave KB150P-TAC User Manual
Keyboard for pc (11 pages)
Keyboard Kinesis Advantage2 KB605 User Manual
(39 pages)
This manual is also suitable for:
Kb600lf
Advantage2
Kb600qd
Advantage2 lf
Advantage2 qd
Kb605
...
Show all
Advantage2 silver
Kb620 series
Advantage2 limited
Kb620-xx
Table of Contents
Print
Rename the bookmark
Delete bookmark?
Delete from my manuals?
Login
Sign In
OR
Sign in with Facebook
Sign in with Google
Upload manual
Upload from disk
Upload from URL


Need help?
Do you have a question about the KB600 and is the answer not in the manual?
Questions and answers