
Related Manuals for TECshow FRESNELED 3100 MAX


Summary of Contents for TECshow FRESNELED 3100 MAX
- Page 1 FRESNELED USER MANUAL / MANUAL DE USUARIO PLEASE READ THE INSTRUCTIONS CAREFULLY BEFORE USE / POR FAVOR LEA LAS INSTRUCCIÓNES ANTES DE USAR...
-
Page 2: Specifications
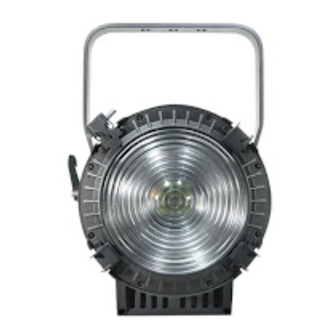
1. OVERVIEW • Fresneled 3100 MAX is a Fresnel LED powered by 1 250W Flux: 15º: 4000 Lux @ 5M (16 ft.) COB LED that works at 3100K and has a performance 50% • Flux: 60º: 404 Lux @ 5M (16 ft.) greater than the MKII version, which has an output similar Effects &... -
Page 3: Safety Warning
2. SAFETY WARNING • This product must be installed by a qualified pro- fessional ONLY. • All maintenance must be carried out by a qualified electrician ONLY. • All minimum distance of 0.5m must be maintained between the equipment and a combustible surface. •... -
Page 4: Installation
3. INSTALLATION MOUNTING- Hanging The LED fixture can be mounted in a hanging position using the supporting bracket. The bracket should be secured to the mounting truss or structure using a standard mounting clamp. Please note that when hanging the unit a safety cable should also be used. -
Page 5: Display Panel Operation
4. DISPLAY PANEL OPERATION DISPLAY OPERATION MENU: Return to the previous menu ENTER: Enter the currently selected menu. UP: Scroll down through the current menu list or decrease the value of the current function. DOWN: Scroll up through the current menu list or increase the value of the current function. -
Page 6: Menu Map
MENU MAP P. 6 FRESNELED MAX ENGLISH VERSION... -
Page 7: Run Mode
DIMMER (STAT) • DIM: To adjust level of intensity • ZOOM: To adjust the zoom position. NOTES: • When using this function, if the MCON menu is set as MAST, then the fixture will transfer the DIM val- ues to other fixtures. •... -
Page 8: Special Settings
SPECIAL SETTINGS • SET: This menu allows the user to adjust key op- eration settings for this fixture. KEY: Select <ON> for automatic lock-out. Password to re-enter the display is <UP>+<DOWN>+<UP>+<DOWN>. • Select <DIM1>, <DIM2>, <DIM3> or <DIM4> for different dimming speeds. <DIM4> is the slow- est dimming speed). - Page 9 CURV Dimming WHITES CALIBRATION (CAL) • Enter the <CAL> to select white color of different color temperature. • Select the <ZOOM> range. <POS1> & <POS2> set the small position for the zoom function. Note that when using DMX to control the fixture, the user will only be able to access up to the set ZOOM position.
-
Page 10: Using A Dmx512 Controller
5. USING A DMX512 CONTROLLER CHANNEL ASSIGNMENT NOTES: • This product have two DMX512 channel configura- tion: <UNO> / <DOS> / <STD.P> P. 10 FRESNELED MAX ENGLISH VERSION... -
Page 11: Parts Diagram
6. APPENDIX PARTS DIAGRAM P. 11 FRESNELED MAX ENGLISH VERSION... -
Page 12: Especificaciones
1. DESCRIPCIÓN • Fresneled 3100 MAX es un Fresnel LED que tiene 1 LED Flux: 60º: 404 Lux @ 5M COB de 250W, trabaja a 3100K y tiene un rendimiento 50% Efectos & Funciones mayor a la versión MKII, la cual se equiparaba con los clási- •... -
Page 13: Instrucciones De Seguridad
2. INSTRUCCIONES DE SEGURIDAD • Toda persona involucrada con la instalación, oper- ación y mantenimiento de este dispositivo debe: - Estar calificada para la tarea. - Seguir las instrucciones del manual. • Instale el equipo a una distancia mínima de 50 cm de otros objetos para garantizar la buena ventilación. -
Page 14: Instalación
3. INSTALACIÓN MONTAJE- Rigging El equipo se puede instalar sobre una superficie plana y tam- bién de forma colgante mediante la abrazadera de montaje. Asegúrese de fijar la abrazadera al sistema de trussing o estruc- tura fija donde instalará la unidad. En caso de colgar la unidad, utilice un cable de seguridad para prevenir que el equipo sufra una caída mayor a 20cm. -
Page 15: Panel De Control
4. PANEL DE CONTROL OPERACIÓN DEL DISPLAY MENU: Abandona el menú o submenú actual. ENTER: Se desplaza arriba o aumenta el valor de la selección. UP: Se desplaza hacia abajo o disminuye el valor de la selección. DOWN: Accede a la función deseada o confirma el valor se- leccionado. -
Page 16: Menú De Funciones
MENÚ DE FUNCIONES P. 16 FRESNELED MAX VERSION ESPAÑOL... -
Page 17: Modo De Ejecución
DIMMER (STAT) • [DIM] Regula el nivel de intensidad de la salida de luz. • [ZOOM] Regula la posición del zoom. NOTAS: • Si utiliza esta función cuando la unidad se encuen- tra en modo maestro ([MAST] en el menú [MCON]), los valores de dimmer se enviarán tam- bién a otras unidades conectadas. -
Page 18: Configuraciones Especiales
CONFIGURACIONES ESPECIALES • [SET] Este menú le permite al usuario ajustar los parámetros principales de la unidad. • [KEY] Active esta función [ON] para bloquear automáticamente la pantalla. El sistema le pedirá una contraseña para acceder al menú. La con- traseña por defecto es [UP], [DOWN], [UP], [DOWN]. - Page 19 CURVA de Dimming CALIBRACIÓN DE BLANCOS (CAL) • Ingrese al menú [CAL] para seleccionar blancos con diferentes temperaturas de color. • Luego avance con el rango de [ZOOM]. Las opciones [POS1] y [POS2] representan las posiciones más pe- queñas para la función zoom. •...
- Page 20 5. USANDO UN CONTROLADOR DMX 512 ASIGNACIÓN DE CANALES NOTAS: • Esta unidad cuenta con las siguientes configura- ciones de canales DMX: [UNO], [DOS], [STD.P]. CANAL VALOR FUNCIÓN CANAL VALOR FUNCIÓN DIMMER DIMMER FINO CANAL VALOR FUNCIÓN DIMMER DIMMER FINO SIN FUNCIÓN ESTROBO (Velocidad Creciente) SIN FUNCIÓN...
-
Page 21: Descripción Del Producto
FOCO SIN FUNCIÓN REINICIAR MOTOR SIN FUNCIÓN 6. DESCRIPCIÓN DEL PRODUCTO PARTES DEL DIAGRÁMA MONTURA DE VENTILADOR TAPA FRONTAL REJILLA DE VENTILADOR ESPEJO MOTOR PASO A PASO MONTURA DEL MOTOR CUBIERTA PLÁSTICA FRONTAL PLACA FRONTAL PLACA DE CONTROL CUBIERTA DE ALUMINIO PLACA DORSAL CUBIERTA PLÁSTICA DORSAL MANGO... - Page 22 FOR MORE INFO ON THIS PRODUCT PLEASE CHECK WWW.NEO-PROFESSIONAL.COM PARA MAS INFORMACION SOBRE ESTE PRODUCTO VISITE WWW.NEO-PROFESSIONAL.COM...
Need help?
Do you have a question about the FRESNELED 3100 MAX and is the answer not in the manual?
Questions and answers