
Related Manuals for Avigilon 1L-HD-LP-35

Summary of Contents for Avigilon 1L-HD-LP-35
-
Page 1: Installation Guide
Installation Guide Avigilon™ License Plate Recognition System Models: 1L-HD-LP-35, 1L-HD-LP-50, 1L-HD-LP-75, 1L-HD-LP-100 and 2L- HD-LP-40 SUPPORT ipvideo@suretek.com.au | 1300 65 44 33 | suretek.com.au... - Page 2 Avigilon Ресурсный центр. ZH: 如 需 适 用 您 的 语 言 的 手 册 副 本 , 请 参 阅 Avigilon 资 源 中 心 的 《 Avigilon LPR 设 计 和 安 装 指 南 》 。 SUPPORT ipvideo@suretek.com.au | 1300 65 44 33 | suretek.com.au...
- Page 3 The absence of the symbols ™ and ® in proximity to each trademark in this document is not a disclaimer of ownership of the related trademark. Avigilon Corporation protects its innovations with patents issued in the United States of America and other jurisdictions worldwide: avigilon.com/patents.
-
Page 4: Table Of Contents
Table of Contents Introduction Site Design LPR Camera Selection Required Number of Servers System Requirements Selecting a Mounting Location Overhead Mounting Roadside Mounting Maximum Cable Length Field Of View Installation Package Contents Installation Steps Connecting Cables to the Camera (Optional) Adding an Overview Camera Connecting External Power Mounting the LPR Enclosure Mounting the Power Supply Unit... - Page 5 Performing a License Plate Search Viewing Search Results Verification Test Specifications Limited Warranty & Technical Support...
-
Page 6: Introduction
Introduction This guide provides instructions on how to install a License Plate Recognition (LPR) system using the Avigilon HD LPR Capture Kit. For information on how to select an appropriate LPR camera model and mounting location, see Site Design on the next page. -
Page 7: Site Design
Required Number of Servers The Avigilon HD LPR Capture Kit is designed to cover a single traffic lane of 10 ft (3m) or two adjacent traffic lanes. The maximum number of lanes that can be monitored on a single server depends on the target vehicle speed and the mounting height. -
Page 8: Selecting A Mounting Location
Overhead Recommended Mounting Height: Recommended Mounting Horizontal Distance (ft HD LPR Capture Kit Target Distance (ft [m]) Height (ft [m]) [m]) 1L-HD-LP-35 35 [11] 9 – 12 [2.8 – 3.6] 33 [10] 1L-HD-LP-50 50 [15] 13 – 17 [4.0– 5.2] 48 [14.5]... -
Page 9: Roadside Mounting
Roadside Mounting Height and Offset: Target Distance (ft Max Mounting Horizontal Distance HD LPR Capture Kit Max Offset (ft [m]) [m]) Height (ft [m]) (ft [m]) 1L-HD-LP-35 35 [11] 12 [3.6] 12 [3.6] 32 [10] 1L-HD-LP-50 50 [15] 17 [5.2] 17 [5.2]... -
Page 10: Maximum Cable Length
Figure 3: Roadside mounting (top view) Figure 4: Roadside mounting (side view) Maximum Cable Length The distance between the Power Supply Unit (PSU) and the LPR kit is limited by the maximum length of the power and network cables. Refer to the following table to select a mounting location for the PSU. Table 6: Wire Gauge vs. -
Page 11: Installation
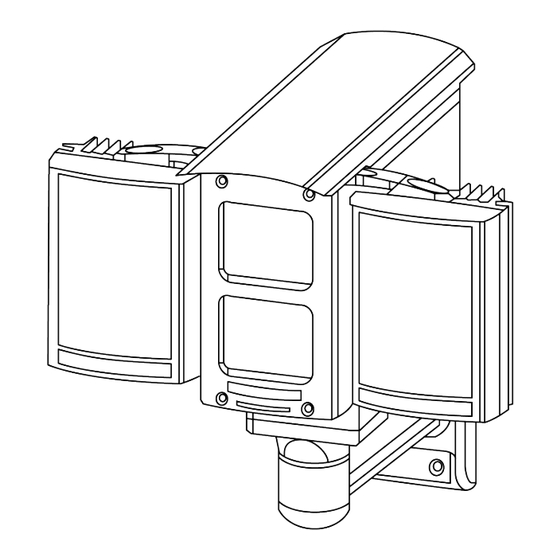
After you have selected a mounting location, you can install the HD LPR Capture Kit. Package Contents Ensure the package contains the following: Avigilon™ HD LPR Camera Avigilon™ HD LPR Enclosure Power Supply Unit (PSU) 3 mm Hex key for enclosure... -
Page 12: (Optional) Adding An Overview Camera
You can install an overview camera in the LPR enclosure to record the wider surveillance area, which is useful for identifying a vehicle model or driver, or capturing video before and after an incident. NOTE: It is recommended that you use Avigilon HD H.264 IP Camera models H3-B2 or H3-B3 as overview cameras. -
Page 13: Connecting External Power
7. Connect the terminal labeled J8 (CAT5) to the Ethernet port of the LPR camera using the network cable provided. 8. If Power over Ethernet (PoE) is not available, proceed to Connecting External Power below 9. Reinstall the back panel of the enclosure. Connecting External Power NOTE: Do not perform this procedure if PoE is used. - Page 14 1. Drill four mounting holes and a cable entry hole into the mounting surface. 2. Attach the mounting bracket to the mounting surface. Use screws that are appropriate for the mounting surface. It is recommended that you apply silicone sealant into the mounting holes underneath the screw heads.
-
Page 15: Mounting The Power Supply Unit
4. Pull the required cables through the mounting arm and into the cable entry hole. Then, secure the enclosure to the mounting arm. Mounting the Power Supply Unit Important: The PSU must be mounted within a certain distance from the LPR kit. For more information, see Maximum Cable Length on page 10 Install the PSU within the maximum distance using the four M4 mounting holes at each corner of the unit. -
Page 16: Connecting Cables In The Psu
1. LPR camera power cable 2. LPR camera network cable 3. Network cable from switch (for LPR camera) 4. Network cable from switch (for optional overview camera) 5. Power supply cable to PSU Connecting Cables in the PSU Refer to the following diagram for the locations of the different connectors: Connecting Cables in the PSU... - Page 17 NOTE: The cable glands are designed for cables between 0.15 – 0.30 inches (4 – 8 mm) in diameter. For thinner cables, thicken the cable with electrical tape at the point of contact with the gland to ensure a tight fit. Unused glands should be plugged or sealed.
-
Page 18: Positioning The Hd Lpr Capture Kit
Positioning the HD LPR Capture Kit Adjusting the Mounting Bracket The Avigilon HD LPR Capture Kit is pre-calibrated for a specific target distance as indicated by the model number. It is important to aim the camera at the appropriate distance. -
Page 19: Adjusting The Enclosure
1. Use the 4mm Hex key provided to loosen the screw at the head of the mounting bracket. 2. Adjust the head as required. 3. Tighten the screw to secure the head. Adjusting the Enclosure When the HD LPR Capture Kit is mounted in the roadside position, vehicle license plates may appear skewed. To improve LPR accuracy, you can use the shims provided to adjust the enclosure such that vehicle license plates appear horizontal in the image. - Page 20 5. Tighten the screws at the base of the enclosure. Figure 5: Tilted license plate (incorrect) Figure 6: Horizontal license plate (correct) Adjusting the Enclosure...
-
Page 21: Configuring Lpr In The Acc Software
Avigilon Control Center system. The LPR options are only available if you have the feature licensed and installed on a server in the site. For more information about the features available in the ACC software, see the Avigilon Control Center Client User Guide. -
Page 22: Setting Up License Plate Recognition
Setting Up License Plate Recognition 1. In the server Setup tab, click The License Plate Recognition dialog box is displayed. 2. Select a lane from the License Plate Lane list. The number of lanes listed is determined by the number of License Plate Recognition (LPR) channels that are available on the server. -
Page 23: Deleting A License Plate From The Watch List
4. Enter the license plate number that you want to watch for. 5. Move the Minimum Confidence slider to determine how similar the detected license plate must be before it is considered a match. For example, if a license plate on your Watch List is ABC 123 and the ACC software detects an ABC 789 license plate, the system will be 50% confident that it has found a match. -
Page 24: Reviewing License Plate Matches
1. In the top-right corner of the Client window, select > Client Settings > Display. 2. In the Image Overlays: area, select the License Plate check box. 3. Click OK. When you display live video for a camera that is configured for license plate recognition, the detected license plates are displayed by the overlay. - Page 25 6. Click Add to new View to display the search result video in a new View tab. 7. To export all listed search results, click Export results to a file and save the file. The search results can be saved as either a CSV or Text file. Viewing Search Results...
-
Page 26: Verification Test
Verification Test After the HD LPR Capture Kit has been installed and the software has been configured correctly, a simple verification test should be performed. Important: Before performing this test, ensure to block off a section of the road for safety purposes. 1. -
Page 27: Specifications
Specifications Camera Resolution Single Lane 1280 x 720 Dual Lane 2592 x 720 Illuminator Technology High-power SMT LED Wavelength 850 nm Network Network 100 BASE-TX Cabling Type CAT5 Connector RJ-45 Security Protocol UDP, TCP, SOAP, DHCP, Zeroconf Mechanical Dimensions (LxWxH) 284 mm x 279 mm x 221 mm (11.0”... -
Page 28: Limited Warranty & Technical Support
Limited Warranty & Technical Support Avigilon warranty terms for this product is provided at avigilon.com/warranty. Warranty service and technical support can be obtained by contacting Avigilon Technical Support: avigilon.com/contact-us/. SUPPORT ipvideo@suretek.com.au | 1300 65 44 33 | suretek.com.au...
Need help?
Do you have a question about the 1L-HD-LP-35 and is the answer not in the manual?
Questions and answers