Table of Contents
Advertisement
Advertisement
Table of Contents

Related Manuals for Whirlpool FSCR 10431


Summary of Contents for Whirlpool FSCR 10431
- Page 1 Health & Safety, Use & Care and Installation guide www.whirlpool.eu/register...
- Page 2 ENGLISH . . . . . . . . . . . . . . . . . . . . . . . . . . . . . . . . . . . 3...
-
Page 3: Table Of Contents
ENGLISH HEALTH & SAFETY, USE & CARE and INSTALLATION GUIDES THANK YOU FOR BUYING A WHIRLPOOL PRODUCT . In order to receive a more complete assistance, please register your appliance on www .whirlpool .eu/register Index Health and Safety guide SAFETY INSTRUCTIONS . . . . . . . . . . . . . . . . . . . . . . . . . . . . . . . . . . . . . . . . . . . . . . . . . . . . . . . . . . . . . . . . . . . . . . 5 SAFEGUARDING THE ENVIRONMENT . - Page 4 SORTING YOUR LAUNDRY . . . . . . . . . . . . . . . . . . . . . . . . . . . . . . . . . . . . . . . . . . . . . . . . . . . . . . . . . . . . . . . . . . . . . . . . . . . . . . . . . . . . . . . . . . . . . . . . .15 HOW TO USE THE WASHING MACHINE .
-
Page 5: Safety Instructions
Health and Safety Guide SAFETY INSTRUCTIONS IMPORTANT TO BE READ AND OBSERVED All safety warnings give interior during transport . Before using the washing specific details of the potential Before using the machine, it is machine carefully read Health risk presented and indicate imperative that the transport and Safety and Use and Care how to reduce risk of injury,... - Page 6 This washing machine is the washing machine does not For models dedicated only for exclusively destined to treat damage the power cable . cold water: Do not connect to machine washable laundry in the hot water supply . Only activate the washing quantities which are usual for machine when the installation For models with hot fill: the hot...
- Page 7 Do not connect the washing ELECTRICAL CONNECTION Socket outlet/plug (valid for FOR GREAT BRITAIN AND both countries) machine to a socket which can IRELAND ONLY be operated by remote control . If the fitted plug is not suitable The power cable must be long for your socket outlet, contact enough for connecting the After-Sales Service for further...
-
Page 8: Safeguarding The Environment
SAFEGUARDING THE ENVIRONMENT DISPOSING OF PACKAGING SCRAPPING OF The symbol MATERIALS HOUSEHOLD APPLIANCES The packaging material is When scrapping the washing 100% recyclable and is marked machine, make it unusable by on the product or on the with the recycle symbol: cutting off the power cable and accompanying documentation removing the doors and... -
Page 9: Declaration Of Conformity
DECLARATION OF CONFORMITY This washing machine has been designed, constructed and distributed in compliance with the safety requirements of European Directives: • 2006/95/EC Low Voltage Directive • 2004/108/EC Electromagnetic Compatibility Directive . -
Page 10: Use And Care Guide
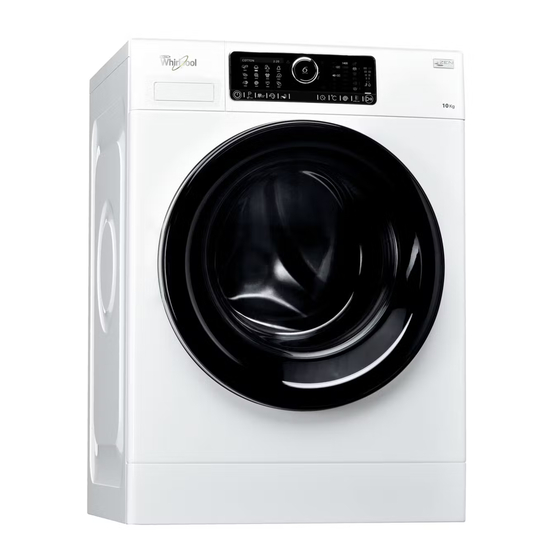
Use and Care guide PRODUCT DESCRIPTION APPLIANCE 1 . Worktop 2 . Detergent dispenser 3 . Control panel 4 . Door handle 5 . Door 6 . Water filter / Emergency drain hose (if available) - behind plinth - 7 . Plinth (removable) 8 . -
Page 11: Control Panel
etergent recommenDations for various types of launDry White robust laundry (cold-95°C) Heavy duty detergents Mild detergents containing whitener and/or optical White delicate laundry (cold-40°C) brighteners Detergents containing whitener and/or optical brighte- Light/pastel- shaded colours (cold-60°C) ners Colour detergents without whitener / optical brighte- Intensive colours (cold-60°C) ners... -
Page 12: Technical Data For Water Connection
TECHNICAL DATA FOR WATER CONNECTION WATER CONNECTION WATER SUPPLY Cold WATER TAP 3/4” threaded hose connector MINIMUM WATER SUPPLY PRESSURE 100 kPa (1 bar) MAXIMUM WATER SUPPLY PRESSURE 1000 kPa (10 bar) -
Page 13: Door
DOOR To open the door, pull the handle To close the door, hold the handle and push so that you can hear it click shut . DRUM LIGHT (if available) • During programme selection: the light goes on • After programme end, when you open the door, for laundry loading the light goes on for a while for unloading the •... -
Page 14: How To Use The Appliance
HOW TO USE THE APPLIANCE FIRST TIME USE If you plug in the washing machine, it will switch on Select programme “Cotton” with temperature automatically . You will be asked to set the desired 95°C . language for the display . Turn the knob to select the desired language, then Add a small amount of detergent to the main press the knob to confirm . -
Page 15: Daily Use
DAILY USE SORTING YOUR LAUNDRY REMOVE ALL OBJECTS FROM TYPE OF FABRIC / CARE LABEL SYMBOL Cottons, mixed fibres, easy care / synthetics, wool, POCKETS handwash items . • Coins, pins etc . can damage your laundry • Colour as well as parts of the washing machine . separate coloured and white items . -
Page 16: How To Use The Washing Machine
HOW TO USE THE WASHING MACHINE Select programme LOAD LAUNDRY Make sure that the programme button • Open the door and load the laundry . lights up . Turn the knob to select the Load the articles one at a time loosely desired programme . - Page 17 Select options, if needed Correct dosing of detergent / additives is If you want to select additional options, important, because make sure that the options button lights • it optimizes the cleaning result up . The options which are selectable for your •...
- Page 18 CHANGE THE SETTINGS OF A RUNNING PAUSE A RUNNING PROGRAMME AND PROGRAMME, IF NEEDED OPEN THE DOOR, IF NEEDED After programme start, the display indicates You can still change the settings while a when the programme can still be paused to add programme is running .
-
Page 19: Programmes And Options
PROGRAMMES AND OPTIONS For choosing the appropriate programme for your kind of laundry, always respect the instructions on the care labels of the laundry. PROGRAMME Type of Wash Care Settings and Recommendations Labels Eco Cotton Normally soiled cotton laundry . load At 40 °C and 60 °C standard cotton Cold to... - Page 20 PROGRAMME Type of Wash Care Settings and Recommendations Labels WOOL 2 .0 kg Woolens, labeled with the Woolmark load Cold to and identified as machine washable, as temperature range 40°C well as textiles made of silk, linen, wool 1000 and viscose marked as handwashable . max spin speed Rapid, Respect the manufacturers...
- Page 21 PROGRAMME Type of Wash Care Settings and Recommendations Labels Shirts, blouses and fine business 2 .5 kg load SHIRTS Cold to clothes made of cotton, synthetics or temperature range 40°C their blends . 1000 rpm Provides gentle treatment for fine max spin speed Prewash, garments .
- Page 22 Not appropriate for delicate laundry . Rinse, Colours 15°, Rapid, Fresh Care The programme used for the evaluation of (FSCR 10431) under the mandatory Singapore Water Efficiency Labelling Scheme (WELS) and the recommended Washing Programme for soiled clothes is as follows: ECO Cotton 60 C...
- Page 23 OPTIONS SELECTABLE BY THE OPTIONS BUTTON The programme chart gives an and options are selectable. option blinks and switches off overview of possible combinations Also certain options are not again, and a signal sounds. of programmes and options. Not combinable. In this case, the all combinations of programmes indicator of the non-combinable PREWASH...
- Page 24 HEAVY SOIL Helps to clean heavily soiled, stained May prolong the programme by up to laundry by optimizing the efficiency 15 minutes . of additives for stain removal . IMPORTANT: Appropriate for use Add an appropriate amount of stain removers and bleaches on of in-wash additive for stain oxygen basis .
- Page 25 OPTIONS WHICH ARE DIRECTLY SELECTABLE BY PRESSING THE RESPECTIVE BUTTON COLOURS 15° Helps to preserve the colours of Make sure that your detergent can your laundry by washing it with cold be used with cold wash temperatures water (15°C) . Saves energy for water (15 or 20 °C) .
- Page 26 SPIN If you want to change the spin speed, If you switch on the washing press the Spin button, turn the knob machine, the last used programme to select the desired spin speed and and spin speed setting will appear on press the knob to confirm .
-
Page 27: Functions
FUNCTIONS ON/OFF To switch on the washing machine: To switch off the washing machine press the button until the Start/Pause after programme end: button lights up . press the key until the lights go off . To cancel a running programme: press and hold the button until the display indicates that the programme is cancelled;... - Page 28 DOSING AID See separate section Dosing Aid – first use / daily use . FINISH IN Moves the end of your programme • When you have finished your to a later time . Helps to profit from settings, press “Start / Pause” more favourable energy rates (for –...
-
Page 29: Indicators
INDICATORS DOOR CAN This indicator will light • before you have started a programme BE OPENED • when you have paused a programme and the water level is not too high, or the laundry is not too hot in that programme phase •... -
Page 30: Dosing Aid / First Use
DOSING AID / FIRST USE The concentration of detergents available on the Furthermore, check if the washing machine’s preset market differs considerably. For that reason, adapt water hardness level (soft) corresponds to your local the washing machine to the dosing amounts of the water hardness level –... - Page 31 Press and hold the Programme button Select and confirm the dosing value, which to enter into the settings mode . you have identified before on the detergent pack, by turning and pressing the knob . Select DOSING AID by turning and pressing the knob .
-
Page 32: Dosing Aid / Daily Use
DOSING AID / DAILY USE Pull out the detergent dispenser and After you have loaded the laundry, pour the recommended detergent quantity closed the door and selected programme into the main wash (II) and, if Prewash is and options, press the “Dosing Aid” button . The selected, also into the prewash (I) Dosing Aid button lights up . -
Page 33: Saving Tips
SAVING TIPS • Achieve the best use of energy, water, detergent • Save energy by using a 60°C instead of a 95°C and time by using the recommended maximum wash programme or a 40°C instead of a 60°C load size for the programmes, as indicated in the wash programme . -
Page 34: Cleaning & Maintenance
CLEANING & MAINTENANCE and unplug the washing machine . WARNING Do not use flammable fluids to clean the For any cleaning and maintenance, switch off washing machine . CLEANING THE OUTSIDE OF THE WASHING MACHINE Use a soft damp cloth to clean the outer parts of Do not use glass or general purpose cleaners, the washing machine . -
Page 35: Checking The Water Supply Hose
CHECKING THE WATER SUPPLY HOSE Check the inlet hose regularly for brittleness and cracks . If damaged, replace it by a new hose available through our After-Sales Service or your specialist dealer . Depending on the hose type: For water stop hoses: check the small safety valve inspection window (see arrow) . -
Page 36: Cleaning The Mesh Filters In The Water Supply Hose
CLEANING THE MESH FILTERS IN THE WATER SUPPLY HOSE Close water tap and screw off the inlet hose . Insert the mesh filter again . Connect the inlet hose to water tap and washing machine again . Do not use a tool to connect the inlet hose . Open the water tap and check that all connections are tight . -
Page 37: Cleaning The Detergent Dispenser
CLEANING THE DETERGENT DISPENSER Remove the detergent dispenser by pressing Wipe the parts dry with a soft cloth . on the release button and at the same time pulling out the detergent dispenser . Reinstall the detergent dispenser and push it Remove the insert from the detergent back into the detergent compartment . -
Page 38: Cleaning The Water Filter / Draining Residual Water
CLEANING THE WATER FILTER / DRAINING RESIDUAL WATER Clean the water filter regularly, to avoid that WARNING the water cannot drain after the wash due to obstruction of the filter . Switch off and unplug the washing machine before If the water cannot drain, the display indicates that cleaning the water filter or draining residual water . - Page 39 If your washing machine model has no emergency Clean the water filter: remove residues in the drain hose: filter and clean it under running water . Slowly turn the filter counterclockwise until water flows out . Let the water flow out, without removing the filter .
-
Page 40: Transport And Handling
TRANSPORT AND HANDLING WARNING Never lift the washing machine by holding it at the worktop . Pull out the mains plug, and close the water Refit the transport bolts . Follow the tap . instructions for removing the transport bolts in the Installation Guide in reverse order . -
Page 41: Troubleshooting
TROUBLESHOOTING Your washing machine is equipped with various These failures are frequently so minor that they can automatic safety and feedback functions . They be removed within a few minutes . enable failures and needed maintenance to be detected and indicated accordingly . PROBLEM POSSIBLE CAUSE SOLUTION... - Page 42 PROBLEM POSSIBLE CAUSE SOLUTION Spin result poor Spin button was set to a low spin Select and start “Spin” programme speed . with a higher spin speed (if selectable) . Unbalance during spinning See line above . prevented final spin cycle . Excessive foam formation Start “Rinse&Spin”...
- Page 43 FAILURE INDICATORS AND MESSAGES Below is a summary of possible failure causes and persists, close the water tap, switch off and unplug solutions . the washing machine and contact our After-Sales If the problem persists after having removed the Service . origin of the failure, press On/Off for at least three seconds .
- Page 44 Failure indicator Display Possible Cause Possible Solution lights up message The door cannot unlock . Firmly press the door on the area of the (or F29) door lock, then press On/Off for at least 3 seconds . If hot cycle is selected, wait until cool down and press again On/Off for at least 3 seconds .
-
Page 45: Door - How To Open It In Case Of Afailure, To Take Out Your Laundry
DOOR – HOW TO OPEN IT IN CASE OF A FAILURE, TO TAKE OUT YOUR LAUNDRY Switch off the washing machine and unplug it . Always drain the water before opening the door, either by pressing and holding On/Off Close the water tap . Wait until the drum has stopped rotating . -
Page 46: After-Sales Service
• Your full address and telephone number . For any repairs, use our authorized After Sales Service, to ensure proper repairing and use of original spare parts . Manufacturer: Whirlpool Europe s .r .l . Socio Unico Viale Guido Borghi 27 21025 Comerio (VA) Italy... -
Page 47: Installation Guide
INSTALLATION GUIDE 17 mm - 0,67 inch 12 mm - 0,47 inch... - Page 48 2 cm - 0,7 inch...
- Page 50 max 2,5 cm max 0,9 inch 10 .
- Page 51 11 . 12 . 13 .
- Page 52 14 . max 125 cm 49 inch min 60 cm 24 inch max 125 cm 49 inch min 60 cm 24 inch max 125 cm 49 inch min 60 cm 24 inch...
- Page 53 15 . IPX4 ....xxx V ~ xx Hz xx A xxxx xxxx xxxx Whirlpool Europe s.r.l. Viale G.Borghi 27 21025 Comerio - Italy Type D xxx 16 .
- Page 54 400010803464 Whirlpool® Registered trademark/TM Trademark of Whirlpool group of companies - © Copyright Whirlpool Europe s .r .l . 2014 . All rights reserved - http://www . w hirlpool .eu...
Need help?
Do you have a question about the FSCR 10431 and is the answer not in the manual?
Questions and answers
why does the water only on last rinse leak out from the left edge of the dispenser tray? It does not leak at any other time and it has started to leak after 3years use