
Related Manuals for Rheem EcoNet CC2

Summary of Contents for Rheem EcoNet CC2
- Page 1 EcoNet CC2 Translator Installation Instructions Instrucciones de instalación del repetidor CC2 de EcoNet Installations d’instructions du translateur CC2 d’EcoNet Part | Pieza núm. | N° de pièce RETRN620CC2...
-
Page 2: Safety Considerations
NOTE: Read the entire instruction manual before starting the installation. NOTA: Lee el manual de instrucciones completo antes de comenzar la instalación. REMARQUE : Lisez tout le manuel d’instructions avant de commencer l’installation. SAFETY CONSIDERATIONS | CONSEJOS DE SEGURIDAD | REMARQUES DE SÉCURITÉ Failure to read and follow all instructions carefully before installing or operating this control and system could cause personal injury and/or property damage. - Page 3 Models that require the CC2 Translator only WARNING: Disconnect power to the outdoor and (discard the RJ14 cable) are: indoor units before beginning installation. Los modelos que requieren sólo el repetidor CC2 ADVERTENCIA: Desconecta de la electricidad las (descartando el cable RJ14) son: unidades exteriores e interiores antes de comenzar la Les modèles qui requièrent le translateur CC2 instalación.
-
Page 4: Installation
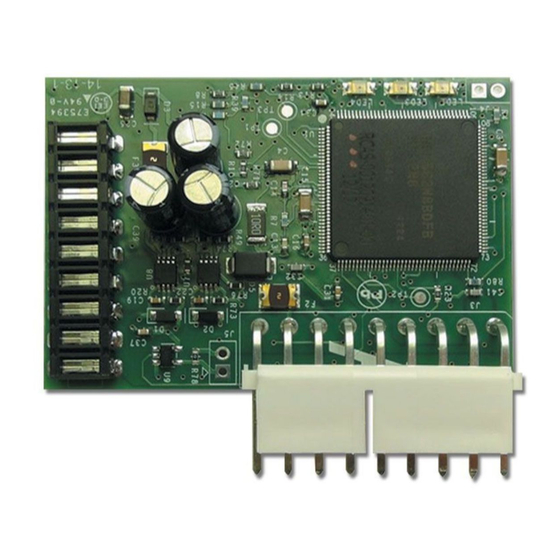
INSTALLATION | INSTALACIÓN | INSTALLATION Models that require the CC2 Translator only (no cable): Modelos que requieren sólo el repetidor CC2 (sin cable): Les modèles qui requièrent le translateur CC2 uniquement (aucun câble): 1. Remove power from the air handler or furnace and the outdoor unit. - Page 5 5. Inserta el conector blanco de 9 clavijas en el que ensamblan los cables dentro del conector blanco de 9 clavijas en la parte lateral del repetidor CC2. (Ver figura 2) 5. Insérez le connecteur blanc à 9 fils dans le connecteur blanc à 9 broches sur le côté...
- Page 6 Models that require CC2 Translator and the RJ14 data cable: Modelos que requieren el repetidor CC2 y el cable de datos RJ14: Modèles qui requièrent le translateur CC2 et le câble de données RJ14 : 1. Remove power from the air handler or furnace and the outdoor unit. 1.
- Page 7 FIGURE 4 5. Connect both the “A” and “B” control boards together by inserting the RJ14 data cable jacks into mating connectors on each control board (see Figure 4)(Note: Do not use any cable other than the one provided in this kit to connect the control boards together) 5.
- Page 8 6. Unplug/disconnect the 2-pin plug (Orange/white and Yellow/pink wires) as shown in Figure 4. It is recommended that these connectors be covered with electrical tape to prevent them from being reconnected. 6. Desenchufa/desconecta el enchufe de 2 clavijas (cables naranja/blanco y amarillo/rosado) tal como se muestra en la figura 4.
-
Page 9: System Start-Up
(Note: Check that the 9-pin connector is properly seated and aligned in the mating connector) (Nota: Comprueba que el conector de 9 clavijas esté adecuadamente colocado y alineado en el conector de acoplamiento) (Remarque : Vérifiez que le connecteur à 9 broches est correctement enfoncé... - Page 10 CC2 TRANSLATOR LED INDICATORS | INDICADORES LED DEL REPETIDOR CC2 | VOYANTS DEL DU TRANSLATEUR CC2 Under normal operation, the Red LED on Power/Status LED (Red) the CC2 translator will be on continuously. Luz LED de energía/estado (Roja) The middle Green LED on the CC2 Alimentation électrique/DEL de statut (rouge) Translator should blink in unison with...
-
Page 11: Troubleshooting
TROUBLESHOOTING | SOLUCIÓN DE PROBLEMAS | DÉPANNAGE Red LED is not lit – Make sure the R and C (24VAC) wires from the outdoor unit are attached to the R and C terminals/wires of the indoor unit. Using an AC voltmeter, measure 24 VAC between the R and C wires. Make sure the indoor unit power is turned on. - Page 12 Le voyant DEL vert (inférieur) ne s’allume pas – Assurez-vous que les fils 1 et 2 de la prise basse tension de l’unité extérieure sont connectés sur les fils E1 et E2 de l’unité intérieure. Assurez-vous que le centre de commande EcoNet est installé et alimenté correctement. Part | Pieza núm. | N° de pièce RETRN620CC2 Rheem.com/EcoNet Ruud.com/EcoNet RCPN-ALT02-0013080201-0001...
Need help?
Do you have a question about the EcoNet CC2 and is the answer not in the manual?
Questions and answers