Monogram ZWL1126SJ Installation Instructions Manual
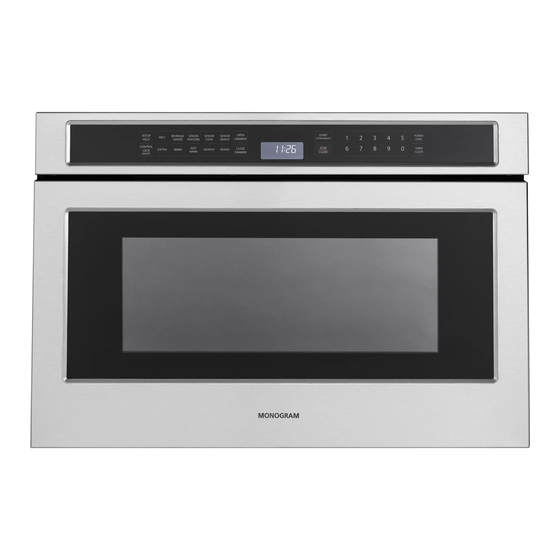
Drawer microwave
Hide thumbs
Also See for ZWL1126SJ:
- Installation instructions manual (16 pages) ,
- Owner's manual (48 pages)

Related Manuals for Monogram ZWL1126SJ


Summary of Contents for Monogram ZWL1126SJ
-
Page 1: Installation Instructions
Installation Instructions Monogram Drawer Microwave For Models: ZWL1126SJ 49-40754 (04-15 GE) -
Page 2: Read Carefully
Installation Instructions Questions? Call 800.GE.CARES (800.432.2737) GEAppliances.com Visit our Website at: BEFORE YOU BEGIN WARNING Stepping, leaning or sitting on the Read these instructions completely and carefully. drawer may result in serious injuries and can also cause damage to the Drawer Microwave. IMPORTANT Save these instructions for local inspector’s use. -
Page 3: Clearances And Dimensions
Installation Instructions CLEARANCES AND DIMENSIONS 24” DRAWER MICROWAVE MEASUREMENTS Dimensions that are shown in Figure 1 (for (Continues) 24”) must be used. Given dimensions provide minimum clearance. Locate electrical outlet in the (6”) shaded area in the upper left-hand corner of the Suggested electrical Anti-Tip outlet location*... -
Page 4: Anti-Tip Block
Installation Instructions ANTI-TIP BLOCK GROUNDING INSTRUCTIONS This appliance must be grounded. In the event of an NORMAL INSTALLATION STEPS electrical short circuit, grounding reduces the risk Anti -Tip BLOCK Installation Instructions of electric shock by providing an escape wire for To reduce the risk of tipping of the drawer, the the electric current. -
Page 5: Important Notes To The Installer
Installation Instructions 24” Flush Mount Deflector Vent IMPORTANT NOTES TO THE INSTALLER PARTS INCLUDED Description Read all of the Installation Manual that is included Flush Mount with the Drawer Microwave before installing in the flush mount configuration. Observe all governing codes, ordinances, and safety instructions. - Page 6 Installation Instructions 24” Flush Mount Deflector Vent 1. Prepare cabinet opening as shown in Figures 6, 7, 8, and 9. Anti-Tip Block Mounting Cleat Cabinet ” 1 ” Drawer Face Face 22” mounting cleat opening width ” back from the face of the cabinet (pushing the face of the drawer out ”).
- Page 7 Installation Instructions 24” Flush Mount Deflector Vent 2. Install deflector as shown in Figures 6. Open the drawer. Using the 4 holes on the drawer as a template, pre drill the cabinet using a 10 and 11 1/16” bit. See Figure 12. Shelf detail showing the deflector vent during installation.
- Page 8 Notes TINSLB048MRR0l...
- Page 9 Instrucciones de Instalación Monogram Drawer Microwave Modelo: ZWL1126SJ 49-40754 (05-15 GE)
- Page 10 Instrucciones de Instalación ¿Preguntas? Llame al 800.GE.CARES (800.432.2737) o visite nuestro sitio web en: GEAppliances.com ANTES DE COMENZAR Pararse, apoyarse o sentarse sobre el ADVERTENCIA Lea estas instrucciones en su totalidad y cajón puede producir lesiones graves y también puede ocasionar daños sobre el Microondas de atentamente.
- Page 11 Instrucciones de Instalación DESPEJES Y DIMENSIONES MEDIDAS DEL MICROONDAS DE CAJÓN DE Deben ser usadas las dimensiones que se muestran en 24” (Continúa) la Figura 1 (para 24”). Las dimensiones dadas proveen un despeje mínimo. Ubique el tomacorriente en el área sombreada en la esquina superior izquierda de la (6”) Ubicación sugerida del...
-
Page 12: Bloque Anti-Volcaduras
Instrucciones de Instalación BLOQUE ANTI-VOLCADURAS INSTRUCCIONES DE CONEXIÓN A TIERRA PASOS PARA UNA INSTALACIÓN NORMAL Instrucciones de Instalación del BLOQUE Este electrodoméstico deberá estar conectado a tierra. En caso de que se produzca un cortocircuito, la conexión Antivolcaduras a tierra reduce el riesgo de descarga eléctrica, brindando A fin de reducir el riesgo de caídas del cajón, el bloque un cable de escape de la corriente eléctrica. -
Page 13: Notas Importantes Para El Instalador
Instrucciones de Instalación Ventilación con Deflector con Montaje al Ras de 24” NOTAS IMPORTANTES PARA EL PIEZAS INCLUIDAS INSTALADOR Cant Descripción Ventilación con Lea todo el Manual de Instalación incluido con el Microondas de Cajón, antes de instalar la Montaje al Ras configuración del montaje al ras. - Page 14 Instrucciones de Instalación Ventilación con Deflector con Montaje al Ras de 24” 1. Prepare la abertura del gabinete como se muestra en las Figuras 6, 7, 8 y 9. Bloque Antivolcaduras Taco de Montaje Cara del ” 1 ” Cara del Cajón Gabinete Ancho de la abertura del taco de montaje...
- Page 15 Instrucciones de Instalación Ventilación con Deflector con Montaje al Ras de 24” 2. Instale el deflector como se muestra 6. Abra el cajón. Utilizando los 4 agujeros del cajón como una plantilla, marque el gabinete usando una en las Figuras 10 y 11. broca de 1/16”.
- Page 16 Notas TINSLB048MRR0l...
Need help?
Do you have a question about the ZWL1126SJ and is the answer not in the manual?
Questions and answers