Table of Contents
Advertisement
Advertisement
Table of Contents

Related Manuals for AEG L 99695 HWD


Summary of Contents for AEG L 99695 HWD
- Page 1 L 99695 HWD User Manual Washer Dryer USER MANUAL...
-
Page 2: Table Of Contents
17. TECHNICAL DATA....................45 FOR PERFECT RESULTS Thank you for choosing this AEG product. We have created it to give you impeccable performance for many years, with innovative technologies that help make life simpler features you might not find on ordinary appliances. Please spend a few minutes reading to get the very best from it. -
Page 3: Safety Information
ENGLISH SAFETY INFORMATION Before the installation and use of the appliance, carefully read the supplied instructions. The manufacturer is not responsible for any injuries or damages that are the result of incorrect installation or usage. Always keep the instructions in a safe and accessible location for future reference. - Page 4 The appliance shall be installed as a freestanding • product or below the kitchen worktop if space margins permit. Do not install the appliance behind a lockable door, a • sliding door or a door with a hinge on the opposite side, that would prevent the appliance door from being fully open.
- Page 5 ENGLISH Do not run the appliance without filters. Clean the lint • filter before or after each use. Items that have been soiled with substances such as • vegetable or mineral oil, acetone, alcohol, petrol, kerosene, spot removers, turpentine, waxes and wax removers should be washed separately with an extra amount of detergent before being dried in the washer dryer.
-
Page 6: Safety Instructions
2. SAFETY INSTRUCTIONS 2.1 Installation • Do not use multi-plug adapters and extension cables. The installation must comply • Do not pull the mains cable to with relevant national disconnect the appliance. Always pull regulations. the mains plug. • Do not touch the mains cable or the •... -
Page 7: Product Description
ENGLISH – Do not use a detergent ball if chlorohydrocarbons. This system must setting a non-stop programme. stay tight. The damage of the system can cause a leakage. WARNING! Risk of injury or damage to 2.6 Disposal the appliance. • Disconnect the appliance from the •... - Page 8 3.2 How to activate the child To close the door, turn the device anticlockwise until the groove is vertical. safety device This device prevents children or pets from being closed in the drum. Turn the device clockwise, until the groove is horizontal.
-
Page 9: Control Panel
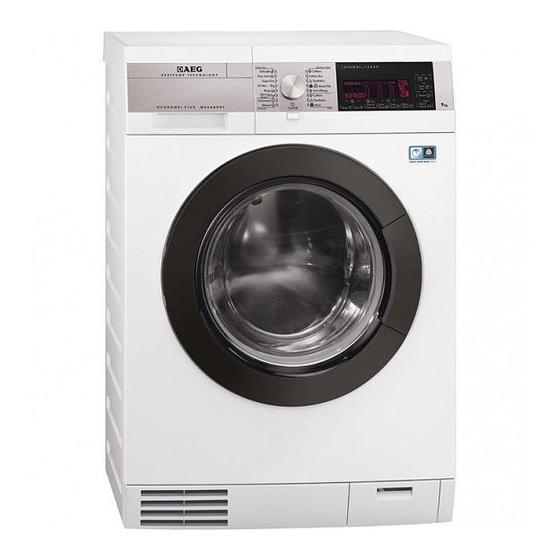
ENGLISH 4. CONTROL PANEL 4.1 Control panel description S P E C I A A L / WA S S E N / D R O G E N S P E C I A L L AVA G E / S E C H A G E Fijne Was Katoen Délicats... - Page 10 The display shows: The text bar: • Guides you in the use of the appliance. • Shows the programme status and phase. • Shows alarm messages. Refer to 'Troubleshooting' . The symbols appear on the display when the related phase or function is set.
- Page 11 ENGLISH This part comes on only if the door is open - Refer to 'Activating the appliance and setting a programme'. Maximum allowed load of laundry for the set programme (in kg). Graphic bars To set a function: The function indicator comes on when the related function is set. The empty indicator bar appears only if the related function is avail- able for the set programme.
-
Page 12: Programmes
Spin speed of the set programme No Spin indicator Rinse Hold indicator 1) Only available for SPIN/DRAIN programme. Default temperature of the set programme Cold water 5. PROGRAMMES 5.1 Programme Chart Programme Maximum load Programme description Temperature Maximum spin... - Page 13 ENGLISH Programme Maximum load Programme description Temperature Maximum spin (Type of load and soil level) range speed Drying programme for cotton items. 6 kg Katoen - Coton 4 kg Drying programme for synthetic items. Synthetica - Syn- thétiques 1 kg Drying programme for woollens.
- Page 14 Programme Maximum load Programme description Temperature Maximum spin (Type of load and soil level) range speed Steam programmes Steam can be used for dried, washed or worn once laundry. These programmes can reduce creases and odours and make your laundry softer.
- Page 15 ENGLISH Programme options compatibility Programme Katoen - Blanc/ ■ ■ ■ ■ ■ ■ ■ ■ Couleurs Katoen Eco - Coton ■ ■ ■ ■ ■ ■ ■ Synthetica - Synthé- ■ ■ ■ ■ ■ ■ ■ ■ tiques ■...
- Page 16 Dryness Level Type of fabric Load Cottons and Linen up to 6 kg Cupboard Dry (bathrobes, bath towels, etc) For items to be stored Synthetics and mixed fabrics up to 4 kg (jumpers, blouses, underwear, household and bed linen)
-
Page 17: Consumption Values
ENGLISH 5.4 Woolmark Apparel Care - washed according to the instructions on the garment label and those Blue issued by the manufacturer of this washing machine. M1230 • The wool drying cycle of this machine has been tested and approved by The Woolmark Company. -
Page 18: Settings
Programmes Load Energy Water con- Approximate pro- (kg) consump- sumption (li- gramme duration tion (kWh) tre) (minutes) Cottons 40°C 1.05 Synthetics 40°C 0.88 Delicates 40°C 0.70 Wool/Handwash 30°C 0.35 1) «Cotton Energy Saving programme » at 60°C with a load of 9kg is the reference programme for the data entered in the energy label, in compliance with EEC 92/75 standards. - Page 19 ENGLISH • You do not use the appliance for 5 The duration of the steam phase minutes before you press the Start/ changes accordingly to your selection. Pauze - Départ/Pause button. 8.7 Start/Pauze - Départ/Pause All settings are cancelled. Press the Aan/Uit - Marche/Arrêt Touch button Start/Pauze - Départ/Pause button to activate the appliance to start or interrupt a programme.
-
Page 20: Before First Use
• Deactivate the spin phase ( 'No spin' function). compartment • Activate the Rinse Hold function. The programme duration Set this function to prevent fabric increases. This function is creases. The appliance does not drain... -
Page 21: Daily Use - Washing Only
ENGLISH 10. DAILY USE - WASHING ONLY WARNING! Refer to Safety chapters. 10.1 Before activating the appliance 1. Connect the mains plug to the mains socket. 2. Open the water tap. 10.2 Activating the appliance and setting a programme 1. Press button Aan/Uit - Marche/Arrêt CAUTION! to activate the appliance. - Page 22 Always obey the instructions that you find on the packaging of the detergent products. 10.5 Liquid or powder detergent Close the detergent dispenser. When you use the liquid detergent: • Do not use gelatinous or thick liquid detergents. • Do not put more liquid then the maximum level.
-
Page 23: Opening The Door
ENGLISH 10.7 Cycle time recalculation The related indicator flashes. 2. Change the options. After approximately 15 3. Touch button Start/Pauze - Départ/ minutes from the start of the Pause again. programme: The washing programme continues. • The appliance adjusts 10.11 Cancelling a running automatically the cycle time to the laundry you programme... -
Page 24: Daily Use - Drying Only
• You must drain the water to open the If you set a programme or an door: option that ends with water 1. If necessary, decrease the spin in the drum, the AUTO speed. Stand-by function doesn't 2. Touch the Start/Pauze - Départ/ deactivate the appliance to Pause button. -
Page 25: Daily Use - Washing & Drying
ENGLISH The display shows 15 minutes for cottons At the beginning of the and synthetics programmes while starts drying cycle (3 – 5 min.) from 13 minutes for wool programme. there could be a slightly Each time you touch this button the time higher sound level. - Page 26 12.1 NON-STOP programme The text bar tells that the appliance is operating. You can wash and dry your laundry The display shows regularly a new time setting a «non stop-programme». value. Proceed as follows: 12.3 Washing and Timed 1. Press button Aan/Uit - Marche/Arrêt...
-
Page 27: Hints And Tips
ENGLISH To prevent the fluff in your laundry, we • Empty the drum. recommend that you: • Clean the drum, the gasket and the door with a wet cloth. • To do not wash dark fabrics after you • Set the rinse programme. washed and dried light coloured •... -
Page 28: Ecological Hints
13.7 Items not suitable for • Follow the instructions that you find on packaging of the detergents or drying other treatments without exceeding Do not set a drying programme for the indicated maximum level ( this laundry: • Use the recommended detergents for •... -
Page 29: Care And Cleaning
ENGLISH Experience will help you to dry the 4. Do not dry rough and smooth textiles laundry better. Take note of the duration together, to avoid scorching on of the cycles done before. smooth garments. 5. Remove all objects from garment To avoid the static charge at the end of pockets, especially melting objects. -
Page 30: Cleaning The Detergent Dispenser
14.5 Cleaning the detergent dispenser 14.6 Cleaning the air filters The air filters collect the fluff. The fluff normally occurs when the clothes are dried in a washer-dryer. • At the end of each drying cycle in the display the indicator is on to advise to clean the primary air filter. - Page 31 ENGLISH To have best drying performances clean regularly the air filters with warm water and afterwards dry them with a towel. Clogged air filter increases the drying time and the energy consumption! WARNING! The primary filter recess must not be blocked by any object. If you only wash the laundry with your washer-dryer, it is normal to find some humidity in the primary air filter.
- Page 32 14.7 Cleaning the drain filter WARNING! Do not clean the drain filter if the water in the appliance is hot. WARNING! Each time you carry out the special programme CLE to remove fluff, clean the drain filter afterwards.
- Page 33 ENGLISH 14.8 Cleaning the inlet hose filter and the valve filter It could be necessary to clean the filters when: • The appliance does not fill with water. • The appliance fills with the water for a long time. • The indicator of button Start/Pauze - Départ/Pause flashes and the display shows the related alarm.
-
Page 34: Frost Precautions
• Remove the inlet hose behind the appliance. • Clean the filter in the valve with a stiff brush or a towel. • Install again the inlet hose. Make sure that the couplings are tight to prevent leakages. • Open the water tap. -
Page 35: Troubleshooting
ENGLISH WARNING! Make sure that the temperature is more than 5 °C and the water is flowing from the tap before you use the appliance again. The manufacturer is not responsible for damages caused by low temperatures. 15. TROUBLESHOOTING WARNING! Refer to Safety chapters. - Page 36 Message Possible solution Make sure that the connection of the drain hose is cor- rect. The display tells to check the Make sure that the appliance door is not open or closed door. correctly. The display tells there is a The anti-flood device is activated: water alert.
- Page 37 ENGLISH Problem Possible solution The spin phase does not op- Make sure that the spin phase is not off. erate or the washing cycle lasts longer than usually. Make sure that the drain filter is not clogged. Clean the filter, if necessary. Refer to 'Care and cleaning'. Make sure that the this is not a balance problem.
- Page 38 Problem Possible solution The washing cycle is shorter The appliance calculates a new time according to the than the time displayed. laundry load. The washing cycle is longer An unbalanced laundry load increases the duration time. than the time displayed.
-
Page 39: Installation
ENGLISH Make sure that the water level inside the drum is not too high. If necessary, proceed with an emergency drain (refer to «Emergency drain» in «Care and cleaning» chapter). To open the door, proceed as follows: 1. Press the Aan/Uit - Marche/Arrêt button to switch the appliance off. - Page 40 • Remove the cardboard top. • Remove the polystyrene packaging materials. • Remove the internal film. • Open the door. • Remove the polystyrene piece from the door seal and all the items from the drum. • Put one of the polystyrene packaging elements on the floor behind the appliance.
- Page 41 ENGLISH • Pull up the appliance in vertical position. • Remove the power supply cable and the drain hose from the hose holders. It is possible to see water flowing from the drain hose. This is due to the testing with water of the appliances in factory.
-
Page 42: Positioning And Levelling
16.3 Installation under a counter The appliance can be installed as 600 mm freestanding or below the kitchen counter with correct space (see picture). CAUTION! Do not install the appliance 600 mm ≥ 870 mm inside a sealed hollow! -
Page 43: Water Drainage
ENGLISH 16.5 The inlet hose • Connect the hose to the back appliance. Turn the inlet hose only left or right. • Loose the ring nut to set it in the correct position. • Connect the water inlet hose to the cold water tap with 3/4"... - Page 44 • Make a U shape with the drain hose. On the edge of a sink • Make sure that the plastic guide cannot move when the appliance drains. Attach the guide to the water tap or the wall. To a stand pipe with vent-hole •...
-
Page 45: Technical Data
ENGLISH To a sink spigot • Refer to the illustration. Put the drain hose in the spigot and tighten it with a clip. • Make sure that the drain hose makes a loop to prevent particles going into the appliance from the sink. To a wall-pipe •... -
Page 46: Environmental Concerns
Wool 1 kg Spin Speed Maximum 1600 rpm This product contains HFC - R134a/GWP1430 0.12 kg fluorinated gas hermetically sealed. 1) Connect the water inlet hose to a water tap with a 3/4'' thread. 18. ENVIRONMENTAL CONCERNS appliances marked with the symbol Recycle materials with the symbol with the household waste. - Page 47 ENGLISH...
- Page 48 www.aeg.com/shop...
Need help?
Do you have a question about the L 99695 HWD and is the answer not in the manual?
Questions and answers