Table of Contents
Advertisement
Advertisement
Table of Contents

Subscribe to Our Youtube Channel
Related Manuals for Olivetti EXPLOR@ 950 LED

Summary of Contents for Olivetti EXPLOR@ 950 LED
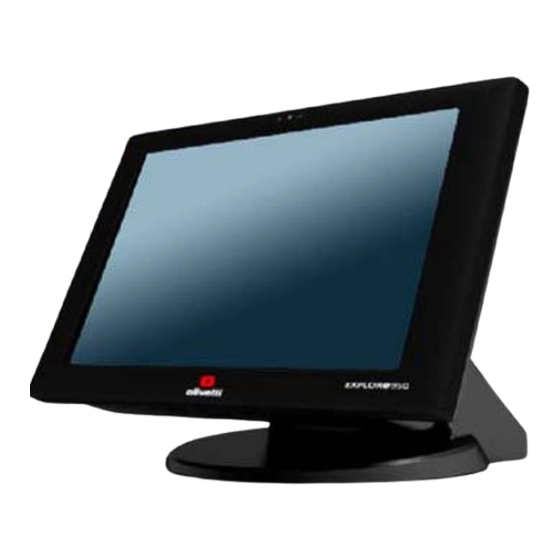
- Page 1 Web Cash EXPLOR@ 950 LED SERVICE MANUAL Code: Y116500-1...
- Page 2 PUBBLICATION ISSUED BY: Olivetti S.p.A. Gruppo Telecom Italia Via Jervis, 77 - 10015 Ivrea (TO) Copyright © 2014 Olivetti All rights reserved...
- Page 3 The approach to the topics covered in this manual requires knowledge of similar products. REFERENCES Spare Parts Catalogue Explor@ 950 LED - code Y116510-2 Product Support Plan Explor@ 950 LED - code 808165-00 Product Logistic Support Explor@ 950 LED – code 808176-00...
- Page 4 Page Intentionally blank...
-
Page 5: Table Of Contents
CONTENTS CHAPTER 1 - HARDWARE SETUP ........................1-1 PACKING CONTENTS ............................1-1 QUICK TOUR ..............................1-2 Front View and Rear View ................... 1-2 LED Indicator ....................... 1-2 Back Panel I/O ..................... 1-3 BASIC PERIPHERALS INSTALLATION ......................1-3 CUSTOMER DISPLAY ............................1-6 A. Hardware Installation ..................1-6 B. - Page 6 Page Intentionally blank...
-
Page 7: Chapter 1 - Hardware Setup
Chapter 1 - HARDWARE SETUP PACKING CONTENTS 1. EXPLOR@950 LED X 1 5. Recovery DVD X 1 2. Power Adapter X 1 6. Cable Cover X 1 3. Power Cord X 1 7. Safety and Disposal Information X 1 4. Drive and Utility DVD X 1 Y116500-1 Service Manual... -
Page 8: Quick Tour
QUICK TOUR Front View and Rear View LED Indicator The Power indicator will glow green when power is on. The HDD indicator will blink green when the HDD is accessed. The LAN indicator will blink green when transferring data though the LAN. Service Manual Y116500-1... -
Page 9: Back Panel I/O
Back Panel I/O BASIC PERIPHERALS INSTALLATION 1. All cables and wires from peripherals to the POS device are recommended to be fed through the base in the direction as shown below. WARNING: Before the cable cover is removed, please make sure the power is off! Disconnect the Power Cord from the socket. - Page 10 Power Adapter Connect the DC cable to the DC in jack. Computer Mouse and Computer Keyboard Connect your computer mouse and keyboard to USB 1/2, UBS 3/4 or the KB/MS port, depends on which type of computer mouse/keyboard used. USB ODD Connect your USB ODD to USB 1/2 or UBS 3/4 port.
- Page 11 LAN Cable Connect one end of RJ-45 LAN cable to the LAN 1 or LAN 2 port on the back panel of the device, another end to your internet device. Cash Drawer Connect one end of RJ-11 cable to the Cash Drawer port on the back panel of the device, another end to your cash drawer.
-
Page 12: Customer Display
CUSTOMER DISPLAY A. Hardware Installation 1. Remove the two screws fixing the customer display cover and then remove the cover. 2. Adjust the hinge of the customer display, and then connect to the device as shown below. 3. Mount the customer display to the device and tighten the two M3 screws as shown below. Service Manual Y116500-1... -
Page 13: Customer Display Power Supply Configuration
4. Finished. B. Customer Display Power Supply Configuration The customer display is driven and powered from the serial port COM6. The serial port COM6 must be appropriately set to provide the 12 V power supply to the customer display. See "Serial Port Configuration"... -
Page 14: Msr
1. Remove the two screws fixing the MSR cover. 2. Remove the MSR cover from the device. 3. Connect the connectors of the MSR assembly to the device. Service Manual Y116500-1... - Page 15 4. Tighten the two M3 screws to fix the MSR assembly as shown below. 5. Finished. Y116500-1 Service Manual...
-
Page 16: Nd Display
DISPLAY Before installation, make sure that the all item listed below are ready. Base Type 2 Display Kit: Display (12” or 15”) Base bracket display base M3 screw X 4 display support M4 screw X 2 Plastic bush VGA Cable Plastic spacer 1-10 Service Manual... -
Page 17: Base Type 2 Nd Display Kit Installation
Pole Type 2nd Display Kit: Display (8.4” or 10”) Base bracket Display Mount Plastic spacer display support M3 screw X 4 display base M4 screw X 2 Plastic pole (long) USB Cable (for USB type 2nd Display only) Plastic pole (short) VGA Cable (for VGA type 2nd Display only) Base Type 2 Display Kit Installation... - Page 18 2. Insert the plastic bush (item D.) into the base as shown. 3. Feed the blue connector of the VGA cable (item I.) through the base of the device as shown below. Remove the film on the back of the plastic spacer (item E.); and then stick the spacer to the base bracket (item F.) as shown.
- Page 19 Connect heads of all the cables to the ports of the back I/O panel of the POS device. Feed the black head (with power connector) of the VGA cable (item I.) through the 2 display support (item C.). Connect the black head (with power connector) and the power connector of the VGA cable to the VGA port and display (item A.), and then tighten the four M3 screws to fix the power input jack of the back I/O panel of the 2 display support onto the 2...
- Page 20 Insert the 2 display onto the base of the device. Push the base holder bracket into the base, and then tighten the two M4 screws to fix the 2 display. 10. Install the IO panel cover onto the device. 11. Finished. Now you can adjust the horizontal angle of the 2 display.
-
Page 21: Pole Type 2 Nd Display Kit Installation
Pole Type 2 Display Kit Installation Install the 2 display base (item D.) onto the 950 by M4 screw X 2 (Item J.) as shown. Insert the plastic bush (item C.) into the base as shown. Feed the Type A USB connector of the USB cable (item K.) or the blue connector of the VGA cable (item L. - Page 22 Remove the film on the back of the plastic spacer (item H.); and then stick the spacer to the base bracket (item G.) as shown. Feed the Type A USB connector of the USB cable (item K.) or the blue connector of the VGA cable (item L.) through the base bracket.
- Page 23 Feed the Type B USB connector of the USB cable (item K.) through plastic poles (item E. and F.) and then install the plastic poles as shown below. (the VGA cable can not be fed through the pole). Feed the Type B USB connector of the USB cable (item K.) or the black connector of the VGA cable (with power connector) (item L.) through the 2 Display Mount (item B.).
-
Page 24: Nd Display Power Supply Configuration
Connect the Type B USB connector of the USB cable (item K.) or the black connector of the VGA cable (with power connector) (item L.) to the proper port of the back I/O panel of the 2nd display (item A.), and then tighten the four M3 screws (item I.) to fix the 2 display mount onto the 2 display as shown below. -
Page 25: Turn On The Device
TURN ON THE DEVICE Make sure all peripherals are connected properly. Press and hold the power switch until the power indicator on the front panel glows green. Install the cable cover. Y116500-1 Service Manual 1-19... -
Page 26: Connections
CONNECTIONS Mother board connections Video LVDS backlighting Touch screen Fans Power connector MRS Reader LVDS Video Power button i-Button / Finger print module Speakers Customer display 1-20 Service Manual Y116500-1... -
Page 27: I/O Definition
I/O DEFINITION Please refer the detailed technical information about all I/O ports as followings. See Chapter 2. Power Connector Description Description +19V GROUND +19V GROUND Serial Port (COM 1, 2 and 5) Three COM ports DB9 are available. COM1 is selectable to RS422 or RS485. All the three COM can have pin 9 selectable to RI (default) or 5V or 12V. -
Page 28: Cash Drawer
Cash Drawer Connector Description Description P24V D_OUT0 D_IN Cash Drawer Control Status Address Value Open 280H Bit 4 = 0 Close 280H Bit 4 = 0 Read Status 280H Bit 0 = 0/1 1-22 Service Manual Y116500-1... -
Page 29: Bios Configuration
BIOS CONFIGURATION Serial Port Configuration Under BIOS screen, use the → or ← key on your computer keyboard to move to the Advanced tab, and then use the ↑ or ↓ key on your computer keyboard to select Super I/O Configuration then press ENTER key. - Page 30 Use the ↑ or ↓ key to select the COM Voltage, and the press ENTER key. Use the ↑ or ↓ key to highlight 12V and press ENTER key.. Press F10 key, highlight Yes and press ENTER key. NOTE: The figures above are for reference only; it is possible that the actual screen on your device does not agree with them.
- Page 31 Following you find the selectable out tension referred to the selectable function type (i.e. only COM 1 is selectable as RS 232/485/422). RS 232 Port Default Selectable output tension Serial type COM 1 5V / 12V RS 232 (default)/485/422 COM 2 5V / 12V RS 232 COM 3...
-
Page 32: Video Function Configuration
Video Function Configuration Under BIOS screen, use the → or ← key on your computer keyboard to move to the Advanced tab, and then use the ↑ or ↓ key on your computer keyboard to select Video Function Configuration then press ENTER key. - Page 33 Use the ↑ or ↓ key to highlight Enabled and press ENTER key. Press F10 key, highlight Yes and press ENTER key NOTE: The figures above are for reference only; it is possible that the actual screen on your device does not agree with them.
-
Page 34: Chapter 2 - Specification
Chapter 2 - SPECIFICATION Y116500-1 Service Manual... - Page 35 Main Board Intel® Sandy Bridge LGA1155 Core i7 - 2600 3.4 GHz (TB 3.8GHz) / L3: 8MB / 4 core 8 threads / 95 watt Core i5 - 2400 3.1 GHz (TB 3.4GHz) / L3: 6MB / 4 core 4 threads / 95 watt Core i3 - 2120 3.3 GHz / L3: 3MB / 2 core 4 threads / 65 watt Pentium G850 2.9 GHz / L3: 3MB / 2 core 2 threads / 65 watt Chipset...
-
Page 36: Explor@950 Led- Troubleshooting
Optional Accessories Customer display: VFD Attached, 20 columns x 2 lines, RS-232 Type MSR-Front Type, 3 Tracks, PS/2 Type MSR-Side Type, 3 Tracks, PS/2 Type & Finger Print, USB Type MSR-Side Type, 3 Tracks, PS/2 Type & i-Button, PS/2 Type 12.1”... -
Page 37: Peripheral Errors
Peripheral errors Problem Solution Audio • Check that the Audio cable is connected correctly or replace the loudspeakers. COM 1 RS 232/422/485 • Check that the connector of the peripheral is inserted correctly. • If the device connected is powered directly by the serial port, from BIOS check correct setting of the voltage. - Page 38 Customer display (optional) • Check correct functioning of the display. • Check that 12V power supply is set on port COM 6. • Check functioning and correct insertion of the display side and mother board side cables. • Check functioning of the mother board. Second LCD video (optional) •...
-
Page 39: Chapter 3 - Disassembling Parts
Chapter 3 - DISASSEMBLING PARTS SEPARATE THE BASE AND OPEN THE DEVICE Un-tighten four screws and remove the base from the Explor@950 LED. Un-tighten the four screws. Open the back panel. Y116500-1 Service Manual... -
Page 40: Mainboard Side Components Replacement
MAINBOARD SIDE COMPONENTS REPLACEMENT Un-tighten the three screws. Remove the wind scooper. Un-tighten the three screws (in blue circle) and unplug the two thermal fan connectors (in blue rectangle), and then you can remove the thermal fan assembly. Service Manual Y116500-1... - Page 41 Open the two ejectors on the slot by pushing them, and remove the RAM from the slot. Un-tighten the four screws, and then you can remove the heat sink. Press down the lever and pull toward outside to open the CPU socket. Y116500-1 Service Manual...
- Page 42 Remove the CPU carefully. Un-tighten the screw and remove the HDD tray cover. Un-tighten the screw and remove it. Service Manual Y116500-1...
- Page 43 10. Un-tighten the four screws fixing the HDD tray bracket. 11. Open the two ejectors on the slot by pushing them, and remove the RAM from the slot. Y116500-1 Service Manual...
- Page 44 12. Unplug: speaker connector (item M); MSR reader connector (item I); touch screen connector (item G). Than, left to right: customer display connector (item F); i-Button / Finger print module (item E); LVDS video connector (item D); LED connector (item C) and backlight connector (item A). Service Manual Y116500-1...
- Page 45 13. Un-tighten the five screws, and then you can remove the mainboard. WARNING: during the reassembly phase, be sure to tighten carefully the ground loop situated near the heat sink side, indicated by the arrow. 14. Loosen the ten hexagonal screws by hexagon socket spanner as shown below, and remove the I/O panel.
-
Page 46: Smontaggio Del Gruppo Video
SMONTAGGIO DEL GRUPPO VIDEO Remove the speaker which is fixed by glue. Remove all eight screws as shown and seperate the LCD and touch assembly from the front bezel. Remove the 4 screws situated near the 4 corners of the LCD panel, similar to the one indicated by the circle below. - Page 47 Remove the black tape fixing the LVDS (LCD) cable connector and backlight connector. Pull out the LED indicator form the front bezel. Y116500-1 Service Manual...
-
Page 48: Hdd Removing
HDD REMOVING Press the button with blue dot to unlock the HDD tray, and then pull out the HDD tray. Disassemble the HDD from the HDD tray as shown. 3-10 Service Manual Y116500-1... - Page 49 UPDATING STATUS DATE UPDATED PAGES PAGES CODE 07/2014 EDITION Y116500-1...
Need help?
Do you have a question about the EXPLOR@ 950 LED and is the answer not in the manual?
Questions and answers