Table of Contents
Advertisement
Advertisement
Table of Contents

Related Manuals for JVC LT-22J10


Summary of Contents for JVC LT-22J10
- Page 1 LT-19J1 LT-22J10 LCD TV/DVD Combo Operating Instructions...
-
Page 2: Safety Precautions
Safety precautions Thank you for buying this JVC LCD panel television. To make sure you understand how to use your new TV, please read this manual thoroughly before you begin. Important Warning CAUTION: A UNIT IS A CLASS 1 LASER PRODUCT. HOWEVER THIS UNIT USES A VISIBLE LASER BEAM WHICH COULD CAUSE HAZARDOUS RADIATION EXPOSURE IF DIRECTED. - Page 3 Safety precautions Contents Safety precautions ..........2 • If a television is not positioned in a sufficiently stable location, it can be potentially hazardous due Contents ..............3 to falling. Many injuries, particularly to children, can How to attach the stand .........4 be avoided by taking simple precautions such as: Location of controls ..........5 - Using cabinets or stands recommended by the...
-
Page 4: How To Attach The Stand
2) Align the stand’s bottom-plate (supplied) as seen here. It will fit in only one direction. 3) Hold the unit and attach the stand slowly. Finally secure the bottom-plate with 2 screws (included). LT-19J1 LT-22J10 NOTE: • To detach the stand, perform these steps in reverse order. -
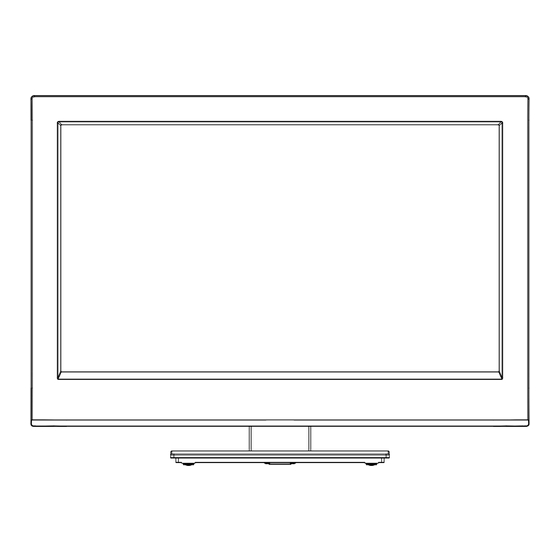
Page 5: Location Of Controls
Location of controls DVD-Player Description of Indicators and Controls 1. Remote sensor (Standby/On) indicator: The LED indicator lights up red in standby mode, and blue in the power ON mode. 3. Loudspeakers 4. EJECT ( ): Eject a disc. 5. PLAY (▶) button: Playback. 6. -
Page 6: Remote Control
Remote Control Function Page Enter standby mode or turn on the power Display program position number 11, 19 Select to operate TV/DVD Eject a disc Select channel Select Teletext page Enter password 12, 23 Select title/chapter/track Select an input source Select picture format Switches between the present channel and the last selected channel... - Page 7 Remote Control Install the batteries Use batteries type UM3 (AA-Size). Do not use old or weak batteries. The remote control may not work properly with a weak voltage from such batteries. Replace exhausted batteries with new ones. Never try to recharge normal batteries - this could cause an explosion.
-
Page 8: Connections
Connections Note: Before you connect other appliances: • To avoid potentially damaging your set, make sure all items are switched off and disconnected from the mains power when you make the connections. • Arrange the desired connection. • When you have finished making the connections, reconnect the mains power to the unit and switch it back on. -
Page 9: Auto Setup
Auto setup Quick guide for Menu operation Call Menu and for example: Select “Auto Your television has an Automatic Tuning Search”. System which makes tuning in your television easy. This Automatic tuning System scans Press INPUT SELECT. Select TV, then press the entire reception range in your area and ENTER. -
Page 10: On-Screen Language Selection
4 Press to start auto search. On-screen Language Selection Channel - Auto Search Press MENU (unless you have already selected when the set was first switched on) Then press to select “Feature”, then Channels found: Picture press . Sound Frequency : Feature 89.50 MHz Channel... -
Page 11: Basic Operation
Fastext/TOPtext Basic Operation The Fastext/TOPtext is teletext with a special directory. Channel selection On the lower part of the screen there are four different coloured fields (red, green, yellow and blue). These fields With the Numbered buttons (0-9). lead directly to the pages shown within. The coloured Example: buttons on the remote control correspond to the coloured •... -
Page 12: Stereo Reception In Analogue Cable Tv Channel Mode
Stereo reception in analogue cable Picture Format TV channel mode Picture Size The required picture format can be set by pressing You can see the each signal type of STEREO, the PICTURE SIZE button. Press PICTURE SIZE MONO and Sound multiplex on the TV-screen when until the required format is displayed. -
Page 13: Other Convenience Functions
Other convenience functions You can change the default settings to convenience use. Selected Items Setup hint Picture Picture Mode Standard Standard picture quality (factory-set) Dynamic Enhanced picture contrast and sharpness (factory-set) Natural Intended for bad-quality signals (factory-set) Favorite Your personal preferences Brightness / Contrast / Sharpness / Color / Tint You can adjust the picture to your preference. - Page 14 Other convenience functions Selected Items Setup hint PC Setup See page 25. Feature Language See page 10. Lock See page 12. Blue Back On: You can set the TV to automatically change to a blue screen and mute the sound if the signal is weak or On / Off absent.
-
Page 15: Disc
Disc The loaded Disc (DVD and Audio-CD) will be recognized automatically. The suitable disc formats are: DVD-Video, DVD-R/-RW (Video format only), Audio CD, Fujicolor CD and CD-R/CD-RW. Some CD-R/RW discs may be incompatible. • This unit cannot play an 8cm disc. It cannot also be Disc type and logo mark content played even using a disc adapter. - Page 16 Disc Playing Audio files WMA and MP3 files recoded in DVD-R/-RW, CD- PC-created disc compatibility R/-RW can be played. • You may not be able to play discs recorded using a personal computer or recorder for disc Windows Media Audio (WMA) compatibility compatibilities, scratches or marks on the disc, •...
-
Page 17: Playing A Disc
Playing a disc To pause playback (still mode) Press during playback. This section shows you the basics on how to To resume normal playback, press PLAY ( play a disc. • The sound is muted during still mode. Basic playback (DVD/Audio CD) To stop playback Preparation Make sure that the... -
Page 18: Zooming (Dvd)
Playing in slow-motion (DVD) Press ENTER. Playback starts. Press during playback. • When you change the title, playback starts Each time you press , the slow-motion from Chapter 1 of the selected title. speed changes. • Some discs may not work in the above operation. -
Page 19: Changing Angles (Dvd)
Changing angles (DVD) Using HOME MENU When playing back a disc recorded with multi-angle Playing a disc facility, you can change the angle that you are Press SETUP during stop mode. viewing the scene from. HOME MENU will appear. Press ANGLE during Current/Total Press / / playback. -
Page 20: Play Mode
Play mode Program playback A-B repeat playback Press PLAY MODE during playback. A-B repeat playback allows you to repeat selection Play Mode screen will appear. between two selected points. Press / to select “Program”, then press Press PLAY ENTER. Play Mode MODE during Press / to A-B Repeat... -
Page 21: Audio Settings Menu
Sharpness Audio Settings menu Adjust sharpness of images. The Audio Settings menu offers features for Brightness adjusting the way discs sound. Adjust brightness of images. Press SETUP during stop mode. Contrast HOME MENU will appear. Adjust a ratio of brightness between the brightest part and the darkest part. -
Page 22: Customizing The Function Settings
Customizing The Function Settings Setting Option Setup hint Video Output settings TV Screen 4:3 (Letter Box) Set Picture Size to Natural. Widescreen movies are shown with black bars top and bottom. 4:3 (Pan & Scan) Set Picture Size to Natural. Widescreen movies are shown with the sides cropped so that the image fills the screen. -
Page 23: Parental Control
Parental Control Level Change Some discs are specified as not suitable for Press Initial Settings children. Such discs can be limited not to playback select “Level Video Output Parental Lock Password Change with the unit. Change”, then Language Level Change Display Country Code press ENTER. -
Page 24: Language Code List
Language Code List Language (Language code letter), Language code Japanese (ja), 1001 Bhutani (dz), 0426 Kirghiz (ky), 1125 Sinhalese (si), 1909 English (en), 0514 Esperanto (eo), 0515 Latin (la), 1201 Slovak (sk), 1911 French (fr), 0618 Estonian (et), 0520 Lingala (ln), 1214 Slovenian (sl), 1912 German (de), 0405 Basque (eu), 0521... -
Page 25: Pc Connection
PC connection Follow these steps: On your PC monitor choose a resolution of 1360 × 768 (LT-22J10 : 1920 x 1080) at 60Hz and save this configuration. Shut down your PC and connect the shut off LCD TV. Use a screensaver to avoid burning-in of static picture content. -
Page 26: Connecting An Hdmi Or A Dvi Device To The Hdmi Input
Connecting an HDMI or a DVI device to the HDMI input The HDMI input receives digital audio and uncompressed video from a HDMI equipped device or uncompressed digital video from a DVI equipped device. When you connect to a DVI device with a HDMI-to-DVI adapter cable, it only transfers the video signal, so it is necessary to use separate analogue leads to transfer the audio signals. -
Page 27: Connection To Other Equipment
Connection to other equipment Attention: Preparation: • Disconnect all equipment from the AC-supply, to prevent any possible damage. • Make the necessary connections. • Make sure all connections are safe & secure before reconnecting your equipment the AC-supply. Note: • Select a appropriate external input mode. - Page 28 Connection to other equipment 4. Connecting to a DVD player or other AV device with Component Video outputs If your DVD player (or other device) has Component Video output jacks, use a suitable set of leads (RCA/ Phono) to connect these to the Component Video inputs on this TV as shown - it can greatly enhance the picture quality and performance.
-
Page 29: Troubleshooting Table
Troubleshooting table Please check the following list before requesting service. Symptom Possible solution Page No picture, no sound Switch on the set. Check that the mains power outlet is properly connected. Select appropriate input mode. Unplug unit for 1 minute, then plug it back in. No reception with built-in Connect the antenna. -
Page 30: License Information
License information * This item incorporates copy protection technology that is protected by U.S. patents and other intellectual property rights of Rovi Corporation. Reverse engineering and disassembly is prohibited. * Manufactured under license from Dolby Laboratories. Dolby and the double-D symbol are trademarks of Dolby Laboratories. -
Page 31: Specifications
Specifications LT-19J1 LT-22J10 Broadcasting System PAL(B/G, D/K, I), SECAM(B/G, D/K) (Analog): NTSC 3.58(M, B/G, D/K), NTSC 4.43(B/G, D/K,I) Preset channels: Analog 110 Carrier Frequency Range: 44.25 MHz-863.25 MHz Sound-multiplex NICAM(B/G/D/K/I), A2(B/G/D/K), MTS(US system) systems: LCD: 47 cm visible 55 cm visible... - Page 32 J56S1101A SH 11/01 © 2011 Victor Company of Japan, Limited 0111TMH-OR-OR...
Need help?
Do you have a question about the LT-22J10 and is the answer not in the manual?
Questions and answers