Table of Contents
Advertisement
Advertisement
Table of Contents

Related Manuals for KIC Explorer

Summary of Contents for KIC Explorer
- Page 1 KIC 2000 User Manual Hardware and Software Ver.2.4.0.x...
- Page 2 FCC Statement (Applies to KIC Explorers with RF capability only) FCC ID: VBSKE This device complies with Part 15 of the FCC Rules. Operation is subject to the following two conditions: (1) this device may not cause harmful interference, and (2) this device must accept any interference received, including interference that may cause undesired operation.
- Page 3 Specifications are subject to change without notice. This document may not be sold. KIC hereby grants the user permission to duplicate, in part or in whole, this document for whatever purposes the user sees fit. No part of this document may be altered and redistributed by the user.
- Page 4 The KIC 2000 Software is subject to the following license terms and conditions. Please read this license before you open the disk package. If you do not agree to the terms and conditions of this license you may return the software to KIC for a full refund.
- Page 5 KIC 2000 v2.4.0.x Table of Contents KIC 2000 HARDWARE AND SOFTWARE USER MANUAL............I SOFTWARE LICENSING AGREEMENT AND PRODUCT WARRANTY ........II CONGRATULATIONS!........................1 KIC’ ......................1 HERMAL ROFILERS KIC N ..................1 AVIGATOR OFTWARE PTION ....................1 OCUS OFTWARE PTION ............
- Page 6 APPENDIX B: ATTACHING THERMOCOUPLES TO THE PRODUCT........116 ..........................116 VERVIEW ......................... 116 LUMINUM ..................... 117 EMPERATURE OLDER APPENDIX C: WRITING KIC 2000 DATA OVER A NETWORK..........118 CONTACTING KIC........................120 KIC USA ........................... 120 KIC I – E ................ 120 NTERNATIONAL ALES...
-
Page 7: Congratulations
KIC software, the software automatically changes the oven set points to your profile. - Page 8 The KIC 2000 installation will automatically start. • If the KIC 2000 software does not auto-start, go to Windows Start Menu and click on Run. • Type D:\setup (or your CD-ROM drive letter) and press the Enter key on the keyboard.
- Page 9 “with Navigator”, “with Auto-Focus” then there may be a problem with your parallel or USB port, the software key, or the KIC 2000 installation did not successfully install the drivers for the software key. Contact KIC tech support for assistance, tech@kicmail.com.
- Page 10 Figure 2: Example KIC Explorer 12 Channel product kit Both the 12 and 7 channel KIC Explorer models can be used as a data logger and with the additional RF hardware they can both communicate wirelessly with the KIC 2000 software.
-
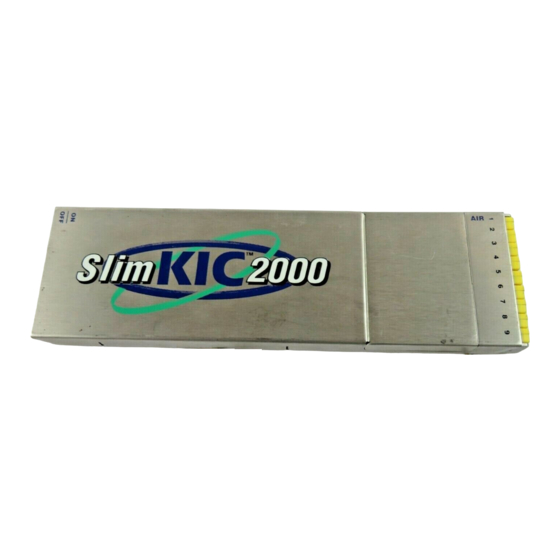
Page 11: Slimkic 2000 Hardware
– For all profiles run with the KIC 2000 software the thermocouple plugged into the first channel on the SlimKIC 2000 or KIC Explorer must be the Air TC. This TC is positioned 1-inch in front of the leading edge of the board for all profiles run using KIC 2000 software. - Page 12 Higher rated Thermocouples – KIC offers thermocouples rated for use up to 400ºC. Standard KIC thermocouples are rated to 300ºC. • KIC Carrier – Optional accessory for the SlimKIC 2000 that carries the SlimKIC through the oven. Used when no belt conveyor is present. Installing or Changing the Battery in your KIC Profiler...
- Page 13 Batteries and Temperature The KIC Explorer is designed to pass through ovens that will cause the batteries inside the KIC Explorer to heat up. Since the batteries have a high heat capacity they will tend to continue to heat even after the KIC Explorer has exited the oven.
- Page 14 The SlimKIC 2000 profiler connects to the computer through a RS-232 serial port. All necessary software drivers will be installed during the KIC 2000 software installation. In the event that the computer has no RS-232 COM ports or none are available, a Serial-USB adapter is required.
- Page 15 Note: The KIC Explorer Base Station is needed to activate the RF function. The KIC Explorer Base Station connects to the USB extension cable and the cable is connected to a USB port on the computer. See Figure 9 and Figure 10. A USB extension cable is used to allow positioning for best reception.
- Page 16 KIC 2000 v2.4.0.x Data Log Mode The standard mode of communication for the KIC Explorer is Data Log mode. The KIC Explorer USB communication cable is used to transfer data to and from the KIC 2000 software computer from your KIC Explorer.
- Page 17 1. Turn on the KIC Explorer. 2. Connect the USB communication cable to the KIC Explorer and the other end to the computers USB port. If the KIC Explorer has the optional RF hardware connect the Base Station to the USB port.
- Page 18 Once the USB driver installation is complete and whenever the KIC Explorer or KIC Explorer Base Station is connected to the computers USB port a KIC message will appear telling the user that the KIC Explorer is connected. See Figure 19.
- Page 19 PWI value. Loading the KIC Explorer into the Thermal Shield 12 Channel -KIC Explorer – Place the KIC Explorer into bottom half of the KIC Explorer thermal shield. • The Mini-TC harnesses should rest flat on the metal block inside the shield.
- Page 20 Figure 22: 7 Channel KIC Explorer Once the KIC Explorer is set inside the bottom half of the thermal shield and the thermocouple wires and antenna are properly routed, verify the KIC Explorer is on by viewing the LED near the On/Off button. See Figure 22.
-
Page 21: Global Preferences
The installation automatically adds a KIC folder to main Windows Start Menu. Click on the Windows Start and scroll up to the KIC folder. Then click on the KIC 2000 icon. The KIC 2000 Main Menu should say “with NAVIGATOR” if you have purchased the Navigator option and installed the software key correctly, and “with Auto-Focus”... -
Page 22: Hardware Setup
• KIC Explorer: Verify that the Base Station is connected to a USB port on the PC (if you have the transmit version this needs to be in close proximity to the oven). - Page 23 Click the Start Profile (Green Traffic Light) button. • Once you have placed the KIC Profiler and board in the oven and run the profile the KIC Profiler Transmit models will automatically retransmit all the data when it drops below the profile stop temperature as it exits.
-
Page 24: Global Tab
Input value in the field or use Slider bar. • Profiling Hardware –Select SlimKIC 2000 or KIC Explorer 12, or 7 channel model. The SlimKIC 2000 or KIC Explorer you purchased will be either a Transmitter capable or Data log capable. Select the appropriate option. •... -
Page 25: Run A Profile
In the Process Window Screen – Saving or deleting Process Windows or changes to Process Windows • In the Run a Profile first screen – Remove Oven • In the Profile Explorer – Delete a profile • In the Profile Graph and Statistics screen – Access to the Optimization tab KIC 2000 User Manual... - Page 26 Conveyor Speed Constraints Low – Select the minimum conveyor speed you would like Auto-Focus to recommend for new products. High - Select the maximum conveyor speed you would like Auto-Focus to recommend for new products. KIC 2000 User Manual...
- Page 27 See details below. Figure 28: Process Window Setup Process Window Name – Name of the KIC Process Window file that includes the statistics chosen and limits for those statistics, along with whatever text is typed in the Description field. See Figure 28.
- Page 28 Clicking on the Red X will cancel your selection and return you to the Process Window screen without making any changes. KIC updates the solder paste list on a regular basis, check KIC on the Internet for updates, www.kicthermal.com KIC 2000 User Manual...
- Page 29 Temperature, and Time limits. These limits are usually dictated by the solder paste used. The KIC 2000 software uses the limits to measure the profile PWI. Changes made within this screen will have a direct effect on the profile PWI value Once you have completed all spec modifications you can click on the Green check “DONE”...
- Page 30 Once you have completed all edits of the specs you can click on the Green Check button and your changes will be applied. Clicking on the Red X (Cancel) button will cancel your changes and exit. See Figure 31. If you are having trouble defining your process specifications, contact KIC and we will try to help. tech@kicmail.com Figure 32: Process Window –...
- Page 31 Process Window file. See Figure 34. Figure 34 Clicking on yes will save it and exit to the main screen. You can click on No and click on the Red X “Cancel button” to exit without accepting or saving any changes. KIC 2000 User Manual...
-
Page 32: Rofilers
Software key – Shows the status of any software key that is connected. Displays the functions associated with the software key. Note: Only one software key can be connected at any given time. The KIC 2000 software will not detect multiple software keys. If you have purchased new software options that require an additional software key, contact KIC Technical Support, tech@kicmail.com. - Page 33 If you are running the software on an oven controller computer that is communication compatible with the KIC 2000 software the number of zones is already known and the oven name will be entered in the Global Preferences screen, not on this screen. Also the Entering Oven Recipe screen is skipped because the KIC 2000 software already has the recipe information from the oven controller.
- Page 34 2. Use Auto-Focus to find an in- spec Oven Recipe – This will initiate the Auto-Focus option for this product. Figure 38: Run a Profile – Auto Focus screen #2 KIC 2000 User Manual...
- Page 35 First Guess recipe in order for the user to confirm. If No, the user will be returned to the Confirm screen. Select the Use Current Oven Recipe button and enter the oven set points and conveyor speed you want to start with. Figure 41 KIC 2000 User Manual...
- Page 36 The user must manually enter the recipe information on the oven. See Figure 43. Figure 43 If there is communication with the oven, then the recipe is copied directly to the oven. KIC 2000 User Manual...
- Page 37 Entering Oven Recipe Figure 44: Run a Profile screen #2 This screen does not appear when the KIC 2000 is communicating with the oven controller. The recipe information is: Number of Zones – Enter in number of heated zones in your oven.
- Page 38 .kiccfg extension. This file will be located in C:\KIC Profiler 2000\Ovens. This file holds information about the zones in your oven, for the use by the KIC 2000 prediction algorithm. By default the software will start with the following assumptions unless changed by the user: •...
- Page 39 This Air Thermocouple MUST be plugged into the first channel on the SlimKIC 2000 or KIC Explorer. Attach the rest of the thremocouples and plug them into the SlimKIC 2000 or KIC Explorer. Order is not important, unless you plan on labeling where they are attached.
- Page 40 Wave On – Application type specific graphics Figure 53: Run a Profile screen #5 Figure 52: Run a Profile screen #4 Figure 54: Run a Profile screen #6 Please see the Appendix for using the Aluminum tape to attach your thermocouples. KIC 2000 User Manual...
- Page 41 TC’s plugged into the KIC Profiler. The TC checkbox must be checked as well to get the temperature updates. If you do not see live temperature readings recheck all the cable and or computer connections.
- Page 42 Green Traffic Light button. • Depending on the settings in the SlimKIC 2000 or KIC Explorer and in the software you may have to initialize the profiler at times. The KIC 2000 software will let you know when this is necessary.
- Page 43 The KIC Profiler sample rates will vary depending on the selected Application type and or profile length. Note: KIC 2000 sample rates for both the SlimKIC 2000 and KIC Explorer profilers are the same for each profile application. See Table 1.
-
Page 44: H Ardware
The Live Profile Graph display will remain on your screen until the KIC Profiler has achieved the trigger temperature that determines the profile end. Profile Status The bottom part of the screen will keep you apprised of the progress of the profile in reference to the KIC Profiler hardware status. •... - Page 45 KIC 2000 Profile Retransmission For users of the SlimKIC 2000 or KIC Explorer thermal profilers with RF capability. While the KIC Profiler transmits the live profile data to the KIC 2000 software; it simultaneously stores the profile data in its memory.
- Page 46 Failing to turn the KIC profiler off will drain the batteries. Next, the KIC 2000 software will automatically analyze the profile data and presents the profile and statistics. If you purchased the Navigator option, the predicted oven settings will be displayed as well.
-
Page 47: F Eatures
KIC 2000 v2.4.0.x Profile Optimization with the KIC Navigator Option Figure 65: Optimization Tab The Optimization Tab allows you to set the search functions of the Navigator Option. The Navigator will search through millions of set point and conveyor speed combinations to find the optimal setting for each product. -
Page 48: Window.
Original/Predicted set points – Navigator (Optional) Figure 67 This is an example of how the KIC 2000 software (standard and with Navigator) lists the PWI, and oven settings for the profile. This table is divided into the original section (top), and the Predicted section (bottom). - Page 49 A PWI under 100% is acceptable Figure 70: PWI In-Spec A PWI above 100% is unacceptable Figure 71: PWI Out-of-Spec This display method enables the user to easily identify if the profile is in or out of spec. KIC 2000 User Manual...
- Page 50 Zero Decimal – When viewing the Pointer tool, this setting enables or disables the decimal display. When unchecked, the software will display one decimal point. Internal Temp – Enables the view of the KIC profiler’s internal temperature profile plot on the graph. KIC 2000 User Manual...
-
Page 51: D Isplay
Green Check /Profile Explorer button– When finished viewing or analyzing the profile select this button to either run another profile with this product or return to the KIC 2000 main menu. You will be returned to the Profile Explorer if the profile was opened from there. -
Page 52: P Rediction
Figure 76 KIC 2000 software will automatically apply the changes to the Run a Profile –Enter Set points screen. You will exit to the Run a Profile –Enter Set points screen. If you are running on the oven controller PC, and the oven is compatible with the KIC 2000 software the oven recipe will automatically be updated. - Page 53 Click on No if you do not wish to profile. You will be sent back to the KIC 2000 Main menu if you had just completed running a profile. If you opened the profile from the Profile Explorer you will be returned to the Profile Explorer. The other two dialogs will only appear if changes are made to the Description notes or Process Window.
-
Page 54: Isplay
See Figure 79. • The list of product folders is in the upper left of the Profile Explorer. Click on a folder to display the profiles in the profile section at the bottom. - Page 55 Inserting KIC 2000 data files from an outside source KIC 2000 data files can be sent or received via floppy disk or email. In order to view them using the KIC 2000 software, copy them to the KIC Profiler 2000\Profiles folder using Windows Explorer.
-
Page 56: S Tatistics
KIC 2000 v2.4.0.x Printing The KIC 2000 software will print profiles only from within the profile display screens. There are two print formats available. Print Format #1 is the default format used. Select the print button at the bottom of the screen to print a profile. A print dialog box will appear. - Page 57 Lead Free Logo Path – When “Lead Free Logo” is enabled, specify the path to any BMP image file that you want to appear in the Lead Free Logo display area on the report. The default image is the KIC...
- Page 58 Profile Graph, Profile Description, Lead-Free Logo Area and Memo Box Area Optionally, you can print the contents of any screen in the KIC 2000 software by pressing F9 on your keyboard. The F9 function will not work while viewing the Profile Printout Setup dialog box.
-
Page 59: Index,
KIC 2000 v2.4.0.x Wave Solder Profiling The SlimKIC 2000 and KIC Explorer profiles can be used to measure wave solder profiles. Profiling wave solder machines using a KIC profiler is very similar to profiling a solder reflow oven. The KIC 2000 software will guide you through the profiling process. - Page 60 KIC 2000 software Wave Solder Profiling This section will outline the steps necessary to setup and run a wave solder profile using your KIC Profiler and KIC 2000 software. This section is written assuming the user has a basic understanding of the KIC 2000 software and its functions before attempting to profile a wave solder machine.
- Page 61 KIC 2000 v2.4.0.x Running a Wave Solder Profile UN A ROFILE Figure 85: KIC 2000 Main Screen From the KIC 2000 main screen select the Run a Profile button. See Figure 85. KIC 2000 User Manual...
-
Page 62: A Pplication Type
For wave solder select to run the profile with the wave On or Off. • If you select Wave on, the KIC 2000 software will utilize two wave TC’s in addition to the Air TC. The Wave TC’s will measure: wave dwell time and Parallelism when profiling with the wave on. -
Page 63: D Isplay
KIC 2000 v2.4.0.x Entering Temperature Set Points and Conveyor Speed If you typed a new oven name, the KIC 2000 software requires you to enter the number of heated zones or pre-heat zones in your wave solder machine. See Figure 87. -
Page 64: B Uttons
Figure 90: Run a Profile Screen #4 – Wave Surfer The next screen will depict thermocouple attachment for wave solder profiling with the wave on. The KIC 2000 software utilizes two Wave TC’s in addition to the Air TC to collect wave specific data. See Figure 91. - Page 65 KIC 2000 v2.4.0.x The next screen will depict the placement of the Wave TC’s and instructs what slot/channel of the KIC Profiler to connect each Wave TC to. See Figure 92. It is very important to follow these directions. •...
- Page 66 Selecting the thermocouples and starting a profile This screen displays the live readings from the KIC profiler for all thermocouples selected, as long as the hardware is properly connected. See Figure 94. Make sure your KIC Profiler has a fresh battery and is powered on.
- Page 67 Once you have selected your thermocouples, you are ready to profile. Make sure your KIC profiler hardware is properly connected to the computer. You will be able to view the live readings for each selected thermocouple. If you don’t see the live readings, the KIC Profiler hardware is not connected properly.
- Page 68 OK. • The KIC 2000 software will have you enter the new set points and then recalculate the capability of your oven. Then continue forward through the Thermocouple Attachment screens until you get to the Select thermocouples screen. Then select the Start Profile button (Green traffic light) to start the profile, once the oven has stabilized.
- Page 69 The live profile graph display will show the profile plot on the graph for the current profile that is running. See Figure 100. If you have a SlimKIC 2000 or KIC Explorer-Data log model, you will not see a live profile display. Live temperature readings and Delta...
-
Page 70: S Upport
If you purchased the Navigator option, the predicted oven settings will be displayed as well. If the Air TC or either Wave TC does not touch the wave(s), the KIC 2000 software will display an error message: See Figure 102.