
Subscribe to Our Youtube Channel
Related Manuals for Studiomaster DX400


Summary of Contents for Studiomaster DX400
- Page 2 5. TECHNICAL SPECIFICATIONS ELECTRICAL SPECIFICATIONS 500W 400W 300W 200W 4ohms 250W 2 200W 2 150W 2 100W 2 Stereo mode, 1KHz (Both channels driven) 8ohms 140W 2 120W 2 85W 2 60W 2 Input sensitivity Balanced 1/4 TRS and XLR: 0.89V(-1dBV); unbalanced RCA: 1.67V (4.5dBV) Input impedance Unbalanced Balanced...
- Page 3 4. QUICK START IMPORTANT SAFETY SYMBOLS Use only with the cart, stand, tripod, bracket, or table specified by the manufacturer, or When operate the amplifier, please make sure: sold with the apparatus. When a cart is used, Please check the AC voltage available in your country before connecting your amplifier to the AC socket. CAUTION use caution when moving the cart/apparatus RISK OF ELECTRIC SHOCK...
- Page 4 3. INSTALLATION AND CONNECTION 3.2 Audio Connection Ventilation Fuse All models present with XLR, 1/4 phone jack, RCA and Do not block areas of ventilation opening. Failure to do could To prevent the risk of fire and damaging the unit, please use 3.1 Installing in A Standard Rack result in fire.
- Page 5 7. AC Inlet socket 1. INTRODUCTION Standard 3-conductor type IEC power connector, serve to connect the amplifier to the mains supply via the enclosed power cord. Thank you very much for expressing your confidence in our product by purchasing 500W/400W/300W/200W professional Please make sure the voltage available in your country and how the voltage for your amplifier is configured before attempting Power amplifier.
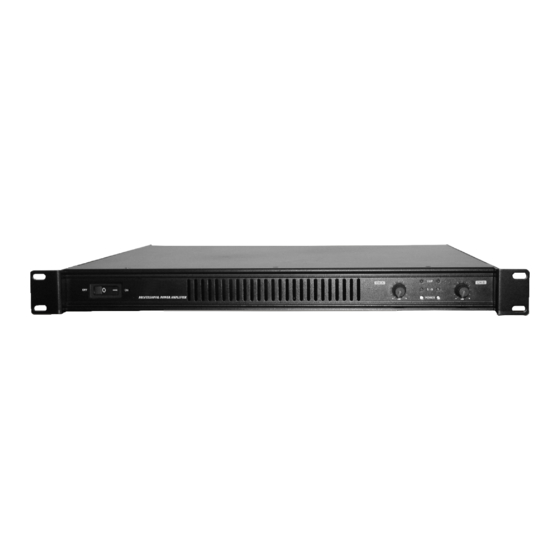
- Page 6 2. CONTROL ELEMENTS 4. POWER Indicator These blue LED indicators light up when the power switch is turned ON. 2.1 Front Panel 5. Volume Control The front control elements of all models are identical, so we have used the 500W as the representation to assure simplicity. These volume controls are used to adjust the volume of corresponding channel (CHA or CHB) in 40 steps in the range of - dB to 30dB.
Need help?
Do you have a question about the DX400 and is the answer not in the manual?
Questions and answers