Table of Contents
Advertisement
Advertisement
Table of Contents

Related Manuals for Aqua J-8010

Summary of Contents for Aqua J-8010
-
Page 2: Prepare Indoor Control Panel Pit
Content Cover Acknowledge Content Important Precautions Filtration Introduction Filtration Technical Parameters Prepare Technical Compartment Pit Prepare Indoor Control Panel Pit Connect The Control Panel To The Unit Operation Guiding For Parts Of The Unit ... -
Page 3: Cover
Important Precautions 1. In order to prevent severe damage to the unit, never power on the unit when it is outside of the swimming pool. 2. The power cord must be connected to an appropriate earthed socket. 3. Do not operate the unit when people are in the pool. 4. - Page 4 Introduction “Degaulle” Pool Water Treatment Principle Vacuum negative pressure has been produced when the motor and pump running →Raw water will be drawn from skimmer opening on the side of the unit to the filter basket (Water come into the basket from the surface to filter the leaves…) →After basket filtered, water outgoing to the filter bag (5~15microns) for precision filtered →After filtered by Bag filter, water will be discharged back to the pool →”Degaulle”...
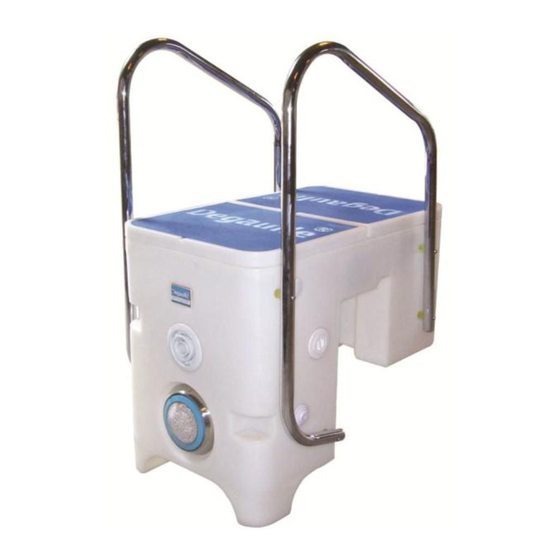
- Page 5 “Degaulle” Filtration System Technical Parameters Model Number: J-8010 Specification: 960×580×810mm Power: 0.75Hp Voltage: 220V/50Hz Filtering: 15m Underwater Light: 6W/12V LED Filter Capability: 5um Filter Medium: Bag Filter N.W.: 80Kgs G.W.: 95Kgs Available Colors: White, Yellow, Blue, Red Packing Size: Main Host:1060×670×880mm...
- Page 6 Fig.1 2. Please ensure the size for technical compartment pit is : 960×530×420mm (Fig.2) 3. Please make sure there is drainage pipe for the technical compartment water outgoing. (Fig.2) if there is no connector inside of the unit; please open a suitable hole yourself.
- Page 7 Fig. 3 6. Please backfill fine sand (Depth≥110mm) at the bottom of the technical compartment pit for shock absorption and noise level reduction. 7. Please backfill sand or concrete and then coping stone to fix the unit and decorate the gap between compartment and the pool wall.
- Page 8 Fig 5 Operation Guiding For Parts Of The Unit 1. Empty air inside of the pump and plumbing system inside of the unit with full of water through the priming jet. 2. Add Chemicals into the chlorine feeder (if there is in the technical compartment) or filter basket in filtration compartment.【Ref.: 4g chlorine for 1 m pool water】...
-
Page 9: Content
technical compartment (back vac.port).get the vacuum hose to be well connected with front port and turn the valve inside of the filtration system to correct position, start the motor to begin the vacuum. (Fig. 6) 2. Delivery/Return Connect the port at the side of technical compartment to plumbing system around the pool and close the port at the side of the filtration system. - Page 10 (Fig.8) .If no setting, pump will enter into automatic working mode; “PUMP” button will not work and the unit will work according to the date& time displaying in the screen. Fig. 8 “POWER” button again, the unit will be standby, Indicator above the button ④...
- Page 11 Set the Date, Time and Week with “UP” and “DOWN” buttons and confirm with “ENTER” button. (Fig. 10) Fig. 10 ② Pump Working Modes Press “MENU” Button to get Pump working mode same as showing below (Fig.11) and then press “UP” and “DOWN” buttons to set the working mode to manual or automatic.【MAN: Manual AUT: Automatic】...
-
Page 12: Clean The Pool Manually With Filtration System
power on, pump will work according to the time setting cycling by week. ④ Blacklist setting under automatic working mode Under automatic working mode, press “MENU” Button to get blacklist setting menu showing below (Fig.13). Press “UP” and “DOWN” buttons to set the date and confirm with “ENTER”... -
Page 13: Daily Maintenance
10. Remove the clips from the membrane 11. Turn the membrane inside out 12. Place it on the filter bag stand ( if there is) or other suitable places 13. Hose it down until all dirt has been removed 14. Turn the membrane back and replace it into the filtration system 15. -
Page 14: Frequent Asked Questions
Frequent Asked Questions 1. Q: Why Control panel does not display? A: No power supply or connector loosen. 2. Q: Why the motor works but no water out? A: Pump or plumbing system is not vacuumed, water inlet does not work or filter bag is too dirty.
Need help?
Do you have a question about the J-8010 and is the answer not in the manual?
Questions and answers