Table of Contents
Advertisement
Advertisement
Table of Contents

Related Manuals for ThingMagic Astra


Summary of Contents for ThingMagic Astra
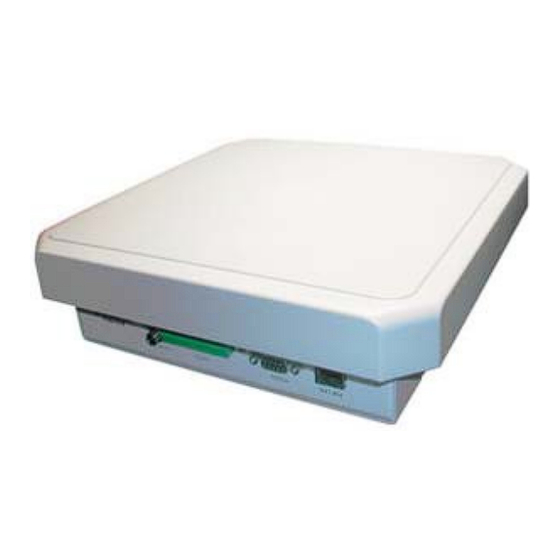
- Page 1 875-0025-03 RevA Astra Reader User Guide...
- Page 2 Other product names mentioned herein may be trademarks or registered trademarks of Trimble or other companies. ©2012 ThingMagic – a division of Trimble Navigation Limited. ThingMagic and The Engine in RFID are registered trademarks of Trimble Navigation Limited. Other marks may be protected by their respective owners.
- Page 3 Regional Information ................8 Astra North America ..........................8 Astra Australia ................................
- Page 4 Appendix A: Astra Antenna Information ........
- Page 5 Reset to the Default Configuration ................70 Collecting Diagnostic Data for ThingMagic Support ......................71...
-
Page 6: Astra User Guide
This document assumes usage of an Astra with firmware version 4.1.21 or later. This document explains how to set up the Astra Reader, how to configure it for network operation, and how to use the browser-based interface. See the corresponding Astra Firmware Release Notes for operational differences that what is in this User Guide specific to a firmware version. - Page 7 Introduction • Connecting to the Astra - Describes the methods available for connecting to the Astra over the ethernet, WiFi and Serial Console interfaces. – Setting Up for Single Reader Operation - Connect using a direct ethernet connection from a Host PC to the Astra.
-
Page 8: Regional Information
ACMA LIPD Class Licence Variation 2011 (No. 1) regulatory configuration is required. Astra Australia Model Number = Astra-AU Astra-AU readers support FCC 47 CFG Ch. 1 Part 15 regulations. No special regulatory configuration is required. Astra Korea Model Number = Astra-KR Astra-KR readers support KCC regulations. -
Page 9: Astra India
Single Channel Mode If only a single channel is moved to the RF Channels in Use field, the Astra will occupy the set channel for up to four seconds, after which it will be quiet for 100ms before transmitting on the same channel again.? Multi Channel Mode If more than one channel is moved to the RF Channels in Use field,.the Astra will occupy... - Page 10 This means that when configured for bistatic operation the external antenna will be the Transmit antenna and the integrated antenna will be the Receive and LBT antenna. This is the reverse of the Astra-NA and Astra-KR which use the integrated antenna for transmit.
-
Page 11: Programming Interfaces
Programming Interfaces Programming Interfaces MercuryAPI Applications to control the Astra reader, and all ThingMagic Reader products, can be written using the high level MercuryAPI. The MercuryAPI supports Java, .NET and C (for on-reader applications) programming environments. The MercuryAPI Software Development Kit (SDK) contains sample applications and source code to help developers get started demoing and developing functionality. -
Page 12: Setting Up For Single Reader Operation
A computer with a Java-enabled web browser • An optional additional antenna Note To install the Astra Reader, no software is required. To set up the Reader as part of a larger scale deployment that uses Power Over Ethernet (PoE), refer to Networking the Reader. -
Page 13: Setup Procedure
Antenna Requirements The performance of the Astra is affected by antenna quality. Antennas that provide good 50 ohm match at the operating frequency band perform best. Specified sensitivity performance is achieved with antennas providing 17 dB return loss or better across the operating band. - Page 14 When checked the two antennas will operate as a single logical antenna with the integrated antenna used for transmit and the external antenna for receive. If the external antenna is not connected and the Antenna Mode is set to Bistatic the Astra will not allow RF operations.
-
Page 15: Powering Up The Reader
Using Power Over Ethernet (PoE). By default, if both DC power supply and PoE are provided to the Astra Reader, the Reader will use only the DC power supply as the source of power. In this situation, if DC power is turned off, then the Reader requires a power cycle in order to function properly and use PoE (even if it is already plugged in). -
Page 16: Interpreting The Reader Indicator Led
Astra Reader. Interpreting the Reader Indicator LED The Astra Reader has one main multi-color LED that indicates Reader activity as shown in Figure 2. By observing the color and the state of the LED, you can determine the current operational status of the Astra Reader. -
Page 17: Connecting Your Pc To The Reader
Connect the other end of the Ethernet crossover cable to the Reader, as shown in Figure 4. Figure 4: Connecting the PC to the Astra Reader Setting Up Your PC's TCP/IP Connection If you are using an operating system other than Windows XP, consult your network administrator regarding how to set up your PC’s TCP/IP connection. - Page 18 Setting Up for Single Reader Operation Figure 5: Local Area Connection Status Window Astra User Guide...
- Page 19 Setting Up for Single Reader Operation Click the Properties button. The Local Area Connections Properties window appears, as shown in Figure 6. Figure 6: Local Area Connection Properties Window Scroll down to the bottom of the list and select Internet Protocol (TCP/IP). Astra User Guide...
- Page 20 Select the Use the following IP address: button. Enter these settings: IP address: 10.0.0.102 Subnet mask: 255.255.255.0 Default gateway: 10.0.0.1 Click OK to save and exit the window. 10. Click OK in the Local Area Connection Properties window. Astra User Guide...
-
Page 21: Logging On To The Reader
The Login dialog box appears. Enter the following: Default user name: “web” Password: “radio” (all lower-case). Click OK. The Reader displays its browser-based interface. The initial page that appears is the Status page, as shown in Figure 8. Astra User Guide... - Page 22 Setting Up for Single Reader Operation Figure 8: Astra Status Page Astra User Guide...
- Page 23 To start reading tags and to control the Reader, see Controlling the Reader. • This section guides you through all the available Reader functions including how to read and write tags, change settings, load firmware, and reboot the Reader in Safe Mode. Astra User Guide...
-
Page 24: Networking The Reader
Setting Up for Single Reader Operation Networking the Reader You can set up the Astra Reader to use either manual IP addressing or DHCP. By default, the Reader has automatic addressing enabled that boots up for a DHCP server. DHCP can be used to automatically assign the Reader's IP address, subnet mask, default gateway, NTP Server, DNS server, and hostname. - Page 25 Setting Up for Single Reader Operation Figure 9: Astra Modify Settings Page Astra User Guide...
-
Page 26: Using Power Over Ethernet (Poe)
Networking the Reader Using Power Over Ethernet (PoE) Another way of powering up the Astra Reader is to use a single Ethernet cable that is connected to a Power over Ethernet (PoE) network. In this configuration, the power converter that is supplied with the Astra Reader is not used. -
Page 27: Using Dhcp
The Local Area Connection Properties window appears, as shown in Figure 6. Scroll down to the bottom of the list and select Internet Protocol (TCP/IP). Click on the Properties button. The Internet Protocol (TCP/IP) Properties window appears, as shown in Figure 11. Astra User Guide... - Page 28 Click OK to save and exit the window. 10. Click OK, in the Local Area Connection Properties window. 11. Click OK, in the Local Area Connection Status window. The PC may take few minutes to save the new network settings. Astra User Guide...
-
Page 29: Automatic Hostname: Astra-Xxxxxx
Automatic Hostname: Astra-xxxxxx At startup, the Reader, by default, generates an 'automatic hostname' by appending the last three bytes of its MAC address to its hostname, such as astra-210027. Note Your network must have properly configured DNS servers if you wish to connect to the Reader through its hostname. -
Page 30: Reader Discovery
Note Each ThingMagic Reader in the Bonjour frame is referenced by the domain name (ThingMagic) followed by the hostname (Astra) and the last six characters of the device's MAC address (such as 210027). A device frame on the left side of the browser opens and lists the names of all active Bonjour devices available. - Page 31 Number of connected antennas • Status information To enable Reader Listing to discover Readers available on the network: Click on the Reader List link in the navigation menu. The Astra Reader Listing Page appears, as shown in the Figure 12. Astra User Guide...
- Page 32 Networking the Reader Figure 12: Astra Reader Listing Page Astra User Guide...
-
Page 33: Connecting To The Astra Serial Port
Astra supports communication over its serial port to enable you to: • Access the boot logs. • Access the console for emergency recovery into Safe Mode. Before you connect to the Astra serial port, ensure that you have: • A PC with a serial port. • A serial terminal program. -
Page 34: Using Gpio
Using GPIO Using GPIO The Astra Reader includes 12-pin GPIO screw terminal connector. This connector is used to support four opto-isolated general purpose inputs and four opto-isolated general purpose outputs. The values of the GPIO lines can be Get and Set using the RQL and the C-API interfaces. - Page 35 GPIO Output (GPIO_1) GPIO Output (GPIO_2) GPIO Output (GPIO_5) 10. Amber LED - Output 11. Green LED - Output 12. Isolated-GND Note: The values in parentheses indicate the enumeration used by the API and RQL for each GPIO line. Astra User Guide...
-
Page 36: Controlling The Reader
The Reader uses RFID (Radio Frequency Identification) technology to read and write data stored on RFID Tag(s). The Astra Reader provides four levels of access to RFID tag(s): Browser-Based Interface A web browser controls high-level Reader operations through a Java Applet. -
Page 37: Status
A navigation menu and the Status page appear in the browser, as shown in the Figure 8. Status Page The Astra Status Page, as shown in the Figure 8, indicates the connected antennas, software version, and LAN configuration of the Reader. Astra User Guide... -
Page 38: Query
Query Page Use the Astra Query Page to set up and run Anti-Collision Searches quickly, and to obtain immediate feedback. This is useful for debugging as well as for verifying performance after installation is completed. - Page 39 RF energy on its antennas. Query Results As shown in Figure 13, the displayed tag data contains useful information, including the tag number, number of times a tag is read, tag data, antenna, and protocol. Figure 13: Query Results Astra User Guide...
- Page 40 Reader, protocol, antenna, tag ID, and CRC for each tag found. A space separates the groups of tags found during each query. You can easily copy and paste the raw data into other documents. Figure 14: Astra Raw Data Page Astra User Guide...
-
Page 41: Write
Unix time in seconds and microseconds from 1-1-1970 when tag was seen. For example: 3004832.188394 Write Page The Astra Write Page, as shown in Figure 15, enables you to replace the ID or data that is encoded on a tag. Consider the following guidelines when writing to tags: •... - Page 42 Controlling the Reader Figure 14: Astra Raw Data Page Astra User Guide...
- Page 43 Place the tag to be read within the detection zone of the antenna. Click the Submit Query button to find the selected tag type. Query results appear in the bottom pane. Note that the query can be run only once, unlike on the Query page. Astra User Guide...
-
Page 44: Settings
Controlling the Reader Settings Page The Astra Modify Settings Page enables you to change network and Reader security settings. The page is divided into seven sections: • RFID Protocol Settings • Network Settings: All Interfaces • Network Settings: Ethernet Interfaces •... -
Page 45: Restart
Turning on automatic hostname will append the last six numbers (3 bytes) of the Hostname Reader’s address to the text in the hostname field. For example, given a hostname of astra and a MAC Address of 00:12:A4: 13:47:AC, the automatic hostname would be Astra-1347ac. Hostname This field contains the name of the Reader. - Page 46 This network configuration will be used by the Reader if DHCP is enabled but Netmask fails to acquire an IP address. Fallback This network configuration will be used by the Reader if DHCP is enabled but Gateway fails to acquire an IP address. Astra User Guide...
- Page 47 Same as Boot Config options. Used when downloading new firmware to the Options Reader. Boot Firmware URL to the firmware file to be downloaded at startup. Syslog Host Hostname for remote logging. All log levels in syslog are sent to this host. Astra User Guide...
- Page 48 SSH tunnel. RQL) SNMP Enabled Enables access to the reader statistics as defined by the EPC Global Reader MIB via Simple Network Management Protocol (SNMP). MDNS enabled Enables reader discovery via Multicast DNS. Astra User Guide...
- Page 49 Controlling the Reader Restart Page The Astra Restart Page enables you to activate reconfigured network Reader settings or to recover from a Reader error. To restart the Reader: Click the Restart link on the navigation menu. The Restart Reader page appears, as shown in Figure 16.
-
Page 50: Diagnostics
The Diagnostics page, as shown in Figure 18, expands on information found on the Status Page, including the current settings of the Reader, comprehensive version information, and the current status of network interfaces. Figure 18: Astra Diagnostics Page Astra User Guide... -
Page 51: Statistics
Controlling the Reader Statistics Page The Statistics Page, as shown in Figure 19, displays the Astra Reader statistics. These statistics are defined by the EPCglobal Reader Management Standard v1.0.1, specifically, the statistics defined in sections 5.5 AntennaReadPoint and 5.6 Source Object. -
Page 52: Firmware Upgrade Utility
Controlling the Reader Firmware Upgrade Utility Astra provides Firmware Upgrade Utility for updating the firmware. Click the Firmware link on the navigation menu. The Firmware Update page appears, as shown in Figure 20. Figure 20: Astra Firmware Update Page Do one of the following: In the File upload field, enter the complete URL network pathname of the •... - Page 53 The status frame at the bottom of the page displays the progress of the update. Restart the reader to activate the new firmware. The old firmware remains active until the Reader is restarted. Note If for any reason a firmware update fails, the device may restart in Safe Mode. Astra User Guide...
-
Page 54: Using Safe Mode
Reader settings. You can then reconfigure the desired settings through the web interface. After you have completed the maintenance, restart the Reader to activate the changes. Example compatible Host IP/subnet settings: • IP address: 10.0.0.102 • Netmask: 255.255.255.0 Astra User Guide... -
Page 55: Forcing Astra To Boot In Safe Mode
Click the Enter button. Type the command: reboot Click the Enter button. Reader reboots. The Astra will now boot into Safe Mode and you can connect to it using the steps defined Connecting Your PC to the Reader. Astra User Guide... -
Page 56: Reader Rf Power
Pmax = 36 dBm - Antenna Gain + Cable Loss Reader RF Power Example The antenna provided by ThingMagic that is listed in Appendix A: Astra Antenna Information has the following features: •... -
Page 57: Setting The Reader Rf Power
Enter the maximum setting based on your cable type, length, and antenna type. Scroll down to the bottom of the Astra Modify Settings Page, and click Save changes button. The Settings Page will reload automatically after the settings have been saved. -
Page 58: Mounting The Reader
Appendix B: Astra Dimensions for mounting hole locations and dimensions. When mounting the Astra Reader it is recommend to use an NRTL approved VESA 100 mount, following the standard mounting procedure of the VESA mount referencing the Astra mounting hole locations as shown in Figure 21. -
Page 59: Variables Affecting Performance
These cables should be laid flat and not coiled up. W A R N I N G ! The Astra antenna ports may be susceptible to damage from Electrostatic Discharge (ESD). Equipment failure can result if the antenna or communication ports are subjected to ESD. -
Page 60: Tag Considerations
• Tag Orientation: Reader performance is affected by the orientation of the tag in the antenna field. The ThingMagic antenna is circularly polarized, so it reads face-to but not edge-to. • Tag Model: Many tag models are available. Each model has its own performance characteristics. -
Page 61: Astra Specifications
- Meet the above operating specs - The output must comply with SELV and LPS characteristics - Have a maximum operating ambient temperature that meets or exceeds the intended Astra operating temperatures as covered under the UL Listing of the power supply. Environmental Operating Temperature: -20°... -
Page 62: Mechanical
Relative Humidity: 5 to 95% non-condensing Mechanical Reader Length: 25.7cm (10.125 in) Width: 25.7cm (10.125 in) Depth: 7.62cm (3 in) Weight: 1.8kg (4 lb) Supported UHF Tag Protocols EPC Class 1 GEN2 User Memory 64MB DRAM 32MB Flash Astra User Guide... -
Page 63: Compliance, Warranty, And Ip Notices
Under Industry Canada regulations, this radio transmitter may only operate using an antenna of a type and maximum (or lesser) gain approved for the transmitter by Industry Canada. To reduce potential radio interference to other users, the antenna type and its Astra User Guide... - Page 64 Le fonctionnement de l’ appareil est soumis aux deux conditions suivantes: Cet appareil ne doit pas perturber les communications radio, et Astra User Guide...
- Page 65 Au but de conformer aux limites d'exposition RF pour la population générale (exposition non-contrôlée), les antennes utilisés doivent être installés à une distance d'au moins 25 cm de toute personne et ne doivent pas être installé en proximité ou utilisé en conjonction avec un autre antenne ou transmetteur. Astra User Guide...
-
Page 66: Appendix A: Astra Antenna Information
You must also provide strain relief for all Reader connections. The only antennas authorized by the FCC for use with the Astra Reader are listed in the table below. Detailed information on each antenna is available from their respective manufacturers. -
Page 67: Appendix B: Astra Dimensions
Appendix B: Astra Dimensions Appendix B: Astra Dimensions Figure 22: Astra Dimensions Astra User Guide... -
Page 68: Appendix C: Advanced Administration
Use the httpPassword command: Usage: httpPassword <filename> <realm> <username> To create a new userid/password file: [root@astra-21071f] $ cd /tmp [root@astra-21071f] $ httpPassword -c users.db thingmagic rfid_user New password: Confirm password: [root@astra-21071f] $ mv /tmp/users.db /etc/appWeb/users.db To add a user to an existing file: [root@astra-21071f] $ cd /tmp [root@astra-21071f] $ cp /etc/appWeb/users.db /tmp/users.db... -
Page 69: Changing Console/Root Password
Changing console/root password: To change the root password, used by the command-line interface and console access, use standard linux "passwd [userid]" command. [root@astra-21071f] $ passwd Changing password for root Enter the new password (minimum of 5, maximum of 8 characters) Please use a combination of upper and lower case letters and num- bers. -
Page 70: Appendix D: Troubleshooting
• Check antenna cables • Try known good Gen2 tags Reader RF Power • Increase Reader error LED stays on Collecting Diagnostic Data for ThingMagic Following Support and send to support. Read “Performance” is slow Performance, as it relates to tag reading, is very usecase dependent. -
Page 71: Collecting Diagnostic Data For Thingmagic Support
Collecting Diagnostic Data for ThingMagic Support When experience problems connecting to the Astra or performing RF (reading, writing) operations it will be necessary to gather the following information to help diagnose the problem. -
Page 72: Analyzing The Boot Logs
One of the most common problems is due to incorrect or unexpected network configuration, resulting in not being able to connect to the Astra. The best way to start diagnosing a network problem is to understand what the Astra’s network settings are after its powered up.
Need help?
Do you have a question about the Astra and is the answer not in the manual?
Questions and answers