
Subscribe to Our Youtube Channel
Related Manuals for Sencore SMD 989

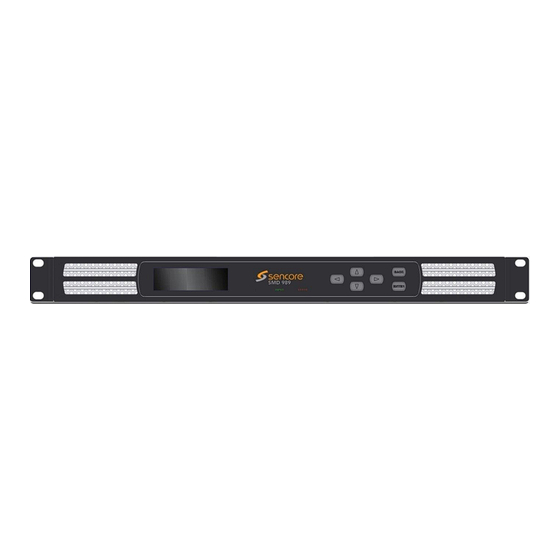
Summary of Contents for Sencore SMD 989
- Page 1 SMD 989 DVB-S2 Satellite Modulator User Manual January 2018 Form 8011L www.sencore.com | 1.605.978.4600 Revision 3.2.2...
- Page 2 Inquiries should be made directly to those companies. This document may also have links to third-party web pages that are beyond the control of Sencore. The presence of such links does not imply that Sencore endorses or recommends the content on those pages. Sencore acknowledges the use of third-party open source software and licenses in some Sencore products.
- Page 3 SMD 989– User Manual Revision History Date Version Description Author 08/09/2010 Initial Draft 11/12/2010 Product Release 11/24/2010 Minor Editing 1/5/2011 Small Additions 5/2/2011 Updated for 2.0 Release 10/28/2011 Updates for 2.1 Release 01/17/2012 Update for 2.2.0 Release 05/01/2012 Update for 2.3.0 Release 01/16/2013 Update for 2.4.0 Release...
- Page 4 Replacement Parts: When replacement parts are required, be sure the service technician uses replacement parts specified by Sencore, or parts having the same operating characteristics as the original parts. Unauthorized part substitutions made may result in fire, electric shock or other hazards.
-
Page 5: Safety Precautions
FCC Class A Information The SMD 989 has been tested and found to comply with the limits for a Class A digital device, pursuant to Part 15 of the FCC Rules. These limits are designed to provide reasonable protection against harmful interference when the equipment is operated in a commercial environment. - Page 6 AC Dual Redundant Power Connection (optional) ............... 21 DC Dual Redundant Power Connection (optional) ............... 21 Rack Installation ........................22 Controlling the SMD 989 Using the Web GUI ................23 ASI Inputs ..........................24 IP Inputs (SMD 910) ........................26 IP Inputs SMD 912(A)(A) ......................
- Page 7 Alarms/Logs Configure ......................65 SNMP Trap Configurations ....................68 About Tab ..........................70 Controlling the SMD 989 Using the Front Panel ............... 71 Front Panel Quick Actions Menu....................71 Front Panel Modulator Settings ....................72 Modulator Input Configuration ....................72 Modulator Configuration –...
- Page 8 SMD 989– User Manual Events ........................... 92 SNMP Trap Configurations ....................93 Front Panel About ........................93 About Software ........................93 About Hardware ........................93 Licenses ..........................94 Appendix ............................95 Specifications ..........................95 Open Source Software ......................102 Warranty ..........................103 Support and Contact Information ....................
- Page 9 SMD 989– User Manual Table of Figures Figure 1: Basic SMD 989 platform ......................13 Figure 2: Contact closure alarm output connector ................13 Figure 3: Contact closure pin connection ..................... 14 Figure 4: SMD 910 single TS input with IF output ................. 15 Figure 5: SMD 912(A) single TS input with monitor and IF output ............
- Page 10 SMD 989– User Manual Figure 55: Update confirmation ......................58 Figure 56: Updating unit .......................... 58 Figure 57: Unit restarting ......................... 58 Figure 58: Software rollback ........................59 Figure 59: Update License ........................59 Figure 60: Reference clock ........................59 Figure 61: Network configuration ......................
-
Page 11: Introduction
SNMP which also provide alarms and traps that may be configured to alert users when errors occur through automation systems. Through the SMD 989 web interface, front panel, or SNMP the user can perform tasks such as configuration, monitoring, and troubleshooting. -
Page 12: Abbreviations
SMD 989– User Manual Abbreviations – 16 APSK 16 Amplitude and Phase Shift Keying – 32 APSK 32 Amplitude and Phase Shift Keying 64 APSK 64 Amplitude and Phase Shift Keying – Asynchronous Serial Interface Bose and Ray Chaudhuri code –... -
Page 13: Hardware Overview
The pinout in Figure 3 shows the relays in a de-energized state. When the SMD 989 is on the relays energize. This allows the possibility to monitor the state of the relays if the unit losses power the relays de-energize and a redundant unit can be activated. -
Page 14: Mhz Reference Input
IP address of the unit. The control port is capable of both DHCP and static IP addressing. By default the IP address of the SMD 989 is statically set to 10.0.0.60. Supported Web Browsers include: ... -
Page 15: Smd 910 Option (Single Or Multistream/If Output)
SMD 989– User Manual SMD 910 Option (Single or Multistream/IF Output) The SMD 910 Module option offers single stream or S2 multistream modulation. A single stream input is selected with one of the ASI and IP inputs to the modulator. There is one IP input port and four ASI ports available by default and come standard. -
Page 16: Smd 920 Option (L-Band Output)
The SMD 920 must accompany either an SMD 910 or SMD 912(A) modulator board in the SMD 989 platform. Inputs to the SMD 910 or SMD 912(A) are described on the previous page of this manual. The SMD 920 module receives an IF input from the SMD 910 or SMD 912(A) and upconverts it to an L-Band frequency output. -
Page 17: Smd 940 Option (10Mhz Reference On L-Band)
SMD 989– User Manual L-band primary output (50 ohm SMA connector) L-band monitor output (50 ohm SMA connector -20 dBc from primary) SMD 940 Option (10MHz Reference on L-Band) The SMD 940 Option, when used with options SMD 920, adds the capability to combine the L- Band output with an internal 10MHz oven-controlled crystal oscillator or with an external 10MHz reference. -
Page 18: Smd 952 Option (Dual Redundant Ac Power Supply)
SMD 989– User Manual SMD 952 Option (Dual Redundant AC Power Supply) The SMD 952 Option Dual Redundant AC Power Supply provides a redundant hot swappable power supply for the unit. If either power supply fails the backup supply will be automatically activated. -
Page 19: Software Licensing Overview
SMD 989– User Manual Software Licensing Overview SMD 961 DVB-S Modulation The SMD 961 option is a software license allowing the modulator board to modulate DVB- S/DSNG using QPSK, 8PSK, or 16QAM. This option is enabled on all SMD 910 or SMD 912(A)(A) modules by default. -
Page 20: Smd 965 Option (30 Msps)
SMD 989– User Manual SMD 965 Option (30 Msps) The SMD 965 option is a software license allowing the modulator SMD 910 board or SMD 912(A)(A) board to modulate at a symbol rate up to 30 Msps. The default symbol rate is 0.5 to 15 Msps and the SMD 965 option allows the modulator to extend the rate up to 30 Msps. -
Page 21: Installation
The SMD 989 is equipped with a temperature monitors to ensure operating temperature is maintained. Power Connection Using the proper power connections is vital to the safe operation of the SMD 989. Only use the supplied 3-prong power connector or one with equal specifications. AC Power Connection The SMD 989 is capable of either operating on 120V or 240V systems. -
Page 22: Rack Installation
SMD 989– User Manual Rack Installation To install the SMD 989 into a rack use the following steps: 1. Determine the desired position in the rack for the SMD making sure that the air intake on the front of the unit and the exhausts on the rear of the unit will not be obstructed. -
Page 23: Controlling The Smd 989 Using The Web Gui
SMD 989, type the IP address of the unit to access the web interface. By default the IP address of the unit is set to static at 10.0.0.60. The SMD 989 is also capable of DHCP addressing and accessing via host name. -
Page 24: Asi Inputs
SMD 989– User Manual ASI Inputs The ASI inputs to the modulator are shown on the left column of the home screen for each bay. The available inputs are listed in sections or rows. Each input has either an enabled or disabled status. -
Page 25: Figure 18: Asi Configuration
SMD 989– User Manual Figure 18: ASI configuration Each input port listing or section contains an active input bitrate indication on the right side of the section. When the input is enabled and an active transport stream is present on that input, the bitrate counter indicates the incoming bitrate in Mbps. -
Page 26: Ip Inputs (Smd 910)
SMD 989– User Manual IP Inputs (SMD 910) The IP inputs to the SMD 910 modulator are shown on the left column of the home screen for each bay. The available IP inputs are listed in rows under the ASI inputs. Each IP input has either an enabled or disabled status. -
Page 27: Figure 20: Expanded Ip Status
SMD 989– User Manual Each input has a listing of advanced details providing information regarding the settings and status of the input. Clicking on the “ ” sign by each IP port allows the advanced details to be shown as presented in Figure 20. Click on the down arrow to close the advanced details list menu. - Page 28 Increasing this value will allow the SMD 989 to receive streams on networks with high network jitter. Increasing this value also increases the latency of the SMD 989. IGMP Filter Mode Exclude Used on networks supporting IGMPv3. If this...
-
Page 29: Figure 22 Ip Inputs On Smd912
SMD 989– User Manual IP Inputs SMD 912(A) The SMD 912(A) or SMD 912(A) provides two physical IP input ports compared to one port on the SMD 910. It further provides RTP/FEC receive capabilities along with configuration of the input buffer by delay time. The IP inputs are also monitored for FEC status information and errors. -
Page 30: Figure 23 Ip Input Settings On Smd 912(A) Modulator
The Receive Enable/Disable field is used to make the input active or inactive. When enabled or active the SMD 989 begins to monitor the input status with the alarms and logging. By default most input ports are disabled, but by clicking on the settings tab for an IP input and selecting enable the port is moved into the Enabled list. - Page 31 This is the only setting required to receive a unicast stream. Enabled Enabling FEC (Forward Error Correction) Disabled tells the SMD 989 to look at Destination Port +2 and Destination Port +4 for a SMPTE 2022 FEC Matrix. RTP SSRC Enabled...
-
Page 32: Figure 24 Ip Input Details List With Smd 912(A)
SMD 989– User Manual appropriate heading in the table. There can be up to 64 addresses entered with the highest address taking priority over the addresses below it. IGMPv2 is used to join/leave multicast streams by default if no IGMP Filter addresses are entered. If IGMP Filter Mode addresses are specified then IGMPv3 is used. -
Page 33: Modulator Settings
SMD 989– User Manual Modulator Settings The section overviews the processing or modulator as shown in the middle of the individual bay home screen. Depending on the enabled licenses, the status might look slightly different as shown in Figure 25 and Figure 26. -
Page 34: Configure Modulator – Modulation
SMD 989– User Manual Configure Modulator – Modulation To configure the modulator click on the “Configure Modulator Options” icon located at the top of the middle “Modulators” section. Figure 27 is a representation of the menu with settings for single stream (single DVB-S2 CCM mode) modulation. -
Page 35: Configure Modulator – Inputs
In TS Analysis mode failover is based on transport stream errors or sync loss. This allows the SMD 989 to switch to a backup source when there are errors in the transport stream even if it does not lose sync. -
Page 36: Configure Modulator – Modulation Parameters
SMD 989 calculates the maximum input bit rate and lists it in the Max. Bitrate field. Description: Input Bit Rate mode allows the entry of a known input bit rate. The SMD 989 then calculates the needed symbol rate and lists it in the Symbol Rate field. -
Page 37: Figure 31: Supported Modulations & Code Rates For Dvb-S/Dsng And Dvb-S2
SMD 989– User Manual Modulation/FEC: The modulations and supported code rates are shown in Figure 31. The supported modes are selectable in the drop down list in the Modulation/FEC field. The listings will depend on unit licensing and the selected mode in the Modulation Mode field at the top of the menu. - Page 38 SMD 989– User Manual Description: Determines whether the spectrum is inverted or normal. Note: When the SMD 920 L-Band option is installed, the default spectral inversion is inverted as the upconverter will invert. Setting the output to Inverted will give a normal output from the upconverter.
-
Page 39: Configure Modulator – Carrier Id
SMD 989– User Manual Configure Modulator – Carrier ID Carrier ID – DVB CID Global Unique ID: The SDM 989 can optionally provide a carrier added to the transmission that contains a unique identifier value (DVB CID Global Unique ID). The identifier value may be used to trace and quickly resolve a satellite interference event to a transmitting source. - Page 40 SMD 989– User Manual Latitude: Provide entry of a latitude pure decimal value to the CID information field. Value Entry Enabled/Disabled Description: When enabled, the entered latitude value is added to the Information Field of the CID transmission. Enter values 0 to 90 with up to 3 decimal places. Enter positive values for northern hemisphere and negative values for the southern hemisphere.
-
Page 41: Configure Modulator – Ts Analysis
SMD 989– User Manual Configure Modulator – TS Analysis Configure TS Analysis (SMD 970 option) The Configure TS Analysis allows the setup of TS Analysis. TS Analysis errors are as defined by TR 101 290 [4]. The TS Analysis may be used for failover input switching, error logging, alarms, SNMP traps, and/or relay switching. -
Page 42: Configure Modulator – S2 Multistream
SMD 989– User Manual Configure Modulator – S2 Multistream Configuration for DVB-S2 Multistream Modulation is similar to single stream settings with the ability to add 6 streams to the modulation as shown in Figure 35 below. Figure 35 SMD 963 multi-stream configuration Multi-stream is supported in DVB-S2 CCM and VCM modes using the SMD910 modulator. -
Page 43: Configure Modulator - Prbs
SMD 989– User Manual Configure Modulator - PRBS The PRBS tab provides selection of the available PRBS (Pseudo Random Binary Sequence) test signal available for use with either the SMD 910 or SMD 912(A) modulators. PRBS (Pseudo Random Binary Sequence): The PRBS feature provides a digital test signal with known properties used for BERT (bit error rate testing) of satellite equipment or transmission paths. -
Page 44: Configure Modulator - Biss
SMD 989– User Manual Configure Modulator - BISS Configure BISS Scrambling (SMD 971 Option) The BISS Scrambling is configured by selecting the BISS tab in the Configuration Modulator window. When BISS Scrambling is enabled the entire transport stream will be scrambled. A CA_descriptor will be added to the PMT and CAT table will be created if one does not exist. -
Page 45: Configure Modulator – Turbopsk
Description: Output Symbol Rate mode allows the entry of the actual output symbol rate desired. With Input Bitrate by entering the bitrate of the input transport stream the SMD 989 uses this bitrate along with the Modulation/FEC settings to calculate the modulation symbol rate. If it is known that the input transport stream contains a significant amount of null packets it is possible to enter a bitrate that is lower than the actual input transport stream bitrate. -
Page 46: Figure 39 Advanced Modulation Turbo Psk Modes And Code Rates
SMD 989– User Manual By clicking the icon, the recommended symbol rate will be inserted into the symbol rate. Turbo PSK modulation includes many modulation types and FEC code combinations. Figure 39 shows code rates available for the Turbo PSK modulation mode and a representation of the settings for TurboPSK single mode modulation in the dropdown menu. -
Page 47: Figure 40: Reduced Latency Selections
SMD 989– User Manual Sync Byte Deletion: The Sync Byte Deletion advanced feature permits removal of the incoming MPEG stream sync bytes from reaching the modulator. so as to not output symbols containing the sync byte information. This enables a savings in bandwidth of 1 byte every 188 bytes as modulator output symbols containing sync byte data are removed. -
Page 48: Configure Modulator – Dvb-S2X
SMD 989 calculates the maximum input bit rate and lists it in the Max. Bitrate field. Description: Input Bit Rate mode allows the entry of a known input bit rate. The SMD 989 then calculates the needed symbol rate and lists it in the Symbol Rate field. - Page 49 The SMD 989 contains a symbol rate or input bit rate calculator to assist with these selections. By clicking the icon, the recommended symbol rate will be inserted into the Symbol Rate field or maximum input bitrate inserted in the Bitrate field.
- Page 50 SMD 989– User Manual Modulation/FEC: The modulations and supported code rates are shown in Figure 42. The supported modes are selectable in the drop down list in the Modulation/FEC field. The remaining settings include (Bold indicates default): Pilot Insertion (Only available in DVB-S2 and DVB-S2X Modes)
- Page 51 SMD 989– User Manual Description: When set to enable a rate adaption is applied to the DVB-S2X.mode. When disabled the rate adaptation is not active. Rate adaptation forces the modulator to add or remove null packets and re-stamp PCRs in order to match TS bitrate to the modulation payload rate.
-
Page 52: Output Settings
All SMD 989 modulations will have an IF output area indicating an active or muted output, frequency range from 57 up to 145 MHz, output level and tilt level. If the SMD 920 L-Band option is available it will indicate the RF settings for the module as shown in Figure 43. -
Page 53: If Output
Upconverter LO (Local Oscillator). This eliminates the need to determine what the output frequency of the SMD 989 should be to achieve the desired satellite frequency. In the example settings below the output of the SMD 989 will be the same. -
Page 54: Figure 45: Rf Settings
SMD 989– User Manual Figure 45: RF settings If the RF L-Band SMD 920 option is installed along with 10 MHz BUC Power SMD 94X option the ability to configure the RF output as well as the ability to enable or disable the 10MHz Ref. Clock and the BUC Power is also shown. -
Page 55: Admin Tab
SMD 989– User Manual Admin Tab The Admin tab located after the two bays in the web interface allow system specific settings to be set or modified. Figure 47: Admin tab Located directly under the admin control panel are the options for saving/loading profiles, changing the password, downloading the SNMP MIBs, downloading the diagnostic file, unit software updating, and license changes. -
Page 56: User Profiles
SMD 989– User Manual User Profiles The “Profiles” button opens a dialog box as shown in Figure 49. The user can create a new profile based on the configuration of the complete system. The profile can be saved locally and downloaded to a remote location for backup. -
Page 57: Diagnostics
The “Diagnostics” button will generate a text file for troubleshooting by Sencore support. This file included the configuration of the system, a log history, and current licensing of the SMD 989 to provide a complete understanding of the system. The file will be saved to the computer browsing to the SMD 989. -
Page 58: Unit Software Rollback
Unit Software Rollback The SMD 989 offers the ability to roll back to the previous version of software that was installed on the unit. The roll back feature will restore the unit back to the previous state before the latest update was performed. -
Page 59: Unit License Update
Figure 58: Software rollback Unit License Update The SMD 989 offers the ability to license certain features for the individual options installed into the chassis. The Update License button allows these licenses to be installed. Upon receiving the new license code from Sencore, copy and paste the new license code into the box that appears when clicking on the “Update License”... -
Page 60: Figure 61: Network Configuration
DHCP and static IP addressing. If set to DHCP the user can enter a hostname to easily access the SMD 989 by the name rather than the IP address given by DHCP. When the mode is set to static, the user has to set the IP, subnet, and gateway addresses. -
Page 61: Figure 63: Configure Clone Settings
SMD989 platform. A list of possible and enabled licenses are shown. Figure 64: Bay License Configuration If one license is enabled and both SMD 989 bays have hardware present, the license can be transferred between the bays by clicking on the “Configure Bay Assignment” button. A dialog box will appear allowing the license to be enabled on a certain bay. -
Page 62: Snmp Communities
Figure 65: Configure Bay Assignment Date/Time The user has the ability to set the local time for the SMD 989 platform. The time can be configured using an NTP server by entering the address to synchronize the time and date or it can be entered manually as shown in Figure 66. -
Page 63: Snmp Trap Managers
SMD 989– User Manual SNMP Trap Managers The managers for the SNMP management can be entered or removed by clicking on “Configure SNMP Managers” Figure 68: SNMP Managers Page 63 (105) -
Page 64: Alarms/Log Tab
SMD 989– User Manual Alarms/Log Tab The Alarms/Log tab holds all of the status and alarm indications for the SMD 989 platform. The Alarms/Log tab has two views Alarms and Logs. The Alarms view shows the current active alarms. Figure 69: Alarms reporting view The Logs View shows a history of Alarms and Events. -
Page 65: Alarms/Logs Configure
SMD 989– User Manual Alarms/Logs Configure The “Configure” button opens a configuration screen as shown in Figure 73. Figure 72: Alarms View - Configure The Configure Report Information window will open. In the Conditions tab, click the + icon to expand the alarm configuration options in the Conditions tab. -
Page 66: Figure 75: Alarm Descriptions
SMD 989– User Manual Name Description of Trap Indicates the unit’s external reference source has 10MHz Ext. Ref Clock Error changed between either internal or external. 12V Supply Error Unable to detect 12V from Power Supply 3V Supply Error Unable to detect 3V from Power Supply... -
Page 67: Figure 76: Event Configuration
The Events tab allows the setup of Events reporting and actions. Events are notable status changes in the SMD 989. Click the + icon to expand the event configuration options. The Selection Options popup menu allows easier configuration of the selected event. Refer to Figure 77. -
Page 68: Snmp Trap Configurations
SMD 989– User Manual SNMP Trap Configurations The SNMP trap configurations can be viewed under the reporting tab by clicking the “Configurations” at the top-left of the report control panel. All conditions can be enabled/disabled from sending SNMP Traps. The current status is shown under configuration. -
Page 69: Figure 80: Snmp Trap Descriptions
SMD 989– User Manual Name Description of Trap Indicates the unit’s external reference source has 10MHz Ext. Ref Clock Error changed between either internal or external. 12V Supply Error Unable to detect 12V from Power Supply 3V Supply Error Unable to detect 3V from Power Supply... -
Page 70: About Tab
The about tab provides the software and hardware details and versions for the equipment found within the SMD 989 platform. It further provides licensing information although added information on licensing may be found in the ADMIN tab. This information will be referenced when talking to technical support. -
Page 71: Controlling The Smd 989 Using The Front Panel
Controlling the SMD 989 Using the Front Panel This section of the user manual covers the menus and operation of the SMD 989 platform using the front panel for control. All functionality of the front panel is also capable through the Web User Interface. -
Page 72: Front Panel Modulator Settings
SMD 989– User Manual Front Panel Modulator Settings BAY 1: MODULATOR CONFIG ↕ Select the modulator settings from the main menu, >INPUT CONFIGURATION the user will be able to set input, modulation, and MODULATION CONFIGURATION TS ANALYSIS CONFIGURATION output parameters for the given bay the modulator is OUTPUT CONFIGURATION installed. -
Page 73: Modulator Configuration – Modulation Mode/Configuration
SMD 989– User Manual Modulator Configuration – Modulation Mode/Configuration The Modulator Configuration menus are found under the BAY 1: MODULATOR CONFIG ↕ Bay 1 and Bay 2 listings in the Main Menu. The INPUT CONFIGURATION Modulator Configuration menu has several menus which >MODULATION CONFIGURATON... -
Page 74: Modulator Configuration – Modulator Parameters (Inputs)
SMD 989– User Manual Modulator Configuration – Modulator Parameters (Inputs) The Modulation Parameters menu provides configuration BAY 1: MODULATOR CONFIG ↕ of the parameters of the modulator. It includes the INPUT CONFIGURATION following line listings in the front panel menus. Listings >MODULATION CONFIGURATON... - Page 75 Mbps Primary TS Error MAX BITRATE: 49.4564248 Manual Only TS Sync Loss mode allows the SMD 989 to switch to BAY 1: FAILOVER CONFIG ↕ backup if the primary input transport sync is lost. In FAILOVER: PRIMAY TS ERROR...
-
Page 76: Modulator Configuration – Modulator Parameters
SMD 989 calculates the maximum input bit rate and lists it in the Max. Bitrate field. Description: Input Bit Rate mode allows the entry of a known input bit rate. The SMD 989 then calculates the needed symbol rate and lists it in the Symbol Rate field. - Page 77 SMD 989– User Manual Note: When the SMD 920 L-Band option is installed, the default spectral inversion is inverted as the upconverter is set to invert. Setting the output to Inverted will give a normal output from the upconverter. This...
-
Page 78: Modulator Configuration- Biss Configuration
SMD 989– User Manual Sync Byte Deletion: (Enabled/Disabled) Description: This selection permits removal of the incoming MPEG stream sync bytes from reaching the modulator. This saves a bandwidth of 1 byte every 188 bytes. When set to Enabled, the modulator blocks the incoming Sync Byte. When Enabled the receive demodulator must reinsert it. -
Page 79: Modulator Configuration- Prbs Configuration
SMD 989– User Manual Modulator Configuration- PRBS Configuration Configure PRBS (PRBS Pseudo Random Binary Sequence) Configuration menu. This menu provides BAY 1: MODULATOR CONFIGURAT ↕ selection of the available PRBS test signal available for use MODULATION PARAMETERS with either the SMD910 or SMD912 modulators. The PRBS MODULATION MODE: S2 SINGLE-CCM >BISS CONGIGURATION... - Page 80 Note: When a CID carrier is enabled and added to the transmission or modulated RF output of the SMD 989 it slightly degrades the MER performance of the RF transmission. Entering CID Values: The latitude, longitude, telephone and user data Carrier ID Configuration fields are all fields which permit user data selection/entry.
-
Page 81: Ts Analysis Configuration
SMD 989– User Manual TS Analysis Configuration Configure TS Analysis (SMD 970 option) The Configure TS Analysis allows the setup of TS Analysis. TS Analysis BAY 1: MODULATOR CONFIG INPUT CONFIGURATION errors are as defined by TR 101 290 [4]. - Page 82 SMD 989– User Manual the value entered. Can be set from1 to 999 errors per second. Default is 1 error per second. PMT Error (1.5a): an error will be indicated when the PMT is not present for a period exceeding the time entered (in ms). Can be BAY 1: TS ERRORS set from 100ms to 10000ms.
-
Page 83: Output Configuration
The range is selectable from -3 to +3 dB If the RF L-Band SMD 920 option is installed in the SMD 989 bay, the ability to configure the RF output is shown. BAY 1: OUTPUT STATUS: RF >OUTPUT: ACTIVE... - Page 84 SMD 989– User Manual range an error is indicated. The output RF level is settable at a range of - 30 to +5 dBm. The input status from the IF output is given in high, medium or low depending on the level of input detected.
-
Page 85: Front Panel Admin Settings
GATEWAY: 10.0.1.3 The hostname allows a user to remotely connect to HOSTNAME: DETG_SMD the SMD 989 platform with a web browser by simply MAC: 00.00.00.00.00.00 typing the hostname and not the IP address into the address bar. This is helpful when used on DHCP networks. - Page 86 SMD 989– User Manual ↕ BAY 1: MODULATOR NETWORKING The each modulator comes standard with an IP input >IP ADDRESS: 10.0.0.61 for data reception. The physical settings are settable SUBNET MASK: 255.255.255.0 GATEWAY: 10.0.0.1 by selecting the bay the modulator is located.
-
Page 87: Unit Time
SMD 989– User Manual Unit Time ↕ TIME >TIME: 2010/8/12 03:27:48 SOURCE: NTP SERVER ADDRESS: 10.0.1.23 The time and date for the unit can be set manually or synchronized with an NTP server. The date and time are used for storing the correct time for alarms and logs for accurate representation of when the ... -
Page 88: Front Panel Alarms/Logs
To view active alarms, select and press enter to view the ↔ ACTIVE ALARMS alarms that are currently generated for the enabled >ASI TS SYNC ERROR – LOC: BAY 1, alarms in the SMD 989. Use the right/left errors to view complete error details. Page 88 (105) -
Page 89: Figure 82: Alarm Descriptions
SMD 989– User Manual Name Description of Trap Indicates the unit’s external reference source has 10MHz Ext. Ref Clock Error changed between either internal or external. 12V Supply Error Unable to detect 12V from Power Supply 3V Supply Error Unable to detect 3V from Power Supply... -
Page 90: Conditions
SMD 989– User Manual sensor3VMinLimit.0 - 3.10 VDC sensor3VMaxLimit.0 - 3.50 VDC 5 Volt Controller Supply sensor5VMinLimit.0 - 4.70 VDC sensor5VMaxLimit.0 - 5.30 VDC 12 Volt Controller Supply sensor12VMinLimit.0 - 11.28 VDC sensor12VMaxLimit.0 - 12.72 VDC Unit Temperature sensorTempMinLimit.0 - 0 C sensorTempMaxLimit.0 - 45.00 C... -
Page 91: Figure 83: Relay Event Descriptions
SMD 989– User Manual Name Description of Trap Indicates the unit’s external reference source has 10MHz Ext. Ref Clock Error changed between either internal or external. 12V Supply Error Unable to detect 12V from Power Supply 3V Supply Error Unable to detect 3V from Power Supply... -
Page 92: Events
SMD 989– User Manual Events ↕ EVENT SELECT >DATE/TIME CHANGE – UNIT UNIT BOTUP – UNIT UNIT SHUTDOWN – UNIT 10 MHZ REFERENCE CHANGE – UNIT Each possible event is configurable to be enabled or NTP UPDATE - UNIT disabled if the user does not want it to be logged. -
Page 93: Snmp Trap Configurations
↕ ABOUT The “About screen” provides information for >SOFTWARE software, hardware and licensing installed in the HARDWARE LICENSES SMD 989 platform. This information is needed when UNIT SERIAL: 1234567 talking to technical support. About Software ↕ SOFTWARE VERSIONS PRODUCT: SMD 989 VERSION: 3.1.0... -
Page 94: Licenses
SMD 989– User Manual ↕ DVB-S2 MODULATOR LOCATION: BAY 1 MODEL: SMD 910 ASSEMBLY: 2 Sample About Modulator PI: 1 REV: D REVISION: F ↕ L-BAND UPCONVERTER LOCATION: BAY 1 MODEL: SMD 920 ASSEMBLY: 2 Sample About Upconverter... -
Page 95: Appendix
SMD 989– User Manual Appendix Specifications SMD 989 Base Unit Includes: Display, keypad, embedded controller, Chassis/case, Power Supply/line cord System – Display Type: Organic LED Display Configuration: 256 pixels by 64 pixels Keypad: Snap-dome Membrane Front Panel Lockout: Password control, up to 10 alpha-numeric... - Page 96 SMD 989– User Manual AC Power – Operating Voltage: 95-135 VAC or 180-265 VAC Current Draw/Power: 200 Watts Frequency: 47-63Hz Line Cord: Detachable, 3-prong General – RoHS Compliant: Operating Temperature: 0 to 45 degrees C Operating Humidity: <95% Non-Condensing Cooling:...
- Page 97 SMD 989– User Manual IP TS Input – (1) – 10/100/1000 Auto-negotiating Base-T Connector: RJ-45 Ethernet Port Input format: UDP, RTP, and RTP with extension headers Multicast and Unicast 0.5 – 160 Mbps Bitrate Range: Packets/IP Frame 1-7 MPEG Packets/IP Frame...
- Page 98 SMD 989– User Manual IF-band Output – Connector: (1) BNC, female Impedance: 75 ohms Min Level: SMD 912: -30 dBm, SMD 912A: -20 dBm Max Level: SMD 912: -5 dBm, SDM912A: +5 dBm Level Adjustability: 1 dB increments Frequency: 70 MHz Default (Selectable 60-140 MHz) Frequency Accuracy: +/-0.6 ppm + +/-0.25 ppm/yr.
- Page 99 SMD 989– User Manual SMD 963 Multistream DVB-S2 Option In Addition to SMD 910 Specifications ASI Serial TS Input – Connector: (4 Total) BNC, female Impedance: 75 ohms Standard: ETSI EN 50083-9 DVB ASI Data Bit Rate: 270 Mbps Packet Size:...
- Page 100 SMD 989– User Manual Spurious Performance -50 dBc @ -10 dBm SMD 968 TurboPSK Modulation (SMD 912(A) Only) Supported modulation schemes and FEC: QPSK 1/2, 2/3, 3/4, 5/6, 7/8 8PSK 2/3, 3/4, 4/5, 5/6, 8/9 16QAM Note: Turbo PSK mode ¾ 2.05 = “3/4”, ¾ 2.10 = “4/5”...
- Page 101 SMD 989– User Manual SMD 920 L-Band Output Option In Addition to the SMD 910 or 912 Specifications when installed Primary L-Band Output – Connector: (1) SMA, female Impedance: 50 ohms Min Level: -30 dBm Max Level: +5 dBm Level Adjustability: 0.1 dB increments...
-
Page 102: Open Source Software
SMD 989– User Manual Open Source Software The SMD 989 includes: Package Version License Copyright AT32 UC3B Software 1.4.0 2008, Atmel Corporation Framework BaseX4JIT GPL Version 3, 29 June 2007 2007-2009, Active Group, Inc BusyBox 1.15.2 GPL Version 2, June 1991 Cgicc 3.2.9... -
Page 103: Warranty
Warranty Sencore One-Year Warranty Sencore warrants this instrument against defects from any cause, except acts of God and abusive use, for a period of 1 (one) year from date of purchase. During this warranty period, Sencore will correct any covered defects without charge for parts, labor, or recalibration. -
Page 104: Support And Contact Information
Support and Contact Information Returning products for service or calibration The SMD 989 is a complex piece of equipment and needs to be serviced and repaired by Sencore. Periodically it is necessary to return a product for repair or calibration. In order to expedite this process please carefully read the instructions below. - Page 105 Sencore Inc. 3200 Sencore Drive Sioux Falls, SD 57107 USA www.sencore.com Copyright © 2013 Sencore Inc. 1.605.978.4600...
Need help?
Do you have a question about the SMD 989 and is the answer not in the manual?
Questions and answers