
Related Manuals for OBaby Lisa Cot Bed


Summary of Contents for OBaby Lisa Cot Bed
- Page 1 Lisa Cot Bed IMPORTANT PLEASE READ THESE INSTRUCTIONS CAREFULLY BEFORE USING THIS PRODUCT KEEP FOR FUTURE REFERENCE...
- Page 2 Thank you for choosing O Baby. To ensure that your cot bed is used in accordance with these instructions, please read them fully and retain for future reference. If you have any problems please contact O Baby - info@obaby.co.uk or 0845 078 0290 BEFORE ASSEMBLY - Unpack all the parts and identify them against the fittings and components lists.
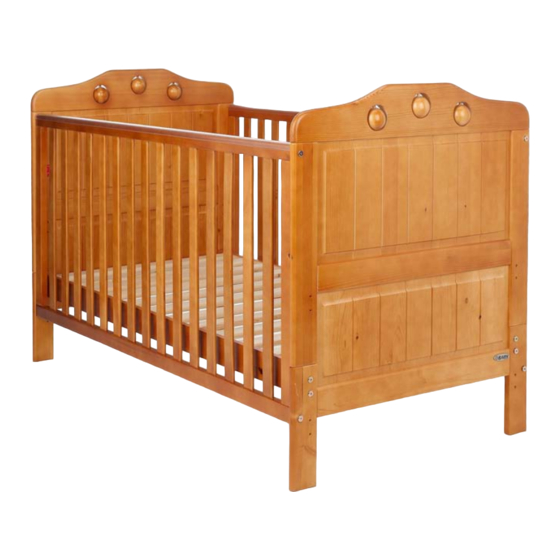
- Page 3 Parts A. Allen key x 1 B. Long assembly screw x 8 C. Short assembly screw x 8 D. Barrel nuts x 16 Cot bed head end & Foot end panel (Foot end has the O Baby logo facing the outside of the cotbed)
- Page 4 Assembling your cot bed Top Tip! don’t tighten all the screws fully until you have completed assembling. Step 1 Starting on one end of the base fit the barrel nuts in the holes provided on the base corners .
- Page 5 Assembling your cot bed Step 4 Now add the first side rail, starting by attaching the tops first. Put the barrel nut in the side rail, then thread the long screw through the cot end & then through the rail and tighten it up into the barrel nut.
- Page 6 Changing the Cot into a Junior Bed Only change into a Junior bed when your are confident that you child will be safe without the side rails. Step 1 Remove both side rails using the allen key. Step 2 Fit the base to the lowest level using the same fittings for the base that were used for the Cot.
- Page 7 If any parts have become worn or damaged then do not use the cot/bed, seek advice from your retailer or contact O Baby’s Customer Care - info@obaby.co.uk or 0845 078 0290. - Do not use replacement parts that are not recommended or supplied by O Baby. Non approved parts may render the cot/bed unsafe or may be considered product damage or misuse, voiding the warranty.
Need help?
Do you have a question about the Lisa Cot Bed and is the answer not in the manual?
Questions and answers