Table of Contents

Related Manuals for Akerstroms Trux 700

Summary of Contents for Akerstroms Trux 700
- Page 1 Certification Exhibit FCC ID: KDZLXEATH FCC Rule Part: 15E ACS Report Number: 08-0264-15E Applicant: LXE Inc. Equipment: 802.11 a/g Module Manuals (Host Device) 5015 B.U. Bowman Drive Buford, GA 30518 USA Voice: 770-831-8048 Fax: 770-831-8598...
- Page 2 FOR REVIEW ONLY - DO NOT PUBLISH OR DISTRIBUTE User Manual Trux 700...
- Page 3 User manual Tx700 © Copyright 2008, ÅKERSTRÖMS Trux AB The contents of this document may be changed without prior notice and therefore cannot be considered binding for ÅKERSTRÖMS Trux AB. ÅKERSTRÖMS Trux AB is not liable for errors that might appear in this document. Under no circumstances can ÅKERSTRÖMS Trux AB be held liable for damages arising from use of this document or from the hardware and software that is described herein.
- Page 4 Table of Contents About this manual..................7 Who should read this manual..............7 Notices...................... 8 How to use this manual................8 1.3.1 Prerequisites....................8 1.3.2 Explanation of symbols ................8 Safety ......................9 Assuring personal safety ................ 9 Product safety..................9 2.2.1 Electrical supply ..................
- Page 5 Table of Contnets User Manual Tx700 4.4.1 Ports for connection of peripherals ............21 4.4.2 Supplying power to peripherals..............22 4.4.3 Connecting keyboards and pointing devices..........22 4.4.4 Installing printers..................22 4.4.5 Installing bar code readers............... 22 4.4.6 Connecting GPS and GSM/GPRS products ..........23 4.4.7 Audio Out....................
- Page 6 User Manual Tx700 Table of Contnets Illustrations Figure 1 Basic product structure ........................12 Figure 2 Different types of Tx700 brackets .....................15 Figure 3 Templates for RAM Ball ........................16 Figure 4 Connection for power supply......................17 Figure 5 Ports for connecting peripherals ......................21 Figure 6 Aerial Outlets.............................24 Figure 7 On/Off Button............................25 Figure 8 Increase or Decrease button, LED’s ....................26...
- Page 7 Table of Contnets User Manual Tx700 E-EQ-TX700OGWW 93 5128-100 C0...
-
Page 8: About This Manual
User Manual Tx700 About this manual About this manual This manual covers these topics related to installation, startup, operation, and maintenance of Åkerströms Trux AB, Tx700: • Safety considerations • General product information • Product installation procedures • Product use and maintenance •... -
Page 9: Notices
About this manual User Manual Tx700 Notices This manual describes the product’s basic design and main procedures for installing, operating, and maintaining the product. Deviation might exist between information in this manual and the appearance and functions in the delivered product because of differences in hardware and software versions. When product updates affect functions and security, recent, relevant, updated information is available from Åkerströms Trux AB. -
Page 10: Safety
User Manual Tx700 Safety Safety Assuring personal safety Keep this information in mind: Always exercise caution when working with electricity. Product safety 2.2.1 Electrical supply You must: • Fit the computers with an external fuse before connecting to the recommended voltage •... - Page 11 Safety User Manual Tx700 E-EQ-TX700OGWW 93 5128-100 C0...
-
Page 12: Product Description
User Manual Tx700 Product description Product description Function and design Åkerströms Trux AB designed and developed Tx700 for mounting on mobile or stationary units. Rugged design, intense screen brightness, and exceptional reliability make Tx700 suitable for demanding environments in which vehicles such as forklifts, forestry machines, and trucks operate. Tx700 is based on a standard PC platform that enables use of most types of software adapted for Windows XP Professional or Windows XP Embedded. -
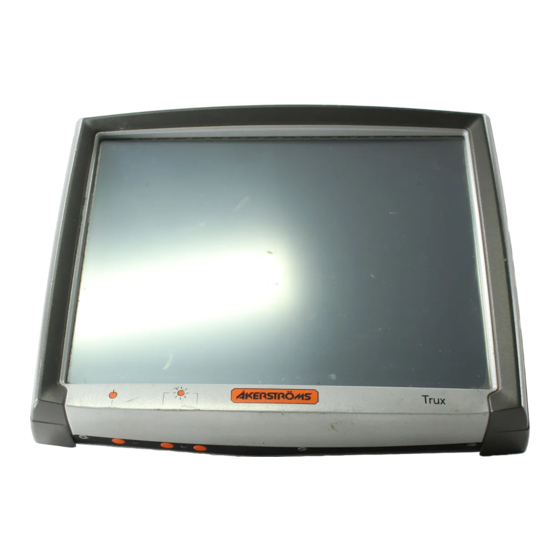
Page 13: Figure 1 Basic Product Structure
Product description User Manual Tx700 Figure 1 Basic product structure E-EQ-TX700OGWW 93 5128-100 C0... -
Page 14: Tx700 Series
For information on use, refer to the documentation that accompanies the product. Go to www.akerstroms.com to display a complete list of peripherals or order the list from Åkerströms Trux Peripheral... - Page 15 Product description User Manual Tx700 E-EQ-TX700OGWW 93 5128-100 C0...
-
Page 16: Product Installation
User Manual Tx700 Product installation Product installation Mounting the unit Tx700 is intended to be mounted so that operators can easily perform tasks while in the vehicle. When positioning the computer on the vehicle, carefully account for operators’ working situations. An ergonomically correct installation, with an optimal field of vision, greatly facilitates the operators’... -
Page 17: Figure 3 Templates For Ram Ball
Product installation User Manual Tx700 1 Check that the planned location of the computer meets ergonometric and field-of-vision requirement. 2 Ensure there is sufficient space underneath the computer so that service can be performed. There must be space to connect and disconnect the wires from the ports. 3 Mark the positions of the holes on the mounting surface. -
Page 18: Installing Electrical Components
User Manual Tx700 Product installation Installing electrical components Always exercise caution when working with electricity. 4.2.1 Connecting electrical cables to power sources The Tx700 comes with a four-meter, four- wired power cable; brown for positive and white for negative, and 2 conductors; yellow and green, to enable the screen black-out function (if selected), see 4.2.2. Connect the brown part of this cable to positive and the white part to negative on the power source (DC/DC converter), and fuse it according to these specifications shown below: Specifications for electrical supply... -
Page 19: Enabling The Screen Black-Out Function
Product installation User Manual Tx700 4.2.2 Enabling the screen black-out function The power supply chassis connector contains two pins that are dedicated to dimming the screen for example when the vehicle is set in motion (when the gas pedal is pressed). The screen then lights up when the vehicle stops (when the gas pedal is released). -
Page 20: Settings
User Manual Tx700 Product installation Settings 4.3.1 Using the Trux Computer Manager application To configure certain Tx700 functions you can use the Trux Computer Manager, which is installed in the computers before shipping. 1 Start the Control Panel from the Settings option on the Start menu. 2 Double-click on the Trux icon. -
Page 21: Black-Out Screen Function
Product installation User Manual Tx700 4.3.6 Black-out screen function The black-out screen (dim) function is not activated at delivery. About function and connection see 4.2.2. To activate this function, refer to the Trux Computer Manager. E-EQ-TX700OGWW 93 5128-100 C0... -
Page 22: Installing Peripherals
User Manual Tx700 Product installation Installing peripherals Åkerströms Trux AB offers peripherals that facilitate use of Tx700. If you order peripherals with the computer, then all drivers are pre-installed. If you order them later or from a supplier other than Åkerströms Trux AB, you might have to install the drivers;... -
Page 23: Supplying Power To Peripherals
Product installation User Manual Tx700 4.4.2 Supplying power to peripherals Some peripherals require power from the computer’s COM or Multi Purpose port, for example a bar-code reader or an illuminated keyboard. You can configure the Tx700 as follows: • 12 V power is supplied from pin 9 on the COM 2 port. •... -
Page 24: C0 E-Eq-Tx700Ogww
User Manual Tx700 Product installation 4.4.6 Connecting GPS and GSM/GPRS products You connect GPS and GSM/GPRS products to the computer’s COM port; these products usually require power supply from the computer. 1 Connect the GPS or GSM/GPRS product to the COM port; see Figure 5, position #3 or #4. 2 Activate the power supply on the COM port according to the instructions in the Trux Computer Manager (4.3.4) documentation. -
Page 25: Audio Out
Product installation User Manual Tx700 4.4.7 Audio Out Audio Out is a standard earphone outlet, Ø 3.5 mm. 4.4.8 Mic In Mic In is a standard microphone inlet, Ø 3.5 mm. 4.4.9 Installing aerials The computer must be fitted with one or two aerials if you ordered the Tx700 with a wireless network. To be valid, network cards for wireless networks, which are not supplied by Åkerströms Trux AB, must meet the Radio &... -
Page 26: Using The Product
User Manual Tx700 Using the product Using the product Operating the computer 5.1.1 Starting the computer To turn on the computer: • Press the on/off button on the computer’s lower side, see pos 1 in Figure 7, or • Click on the screen if: −... -
Page 27: Adjusting Screen Brightness
Using the product User Manual Tx700 5.2.2 Adjusting screen brightness Increase or decrease the The buttons on the lower side of the computer. Increase (1) or Decrease screen’s brightness (2) on the lower side of the computer. Figure 8 Increase or Decrease button, LED’s Turn off the screen’s Both buttons on the lower side of the computer;... -
Page 28: Maintaining The Product
User Manual Tx700 Maintaining the product Maintaining the product Cleaning the screen Clean the screen when necessary. Use a soft, slightly damp cloth. If required, use a cleaning solution that is intended for computer screens. Never use strong cleaning or solvent solutions when you clean the screen. Checking connections Check regularly that all connections are firmly in place and that all cables are securely fastened. - Page 29 Maintaining the product User Manual Tx700 E-EQ-TX700OGWW 93 5128-100 C0...
-
Page 30: Troubleshooting
User Manual Tx700 Troubleshooting Troubleshooting Perform the following troubleshooting procedures before contacting Åkerströms Trux AB regarding problems with Tx700: Problems with the computer 7.1.1 The computer will not start If nothing happens when the button is pressed, ensure that the: •... - Page 31 Troubleshooting User Manual Tx700 E-EQ-TX700OGWW 93 5128-100 C0...
-
Page 32: I Specifications
Appendix Specifications Wireless Application platform Wireless Client Terminal Processor/RA M Intel Pentium M 1,4GHz, 512 MB Intel Celeron M 600MHz, 512 MB Intel Celeron M 600MHz, 512 MB Storage 40 GB IDE ATA hard disk 1 GB Compact Flash (XPE) 4 GB Compact Flash 64 MB Compact Flash (CE) Screen... -
Page 33: Ii Port Signals
Appendix User Manual Tx700 Port signals Keyboard/Mouse 9-Pin Dsub (see Pos. 5, Figure 5) Signal Type Purpose Reserved Do not connect MS_DATA Input/output Mouse data MS_CLK Input/output Mouse clock Power output +5 V power supply +12VKB Power output +12 V power supply KB_DATA Input/output Keyboard data... - Page 34 User Manual Tx700 Appendix Serial (COM2) 9-Pin Dsub (see Pos. 3, Figure 5) Signal Type Purpose RS232 input COM2 handshake RS232 input COM2 receive data RS232 output COM2 transmit data RS232 output COM2 handshake RS232 input COM2 handshake RS232 output COM2 handshake RS232 input COM2 handshake...
- Page 35 Appendix User Manual Tx700 Multi Purpose 15-Pin D-sub (see Pos. 8, Figure 5) Signal Type Purpose VCC 5 5 V Power +5 V Power Supply RS232 Input COM 4 Receive data RS232 Output COM 4 Transmitting data Reserved +12V Power Supply +12 V Power Supply USB + Input/Output...
-
Page 36: Iii Technical Recommendation
User Manual Tx700 Appendix Technical recommendation To make sure that all software and hardware will be fully functional the image needs to be created from a factory default Tx700 computer, meaning either new out of the box or reinstalled from a recovery media supplied by Åkerströms Trux AB. -
Page 37: Iv Environmental Care Information
Appendix User Manual Tx700 Environmental care information Thanks to its low energy consumption, the use of Tx700 has a minimal effect on the environment. However, the computer should still be turned off or put on standby when it is not in use, to avoid the unnecessary consumption of energy. -
Page 38: V Certification
Certification Declaration of conformity Type of equipment: Industrial PC Brand name/trade mark: ÅKERSTRÖMS Type designation/model: TRUX 700 Manufacturer: Åkerströms Trux AB Björbovägen 143 S-780 45 BJÖRBO, Sweden Pone +46 241 25000 Fax +46 241 25061 All models in Tx700 are CE certified, according to EMC Directive 89/336/EEC, including amendments in the CE marking directive, 93/68/EEC. - Page 39 Appendix User Manual Tx700 FCC Information: This device complies with FCC Rules, part 15. Operation is subject to the following conditions: This device may not cause harmful interference This device must accept any interference that may be received, including interference that may cause undesired operation.
- Page 40 User Manual Tx700 Appendix Lithium Battery Safety Statement Caution: Lithium battery inside. Danger of explosion if battery is incorrectly replaced. Replace only with same or equivalent type recommended by battery manufacturer. (US) Attention: Contient une pile de lithium. Risque d’explosion dans le cas où la pile ne serait pas correctement remplacée. Remplacer uniquement avec une pile semblable ou equivalente au type de pile recommandé...
-
Page 41: Vi Warranty, Support And Service
Appendix User Manual Tx700 Warranty, support and service Warranty The functioning of a Tx700 is under warranty for one year from date of delivery. The warranty presupposes that the product was used in a way that can be considered normal and that all the requirements in this manual are met. -
Page 42: Vii Batteries
User Manual Tx700 Appendix Batteries CAUTION: Risk of explosion if battery is replaced by an incorrect type. Dispose of used batteries according to the instructions. DISCHARGED BATTERY Disposal of a Li-Ion battery poses a smaller threat to the environment when compared to other battery types. -
Page 43: Viii Français Avertissement Et Emarque
Appendix User Manual Tx700 VIII Français Avertissement et emarque Le manuel n'explique pas comment installer et utiliser le système d'exploitation ou les applications. Avertissement ! Vous avertit des risques de dommages pour les individus ou les biens. Suivez toujours les instructions qui figurent en regard de ce symbole. - Page 44 User Manual Tx700 Appendix Une fois que les périphériques sont connectés, fixez les câbles sur la partie inférieure de l'ordinateur qui comporte des trous prévus pour les brides de câbles. N'oubliez pas que les systèmes d'exploitation n'ont pas tous une prise en charge intégrée de la souris (par exemple, DOS).
- Page 45 Åkerströms Trux AB Björbovägen 143 SE-780 45 Björbo Phone +46 241 250 00 Fax +46 241 250 61 E-mail sales@akerstroms.se www.akerstroms.com...
- Page 46 User Manual Tx800 Triton...
- Page 47 User Manual Tx800 © Copyright 2008, ÅKERSTRÖMS Trux AB The contents of this document may be changed without prior notice and therefore cannot be considered binding for ÅKERSTRÖMS Trux AB. ÅKERSTRÖMS Trux AB is not liable for errors that might appear in this document. Under no circumstances can ÅKERSTRÖMS Trux AB be held liable for damages arising from use of this document or from the hardware and software that is described herein.
- Page 48 Table of Contents BOUT THIS MANUAL 1.1 Who should read this manual ................7 1.2 Notices ......................... 7 1.3 How to use this manual ..................8 1.3.1 Prerequisites........................8 1.3.2 Symbols used ........................8 AFETY 2.1 2.1 Personal safety ..................... 9 2.2 Product safety ..................... 9 2.2.1 Supplying power......................9 2.2.2 Humidity, moisture, cold and heat...................9 2.2.3 Interference ........................9...
- Page 49 Table of Contents User Manual Tx800 4.3.4 Supplying power to peripherals ..................20 4.3.5 Battery charging options....................20 4.3.6 Blackout screen......................20 4.3.7 Sound, ambient light sensor and defroster..............20 4.4 Installing peripherals ..................21 4.4.1 Ports for connecting peripherals ..................21 4.4.2 Supplying power to peripherals ..................22 4.4.3 Keyboard and mouse .....................22 4.4.4 Printers...........................22 4.4.5 Barcode readers ......................23...
- Page 50 User Manual Tx800 Table of Contents PPENDIX I Technical Specifications ..................33 II Port Signals ......................35 III Technical Recommendations ................42 IV Disclaimer ......................43 V Tx800 Software....................44 VI Certification......................45 VII Warranty, Support and Service ................ 47 VIII Environmental Care Information ..............
- Page 51 Table of Contents User Manual Tx800 E-EQ-TX800OGWW-A 105858-100A0...
- Page 52 1 About this manual This manual covers the following topics related to installation, start-up, operation and maintenance of Tx800. • Safety considerations General product information Product installation procedures Product use and maintenance Troubleshooting The appendices provide this reference information: technical specifications, port signals, environmental considerations, fulfillment of EU and US compliance regulations, warranty, support, service and Åkerströms Trux AB addresses and phone numbers.
-
Page 53: Symbols Used
About this manual User Manual Tx800 1.3 How to use this manual To… Read Chapter… Prepare for electrical installation 2 Safety Prepare for product installation 3 Product description Install Åkerströms Tx800 4 Product installation Operate Tx800 5 Using the product Maintain proper operation 6 Maintenance Solve problems... - Page 54 2 Safety 2.1 2.1 Personal safety Keep this in mind: Always exercise caution when working with electricity 2.2 Product safety 2.2.1 Supplying power Tx800 have to be supplied with an external fuse before connecting to recommended voltage (see 4.2.1). Connect only the recommended voltage. Any other voltage may damage the product or make its operation fail.
- Page 55 Safety User Manual Tx800 E-EQ-TX800OGWW-A 105858-100A0...
- Page 56 3 Product description 3.1 Design and functionality Åkerströms Trux AB designed and developed Tx800 for mounting on mobile or stationary units. Rugged design, intense screen brightness, and exceptional reliability make Tx800 suitable for demanding environments, in which vehicles such as forklifts, forestry machines, and trucks operate. Tx800 is designed to withstand vibrations, moist and dust.
- Page 57 Product description User Manual Tx800 3.3 Connections and adapters 3.3.1 Interfaces and connections Figure 1: Overview connections and interfaces Connections and interfaces (port lid) Position Function Power supply (12V DC 50W) Mic. in Audio out COM2 RS232 +12V COM1 RS232 +5V VGA (external monitor) Multipurpose connector (USB 2.0, RS232, +12 V) RJ-45 Ethernet 10/100 (LAN)
- Page 58 User Manual Tx800 Product description 3.3.2 Under the service-lid Figure 2: Overview: connections and interfaces under the service-lid Position Function USB 2.0 Harddrive Compact Flash slot (behind HD cable) Battery/UPS Mini PCI slot PC Card slot (option) 3.4 Tx800 series Åkerströms Tx800 is developed for companies that want flexibility and need powerful computers that enable several heavy applications to run simultaneously.
- Page 59 Product description User Manual Tx800 3.4.1 Peripherals and accessories Listed below are some of the peripherals which can be connected to the Tx800. The Section column lists the sections in this manual describing how to install the peripheral. For information on use, refer to the documentation that accompanies the product.
- Page 60 4 Installation Before mounting the Tx800, write down the license key for the operating system. It’s located on the chassis, under the port lid. 4.1 Mounting the unit Tx800 should be mounted in a way that enables the operator to easily perform tasks while in the vehicle. When positioning the computer in the vehicle, carefully account for the operators’...
- Page 61 Installation User Manual Tx800 4.1.1 Mounting brackets You can order several different types of brackets for the Tx800. The brackets have built-in shock absorption and can move in all directions. Figure 3: Brackets (are available in 2 dimensions, in 3 lengths, see below) Bracket with 1.5”...
-
Page 62: Electrical Installation
User Manual Tx800 Installation Check that the planned location of the computer meets ergonometric and field-of-vision requirement. Ensure there is sufficient space underneath and above the Tx800 (easier to perform service/connect and disconnect cables). There should be enough space behind the unit, making the passive cooling work correctly. - Page 63 Installation User Manual Tx800 4.2.1 Connecting to power source The Tx800 comes with a four meter, four-wired power cable; brown for positive and white for negative, and 2 conductors; yellow and green, to enable the screen black-out function (if selected), see 4.2.2. Connect the brown part of this cable to positive and the white part to negative on the power source (DC/DC converter), and fuse it according to the specifications shown below: Specification external power source...
- Page 64 User Manual Tx800 Installation 4.2.2 Blackout screen function This function is disabled by default but can be activated in Trux Computer Manager. In the power supply connector there are two pins (5 and 6), dedicated to dimming the screen for example when the vehicle is set in motion (when the pedal is pressed).
- Page 65 Installation User Manual Tx800 4.3.3 Settings for start and shutdown Depending on the environmental conditions, in which the Tx800 is operating and the nature of the power supply, settings for start-up and shutdown can be adjusted. For example, using the Trux Computer Manager, you can specify whether the computer can be started from battery power when the incoming power supply is connected or by touching the screen.
- Page 66 User Manual Tx800 Installation 4.4 Installing peripherals Åkerströms Trux AB offers peripherals to enhance the use of Tx800. Peripherals, ordered with the computer, comes with pre-installed drivers. If you order them later, or from a supplier other than Åkerströms Trux AB, you might have to install drivers; if so, refer to the peripheral’s documentation. 4.4.1 Ports for connecting peripherals Port lid Figure 7: Ports...
- Page 67 Installation User Manual Tx800 Figure 8: Strain relieving brackets for USB and PS/2 connectors When all peripherals are connected, the cabling should be put in the openable cable protection tube, delivered with the unit (described in section 4.5). 4.4.2 Supplying power to peripherals Some peripherals require power from the computer’s COM or Multi Purpose port, for example a bar-code reader or an illuminated keyboard.
- Page 68 User Manual Tx800 Installation 4.4.5 Barcode readers Use this installation procedure for all bar code readers that Åkerströms Trux AB supplies for Tx800: Select the appropriate port (COM2 supplies 12V, COM1 5V) or connect it using a keyboard wedge connector. 1 Connect the barcode reader to the selected port.
- Page 69 Installation User Manual Tx800 4.5 Mounting the port lid Cut the provided openable cable protection tube to the appropriate length. Put the cables in one half of it and then put the other half on, according to fig. 9. Figure 9: Applying the openable cable protection tube Before mounting the port lid, fit the cable tube in the sockets of the chassis and lid.
- Page 70 5 Using the Tx800 5.1 Operating 5.1.1 Starting the computer Figure 11: On/Off button To turn on the computer: • Press the on/off button on the computer’s front left side, see Fig. 11, or: Depending on the settings in Trux Computer Manager (see section 4.3.3), Tx800 also can be started by touching the integrated touch screen, or when turning the external power source on.
- Page 71 Using the Tx800 User Manual Tx800 5.2.1 Using the stylus to select screen objects To select an object on the interface, gently tap the screen: • One time to click. • Two times in rapid succession to double-click. • Tap on the mouse symbol in the system tray, down in the right corner, the next click will then be a right click.
- Page 72 User Manual Tx800 Using the Tx800 5.2.4 LED indications Figure 13 LED Indicators The On/Off button’s built-in LED, indicates operational mode. 1. On/Off LED Operational Mode Indication Off and not powered Off (dark) Off but powered Green flash very slow Operating normally Green on Suspend...
- Page 73 Using the Tx800 User Manual Tx800 E-EQ-TX800OGWW-A 105858-100A0...
- Page 74 6 Maintenance 6.1 Cleaning the screen Clean the screen when necessary. Use a soft, slightly damp cloth. If required, use a cleaning solution that is intended for computer screens. Never use detergents or any other liquid not intended for this use when cleaning the screen..
- Page 75 Maintenance User Manual Tx800 E-EQ-TX800OGWW-A 105858-100A0...
- Page 76 7 Troubleshooting Perform the following troubleshooting procedures before contacting Åkerströms Trux AB regarding problems with Tx800: 7.1 Computer problems 7.1.1 The computer will not start If nothing happens when the On/Off button is pressed, ensure that the: • Power supply is connected (On/Off LED blinking green). •...
- Page 77 Troubleshooting User Manual Tx800 7.2 Problems with peripherals If a peripheral doesn’t work: • Check cabling/contacts and connections first. • If the peripheral needs power supply, make sure the power supply for peripherals is activated in the Trux Computer Manager (see 4.3.4). 7.2.1 Keyboard/Mouse If keyboard or mouse doesn’t work: •...
-
Page 78: Technical Specifications
Appendix I Technical Specifications Processor/RAM Intel Pentium M 1,4GHz, 1024 MB DDR Intel Pentium M 1,4GHz, 512 MB DDR Intel Celeron M 600MHz, 1024 MB DDR Intel Celeron M 600MHz, 512 MB DDR Storage 40 GB IDE ATA 2,5” automotive harddrive 4 GB Compact Flash 2 GB Compact Flash Screen... - Page 79 Troubleshooting User Manual Tx800 Power Consumption 2,5 A (typ) 4 A (max) 0,7 A (typ) 1,0 A (max Operating System Windows XP Professional or Windows XP Embedded Dimensions 279 x 229 x 77 mm (11,0 x 9,0 x 3,0 inches) Weight 2,9 kg ((7,7 lb) Options...
- Page 80 User Manual Tx800 Troubleshooting II Port Signals PS/2 PS2Connectors Keyboard and mouse (position: 10 and 11, section 3.3) PS/2 Keyboard PS/2 Mouse Signal Signal KBDData MSData Reserved Reserved Ground Ground Volt Volt KBDClock MSClock Reserved Reserved 105858-100A0 E-EQ-TX800OGWW-A...
- Page 81 Troubleshooting User Manual Tx800 COM1 Serial (COM1) 9-Pin D-sub M (position: 5, section 3.3) Signal Type Purpose RS232 Input COM1 Handshake RS232 Input COM1 Receive data RS232 Output COM1 Send data RS232 Output COM1 Handshake Ground Ground RS232 Input COM1 Handshake RS232 Output COM1 Handshake RS232 Input...
- Page 82 User Manual Tx800 Troubleshooting COM2 Serial (COM1) 9-Pin D-sub M (position: 4, section 3.3) Signal Type Purpose RS232 Input COM2 Handshake RS232 Input COM2 Receive data RS232 Output COM2 Send data RS232 Output COM2 Handshake Ground Ground RS232 Input COM2 Handshake RS232 Output COM2 Handshake RS232 Input...
- Page 83 Troubleshooting User Manual Tx800 USB 2.0 x2 (position: 9, section 3.3) Signal Type Purpose USB power +5V Power out USB0- Input/Output USB data - USB0+ Input/Output USB data + Ground Ground E-EQ-TX800OGWW-A 105858-100A0...
- Page 84 User Manual Tx800 Troubleshooting Multipurpose Multi Purpose 15-Pin D-sub M (position: 7, section 3.3) Signal Type Purpose VCC 5 5 V Power +5 V USB Power Supply RS232 Input COM 4 Receive data RS232 Output COM 4 Transmitting data Reserved Not used +12V Power out...
- Page 85 Troubleshooting User Manual Tx800 Ethernet RJ-45 Ethernet 10/100 8-Pin Modular (position: 8, section 3.3) 8,7,6,5,4,3,2,1 Signal Function Transmit data + (pair 2) TX– Transmit data (pair 2) Receive data + (pair 3) Not used (pair 1) Not used (pair 1) RX–...
- Page 86 User Manual Tx800 Troubleshooting VGA connector 15-Pin D-sub F. (position 6, section 3.3) Signal Function CRT_R CRT Red CRT_G CRT Green CRT_B CRT Blue Not connected Ground RGND Red Ground GGND Green Ground BGND Blue Ground Not connected Ground Not connected DDC_Data CRT_HS CRT Horisontal Sync.
- Page 87 Troubleshooting User Manual Tx800 III Technical Recommendations Recovery The recovery media can be ordered as a stand alone product. E-EQ-TX800OGWW-A 105858-100A0...
- Page 88 User Manual Tx800 Troubleshooting IV Disclaimer All Åkerströms Trux AB’s software products, whether imbedded in ROMs or other hardware or delivered on CD-ROM or other media, including all related manuals and documentation (collectively “Åkerströms Software”) are proprietary to Åkerströms. Åkerströms reserves all right, title and interest in and to the Åkerströms Software not explicitly licensed herein, including without limitation, all copyrights, patents and other proprietary rights.
- Page 89 Troubleshooting User Manual Tx800 V Tx800 Software The following software is installed on a new Tx800. Freefloat WLinq WLinq is an integration tool for auto-id solutions. Featuring communication and control to devices connected to COM-ports, physical or virtual (USB and Bluetooth). For use it with barcode readers, scales, RFID readers and other serial devices.
- Page 90 User Manual Tx800 Troubleshooting VI Certification FCC Information: This device complies with FCC Rules, part 15. Operation is subject to the following conditions: This device may not cause harmful interference This device must accept any interference that may be received, including interference that may cause undesired operation.
- Page 91 Troubleshooting User Manual Tx800 Lithium Battery Safety Statement Caution: Lithium battery inside. Danger of explosion if battery is incorrectly replaced. Replace only with same or equivalent type recommended by battery manufacturer. (US) Attention: Contient une pile de lithium. Risque d’explosion dans le cas où la pile ne serait pas correctement remplacée. Remplacer uniquement avec une pile semblable ou equivalente au type de pile recommandé...
- Page 92 User Manual Tx800 Troubleshooting VII Warranty, Support and Service Warranty The Tx800 has a warranty of one year from the date of delivery The warranty assumes that the product was used in a way that can be considered normal and that all the requirements in this manual are met.
- Page 93 Troubleshooting User Manual Tx800 VIII Environmental Care Information Thanks to its low energy consumption, the use of Tx800 has a minimal effect on the environment. However, the computer should still be turned off or put on standby when it is not in use, to avoid the unnecessary consumption of energy.
- Page 94 User Manual Tx800 Troubleshooting IX Batteries CAUTION: Risk of explosion if battery is replaced by an incorrect type. Dispose of used batteries according to the instructions. DISCHARGED BATTERY Disposal of a Li-Po battery poses a smaller threat to the environment when compared to other battery types.
- Page 95 Troubleshooting User Manual Tx800 X Français Avertissement et emarque Le manuel n'explique pas comment installer et utiliser le système d'exploitation ou les applications. Avertissement ! Vous avertit des risques de dommages pour les individus ou les biens. Suivez toujours les instructions qui figurent en regard de ce symbole.
- Page 96 User Manual Tx800 Troubleshooting Une fois que les périphériques sont connectés, fixez les câbles sur la partie inférieure de l'ordinateur qui comporte des trous prévus pour les brides de câbles. N'oubliez pas que les systèmes d'exploitation n'ont pas tous une prise en charge intégrée de la souris (par exemple, DOS).
- Page 97 Åkerströms Trux AB Björbovägen 143 SE-780 45 Björbo Phone: +46 241 250 00 Fax: +46 241 250 61 e-mail: sales@akerstroms.se www.akerstromstrux.com...
Need help?
Do you have a question about the Trux 700 and is the answer not in the manual?
Questions and answers