
Related Manuals for World Tech Toys Orion


Summary of Contents for World Tech Toys Orion
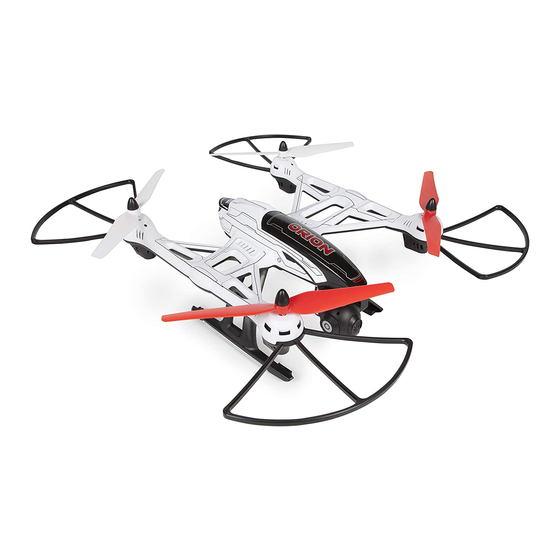
- Page 1 PICTURE / VIDEO CAMERA 2 . 4 G H z 4 . 5 C H R C D R O N E I N S T R U C T I O N M A N U A L...
-
Page 2: Safety Instructions
I N TRODUCTION Thank you for purchasing this amazing World Tech Toys product. This drone is suitable for outdoor flight. Please carefully read the entire manual before operating this drone and keep it for reference in the future. SAFETY & PR ECAUT IO NS 1. - Page 3 TRAN S MITTE R DI AGRAM Power Switch Antenna Power Indicator Speed Modes Flip Stunt Mode Angle Up/Angle Down Forward/Backward Trim Camera Motor Control Ascend/Descend Forward/Backward [Left/Right Turning] [Left/Right Sideways Flight] Left/Right Turning Trim Left/Right Sideways Trim Return Assist Easy Mode Emergency Stop Photo Button Start/Stop...
- Page 4 CHARGING THE DRONE BATTERY RECHARGEABLE BATTERY PACK WALL BALANCE WIFI CHARGER CHARGER Switch off the power and open the Plug the wall charger into an outlet and connect it to the balance charger. battery compartment. Disconnect The GREEN LED will turn on when the balance charger has power. Plug the battery cable from the drone and the drone’s battery pack into the balance charger.
- Page 5 INSTALLING THE ROTOR GUARDS CONTINUED Screw Holes Slide in the correct rotor guard into the rotor. Flip the drone upside down and screw in the rotor guard with 2 screws to secure it into place. Repeat this process for the 3 other rotor guards. INSTALLING THE CAMERA Slide the vibration absorbing board on to the bottom of the drone until it clicks into place.
- Page 6 INSTALLING THE LANDING SKIDS The drone comes with 2 landing skids that will need to be installed. Landing Skid A and B. Landing Skid A will go into slot A on the bottom of the drone and Landing Skid B will go into slot B on the bottom of the drone, as shown above.
- Page 7 INSTALLING THE ROTOR BLADE CAPS The drone comes with removable rotor blade caps. These caps are purely cosmetic and are not necessary for flight. They can be installed by just firmly pushing the caps onto the rotor blades as shown above. To remove the cap just simply pull them off.
- Page 8 CAMERA INDICATOR LIGHT The Camera indicator light is located inside the motorized camera assembly. It can been seen through the vents on the back. • BLUE + BLINKING RED: Memory Card Isn’t Inserted • BLUE + RED: Recording Video • BLUE: Camera Standby Status •...
- Page 9 VIEWING VIDEO/PHOTO FILES ON THE COMPUTER Turn the drone off. Remove the memory card, then install it into the included memory card USB adaptor and plug it into a computer. Videos and photos can be viewed using media players. If you are having issues viewing your drone videos, try downloading and viewing the video files with VLC media player.
- Page 10 FLYING THE DRONE Before flying the drone for the first time please read the instructions carefully and make sure you fully understand how to control your drone. START/STOP BUTTON Once you’ve gone through the flight preparation, START/STOP press the START/STOP button once and the drone’s rotor will start to spin.
- Page 11 FLYING THE DRONE CONTINUED If the drone crashes or to avoid a collision you will EMERGENCY STOP need to do an EMERGENCY STOP. Push the left joystick to the bottom left and push the right joystick to the bottom right at the same time and hold the position until the drone shuts down Press the EMERGENCY STOP button on the remote.
- Page 12 FLYING THE DRONE CONTINUED RETURN ASSIST RETURN ASSIST does not use GPS to fly back to the pilot. The RETURN ASSIST function only remembers the general direction the drone took off from. TAKING OFF For RETURN ASSIST to work properly you will need to launch the drone with the front of the drone facing away from the pilot like the illustration to the left.
- Page 13 AD J U S T I N G TH E TR I M When drone moves with no directional transmitter input, adjust the trim controls until hovering is stable. If the drone is spinning to the left, push the Left Turn/Right Turn Trim button to the RIGHT until the drone stops spinning. If the drone is spinning to the right, push the Left Turn/Right Turn Trim button to the LEFT until the drone stops spinning.
- Page 14 R E P L A C I N G TH E R O TO R S The rotors may become damaged during a collision. The drone comes with 4 spare rotors. Please replace damaged rotors immediately. The drone comes with 2 A rotors and 2 B rotors. The A and B rotors need to installed on specific locations on the drone for it to fly properly.
- Page 15 POST FLIGHT After you are done flying the Drone make sure the battery pack on the drone is disconnected and the transmitter power is turned off. If you are not going to use the drone for a long period of time, please remove the AA batteries to prevent the batteries from draining or leaking.
- Page 16 Website: www.worldtechtoys.com Email: customerserv@worldtechtoys.com SPECIFICATIONS, Phone: (877) 498-8697 COLORS AND CONTENT Monday - Friday / 9:00AM - 5:00PM / Pacific Time MAY VARY FROM ILLUSTRATIONS MADE IN CHINA WWW.WORLDTECHTOYS.COM...
Need help?
Do you have a question about the Orion and is the answer not in the manual?
Questions and answers