Table of Contents
Advertisement
Advertisement
Table of Contents

Related Manuals for QUAN SHENG TG-UV2PLUS


Summary of Contents for QUAN SHENG TG-UV2PLUS
- Page 1 User’s Manual...
- Page 2 Thank you for purchasing this QS Radio. We believe this easy-to-use radio will provide reliable and dependable communication. QS Radio incorporates the latest advanced technology. As a result, we know that you will be pleased with the quality and features of this product.
- Page 3 18.Channel delete 1.Multiband TX&RX,dual PRECAUTIONS BEFORE USING display dual standby 19.Reset 2.H (High) , M (Medium) , L (Low) Please read the User’s Manual before using. It gives you important 20.Up/down scan function output power selective information about how to operate the portable radio. 21.Main/sub channel shift 3.Double frequency, double channel Please put the radio and accessories where the children can not touch.
-
Page 4: Supplied Accessories
CONTENTS SUPPLIED ACCESSORIES Carefully unpack the portable radio. We suggest that you check the Channel display mode (DSP)-------------- 21 SUPPLIED ACCESSORIES-----------------------1 Priority scan (PCH)----------------------21-22 CHARGING NOTES(1)(2)----------------------- 2-3 following items before you throw away the packing materials. Wide/Narrow bandwidth (W/N)----------- 22 ATTACHING/RELEASING Channel delete (DEL)------------------ 22-23 THE BATTERY PACK------- -------------------------4... - Page 5 CHARGING NOTES(1) CHARGING NOTES(2) Charging the battery pack: Plug the AC adapter into the back of the Battery packs are not charged when they are shipped.Charge charger.Then plug the power cable of the them before use. adapter into 220V power. Initially charging the battery pack after purchase or extended storage (longer than 2 months) will not bring the battery pack to its greatest capacity or its normal charge, which can be done only after...
- Page 6 INSTALLING BELT CLIP ATTACHING THE BATTERY PACK Slide the battery pack into the back of the radio in the direction of the Conveniently attaches to your belt. arrow ( ), then lock it with the battery release button. Attach the belt clip with the supplied screws Slide the battery pack until the battery release button makes using a phillips screw driver.
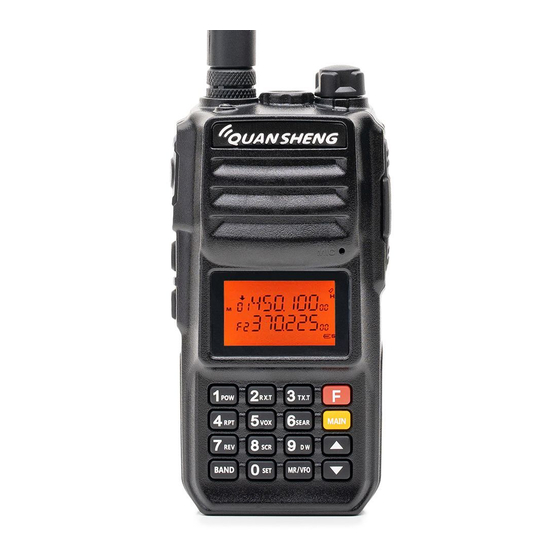
- Page 7 DIAGRAM Jacklight Antenna connector Power/Volume switch Receive/Transmit PTT switch indicator lamp Ear/Mic jacks Monitor Speaker Jacklight switch Microphone LCD display Battery pack Function key Keypad Up key Down key...
-
Page 8: Lcd Display
LCD DISPLAY BASIC OPERATION Turn the Power/Volume knob clockwise to turn the power on. When you turn it on, it will beep and the channel will display on the LCD. Dual watch operation Priority scan channel The LCD backlight shows. (P-1) Priority scan Repeater shift direction Turn Power/Volume knob counter-clockwise to... - Page 9 FAST MENU OPERATION FLOW Fast key LCD Fast key LCD Page Page Parameter Feature Parameter Selectable NO. Feature Selectable Confirm Confirm mode display mode display H: (5W) Voice scrambler Press Auto SCR. ** ON/OFF Repeatedly Power switch H/M/L Auto Auto M: (2.5W) press F+1 L: (1W)
- Page 10 Fast key LCD Parameter Selectable Confirm VFO Fast key LCD Confirm VFO Page Page NO. Feature NO.Feature Parameter Selectable mode display display mode Press Letters (A-Z) Wide/narrow Channel W: 25k F or press BAND to Press F+0+7 W/N * _Glitters Auto F+BAND Numbers (0~9)
- Page 11 1. On standby mode, press , the LCD will displays "RC.***"( as picture 2) FUNCTION INSTRUCTION 2. Press to change CTCSS/DCS, press OFF to turn it off. CTCSS: 67.0-254.1 NOTICE RC.off DCS: N023-N754 ( Normal DCS) Picture 2 46.025 This model has double-frequency-display function. On frequency mode, it can show two DCS: I023-I754 ( Inverse DCS) different receiving and transmitting frequencies at the same time;...
- Page 12 Fequency Deviation Setting (+/-)-----Menu 4 NOTICE This function is a way used with repeater or other working stations. The higher the level is , the higher the sensitivity of microphone is. 1. On frequency mode, press , the LCD displays as picture 4. When scanning, FM radio or dual watch, this function is invalid.
- Page 13 1. On standby mode, press to enter, the LCD displays "R". (as picture8) Example: Main channel frequency is 460.125MHz, sub channel frequency is151.235MHz. 2. Operating it repeatedly means turning on or off. Want to set dual watch, operates it as following: 440.025 3.
- Page 14 Using this function, you may set deviation between receving and transmitting. 1. On standby mode, press to enter, the LCD shows "TOT.***". Generally, only repeaters use this. The frequency deviation of this radio is : 0-69.995MHz 2. Press to choose time-limit level. The TOT of this radio may set 60- 1.
- Page 15 3. After setting, press to confirm, it would remind you whether you would delete. 3. After setting is finished, press to confirm. Press or PTT to return to standby LCD displays "DEL?" mode. RESET 4. If you want to delete, press to confirm again.
- Page 16 Squelch Level Setting-----Menu 24 Using this function may shift between main and sub channels when in frequency or channel mode. On standby mode, press , the frequency or channel will shift This function makes the squelch level"ON"or"OFF"via choose the signal level of radio. the top or bottom row.
- Page 17 Channel Storing-----Menu 26 d: Press key repeatedly until the repeater shift direction shows (-). (see Menu 11). e: Press key , and then input key 0、5、0、0、0 ordinal. When the radio on the frequency working and standby mode, input the desired f: Press key to confirm.
- Page 18 Frequency Band Shift-----Menu 30 On the frequency mode, input the FM frequency of the radio, the FM frequency range: 88-108MHz.Example: FM frequency: 88.1MHz This function is convenient to choose the frequency band of the radio. 00.000 Picture 24 1. On the frequency mode . (as picture 24). 1.
- Page 19 CTCSS 1 9 9 .5 D251N D446N D732N D145I D325I D526I 6 7 .0 1 0 3 .5 1 5 9 .8 D252N D452N D532I D734N D152 D331I 2 0 3 .5 6 9 .3 1 0 7 .2 1 6 2 .2 D255N D155I D546I...
-
Page 20: Specifications
SPECIFICATIONS NOTE: This equipment has been tested and found to comply with the limits for a Class B digital device, pursuant to part 15 of the FCC Rules. These limits are GENERAL designed to provide reasonable protection against harmful interference in a residential installation.
Need help?
Do you have a question about the TG-UV2PLUS and is the answer not in the manual?
Questions and answers
Как настроить радиостанции на кана дальнобойщиков?
To set up QUAN SHENG TG-UV2PLUS radios for trucker channels:
1. Enter Frequency or Channel Mode:
- Use the mode switch to select frequency or channel mode as needed.
2. Set the Correct Frequency:
- Use the keypad or programming software to set the frequency for the trucker channel (e.g., CB channel 19 is 27.185 MHz, but TG-UV2PLUS is a VHF/UHF radio, so make sure the trucker frequency is within its supported range).
3. Set Channel Step (Menu 10):
- Press F + 0 + SET + 1 to access the menu.
- Navigate to Menu 10 "Channel Step (STP)" to match the step frequency of the desired channel.
4. Save the Channel:
- Use the "Channel store" function (Option 26 in manual) to save the frequency to a memory channel.
5. Optional Settings:
- Set CTCSS/DCS codes if needed for privacy (Option 10 in manual).
- Enable voice scrambler only if both radios support it.
Note: Ensure the frequency used is legal and supported by the radio. The TG-UV2PLUS does not support CB (27 MHz) frequencies. Use only VHF/UHF trucker frequencies that are compatible with the radio.
This answer is automatically generated