Advertisement
Available languages
Available languages
Quick Links
http://waterheatertimer.org/Honeywell-timers.html
Applications
The RPLS530A/RPLS531A switch can be used in a single-pole or 3-way
installation with the following types of lighting:
• Incandescent
• Halogen
• Low-voltage halogen with transformer
• Fluorescent
The RPLS530A/RPLS531A switch cannot be used with a load below 40
W, a load above 500 W or a motor.
Installation
Cut power at the circuit breaker to avoid electric shock.
Remove the existing switch. (For a 3-way installation, identify and
label the wire that is connected to the "common" screw.)
Install the new switch (refer to the appropriate section below).
Apply power at the circuit breaker.
NOTE A:
The white wire is not the neutral wire but the wire going to the load.
SINGLE-POLE INSTALLATION
Line
120 VAC
Neutral
120 VAC
Connect wires "2" and "C" of the RPLS530A/RPLS531A to the line
(120 V) wire.
EXISTING 3-WAY INSTALLATION
120 VAC
Jumper
RPLS530A/RPLS531A
See NOTE A
Line
Neutral
See NOTE A
Red
Red
3-wire cable
RPLS530A/RPLS531A
Connect wire "C" of the RPLS530A/RPLS531A to the "common" wire,
1.
identified when removing the old switch. Connect the other two
RPLS530A/RPLS531A wires to the two remaining wires.
At the other 3-way switch, connect the jumper wire between the "com-
mon" screw and the screw where wire "1" of the RPLS530A/RPLS531A
is connected.
NEW 3-WAY INSTALLATION
120 VAC
2.
The jumper wire is not required in this installation. A single-pole switch
can be used as the other switch in a 3-way installation.
Power-On
Pry the switch door open from the
bottom using a small screwdriver.
Ensure the ON/OFF selector is set to
ON.
Reset the switch using a paper clip.
0:00 and MO will flash.
If the display is blank:
•
Ensure the ON/OFF selector is prop-
erly engaged in the ON position. Push it to the right using a small
screwdriver.
•
If the programmable switch controls a lamp equipped with a built-in
On/Off switch, ensure the lamp switch is set to On.
•
Ensure the light bulb is not burned out and is tightly screwed in its socket.
EXISTING 3-WAY INSTALLATION
If either switch does not work properly, rewire the jumper between the
"common" screw and the other screw.
WARNING: Before replacing the light bulb, place the ON/OFF selector in
the OFF position. Failure to do so might damage the switch.
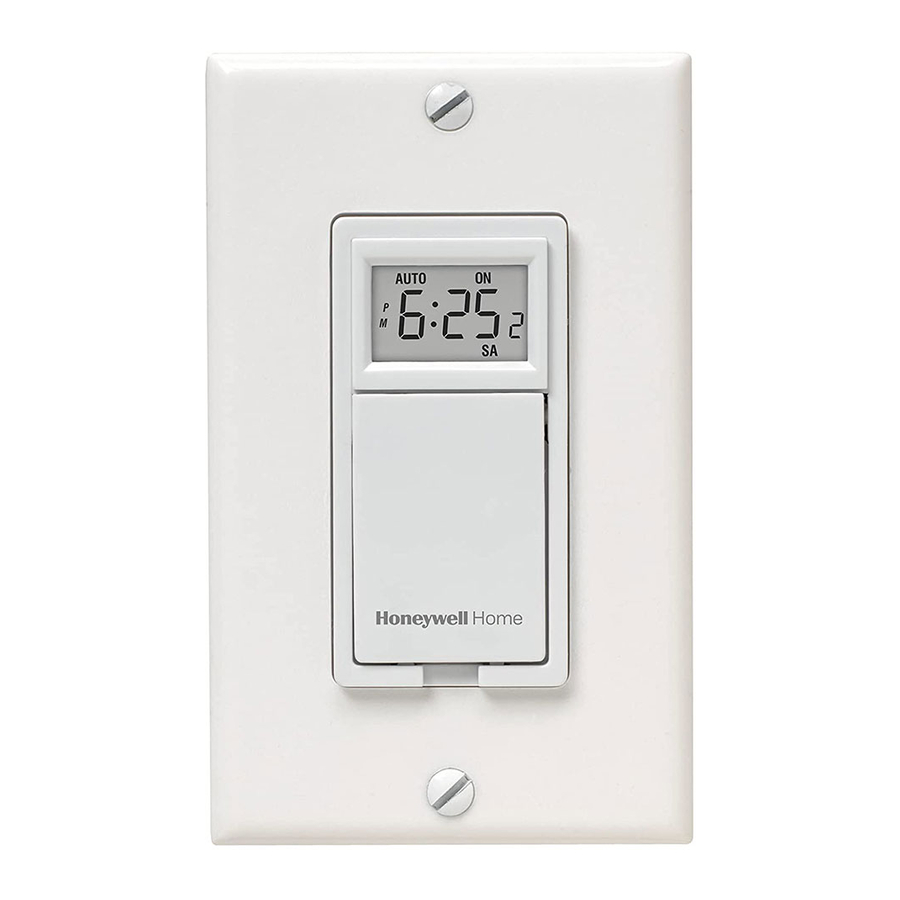
Setting the Clock
NOTE: The switch displays the time in 24-hour format by default or fol-
lowing a reset.
To change to 12-hour format (or vice versa), proceed as follows:
a) Press one of the control buttons to ensure the MAN or AUTO
indicator is displayed.
b) Press the MIN and HOUR buttons simultaneously and brieftly
(0:00 display = 24-hour, 12:00 display = 12-hour ).
Set the time using the HOUR and MIN buttons. If you have selected
the 12-hour format, ensure that PM appears on the screen when an
afternoon time is displayed.
Set the day by using the DAY button.
Press one of the control buttons or close the switch door to return to
normal operation.
Installation and User Guide
Programmable Wall Switch
See NOTE A
3.
Reset
Control (4)
On/Off selector
4.
1/6
Advertisement

Related Manuals for Honeywell RPLS530A


Summary of Contents for Honeywell RPLS530A
- Page 1 Connect the other two RPLS530A/RPLS531A wires to the two remaining wires. The RPLS530A/RPLS531A switch can be used in a single-pole or 3-way At the other 3-way switch, connect the jumper wire between the "com- installation with the following types of lighting: mon"...
-
Page 2: Troubleshooting
This warranty does not cover removal or reinstallation costs. This warranty shall not apply if it is shown by Honeywell that the defect or malfunction was caused by display the OFF time (time when you want the lights to turn off). - Page 3 neutre Régler l’horloge NOTA : L’interrupteur affiche l’heure en format 24 heures par défaut ou Relier les fils «2» et «C» du RPLS530A/RPLS531A à la ligne 120 Vca. après une réinitialisation. INSTALLATION EXISTANTE À 3 VOIES Pour basculer entre le format 12 heures et le format 24 heures, pro- céder comme suit :...
- Page 4 (OFF) du programme. Par exemple, lorsque vous appuyez sur PGM pour la Honeywell garantit ce produit, à l'exception des piles, contre tout vice de fabrication ou première fois, le programme 1 (P1) et l’heure du de matière dans la mesure où...
- Page 5 Ajuste de la hora y el día Conectar los cables “2” y “C” del RPLS530A/RPLS531A a la línea de 120 NOTA: El interruptor viene de fábrica con el formato de 24 horas, que Vca. aparece también luego de una reinicialización INSTALACIÓN EXISTENTE DE 3 VÍAS...
- Page 6 Levantar la parte inferior de la tapa del interruptor con un pequeño destornillador. Honeywell garantiza por un período de un (1) año, a partir de la fecha de compra por el consumidor, que este producto, sin incluir las baterías, no presentará defec- Presionar el botón PGM para visualizar un programa,...