Table of Contents
Advertisement
Advertisement
Table of Contents

Related Manuals for Cashmaster One Pro


Summary of Contents for Cashmaster One Pro
- Page 1 User Guide...
- Page 3 They are used only for explanation, without intent to infringe. Intended purpose This document is provided for Cashmaster One users and describes how to get the most from their Cashmaster One product. Safety and using the counter The counter must be used on a stable and level surface.
- Page 4 Any modifications made to this device that are not approved by Cashmaster International Ltd may void the authority granted to the user by the FCC to operate this equipment.
-
Page 6: Table Of Contents
Contents 1 Product information 1.1 Variants 1.2 Connections 1.3 Power 2 Getting started 2.1 Package contents 2.2 Install the hod 2.3 Install the optional printer 2.4 Connect the power adaptor 2.5 Power up 3 Interface 3.1 Count screen 3.2 Icons 4 Operations 4.1 Counting 4.2 System settings... - Page 7 5.5 Miscellaneous 6 Specifications 6.1 Regulatory and approvals 6.2 Counter specifications 6.3 Printer specifications 7 Global support 10479 - vE...
-
Page 8: Product Information
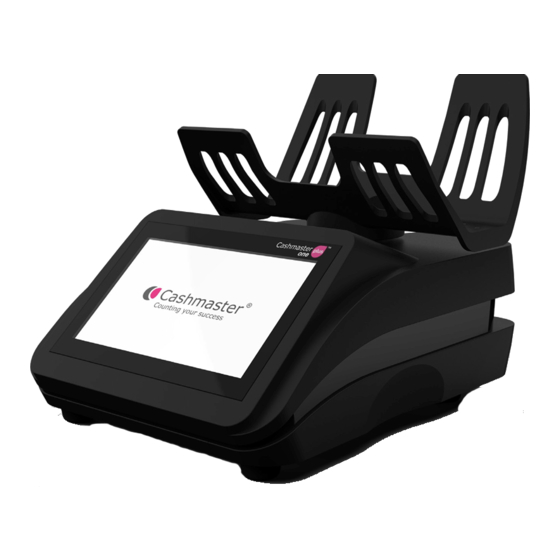
Product information The Cashmaster One product range counts notes, coins and coupons in any configured currency, and can help streamline cash-handling business processes. The Cashmaster One counters are count-by-weight devices controlled by a robust colour touch-screen display. All Cashmaster One counters are compatible with the Cashmaster Printer One. - Page 9 Cashmaster One - User Guide 1 Product information 1.1.1 Cashmaster One Pro The Cashmaster One Pro accurately counts loose and bundled cash, and is ideal for sole traders or small businesses with one till. The Cashmaster One Pro has the following features: •...
- Page 10 The Cashmaster One Plus performs all cash-counting requirements including vouchers and coupons, and non-cash items such as debit or credit cards and cheques. With multiple count mode capabilities, the Cashmaster One Plus is ideal for small to medium-sized businesses with multiple tills and cash-handling processes.
- Page 11 1.1.3 Cashmaster One Max The Cashmaster One Max offers advanced functionality, including multi-till memory and built-in Ethernet. With extended features and customisation options, the Cashmaster One Max is ideal for larger organisations, or businesses which have demanding processes and complex operational requirements.
- Page 12 The optional Cashmaster Printer One can integrate with any of the three counters in the Cashmaster One range. It easily and neatly fits into the base of the counter. With intelligent autostart, as soon as the printer is installed it is ready for use - no setup is required.
-
Page 13: Connections
Power Power is provided using the 12V DC power adaptor. Only use a Cashmaster-supplied PSU with your Cashmaster One product. Using a non- Cashmaster PSU may result in damage to the product and will invalidate your warranty. 10479 - vH... - Page 14 Cashmaster One - User Guide 1 Product information 1.3.1 External power Plug the power adaptor into the socket at the back of the Cashmaster One counter. Do not connect power adaptor with wet hands or use a damaged or wet power adaptor.
-
Page 15: Getting Started
Getting started This chapter describes the initial steps required to start using the Cashmaster One counter. 10479 - vE... -
Page 16: Package Contents
Cashmaster One - User Guide 2 Getting started Package contents 10479 - vH... - Page 17 Cashmaster One - User Guide 2 Getting started 2.1.1 Package contents list Item Description Scoop Cashmaster One Cashmaster One battery Base plate cover Cashmaster Printer One battery Paper roll Cashmaster Printer One (optional) Power adaptor 10479 - vH...
-
Page 18: Install The Hod
3. Gently twist the hod and push down until the hod clicks into position. Install the optional printer The Cashmaster Printer One can be integrated into the base of all counters. 1. Carefully turn over the counter. 2. Remove the base plate cover by pressing both retaining tabs and pulling the base plate down and forward, towards the front of the counter. - Page 19 Cashmaster One - User Guide 2 Getting started 3. Carefully insert the two holding tabs on the printer into the base of the counter. 4. Lift the printer up and into the base of the counter. 5. Push the printer into the counter until you hear the click of the printer’s retaining tabs.
-
Page 20: Connect The Power Adaptor
2. Insert the power adaptor plug into the counter power adaptor port. The Cashmaster One counter must be placed near to the power supply during setup. The Cashmaster One counter is designed for portable use and has an eight-hour battery life. 10479 - vH... -
Page 21: Power Up
Cashmaster One - User Guide 2 Getting started Power up Press the power button to start the Cashmaster One counter. 10479 - vH... -
Page 22: Interface
Interface All variants of the Cashmaster One range have a touch-screen interface which is used to perform count and setup tasks on the counter. When the counter is powered up, a start-up screen is briefly shown followed by the Home screen for the variant of your counter. -
Page 23: Count Screen
Count screen user interface. Selecting a highlighted area displays additional information. Count screen Each variant also has one or more Count screens containing additional controls and information for the counting workflow. Figure 2 - Cashmaster One Plus/Max Count screen 10479 - vH... -
Page 24: Icons
Cashmaster One - User Guide 3 Interface Item Description Selected currency Media type Selected denomination Additional counting options Icons Tap the Power Key at any time to display a pop-up with the following options: Power key menu icon Description Power off Tap to power off the device. - Page 25 Cashmaster One - User Guide 3 Interface Status bar icon Description Cashmaster Printer One is installed Network USB device mode. Counter is connected to USB host USB Flash drive inserted Battery level indicator Mains power connected and battery charging Help, home or workflow control...
- Page 26 Cashmaster One - User Guide 3 Interface Help, home or workflow control Description icon Count data transfer Help Count and settings icon Description Single till count mode(s) Multi-till count mode(s) Count settings System settings Media icon Description Loose coins - scoop as coin...
- Page 27 Cashmaster One - User Guide 3 Interface Media icon Description Rolls of coins Bags of coins Loose notes and tokens Manual entry - Keypad entry for non- physical cash items, such as debit and credit card values. Packaged notes Add lists - keypad entry for itemised cash items such as cheques or vouchers.
- Page 28 Cashmaster One - User Guide 3 Interface Description Denomination icon Notes, for example, $1, $10, $50. Coupon Cheque Card Additional counting options Description Clear subtotal Manual entry - Access keypad to manually enter values. Clear count and restart Access float/Start bank settings...
-
Page 29: Operations
A running total is kept at all times. A cash-count workflow typically begins with counting loose coins. Therefore, at the beginning of a count, the Cashmaster One device may request an empty coin container such as the Cashmaster-supplied scoop or an empty, weighable till cup from your cash drawer. - Page 30 For more information, see Section 3.2 "Icons" on page 24 4.1.1 Count modes A cash count is the process of counting cash using a Cashmaster One device. The Cashmaster One Plus and Max models allow you to configure multiple ‘cash count modes’. A count mode is comprised of the following configurable settings: •...
- Page 31 Cashmaster One - User Guide 4 Operations Action Description Loose coins (Cups) Coin rolls Loose notes Manual entries 4.1.2 Cash-count workflow Action Description From the Home screen, tap the required count type. (Single Count / Multi Count). Place the empty coin container on the counter hod. The counter adjusts for the Tare weight of the coin container.
- Page 32 Cashmaster One - User Guide 4 Operations Action Description Fill the coin container with the requested media and place on the counter hod. The counter workspace updates with the counted media. Remove the coin container. The workflow automatically moves onto the next media type to be counted.
-
Page 33: System Settings
Cashmaster One - User Guide 4 Operations Notes are counted in ‘slices’ of up to 30 notes at a time. If too many notes are added, or if the counter cannot determine the quantity of notes on the hod, the counter prompts you to remove a few notes at a time until it can successfully count the slice. - Page 34 Cashmaster One - User Guide 4 Operations Setting Description About System update Switches Environment test 4.2.1 Advanced settings Setting Description Calibrate Margin tare Gravity zone Currency 10479 - vH...
-
Page 35: Editing The Counter Workflow
• Auto - The currency or denomination exists in the workflow and is used during a normal count. 4. Tap Set. Multi-till counting (Max only) The Cashmaster One Max supports counts from multiple tills. 10479 - vH... -
Page 36: Changing The Printer Roll
Print or transfer individual stored counts from within their Review screen. Changing the printer roll When the paper from the Cashmaster Printer One begins to show a red stripe, the printer roll is nearly empty and must be changed. 10479 - vH... - Page 37 Cashmaster One - User Guide 4 Operations 1. Remove the Cashmaster Printer One from the counter. For more information, see Section 2.3 “Install the optional printer” on page 18 2. Press the release lever to the left of the print head.
-
Page 38: Removing The Hod
Cashmaster One - User Guide 4 Operations Removing the hod To provide accurate count results, the hod must be kept clean. Remove the hod before cleaning it. For more information, see "Care and maintenance" on page 40 If the hod is damaged it must be replaced. -
Page 39: Care And Maintenance
Cashmaster One - User Guide 4 Operations Care and maintenance Ensure that the power is switched off when cleaning the Cashmaster One counter. Clean the counter with a dry cloth only. Do not use any cleaning products or damp material. -
Page 40: Troubleshooting
Troubleshooting This chapter provides troubleshooting information to resolve common issues. Notes and bills Mode Message Description Scale has lost its Your counter has drifted from its factory- Loose zero point calibrated zero weight, usually due to a note draft or vibration. counting Ensure the hod is empty and press the power on/off button once. -
Page 41: Coins
Cashmaster One - User Guide 5 Troubleshooting Coins Mode Message Description Too much Cashmaster One supports up to 1.5kg. weight on Remove some of the coins. scale * Suspect * The measured weight of the item currently on the Packaged... -
Page 42: Note Learning
Note weights vary slightly depending on age and usage, and this may cause occasional Too many, remove some alerts. All Cashmaster products include patented note learning algorithms and can be trained with current note weights to improve the ‘slice limit’. This reduces the chance of a Too many, remove some alert. - Page 43 Cashmaster One - User Guide 5 Troubleshooting Message Description Battery low Attach the counter to the power supply. The battery charge status is shown in the status bar Scale below The hod may not be fitted correctly. Ensure the hod is fitted minimum correctly and has clicked into place.
-
Page 44: Specifications
Specifications This chapter details the specifications of the Cashmaster One counter. Regulatory and approvals • Electromagnetic Compatibility (EMC) Directive 2014/30/EU • Restriction of Hazardous Substances (RoHS) Directive 2011/65/EU RoHS 2 • Waste Electrical & Electronic Equipment (WEEE) Directive 2012/19/EU Counter specifications... -
Page 45: Printer Specifications
6 Specifications Average battery 6 hours charging time For best results, charge at between 10°C and 30°C Printer specifications The Cashmaster Printer One has the following technical specifications: Weight 0.34kg (Including battery) Dimensions 116 x 134 x 66mm Power supply... -
Page 46: Global Support
Global support • North America t: +1 877 227 4627 e: enquiriesusa@cashmaster.com • Hong Kong and Asia t: +852 3511 6183 e: enquiriesasia@cashmaster.com • Germany t: +49 (0) 2463 999 339 e: germany@cashmaster.com • UK and all other customers t: +44 (0) 1383 410 121 e: support@cashmaster.com... - Page 48 cashmaster.com...
Need help?
Do you have a question about the One Pro and is the answer not in the manual?
Questions and answers