Advertisement
Advertisement

Subscribe to Our Youtube Channel
Related Manuals for Gourmia GCM-4900


Summary of Contents for Gourmia GCM-4900
- Page 1 Pour Over Coffee Maker Model# GCM-4900 USER MANUAL...
- Page 2 Read this manual thoroughly before using and save it for future reference Model: GCM-4900 © 2017 Gourmia www.gourmia.com The Steelstone Group Brooklyn, NY All rights reserved. No portion of this manual may be reproduced by any means whatsoever without written permission from The Steelstone Group, except for the inclusion of quotations in a media review.
- Page 3 The pages of this manual offer full and comprehensive instructions to guide you through the functions and features of the Gourmia Pour Over Coffee Maker. In this guide you will also find complete step-by-step instructions for the operation, assembly, and maintenance of your appliance.
-
Page 4: Important Safety Instructions
Important Safety Instructions 1. Read all instructions. 15. Do not touch or move the machine while in use. Hot steam will be escaping from the steam 2. Remove all packaging from the appliance. outlet. 3. Use handles or knobs to operate the appliance. 16. -
Page 5: Table Of Contents
TABLE OF CONTENTS Know Your Pour Over Coffee Maker..6 Using Your Coffee Maker ......8 Why pour over coffee......11 Cleaning And Maintenance ....12 Troubleshooting ........14 Warranty & Services......15... -
Page 6: Know Your Pour Over Coffee Maker
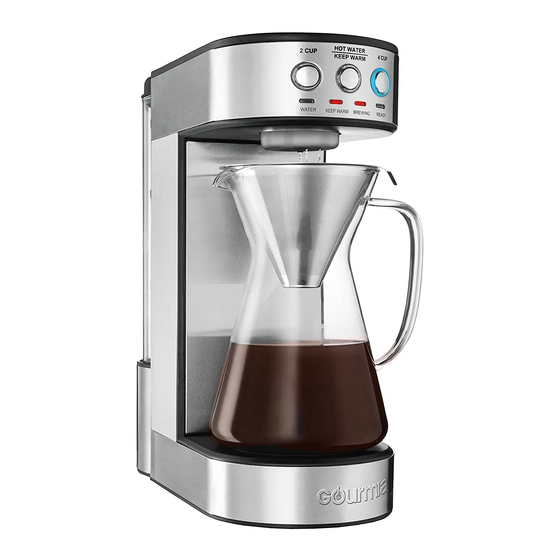
KNOW YOUR COFFEE MAKER Water Tank Lid Glass Steam Water Tank Vent 2 Cup Water Button Indicator Light Hot Water/ Keep Warm Button Warm Indicator Light Coffee Brewing Filter Indicator 4 Cup Ready Light Button Indicator Light Glass Carafe Glass Coffee Carafe Filter... - Page 7 Back View Water Tank Lid Glass Water Tank Water Power Suction Button Tube Water Heater Lower View Water Nozzle...
-
Page 8: Using Your Coffee Maker
Using Your Coffee Maker For The First Time 1. Remove all packaging from the machine and make sure you have all the attachments. 2. Clean all the attachments. 3. Remove the water tank cover. 4. Using the glass carafe, fill the water tank with desired amount of water. - Page 9 USING YOUR COFFEE MAKER • Place the coffee grinds into the filter. • The suggested ratio of water to coffee grinds is 16ml water/1g of coffee grinds. Recommended grind size Medium/Coarse-Coarse • Place the filter into the glass carafe. • Place the carafe on the base of the coffee maker. •...
- Page 10 TO USE KEEP WARM MODE 1. Under standby mode, place the glass carafe on the base, then press hot water/ warm button for three seconds. 2. The 2 cup or 4 cup indicator light will turn off and the keep warm indicator light will turn on.
-
Page 11: Why Pour Over Coffee
The Pour Over Coffee Maker has different features that provide the perfect system to brew coffee. It automatically calculates the different variables that are important for brewing coffee and maintains quality and consistency with each step. The way the coffee is brewed mimics the manual pour over technique which has many benefits over your standard cup of coffee. -
Page 12: Cleaning And Maintenance
CLEANING AND MAINTENANCE 1. Unplug the appliance and allow it to cool down completely before clean- ing. 2. Clean the exterior of the appliance with a damp cloth. 3. Clean the steam outlet on top of the machine with a damp cloth to make sure there is no residue blocking the outlet. - Page 13 CLEANING MINERAL DEPOSITS: After using the coffee maker several times, lime scale can begin to build up inside the machine. Descale the machine every 2-3 months. 1. Fill the water tank with water and vinegar or lemon juice till the MAX line (about 1.8L).
-
Page 14: Troubleshooting
TROUBLESHOOTING PROBLEM POSSIBLE CAUSE SOLUTION No water comes out. water tank is empty. Pour water into the water tank. The input voltage or frequency is Make sure the voltage and frequency is inconsistent with nameplate. consistent with the nameplate. Machine malfunctions Please contact the authorized dealer. -
Page 15: Warranty & Services
WARRANTY & SERVICE This Limited Warranty is for one full year from the date of purchase. It is applicable to the original purchaser only and is not transferable to a third party user. Repair or replacement of defective parts is solely at the seller’s discretion. - Page 16 FOR CUSTOMER SERVICE QUESTIONS OR COMMENTS VISIT US @ GOURMIA.COM INFO@GOURMIA.COM OR CALL 888.552.0033...
Need help?
Do you have a question about the GCM-4900 and is the answer not in the manual?
Questions and answers