Table of Contents
Advertisement
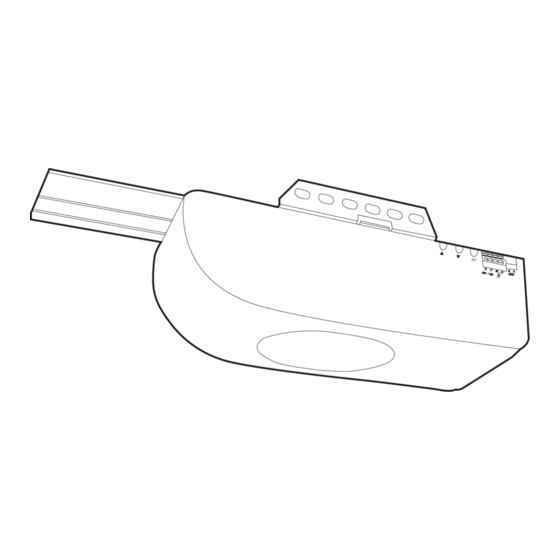
model no. 046-0265-2
CHAIN DRIVE GARAGE DOOR OPENER
IMPORTANT:
• Please read this manual and enclosed safety materials carefully!
• Safety infrared sensor MUST BE INSTALLED and aligned properly.
• Periodically testing the opener is required to ensure safe operation.
• Save this manual for future reference.
• This equipment meets or exceeds all federal, provincial and UL325
safety requirements.
•
DO NOT RETURN this to the store
• Please call: 1-800-689-9928.
INSTRUCTION
MANUAL
Advertisement
Table of Contents

Related Manuals for MasterCraft 046-0265-2

Summary of Contents for MasterCraft 046-0265-2
- Page 1 046-0265-2 CHAIN DRIVE GARAGE DOOR OPENER IMPORTANT: INSTRUCTION • Please read this manual and enclosed safety materials carefully! • Safety infrared sensor MUST BE INSTALLED and aligned properly. MANUAL • Periodically testing the opener is required to ensure safe operation.
- Page 2 headline bars continuation tabs notes warnings...
-
Page 3: Table Of Contents
TABLE OF CONTENTS Introduction Pre-Installation Checklist What is Included Important Instructions 10-11 Assemble The T-Rail 12-17 Install The Header Bracket 18-21 Hang The Opener 22-23 Install The Door Bracket 24-25 Install The Door Arms 26-28 Install The Wall Console 29-30 Connect The Opener To Power 31-32 Install Safety Beam Sensor... - Page 4 046-0265-2 | contact us 1-800-689-9928 continuation tabs continuation tabs notes notes BLANK PAGE (ON PURPOSE) warnings warnings...
-
Page 5: Introduction
INTRODUCTION Congratulations on purchasing the Mastercraft® Chain Drive Garage Door Opener a garage – door opener with many innovative features. Features include: extremely quiet operation with DC motor; automatic force adjustment so the door can be closed with just the right amount of force, not overpowered;... -
Page 6: Pre-Installation Checklist
046-0265-2 | contact us 1-800-689-9928 PRE-INSTALLATION CHECKLIST Check the following items before assembling the opener: • Identify the door type: sectional door or one-piece jamb door. • Ensure your garage door is balanced and is not sticking or binding. -
Page 7: What Is Included
WHAT IS INCLUDED The garage door opener and all accessories are packaged in one carton. Note that accessories will depend on the model you purchased. If anything is missing, carefully check the packing material. Wall Console Keychain Remote Keyless Entry Safety Beam Unit Trolley Pulley Assembly... - Page 8 046-0265-2 | contact us 1-800-689-9928 Emergency Release Rope continuation tabs notes Chain and Cable Hanging Assembly Bracket warnings Straight Arm Rail Sections...
- Page 9 BAG A A1 x 12 A2 x 12 A3 x 2 A4 x 3 A5 x 3 Carriage Bolt Locknut Bolt Locknut Flange Bolt BAG B B1 x 4 B2 x 4 B3 x 2 Lag Screw Bolt Self-tapping Screw B4 x 1 B5 x 1 Clevis Pin...
-
Page 10: Important Instructions
046-0265-2 | contact us 1-800-689-9928 IMPORTANT INSTRUCTIONS WARNING To reduce the risk of severe injury or death: 1. READ AND FOLLOW ALL INSTALLATION INSTRUCTIONS. 2. Check with the door manufacturer to determine if additional reinforcement is required to support the door prior to installation of the garage door opener. - Page 11 An overall view of a completed garage door opener system installed on a sectional door. The arrangement is similar for a one-piece jamb door (except for differences described later in this manual).
-
Page 12: Assemble The T-Rail
046-0265-2 | contact us 1-800-689-9928 ASSEMBLE THE T-RAIL ΠConnect the T-Rail Sections Align the 4 T-Rail sections on the floor. Connect these rails together with the rail couplers as shown. All rail pieces must be aligned properly. -
Page 13: Attach The Pulley Bracket
Please note the arrow and “M” marking which indicates this side to the motor unit. Attach the Pulley Bracket Attach the pulley bracket assembly to the end of the front rail with 2 nuts and bolts. Align the pulley bracket and rail. Ž... - Page 14 046-0265-2 | contact us 1-800-689-9928 Attach the T-Rail to the Opener Raise the pulley end of the rail so the rail can sit on the motor unit properly. Attach the rail to the motor unit by tightening 2 screws. Insert a bolt to the stop bolt hole and secure it with nut.
-
Page 15: Align The Chain On The Sprocket
’ Align the Chain on the Sprocket Start aligning the chain by placing the turnbuckle 10" (25 cm) from the sprocket. Wrap the chain around the sprocket. The sprocket teeth must engage the chain as shown. Start from Here 10" (25 cm) “... -
Page 16: Tighten The Chain And Cable
046-0265-2 | contact us 1-800-689-9928 ” Tighten the Chain and Cable Connect the 2 ends of the chain assembly together at the turnbuckle. continuation tabs Do not rotate Do not rotate To connect the turnbuckle and threaded... -
Page 17: Attaching The Sprocket Cover
• Attaching the Sprocket Cover Squeeze the cover slightly and insert the 2 tabs on the cover in the slots on the motor unit. WARNING • Always keep hand clear of sprocket and chain while operating opener. • Securely attach sprocket cover before operating. -
Page 18: Install The Header Bracket
046-0265-2 | contact us 1-800-689-9928 INSTALL THE HEADER BRACKET ΠMark the Door Centerline Close the door from inside the garage and mark the vertical centreline of the door on the wall and the top door panel. -
Page 19: Install The Header Bracket
Mark Above the Highest Point of Travel 1 1/4" (3 cm) above highest point of travel. 1 1/4" (3 cm) 7" (18 cm) Highest point of travel Mark a spot on the Mark a spot on the centreline of the centreline of the garage garage door, 7”... - Page 20 046-0265-2 | contact us 1-800-689-9928 Attach the Header Bracket Place the bottom edge of the bracket on the line marked above the highest point of travel. Mark the 2 holes with a pencil. 1 1/4" (3 cm) Above Sectional Door/ 7"...
- Page 21 Position The Opener Position the pulley bracket against the header bracket. Position the opener on the floor with packaging material as protective base. ‘ Connect the T-Rail to the Header Bracket Align the bracket holes and join with a clevis pin and hitch pin as shown.
-
Page 22: Hang The Opener
046-0265-2 | contact us 1-800-689-9928 HANG THE OPENER ΠRaise the Opener Raise the opener onto a stepladder. Use extra spacers on top of the ladder if the ladder is not tall enough. Carefully raise the door to the fully open position. Be sure the door is clear from the rail or any other part of the opener. -
Page 23: Attach The Hanging Brackets
Attach the Hanging Brackets Hanging brackets should be angled to provide rigid support. Measure the distance from the motor unit to the structural support. Cut and bend the hanging brackets as required. For an “open-seam” garage, attach the hanging brackets directly to the joists with 2 lag screws. Bracket (not included) Bolts and Nuts (not included) On a finished ceiling, attach a sturdy metal bracket (not included) to structural supports before installing... -
Page 24: Install The Door Bracket
046-0265-2 | contact us 1-800-689-9928 INSTALL THE DOOR BRACKET Top of Door Door Bracket Location continuation tabs continuation tabs Hardware Door arm connects directly (not included) to vertical reinforcement notes notes Bolt 5/16 x 2" (8 x 50 mm) - Page 25 One-Piece Wood Doors Bolt 5/16 x 2" (8 x 50 mm) (not included) For wood doors, drill 5/16" (8 mm) holes through the door and secure bracket with 5/16 x 2" (8 x 50 mm) carriage bolts, lock washers and nuts (not included).
-
Page 26: Install The Door Arms
046-0265-2 | contact us 1-800-689-9928 INSTALL THE DOOR ARMS ΠAttach Emergency Release Rope continuation tabs continuation tabs Engaged Released notes notes Thread the red rope through the hole in the trolley release handle and tie an over-hand knot. -
Page 27: Connect The Door Arm To The Trolley
Ž Connect the Door Arm to the Trolley Sectional Door Connect the straight door arm to the trolley with clevis pin and hitch pin. One-piece Jamb Door Connect the curved door arm to the trolley with clevis pin and hitch pin. NOTE: •... - Page 28 046-0265-2 | contact us 1-800-689-9928 Connect the Door Arms Together Bring two arms together. Find two pairs of holes that line up and join 2 arms with bolts and nuts. Select holes as far apart as possible to increase door arm rigidity.
-
Page 29: Install The Wall Console
INSTALL THE WALL CONSOLE Œ Place the wall button or wall console at least 5’ (1.5 m) above the finished floor or the topmost step. 5' (1.5 m) Ž Connect the bell wires to the 2 terminal Secure the wall console with two screws. screws. - Page 30 046-0265-2 | contact us 1-800-689-9928 Mount the user safety instruction label next to the wall console. continuation tabs continuation tabs Route the wire up the wall and across the ceiling to the opener with wire holders.
-
Page 31: Connect The Opener To Power
CONNECT THE OPENER TO POWER ΠConnect AC Power Plug motor unit into grounded outlet. If a grounded outlet is not available, contact a qualified electrician to install a proper outlet. DO NOT ACTIVATE THE OPENER UNTIL INSTRUCTED. Permanent Wiring/Remove Cover Be sure the power cord is unplugged. - Page 32 046-0265-2 | contact us 1-800-689-9928 Permanent Wiring/Remove the Bushing Be sure the power cord is unplugged. Cut the cord about 6" (15 cm) above the bushing. continuation tabs continuation tabs notes notes Remove the bushing with pliers ...
-
Page 33: Install Safety Beam Sensor
INSTALL SAFETY BEAM SENSOR Important Information: The safety beam sensor can detect obstacles in the path of its invisible beam. When the beam is obstructed while the door is closing, the door will stop immediately, reverse to the fully open position and the opener lights will flash. It is important to ensure the invisible infrared is unobstructed by any part of the garage door, tracks, other hardware or objects near the garage door. - Page 34 046-0265-2 | contact us 1-800-689-9928 Mounting the Sensor on the Door Track Clip the mounting bracket onto the garage door track. Ensure the sensor is mounted between 4" (10 cm) and 6" (15 cm) above the ground. Follow the same procedure to install the sensor on the other track ensuring the sensors are facing each other.
- Page 35 NOTE: Remove the spring bracket from the mounting bracket if installing to the wall or floor. 1. Slide the sensor from the mounting bracket. 2. Slide the spring bracket from the mounting bracket. 3. Re-install and secure the sensor to the mounting bracket.
-
Page 36: Align The Safety Beam Sensor
046-0265-2 | contact us 1-800-689-9928 ’ Check the Safety Beam Sensor LED Plug in the opener. The receiving sensor indicator's blue LED should glow steadily if the wiring and alignment are correct. The transmitting sensor indicator's red LED will glow steadily regardless of alignment or obstruction. - Page 37 ” Testing with Obstruction With the sensors properly aligned, place an obstacle in the path of the beam. The transmitting sensor's red LED should be on, the receiving sensor's blue LED should be off. Remove the obstacle, both LEDs should be on steadily. NOTE: •...
-
Page 38: Programming Guide
046-0265-2 | contact us 1-800-689-9928 PROGRAMMING GUIDE While programming, the buttons can be used to move the door as needed. A. Set Up Travel Limit and Open/Close Force 1. Connect the opener to an approved power source. - Page 39 B. Changing Force Adjustment 1. Press and hold the [SET] button for 10 seconds. When the LED display shows SET FORCE LEVEL “F”, release the [SET]button. 2. The LED display will show “0”. 3. Press the button to set the force 0, 1, 2 or 3.
- Page 40 046-0265-2 | contact us 1-800-689-9928 D. Keypad Initial Setup The factory default PIN is 0 0 0 0. It will be used during the keypad initial setup. After you set your own PIN, you will need to use your current PIN instead of 0 0 0 0 in below steps.
- Page 41 E. Erasing all the Remote Controls from Opener 1. Press the [SET] button for 15 seconds. When the LED display flashes “E”, release the [SET]button. ERASE WIRELESS 2. Press the [SET] button again to confirm erase all the programmed CONTROL remotes.
-
Page 42: Safety Tests
046-0265-2 | contact us 1-800-689-9928 SAFETY TESTS Test Safety Reversal System With the door fully open, place a 1 1/2" (3.8 cm) board (or 2x4 laid flat) on the floor, centred under the garage door. Close the door by pressing the button on the wall console. -
Page 43: Operation
OPERATION Important Safety Instructions WARNING To reduce the risk of severe injury or death: 1. READ AND FOLLOW ALL INSTRUCTIONS CAREFULLY. 2. NEVER let children operate or play with any garage door controls or remote controls. Always keep these controls away from children. 3. -
Page 44: Operation
046-0265-2 | contact us 1-800-689-9928 Operating the Door Activate your opener by: • Pressing the wall console. • Pressing the assigned button on the remote control. Depending on the status of the garage door opener and the... - Page 45 Mastercraft® Garage Door Opener Deluxe Wall Console (046-0508-6) Press the large button on the wall console to Large button activate the garage door opener. On the wall console there are 3 additional features: 1. Light feature. 2. Lock feature. 3. Door closer timer.
-
Page 46: To Open The Door Manually
046-0265-2 | contact us 1-800-689-9928 To Open the Door Manually In case of a power failure, or if the door becomes obstructed, pull the red trolley release handle to disengage the opener from the door. -
Page 47: Maintenance
MAINTENANCE Once a Month • Test the door balance. Manually operate door. If it is unbalanced or binding, call a trained door systems technician. • Check to be sure door opens and closes fully. Adjust limits and/or force if necessary. •... -
Page 48: Battery Replacement
046-0265-2 | contact us 1-800-689-9928 Battery Replacement All remotes come with battery installed. To replace the battery, follow the instructions below. It is time to change the battery when the red LED light on the remote does not turn on when either button is pressed. -
Page 49: Troubleshooting
TROUBLESHOOTING LED Light Symptom Solution Flashing Display Flashing • 3 Flashes The wall console is Unlock the wall console. in lock mode. The remote controls are deactivated. • 5 Flashes Overtime. The motor is Ensure the opener is correctly running continuously installed and attached to the over 30 seconds in one garage door. - Page 50 046-0265-2 | contact us 1-800-689-9928 • Opener operates from Ensure the wiring connections are correct. remote but not from • Is the wall console lit? If not, disconnect low voltage wires to wall console. wall button and momentarily touch them together. If opener runs, replace wall button.
- Page 51 • Door reverses for no The door hardware may be binding causing the close door apparent reason. force setting to be exceeded. Disengage the trolley and manually check the door movement and balance. Lubricate the door hardware as recommended by the garage door manufacturer.
-
Page 52: Optional: Programming
046-0265-2 | contact us 1-800-689-9928 OPTIONAL: PROGRAMMING To SKYLINK® Internet Hub (046-0510-8; Sold separately) Œ Open SkylinkNet App and tap on “System Settings”. Tap on “Set-up Wizard”. Ž Tap on “Add Device”. Tap on “2-way Garage Door Opener”. -
Page 53: Accessories
ACCESSORIES Mastercraft® GARAGE DOOR OPENER Mastercraft® GARAGE DOOR OPENER COMPACT REMOTE BACKUP BATTERY Model no. 046-0507-8 Model no. 046-0504-4 Mastercraft® GARAGE DOOR OPENER Mastercraft® GARAGE DOOR OPENER INFRARED SAFETY SENSORS PROGRAMMABLE LCD WALL CONSOLE Model no. 046-0505-2 Model no. 046-0509-4 Mastercraft®... -
Page 54: Fcc
046-0265-2 | contact us 1-800-689-9928 This device complies with Part 15 of the FCC Rules. Operation is subject to the following two conditions: (1) This device may not cause harmful interference and (2) This device must accept any interference received, including interference that may cause undesired operation. -
Page 55: Limited Warranty
LIMITED WARRANTY The motor on this Mastercraft product carries an 8 (eight) year LIMITED warranty against defects in workmanship and materials. The parts, including the rail and belt, carry a 2 (two) year LIMITED warranty. The accessories carry a 1 (one) year LIMITED warranty.
Need help?
Do you have a question about the 046-0265-2 and is the answer not in the manual?
Questions and answers
Can you replace the light if it is not working
Yes, the light can be replaced if it is not working. The manual mentions checking the LED indicators and adjusting alignment, which implies the components are accessible and replaceable if needed.
This answer is automatically generated
@Mr. Anderson Where can we buy the LED to replace? Also what page of manual explains the light alignment,
Why does my garage door sometimes open by itself
The MasterCraft garage door model 046-0265-2 may sometimes open by itself after closing due to a travel limit issue or an unbalanced or binding door. If the door is not properly balanced or sticks during operation, the opener may misinterpret the resistance as an obstruction and reverse the door. Repeated need to reset the travel distance suggests the opener loses track of the door’s position, possibly due to mechanical issues with the door or opener. It is recommended to check door balance and ensure it does not bind or rub, and have any issues repaired by a qualified professional.
This answer is automatically generated
with tension on chain how do you get the chain guide together
To assemble the chain guide on a MasterCraft 046-0265-2 with tension on the chain:
1. Insert Trolley Guides: Insert the trolley guides into the chain traveller until you hear a click, ensuring the chain traveller is fully seated.
2. Connect the Chain Assembly: Attach the two ends of the chain assembly at the turnbuckle.
3. Hand-Tighten the Turnbuckle: Rotate the turnbuckle by hand to connect it to the threaded shaft. Do not rotate the threaded shaft to prevent twisting the cable.
4. Secure the Locknuts: Once the desired tension is achieved, tighten the locknuts.
5. Adjust Chain Tension: Hold the threaded shaft with pliers and use a flat screwdriver to twist the turnbuckle. Tighten the chain until it is 1/3" (8 mm) above the base of the T-rail.
6. Final Check: After installation, some chain drop may occur when the door is fully closed.
This ensures proper chain tension and prevents twisting or damage to the cable.
This answer is automatically generated
How to install the wall console of mastercraft
To install the wall console for MasterCraft part number 046-0265-2:
1. Position the Wall Console: Place it at least 5 feet (1.5 meters) above the finished floor or the topmost step.
2. Ensure Proper Location: Install it within sight of the garage door, out of children's reach, and away from all moving parts.
3. Connect the Wires: Attach the bell wires to the two terminal screws. The wires are not polarity sensitive.
4. Secure the Console: Fasten it to the wall using two screws.
5. Safety Precautions: Ensure the power is not connected before installation.
Follow all warnings and placement guidelines to ensure safe operation.
This answer is automatically generated
Why won’t my garage door close with the remote?
The MasterCraft garage door opener may not close with the remote for several reasons:
1. Safety Reversal System Issue: The state-of-the-art safety reversal system might be detecting an obstruction near the door. Check for any objects or debris blocking the sensors.
2. Remote Control Programming: The remote may not be properly programmed. Follow the programming steps in the manual to ensure the remote is correctly paired with the opener.
3. Erased Remote Controls: If all remotes were erased (e.g., by holding the [SET] button for 15 seconds), you need to reprogram the remote.
4. Door Reinforcement Requirement: If the door is lightweight or not properly reinforced, it may not operate correctly. Check if a door reinforcement kit is required.
5. Battery or Remote Issue: Ensure the remote has working batteries and is functioning correctly.
Verify these potential causes to diagnose the issue. If the problem persists, contact the helpline at 1-800-689-9928.
This answer is automatically generated
Door not closed or open show H
How can I change the lamp? It is constantly flashing and sometimes it doesn’t turn on at all.
My garage door keeps off lining the chain and just stops opening until I xan re programme why does it keep doing this its very frustrating every couple months calking out a repair at a cost of 89 dollars each time
Where do I find a wording diagram
How to change speed on door opener