Table of Contents
Advertisement
Quick Links
Operation and Service Manual
TestEquity LLC
6100 Condor Drive
Moorpark, CA 93021
Support:
877-512-3457 Toll Free
805-480-0636
Corporate:
800-732-3457
805-498-9933
http://www.testequity.com
Copyright © 2008-2017 TestEquity LLC
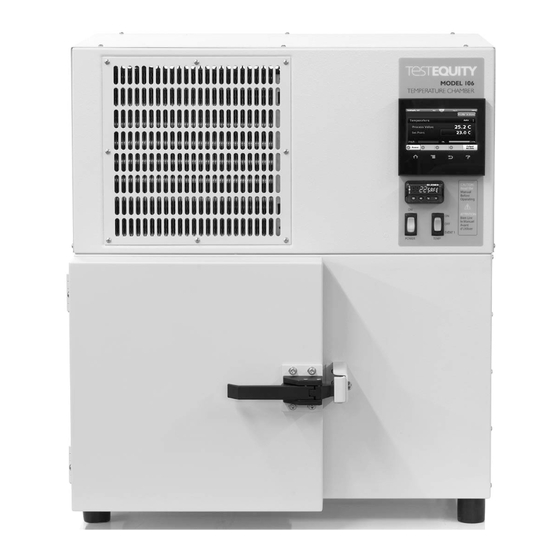
Model 106 & 107
Temperature Chamber
Model 107
Model 106
Rev. 2.1 – February 13, 2017
Advertisement
Table of Contents

Related Manuals for TestEquity 106


Summary of Contents for TestEquity 106
- Page 1 Model 106 & 107 Temperature Chamber Operation and Service Manual Model 107 Model 106 TestEquity LLC 6100 Condor Drive Moorpark, CA 93021 Support: 877-512-3457 Toll Free 805-480-0636 Corporate: 800-732-3457 805-498-9933 http://www.testequity.com Copyright © 2008-2017 TestEquity LLC Rev. 2.1 – February 13, 2017...
-
Page 3: Table Of Contents
Resetting an Out of Limit Condition ........................ 4-2 Chapter 5 – Frequently Asked Questions ................5-1 Chapter 6 – Specifications ......................6-1 Model 106 & 107 Chamber Specifications ____________________________________________________ 6-1 Chapter 7 – Maintenance ......................7-1 Preventive Maintenance Schedule __________________________________________________________ 7-1 Daily or As Needed ............................ - Page 4 Table of Contents EZ-Zone Limit Controller Setup Parameters ________________________________________________ 7-10 Setup Menu ..............................7-10 Operations Menu ............................7-10 Chapter 8 – Warranty ....................... 8-1 Chapter 9 – Drawings ........................ 9-1...
-
Page 5: Chapter 1 - Safety Instructions
! WARNING: Do NOT put items in the chamber that could burn or explode at high temperatures. This chamber uses open wire heating elements which generate surface temperatures over 1000ºF. This is NOT an explosion-proof chamber. TestEquity 106 & 107 Temperature Chamber Page 1-1... - Page 6 You are responsible for providing thermal protection devices to your test sample. ! CAUTION: To prevent damage to your test sample and the chamber’s compressor, do not exceed the live load rating of the chamber. Page 1-2 TestEquity 106 & 107 Temperature Chamber...
-
Page 7: Chapter 2 - Installation
Chapter 2 – Installation Chapter 2 – Installation Unpacking Inspect the shipping container for any signs of visible damage. Notify the carrier and TestEquity immediately if there are signs of shipping damage. 1. Cut the bands that hold the packaging together. -
Page 8: Condensate Drain
If you reverse the door, see “How to inspect the door seal” in the Maintenance chapter of this manual to make sure the hinges and door latch are adjusted correctly. Page 2-2 TestEquity 106 & 107 Temperature Chamber... -
Page 9: Chapter 3 - Operation
When the TEMP Switch is in the EVENT 1 position, you can enable and disable all chamber functions through Event 1 (Digital Output 1) of the F4 Temperature Controller or the Power button on the F4T Temperature Controller. TestEquity 106 & 107 Temperature Chamber Page 3-1... -
Page 10: Loading The Chamber
To prevent damage to your test sample and the chamber’s compressor, do not exceed the live load rating of the chamber. Live Load Rating Temp +23°C 0°C –30°C –40°C Watts 200 W 155 W 100 W 35 W Page 3-2 TestEquity 106 & 107 Temperature Chamber... -
Page 11: Performance Considerations
Make sure that all connectors, wiring, pc boards, and auxiliary components can withstand the temperature extremes that they will be subjected to. In some cases, these components may not be able to last after repeated tests and should be considered expendable. TestEquity 106 & 107 Temperature Chamber Page 3-3... -
Page 13: Chapter 4 - Limit Controller
Not all features or functions are applicable. Only the capabilities of a model PM3L1AJ-AAAABAA are applicable. ! CAUTION: The EZ-Zone Limit Controller has been properly configured by TestEquity to match the chamber’s system requirements. Improper modifications to these setup values can result in unreliable and unsafe operation. Do not attempt to modify the setup values, unless you thoroughly understand what you are doing. -
Page 14: Limit Controller Keys And Displays
[FAiL] in the right display. It will also shut down all chamber functions. The Limit Controller cannot be reset until the temperature returns to within the limit set points. Then, you must press the RESET Key to resume normal operation. Page 4-2 TestEquity 106 & 107 Temperature Chamber... -
Page 15: Chapter 5 - Frequently Asked Questions
+0.1°C or a total of 0.7°C of RELATIVE variations. These specifications are for an empty chamber. The addition of a test sample may affect the control variations. In some instances, the test sample will reduce these variations. TestEquity 106 & 107 Temperature Chamber Page 5-1... - Page 16 This will ensure that nothing has been damaged and that a leak has not developed. Can/Should I put a filter in front of the condenser air inlet? No, TestEquity does not recommend this. Just follow the maintenance procedures and clean the condenser fins periodically.
-
Page 17: Chapter 6 - Specifications
(maximum rated chamber load at maximum cooling rate from high temperature soak) Workspace Dimensions Model 106: 9" W x 9" H x 13.25" D (0.62 cubic feet) Model 107: 12" W x 9" H x 11.25" D (0.7 cubic feet) Outside Dimensions Model 106: 23"... -
Page 19: Chapter 7 - Maintenance
• Listen for abnormal noise or vibration. Every 6 Months • Inspect the door seal. • Clean the condenser. • Inspect the electrical/refrigeration compartment. • Verify the chamber performance. Every 12 Months • Verify the calibration. TestEquity 106 & 107 Temperature Chamber Page 7-1... -
Page 20: How To Clean The Chamber Interior And Exterior
NOTE: You may need to clean the condenser more frequently if the chamber is in a dusty environment. You may be able to clean the condenser less frequently if the chamber is in a very clean environment. Page 7-2 TestEquity 106 & 107 Temperature Chamber... -
Page 21: How To Inspect The Electrical/Refrigeration Compartment
5. Inspect for loose hardware and tighten as required. 6. Check for loose wires and burned insulation near terminals. 7. Inspect for signs of insect or rodent infestation. Yes, it does happen! TestEquity 106 & 107 Temperature Chamber Page 7-3... -
Page 22: How To Verify The Chamber Performance
Temperature Controller’s setup and tuning values have not been changed from the values as shipped from TestEquity. Also, the Limit Controller high limit must be set to over +85°C (+88°C would be fine), and the low limit set to below –42°C. If the chamber fails any of these tests, it should be removed from service to prevent further damage until the cause of the problem is determined and resolved. -
Page 23: How To Verify The Calibration
TestEquity recommends verifying the calibration before attempting to actually perform a calibration. The microprocessor-based instrumentation used in TestEquity chambers seldom goes out of calibration. If you try to calibrate the instrumentation before determining that calibration is necessary, you may make it worse if done incorrectly. -
Page 24: Theory Of Operation
At chamber temperatures below –35°C, the temperature controller’s Alarm 2 disables the suction cooling expansion valve and hot-gas bypass valve through SV2, while locking SV1 ON regardless of the controller’s cool output status. Page 7-6 TestEquity 106 & 107 Temperature Chamber... -
Page 25: Troubleshooting
If tuning PID control parameters in a) Control parameters may need to be temperature controller are as shipped from changed for your unique test conditions. TestEquity and only occurs in cool mode. b) Solenoid valve SV1 may be defective. Compressor If controller Compressor Output parameters a) Re-enter values as shipped from were changed. -
Page 26: Refrigeration System Charging Instructions
Do NOT substitute any component. Do NOT substitute refrigerants. Improper repairs will void the warranty. These instructions are intended as guidelines for repairing TestEquity chambers. Details such as how to attach a gauge manifold are not covered. These are NOT do-it-yourself instructions! -
Page 27: Recommended Spare Parts
Chapter 7 – Maintenance Recommended Spare Parts Replacement parts are available from TestEquity. Parts are generally in-stock and ready for immediate shipment. Next-day delivery is always available. If you cannot risk being out of service for even one day, then you should purchase critical spare parts in advance. The following is a list of the kinds of parts that you may want to purchase in advance. -
Page 28: Ez-Zone Limit Controller Setup Parameters
Improper modifications to these setup values can result in erratic performance and unreliable operation. Do not attempt to modify the setup values, unless you thoroughly understand what you are doing. If there is any doubt, please call TestEquity before proceeding. Setup Menu Prompt... -
Page 29: Chapter 8 - Warranty
If the repair or replacement is performed in the FIRST YEAR from the date of invoice, TestEquity will also pay for the labor associated with the repair at the Purchaser's site, subject to TestEquity’s prior approval. During the SECOND and THIRD YEAR of the warranty period, Purchaser will be responsible for the installation and cost of installation of replacement or repaired parts. -
Page 31: Chapter 9 - Drawings
Chapter 10 – Drawings Chapter 9 – Drawings TestEquity 106 & 107 Temperature Chamber Page 9-1... - Page 33 Electrical Subpanel Component Location SSR2 Bussman MDL-3/10A SSR1 SSR3...
Need help?
Do you have a question about the 106 and is the answer not in the manual?
Questions and answers