Table of Contents
Advertisement
Operation and Service Manual
TestEquity LLC
6100 Condor Drive
Moorpark, CA 93021
Support:
877-512-3457 Toll Free
805-480-0638
Corporate:
800-732-3457
805-498-9933
http://www.testequity.com
Copyright © 1999-2015 TestEquity LLC
Model 1007C
Temperature Chamber
With F4 Controller and EZ-Zone Limit Controller
Serial Number 11157 and above
Rev. 4.2, October 8, 2015
Advertisement
Table of Contents

Subscribe to Our Youtube Channel
Related Manuals for TestEquity 1007C


Summary of Contents for TestEquity 1007C
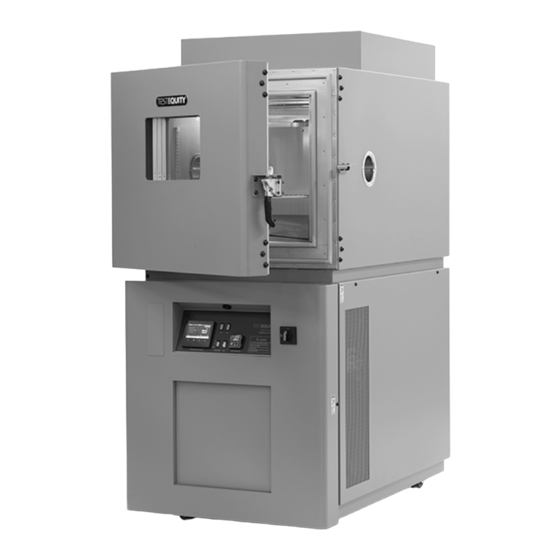
- Page 1 With F4 Controller and EZ-Zone Limit Controller Serial Number 11157 and above Operation and Service Manual TestEquity LLC 6100 Condor Drive Moorpark, CA 93021 Support: 877-512-3457 Toll Free 805-480-0638 Corporate: 800-732-3457 805-498-9933 http://www.testequity.com Copyright © 1999-2015 TestEquity LLC Rev. 4.2, October 8, 2015...
-
Page 3: Table Of Contents
Table of Contents Chapter 1 – Safety Instructions ________________________________________________ 1-1 Introduction ____________________________________________________________________ 1-1 Installation Safety Notices _________________________________________________________ 1-1 Operation Safety Notices __________________________________________________________ 1-2 Chapter 2 – Installation ______________________________________________________ 2-1 Uncrating _______________________________________________________________________ 2-1 Preparation For Use ______________________________________________________________ 2-1 Installation Location _____________________________________________________________ 2-2 Condensate Drain ________________________________________________________________ 2-2 Input Power Configuration ________________________________________________________ 2-3 Overview _____________________________________________________________________________ 2-3... - Page 4 Purge Operation _______________________________________________________________________ 6-2 Chapter 7 – Frequently Asked Questions ________________________________________ 7-1 Chapter 8 – Specifications ____________________________________________________ 8-1 Model 1007C Chamber Specifications _______________________________________________ 8-1 F4 Temperature Controller Specifications ____________________________________________ 8-2 Chapter 9 – Maintenance _____________________________________________________ 9-1 Preventive Maintenance Intervals __________________________________________________ 9-1 Maintenance Procedures __________________________________________________________ 9-2 How to clean the chamber interior and exterior.
-
Page 5: Chapter 1 - Safety Instructions
If the input voltage configuration is changed, this label must be replaced to reflect the new configuration. Replacement labels are available from TestEquity at no charge. ! CAUTION: This chamber must be properly configured for either 208 V or 230 V nominal input. -
Page 6: Operation Safety Notices
! CAUTION: The Series F4 “Alarm” functions are NOT used in the chamber’s safety system and are NOT connected. TestEquity does NOT recommend using the Series F4 alarm function as the main protection device. The independent EZ-Zone Limit Controller functions as the main protection device. - Page 7 ! WARNING: This chamber operates at extreme temperatures. Avoid contact with air, objects, and surfaces that are hot or cold to prevent severe burns or frostbite. Protective gloves are recommended. TestEquity 1007C Temperature Chamber Page 1-3...
-
Page 9: Chapter 2 - Installation
Chapter 2 – Installation Uncrating Inspect the shipping container for any signs of visible damage. Notify the carrier and TestEquity immediately if there are signs of shipping damage. The pallet is designed with ramps so the chamber can be rolled off without the need for a forklift or pallet jack. -
Page 10: Installation Location
Therefore, it must empty into an open floor drain. Alternatively, the chamber drain can empty into a condensate pump. You can purchase a condensate pump from suppliers such as Grainger (www.grainger.com). Page 2-2 TestEquity 1007C Temperature Chamber... -
Page 11: Input Power Configuration
If the input voltage configuration is changed, this label must be replaced to reflect the new configuration. Replacement labels are available from TestEquity at no charge. ! CAUTION: This chamber must be properly configured for either 208 V or 230 V nominal input. -
Page 12: Voltage And Phase Configuration
Switch. Connect earth ground to the ground lug. Three Phase Single Phase Wire D to terminal B Wire D to terminal A Figure 2-2 – Power Distribution Block Terminals on the Electrical Sub Panel Page 2-4 TestEquity 1007C Temperature Chamber... -
Page 13: Connection To The Power Source
2. Connect the “Hot” input wires to terminals L1 and L2 on the Main Disconnect Switch. 3. Connect the Ground wire (NOT A NEUTRAL) to the Ground terminal. 4. Put the chamber side panel back on and close the lower door. TestEquity 1007C Temperature Chamber Page 2-5... -
Page 15: Chapter 3 - Operation
3. Enter the desired temperature set point (or program) on the Temperature Controller. 4. Load your test sample in the chamber. 5. Turn the CONDITIONING Switch ON. Alternatively, turn the CONDITIONING Switch to the EVENT 1 position and turn EVENT 1 on the F4 controller ON. TestEquity 1007C Temperature Chamber Page 3-1... -
Page 16: Front Panel Switches And Lights
In this mode, the Modbus register for Digital Output 1 is 2000. ! CAUTION: Remember to set CONDITION to On in the profile event prompt all programmed steps when the chamber is to be operational. Page 3-2 TestEquity 1007C Temperature Chamber... -
Page 17: Light Switch
The Cool Light will illuminate when the Temperature Controller turns on the cooling valve to maintain the workspace temperature. The Cool Light will cycle on/off as the workspace temperature approaches and reaches the temperature set point. TestEquity 1007C Temperature Chamber Page 3-3... -
Page 18: Loading The Chamber
Limit Controller’s temperature limits are exceeded. ! CAUTION: To prevent damage to your test sample and the chamber’s compressors, do not exceed the live load rating of the chamber. Live Load Capacity for Model 1007C Temp +23°C 0°C –40°C... -
Page 19: Performance Considerations
Make sure that all connectors, wiring, pc boards, and auxiliary components can withstand the temperature extremes that they will be subjected to. In some cases, these components may not be able to last after repeated tests and should be considered expendable. TestEquity 1007C Temperature Chamber Page 3-5... -
Page 20: Chamber Relief Vent
The vent body can become hot or cold depending on the workspace condition. The vent assembly has a drip pan to catch any condensate that may occur. Page 3-6 TestEquity 1007C Temperature Chamber... -
Page 21: Chapter 4 - Temperature Controller
However, there will be times when entry into these menus is necessary. For example, you may need to gain access to Setup Page in order to change from °C to °F display, or to change the time or date. You must call TestEquity at 877-512-3457 or 805-480-0638 to obtain the password. TestEquity 1007C Temperature Chamber... -
Page 22: Temperature Controller Keys And Displays
After making the change with the with the ▲ or ▼ key, you may back using the ◄ key out or proceed using the ► key to the end of the series. Page 4-2 TestEquity 1007C Temperature Chamber... -
Page 23: Main Page
The % of throttle of the heat (positive number) or cool (negative number) output. Real-time clock date. Date Real-time clock time. Time TESTEQUITY 1007C Identifies the chamber model number. Go to Operations Access to Operations Page Access to Profiles Page Go to Profiles Access to Setup Page. Not displayed if running a profile. -
Page 24: System Enable Function
Choose Event Output prompt. 85.0°C ▲ ► DigitalOut1______ █ Press the ◄ key once to return back to the Main Page. Power1 50% ▼ You will see a 1 in the DigitalOut line if Event1 is Page 4-4 TestEquity 1007C Temperature Chamber... -
Page 25: Profile Programming
• Event outputs 1 through 7 to turn ON or OFF (For controlling the power to remote devices.) • Rate (in degrees per minute) • Temperature Set Point • PID set (One of five sets of PID tuning parameters. Normally, just leave at PID Set 1.) • **Guaranteed Soak TestEquity 1007C Temperature Chamber Page 4-5... - Page 26 Define the End by choosing Hold, Control Off, All Off or Idle end state. NOTE: TestEquity recommends having the end step type to be Hold or Idle. TestEquity does NOT recommend using an end step type of Control Off or All Off. This does not turn off the chamber fan.
-
Page 27: How To Program A New Profile
► Idle Save your settings. Save profile data • Press ◄ to exit the Profiles Page. or restore values? • After exiting the Profiles Page, choose ▲ to save ▼ Restore ▲ Save profile data. TestEquity 1007C Temperature Chamber Page 4-7... -
Page 28: Programming Hints
• TestEquity recommends having the end step type to be Hold or Idle. • TestEquity does NOT recommend using an end step type of All Off or Control Off. This does not turn off the chamber fan. The chamber temperature can reach +55°C just from heat generated by the fan, and even higher if your test sample is energized. - Page 29 While running a profile, the Main Page on the lower display will keep you informed about the progress of the profile. Use the ▲or ▼ key to scroll through the list of running profile parameters. You cannot manually change any operating condition while the profile is running. TestEquity 1007C Temperature Chamber Page 4-9...
-
Page 30: How To Hold/Resume A Running Profile
• Press ▲or ▼ to scroll through your choice. ▲ Edit Profile • Press ► to select your choice. ► Delete Profile █ • The controller will prompt you to select the profile Re-Name Profile you want to delete or re-name. Page 4-10 TestEquity 1007C Temperature Chamber... -
Page 31: How To Edit A Profile
• A Jump Step that jumps to an End Step cannot be deleted. • An End Step cannot be deleted. • Inserting a new ramp step usually requires inserting an associated soak step. • Deleting a ramp step usually requires deleting the associated soak step. TestEquity 1007C Temperature Chamber Page 4-11... -
Page 32: Profile Examples
Chapter 4 – Temperature Controller Profile Examples The following are examples of two typical profiles Note that Digit Out 1 is named CONDITION. Page 4-12 TestEquity 1007C Temperature Chamber... -
Page 33: Digital Event Outputs
The solid state relays are rated for 24 to 240 VAC, 3.0 Amps. However, TestEquity recommends derating the maximum current to 2.5 Amps. The solid state relay mounting board is UL recognized/CSA certified for 120 VAC max. with the board-mounted fuses;... -
Page 34: Operations Page
The Operations Page provides access to menus for control tuning (PID) and controller alarms. TestEquity has configured the security to require a password for access to all parameters in the Operations Page. You must call TestEquity at 877-512-3457 or 805-480-0638 to obtain the password. -
Page 35: Factory Page
Chapter 4 – Temperature Controller Factory Page The Factory Page provides access to menus for controller diagnostics and calibration. TestEquity has configured the security to require a password for access to the Setup Page. However, there will be times when entry into these menus is necessary. For example, you may need to gain access to Factory Page in order to perform a calibration, or to change the security password. -
Page 37: Chapter 5 - Limit Controller
Not all features or functions are applicable. Only the capabilities of a model PM6L1AJ-AAAABAA are applicable. ! CAUTION: The EZ-Zone Limit Controller has been properly configured by TestEquity to match the chamber’s system requirements. Improper modifications to these setup values can result in unreliable and unsafe operation. Do not attempt to modify the setup values, unless you thoroughly understand what you are doing. -
Page 38: Limit Controller Keys And Displays
Then, you must press the RESET or EZ Key to resume normal operation. Silencing the Audible Alarm Turning off the MASTER switch on the chamber front panel lets you temporarily turn off the Audible Alarm, even though the High or Low Limit condition may still exist. Page 5-2 TestEquity 1007C Temperature Chamber... -
Page 39: Protecting An Energized Test Sample
3. Locate the terminal strip on the electrical subpanel. Connections to the safety contacts are at terminals A1 and A2 on the terminal strip. Terminal Strip A1 A2 Figure 5-2 – Location of Safety Contact Connections on the Electrical Sub Panel TestEquity 1007C Temperature Chamber Page 5-3... -
Page 41: Chapter 6 - Purge
Connect the power cord from the Dry Air system to the DRY AIR POWER socket on the rear panel. This plug must be twisted clockwise to lock it. The Dry Air system requires 8 cfm of compressed air at 100 psig (175 psig max). TestEquity 1007C Temperature Chamber Page 6-1... -
Page 42: Purge Operation
A suggested starting setting is 4 SCFM. Relief Vent Excess pressure in the chamber workspace is vented through a pressure-relief check-valve, which is located on the top of the chamber. There is no need to vent this externally. Page 6-2 TestEquity 1007C Temperature Chamber... -
Page 43: Chapter 7 - Frequently Asked Questions
50 Hz rating of 200 V. This transformer is available from TestEquity for a reasonable cost and is easy to install in the field. Note that the cooling performance will be reduced by 17% at 50 Hz. Please call TestEquity for details on reconfiguring for 50 Hz operation. - Page 44 “How to inspect the refrigeration machinery compartment” and “How to check the refrigerant charge” before placing the chamber back into service to make sure that no damage has occurred. Page 7-2 TestEquity 1007C Temperature Chamber...
- Page 45 Can/Should I put a filter in front of the condenser air inlet? No, TestEquity does not recommend this. Just follow the maintenance procedures and clean the condenser fins periodically.
-
Page 47: Chapter 8 - Specifications
Chapter 8 – Specifications Chapter 8 – Specifications Model 1007C Chamber Specifications Temperature Range –73°C to +175°C Control Tolerance ±0.5°C (±0.2°C Typical) (Measured at the control sensor after stabilization) Uniformity ±0.5°C (Variations throughout the chamber after stabilization) Live Load Capacity @ +23°C... -
Page 48: F4 Temperature Controller Specifications
Chapter 8 – Specifications F4 Temperature Controller Specifications Specifications as configured for the TestEquity 1007C Chamber Accuracy & Sensor Conformity* ±1.55°C (above –50°C) ±1.66°C (below –50°C) Stability ±0.1°C/°C rise in ambient Digital Inputs (Four) Contact closure or dc voltage, 10 kΩ impedance... -
Page 49: Chapter 9 - Maintenance
• Check the low-stage refrigeration charge. • Check the high-stage refrigeration charge. • Verify the chamber performance. Every 6 Months • Inspect the electrical compartment. • Clean the condenser. Every 12 Months • Verify the calibration. TestEquity 1007C Temperature Chamber Page 9-1... -
Page 50: Maintenance Procedures
• If you (the cleaner) are in doubt about the compatibility of the cleaning or decontamination agents with the door seal, the interior, or other parts of the equipment, you (the cleaner) should contact TestEquity or an authorized TestEquity agent. How to listen for abnormal noise or vibration. -
Page 51: How To Inspect The Refrigeration Machinery Compartment
4. If you see bubbles or it appears partially full, then this indicates that there is probably a leak. 5. When the Temperature Controller is cycling (Cool Light cycles on/off), the sightglass may appear 1/2 to 2/3 full. This is normal. TestEquity 1007C Temperature Chamber Page 9-3... -
Page 52: How To Verify The Chamber Performance
These tests assume that the Temperature Controller’s setup and tuning values have not been changed from the values as shipped from TestEquity. Also, the Limit Controller high limit must be set to over +85°C (+88°C would be fine), and the low limit set to –75°C. - Page 53 18. Set the Temperature Controller Set Point to +23°C. The chamber should begin to heat up. The compressors should turn off within approximately 1 minute. 19. This concludes the chamber performance verification tests. 20. Let the chamber heat up to +23°C before turning the Master Switch OFF. TestEquity 1007C Temperature Chamber Page 9-5...
-
Page 54: How To Inspect The Electrical Compartment
How to verify the calibration. TestEquity recommends verifying the calibration before attempting to actually perform a calibration. The state-of-the-art instrumentation used in TestEquity chambers is of the highest quality and seldom goes out of calibration. If you try to calibrate the instrumentation before determining that calibration is necessary, you may make it worse if done incorrectly. -
Page 55: Theory Of Operation
The Low-Stage uses refrigerant R-508B. High pressure liquid refrigerant is fed from the condenser circuit of the cascade condenser, through the filter-drier and liquid-line solenoid valve to the capillary tube/strainer assembly. The capillary tubes feed the finned evaporator coil, which TestEquity 1007C Temperature Chamber Page 9-7... - Page 56 The low-stage compressor turns on 30 seconds after the high-stage turns on through Timing Module TM1. This reduces the system’s starting current, while allowing the cascade condenser to get cool before the low-stage turns on. Page 9-8 TestEquity 1007C Temperature Chamber...
-
Page 57: Troubleshooting
Moisture or debris in the refrigeration system. DPS2 trips. (pressure switch on the rear left side) Trips when the cool light cycles Hot gas bypass regulator may to OFF. be defective or set too low. TestEquity 1007C Temperature Chamber Page 9-9... - Page 58 Chamber has been off for R-404A crankcase heater several hours or more, and is defective (open). connected to source of power and main disconnect switch is on during that time. Page 9-10 TestEquity 1007C Temperature Chamber...
-
Page 59: Refrigeration System Charging Instructions
These are NOT do-it-yourself instructions! R-404A High-Stage Charge TestEquity does NOT recommend charging the system by relying on a clear sight glass only. Although a clear sight glass generally means the system is fully charged, it can be misleading. -
Page 60: Recommended Spare Parts
Chapter 9 – Maintenance Recommended Spare Parts Replacement parts are available from TestEquity. Parts are generally in-stock and ready for immediate shipment. Next-day delivery is always available. If you cannot risk being out of service for even one day, then you should purchase critical spare parts in advance. Although most parts are standard and available from a variety of local distributors, some parts are either harder to find or custom. -
Page 61: Major Electrical Parts
Recorder, 1 Pen, 10" Honeywell DR4301-0000-G0100 RCD1 200094 Chart paper, -90 to 210 C Honeywell 24001660-034 200095 Chart paper, -130 to 410 F, Alternate Honeywell 24001660-033 200096 Pen, Purple, Six Pack Honeywell 30735489-007 200097 TestEquity 1007C Temperature Chamber Page 9-13... -
Page 62: Major Refrigeration Parts
Door Latch, Chamber Workspace Southco A2-10-501-21 300009 Caster, Swivel Caster Industries CUSTOM 900021 Caster, Rigid Caster Industries CUSTOM 900022 Shelf with 4 Clips CUSTOM CUSTOM TE-0701 Shelf Retainer Clip Kason Style 66, #0066000008 300015 Page 9-14 TestEquity 1007C Temperature Chamber... -
Page 63: Series F4 Temperature Controller Setup Parameters
“Full Defaults”, you must reconfigure all System and Operation Parameters as documented in the TestEquity manual, NOT the “Series F4 User’s Manual”. TestEquity has configured the Temperature Controller with the parameters as documented on the following pages. TestEquity 1007C Temperature Chamber... -
Page 64: Series F4 Setup Parameters
NOTE: The alarm outputs of the Power-Out Action Continue Temperature Controller are NOT connected Communications Menu to the chamber’s safety system. TestEquity Analog Input Menu Main Page\Go to Setup\ does NOT recommend using the Communications Main Page\Go to Setup\Analog Input1 Temperature Controller’s alarm function as... -
Page 65: Series F4 Operations Parameters
The Series F4 Controller has several levels of security to prevent unauthorized users from changing critical configuration parameters. Only the Set Point and Profile menus have “Full Access”. TestEquity has configured all other menus to “Password”, and have protected them with a password. -
Page 66: Ez-Zone Limit Controller Setup Parameters
Improper modifications to these setup values can result in erratic performance and unreliable operation. Do not attempt to modify the setup values, unless you thoroughly understand what you are doing. If there is any doubt, please call TestEquity before proceeding. Setup Menu Prompt... -
Page 67: Chapter 10 - Warranty
If the repair or replacement is performed in the FIRST YEAR from the date of invoice, TestEquity will also pay for the labor associated with the repair at the Purchaser's site, subject to TestEquity’s prior approval. During the SECOND and THIRD YEAR of the warranty period, Purchaser will be responsible for the installation and cost of installation of replacement or repaired parts. -
Page 69: Chapter 11 - Drawings
Chapter 10 – Drawings Chapter 11 – Drawings TestEquity 1007C Temperature Chamber Page 11-1... - Page 71 Electrical Subpanel Component Location Ground FNM-3 FNQ-R-15 LP-CC-R-15 Input F1 F2 F3 F4 F5 F6 F7 F8 Control Transformer L1 L2 L3 SSR1 Disconnect Switch FNM-3 T1 T2 T3 SSR2 Terminal Strip Power Distribution A1 A2 Block...
Need help?
Do you have a question about the 1007C and is the answer not in the manual?
Questions and answers