Table of Contents
Advertisement
Quick Links
Advertisement
Table of Contents

Subscribe to Our Youtube Channel
Related Manuals for Waver WAC52N+


Summary of Contents for Waver WAC52N+
- Page 1 QUICK START GUIDE READ CAREFULLY BEFORE USING THE DEVICE WAC52N | WAC52N+...
-
Page 2: Package Contents
Apple Safari • Broadband Internet Connection (Ethernet) Thank you for choosing our product! Your satisfaction is our top priority. Propose a feature that will be useful to be added on Waver SmartOne in the upcoming software updates at features@wavertech.eu... -
Page 3: Table Of Contents
• Read this manual thoroughly before using Waver SmartOne • To ensure proper use of the device, make sure to read “Safety Information” page • After reading, keep it in a readily accessible place for future reference CONTENTS - Safety Information... -
Page 4: Safety Information
Safety Information - Use only the supplied Power Adapter. Connection to a different power source may result in improper operation, damage or pose to fire hazard. - Do not cover ventilation holes at the bottom. This product must be operated on a flat surface far from any heater or heating vent. - Avoid direct irradiation of any strong light (such as sunlight) - Keep at least 5 cm of clear space around the device - Operating Temperature: - 20 - 60°... -
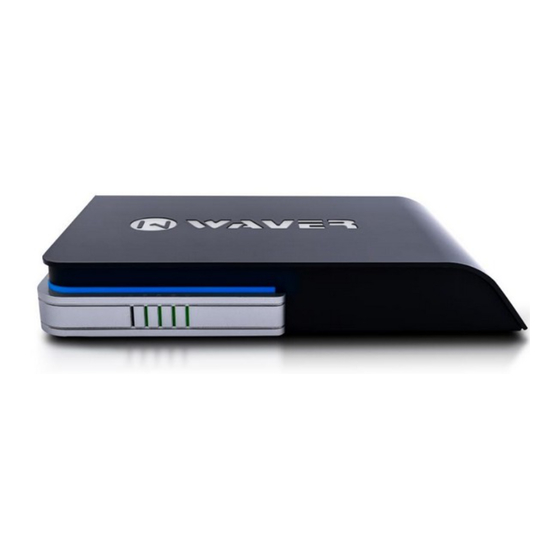
Page 5: Hardware Overview
Hardware Overview 10 11 12 1. Power Led 10. Reset to Factory Button 2. Internet Port Led 11. 2.4GHz Interface Button 3. 2.4GHz Wireless Interface Led 12. 5GHz Interface Button 4. 5GHz Wireless Interface Led 13. Internet Ethernet Port 5. Guest Ethernet Port Led 14. -
Page 6: Hardware Installation
Hardware Installation To install the Waver SmartOne router, perform the following steps: Connect Ethernet cable from you DSL/Cable modem to the INTERNET Port of Waver SmartOne Router. Connect the DC Power Adapter to the router and to a power outlet. -
Page 7: Configuration Interface
(Power, Logo and side RGB Leds are ON). - Always push the ON/OFF switch to OFF position before unplugging the DC Adapter. Configuration Interface To connect to the Waver SmartOne, use one of the two methods below: Wired By connecting an Ethernet cable from your computer to a LAN port on the Waver SmartOne. - Page 8 If you agree with all the terms you can check the “I agree the terms and conditions” checkbox and click on the “Login button”. The MAIN page of configuration interface will appear. You are logged in and you can configure your Waver SmartOne router!
- Page 9 A quick overview on the configuration interface MAIN: Shows general guest user data statistics, device information, interface throughput and Inter- net connectivity status.
- Page 10 WAN | LAN Configures Internet connectivity type, Firewall and Port forwarding, Website Filtering and Local Net- work Settings.
- Page 11 WIRELESS Shows wireless interface information and statistics, Configures interface and wireless networks settings.
- Page 12 GUEST CAPTIVE PORTAL Configures the guest landing page appearance and the way guests are authenticated on your guest network.
- Page 13 GUEST NETWORK Configures network parameters for guest network. It shows information regarding devices on the guest network.
- Page 14 GUEST USERS | STATISTICS Analytic guest user data statistics and management for guest user credentials. The synchronization of user data with third-parties can also be edited on this page.
- Page 15 SYSTEM Gives you access to basic system settings like con- figuration interface security and system time. It also provides external RGB LED color control, software update and networking tools...
- Page 16 Secure Local Wireless Networks On the main page go to Wireless -> Local Wireless tab. Enter a name for your wireless network in the SSID field and click the “Change SSID button”.
- Page 17 Enable security for wireless network.
- Page 18 Enter a passphrase in the Network Key field. You can click the “Show” option to check the characters that you are typing.
- Page 19 Click on the “Change WPA2 Key” button The same way you can manage SSID and Security for Local 5GHz and guest wireless interfaces.
- Page 20 Securing the device On the main page go to System -> Security tab. Enter a strong admin password in the new password field. Enter the same password in confirm new password field and click the “save” button. The admin password will be changed!
- Page 21 Congratulations! Basic security router configuration is now complete. For additional information on configuring and using the Waver SmartOne Router, refer to the explanations and tooltips on the configuration interface or download the full User Guide online at: https://www.wavertech.eu/downloads...
-
Page 22: Multilingual Instructions
Multilingual Instructions EN. Instruction manual: Connect the power adapter to turn on the device. Open 192.168.10.1 in your web browser, to configure it. More information on https://www.wavertech.eu/downloads BG. Инструкция: Свържете адаптера на захранване, за да включите устройството. Отворете 192.168.10.1 в уеб браузър, за да настроите... - Page 23 IT. Manuale di istruzioni: Collegare l’adattatore di alimentazione per accendere l’unita. Aprire 192.168.10.1 in un browser Web per configurare il prodotto. Maggiori informazioni in https://www.wavertech.eu/downloads LV. Lietošanas instrukcija: Pievienojiet Strāvas adapteri, lai ieslēgtu ierīci. Atvērt 192.168.10.1 ar interneta pārlūku, lai konfigurētu produktu. Plašāka informācija https://www.wavertech.eu/downloads LT.
- Page 24 SK. Navod na použitie: Pripojte napajaci adapter k zapnutiu pristroja. Otvorte 192.168.10.1 vo webovom prehliadači pre konfiguraciu produktu. Viac informacii najdete v https://www.wavertech.eu/downloads SI. Navodila: Priključite napajalnik za vklop naprave. Odprite 192.168.10.1 v splet- nem brskalniku nastaviti izdelek. Več informacij v https://www.wavertech.eu/downloads FI.
-
Page 25: Warranty And Returns
Limited Warranty & Returns WAVERTECH LTD. (“WAVERTECH”) warrants that the product(s) provided hereunder (the “Product(s)”) will be free from defects in material and workmanship for a period of twenty four (24) months. The warranty duration begins from the date of purchase by the customer from WAVERTECH or its authorized representatives. -
Page 26: Disclaimer Of Warranty
Returns of defective products During the warranty period defective products are accepted for repair or replacement only if they are accompanied by a Return Materials Authorization (RMA) number from WAVERTECH, details on the RMA process are available at: https://www.wavertech.eu/support under the Returns Policy section. -
Page 27: Declaration Of Conformity
WAVER SMARTONE overholder de vasentlige krav og ovrige relevante krav i direktiv 2014/53/EU. [DE] German Hiermit erklart WAVERTECH dass sich das Gerat WAVER SMAR- TONE in Ubereinstimmung mit den grundlegenden Anforderun- gen und den ubrigen einschlagigen Bestimmungen der Richtlinie 2014/53/EU befindet. - Page 28 2014/53/ EU iranyelvben meghatarozott vonatkozo rendelkezeseket. [NL] Dutch Hierbij verklaart WAVERTECH dat het toestel l WAVER SMARTONE in overeenstemming is met de essentiele eisen en de andere relevante bepalin-gen van richtlijn 2014/53/EU. [PL] Polish Niniejszym WAVERTECH deklaruje że WAVER SMARTONE jest zgod-...
- Page 29 WAVERTECH tymto vyhlasuje, že WAVER SMARTONE spĺňa zakladne požiadavky a všetky prislušne ustanovenia Smernice 2014/53/EU. [SI] Slovenian WAVERTECH izjavlja, da je ta WAVER SMARTONE v skladu z bistveni- mi zahtevami in drugimi relevantnimi določili direktive 2014/53/EU. [FI] Finish WAVERTECH vakuuttaa taten etta WAVER SMARTONE tyyppinen laite on direktiivin 1999/5/EY oleellisten vaatimusten ja sita ko- skevien direktiivin muiden ehtojen mukainen.
-
Page 30: National Restrictions
National Restrictions In the majority of the EU and other European countries, the 2.4 GHz and the 5 GHz bands have been made available for the use of wireless local area networks (WLANs). The requirements for any country may evolve. Wavertech recommends end-user to check with the local authorities for the latest status of their national regulations for both the 2.4 GHz and the 5 GHz bands. - Page 31 Support www.wavertech.eu/support Downloads www.wavertech.eu/downloads...
-
Page 32: Quick Start Guide
WAVERTECH Quick Start Guide WAVER SMARTONE WAC52N/WAC52N+ www.wavertech.eu ©2017 Wavertech Ltd. All rights reserved.
Need help?
Do you have a question about the WAC52N+ and is the answer not in the manual?
Questions and answers