
Subscribe to Our Youtube Channel
Related Manuals for EZ Lite Cruiser Slim


Summary of Contents for EZ Lite Cruiser Slim
-
Page 1: Front Cover
Deluxe Models Slim, Regular and Wide Website: www.EZLiteCruiser.com E‐mail: support@ezlitecruiser.com Phone (Toll Free): 1‐(888) 544‐6054 ... -
Page 2: Precau Ons
PRECAUTIONS Thank you for purchasing the EZ Lite Cruiser. We sincerely hope that it will bring convenience and enjoyment to your daily life. Please read the instruc ons before using the chair in order to operate and maintain it properly. EZ Lite Cruiser assumes no responsibility for personal injury or property damage sustained by or through the use of this product. By using the product, you agree to indemnify EZ Lite Cruiser from any injuries sustained from and during use, regardless of fault. ... -
Page 3: Table Of Contents
TABLE OF CONTENTS Front Cover ————————————————————————— 1 Precau ons ————————————————————————— 2 Iden fica on of Components ————————————————— 4 Safe Usage Guide ——————————————————————‐ 6 Ba ery Guide ———————————————————————— 11 Charging Guide ———————————————————————‐ 12 Using Two Ba eries —————————————————————‐ 15 Powered & Manual Mode Opera on —————————————‐‐ 16 Safety Tips —————————————————————————‐ 17 Transport, Storage & Maintenance ——————————————‐‐ 18 Quick Start Guide ——————————————————————‐ 19 Helpful Links Online ————————————————————— 29 Joys ck Informa on ————————————————————— 30 Fault Indicators ———————————————————————‐ 31 Troubleshoo ng Guide ———————————————————‐‐ 32 Specifica ons ———————————————————————— ... -
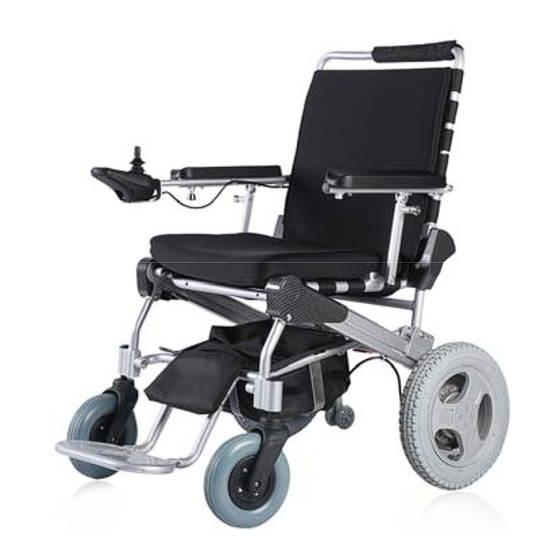
Page 4: Iden Fica On Of Components
IDENTIFICATION OF COMPONENTS ... - Page 5 IDENTIFICATION OF COMPONENTS ...
-
Page 6: Safe Usage Guide
SAFE USAGE GUIDE BEFORE DRIVING — READ THIS SECTION CAREFULLY. The user must be of sound mind and judgment. They must be conscious and have unimpaired motor func ons in their hand to use the controller. The user must read this user’s guide before opera ng the chair and get fa‐ miliar with its components and features. ... - Page 7 SAFE USAGE GUIDE Driving on Bends or Windy Paths Lightly push the joys ck in the direc on of the bend. Prac ce speed control. Avoid making sharp or hard turns. Sharp or hard turns are only to be done when the chair is already in a stopped posi on. Prac ce Avoiding Obstacles ...
- Page 8 SAFE USAGE GUIDE Driving Uphill Keep your body lted forward to keep the center of gravi‐ ty stable. Drive slowly and calmly. We recommend the slope be less than 8 degrees for op ‐ mal performance. Driving Downhill Make sure the electromagne c brake is engaged before driving downhill. We recommend the slope be less than 8 degrees for op ‐ mal performance. Drive all the way through a decline and stop on flat area. Limit Driving to Sidewalks The user should stay on the sidewalk and avoid entering the street or anywhere there is a motor vehicle lane, un‐ less it is to cross the street. Pay a en on to obstacles and avoid contact with them. ...
- Page 9 SAFE USAGE GUIDE Entering & Exi ng an Elevator The user should pay a en on to the opening and closing intervals of the elevator door to avoid a collision while en‐ tering or exi ng the elevator. Driving over Train or Railroad Tracks We highly discourage you from ever crossing railroad/ train tracks alone in the EZ Lite Cruiser. You should be ac‐ companied by an assistant, friend, or loved one. A emp ng to cross tracks that are elevated too high (more than 1.25 inches) could result in a rollover or acci‐ dent. It could endanger the personal safety of the user. ...
- Page 10 SAFE USAGE GUIDE Seat Belt We recommend using the seat belt. Self Repair of the EZ Lite Cruiser Avoid a emp ng to repair the product on your own. It may cause permanent damage to the chair and could put yourself at risk of injury. We strongly recommend that the product should be re‐ paired by a professional repair shop or maintenance ser‐ vice personnel. ...
-
Page 11: Ba Ery Guide
BATTERY GUIDE Ba ery Handling and Care DO NOT leave the ba ery in direct sunlight. It will cause permanent damage, or a vola le reac on. Store the ba ery in a cool, dry area. DO NOT remove ANY wrapping, whether it is blue, clear, plas c or otherwise, from the ba ery pack. DO NOT allow children access to the ba ery or electrical components of the chair. ... -
Page 12: Charging Guide
CHARGING GUIDE General Informa on on Charging the Ba ery Please use the Lithium ba ery charger supplied by EZ Lite Cruiser and never use a charger from another power chair! Unless instructed by an EZ Lite Cruiser Technical Support technician, DO NOT turn on the controller power or use the chair during charging. Ensure that the ba ery is cool while charging. The charger may get a li le warm while charging, due to current run‐ ning through it. The charger should never get HOT to the ... - Page 13 CHARGING GUIDE Charging the Ba ery “On Board” “On Board” charging means the ba ery is connected to the EZ Lite Cruiser’s Power Input connec on, to supply the chair with power. First, Plug the ba ery in to the chair. Next, Insert the charger into an electrical outlet, which will cause the charger light to turn on. The light will be Green. Lastly, Insert the charger round metal p into the Joys ck. GREEN Indicator light means either that the ba ery charging has finished, or is taking a break** (see below). ...
- Page 14 CHARGING GUIDE Charging the Ba ery “Off Board” “Off Board” charging means the ba ery is NOT connected to the EZ Lite Cruiser’s Power Input connec on, and it is not supplying the chair with power. In this scenario, you will first connect the charger into an electrical outlet, which will cause the charger light to turn on. The light will be Green. Lastly, Insert the charger round metal p into the matching round metal ...
-
Page 15: Using Two Ba Eries
USING TWO BATTERIES Using the Dual Ba ery Connector Cable You can connect and use Two ba eries at the same me. The power will be drawn from both ba eries. In order to do this, you must have purchased a second ba ery (your chair only comes with one) and a Dual Ba ery Connector. As described on the previous page (Page 14), charging two ba eries together with the Dual Ba ery Connector cable is not possible. Each ba ery must be charged individually. ... -
Page 16: Powered & Manual Mode Opera On
POWERED & MANUAL MODE OPERATION Using in the Powered (Electric) Mode Flip the red levers (the electromagne c locks, iden fied in the compo‐ nents of the EZ Lite Cruiser on page 5) on both of the rear wheels and ensure that the wheels are locked in place, and are not moving at all. When the chair is powered electrically, the chair can not be pushed manually. A er the user is seated in the chair, turn on the power. Pushing the joys ck forward to go forward. Pulling joys ck back to go back. Pushing joys ck le to turn le . Pushing joys ck right to turn right. ... -
Page 17: Safety Tips
SAFETY TIPS Addi onal Warnings & Precau ons If the EZ Lite Cruiser is not locked in the open posi on, it can collapse when a emp ng to sit on the chair. This can cause damage to the chair and also hurt the user. Please ensure that the chair is fully unfolded before si ng in it. Check, double‐check and triple‐check to make sure the chair is unfolded all the way and locked into posi on. If the front wheel is not in the proper posi on the chair ... -
Page 18: Transport, Storage & Maintenance
TRANSPORT, STORAGE & MAINTENANCE Transport & Storage To pick up the chair, stand it up when it is folded. Li the chair by metal frame parts always, never by any cushions, straps or plas c parts. The ba ery should be fully charged and the chair should be placed in cool, dry, and ven lated place in case of the chair will long‐term place‐ ment. The ba ery needs to be charged once every two months, otherwise it could lead to over‐discharge damage. Avoiding storing the chair around heat, cold or direct sunlight. The rub‐ ber parts will age quicker and shorten the service life. The ba ery is very sensi ve to high temperature environments and to pressure. Avoid high temperature and pressure, as it may cause a fire. There are electronic components in the joys ck. Avoid pressing and pu ng too much pressure on it ... -
Page 19: Quick Start Guide
QUICK START GUIDE YOU MUST read all of the informa on on the previous pages before star ng to use your EZ Lite Cruiser. The previous pages contain ex‐ tremely important safety informa on, proper usage, care & maintenance of your EZ Lite Cruiser. Failure to read the informa on can lead to prob‐ lems that will not be covered under your warranty, due to user error. A er reading the previous pages, con nue reading this Quick Start Guide, which will give you a quick run through before you get started driving: Ba ery Outer Packaging ... - Page 20 QUICK START GUIDE Charging Two Ba eries You can not charge two ba eries at the same me using the dual ba ery connector. For more informa on on charging two ba eries, see page 14. To charge two ba eries, the easiest way is to have two chargers and charge each ba ery Off Board. Or Charge one ba ery On Board and one ba ery Off Board, but you will s ll need a second charger to do this. If you have one charger, you can charge one ba ery first, and charger the second ba ery when the first one is done. Red Levers on the Rear Wheels The red levers on the rear wheels control the electromagne c lock and ul mately the braking system. The levers must be ENGAGED in order for you to use the chair in the powered mode. ...
- Page 21 QUICK START GUIDE Toolkit The toolkit is supplied is so you can get your chair setup. Simply follow the guide on the next few pages to put the finishing touches on your chair. From me to me, ghten certain hinge joints on which the chair folds. This will help make it func on as it was when it was produced. Any major service or maintenance work on the chair will require addi onal tools, and we recommend taking the chair to a local medical supply shop or a trained mechanic/technician that works on power chairs. ...
- Page 22 QUICK START GUIDE Keep it Clean & Take Good Care of Your EZ Lite Cruiser The key to a long life out of the EZ Lite Cruiser, like anything else, is to keep it clean and take good care of it. Keeping it clean will keep it look‐ ing like new again,. Taking good care of it will ensure the longest life possi‐ ble out of it. This may mean occasionally performing service & mainte‐ nance to keep it running like new. Please contact us if you have any ques‐ ons or need help finding a shop in your area that can perform service or maintenance on your EZ Lite Cruiser. Now, let’s start working with Your EZ Lite Cruiser Deluxe Model…. Unboxing the EZ Lite Cruiser When you take the chair out of its box, ...
- Page 23 QUICK START GUIDE Iden fy & Prepare the Finishing Parts Due to restric ons in the shipping con‐ tainer, some parts need to be installed. (1) Seat Belt, (2) An ‐Tipping Wheels, (3) Kickstands, (4) Recline Mechanism Co‐ vers, (5) Toolkit. Inside the toolkit, as shown on page 21, there will be various screws and tools used to affix these parts ...
- Page 24 QUICK START GUIDE A ach Recline Mechanism Covers Shown on the previous page (labelled as “4”) are the Recline Mechanism Co‐ vers. Place them as shown in this pho‐ to, and get the 2 small silver screws, and the 2 black screws that were included in the toolkit, along with the screwdriver and proper sized hex wrench. You will need them for the next steps. Fasten the Cover in the Back Using the provided screw driver, and the 2 small silver screws, fasten the covers on each side to the frame part, from the back. Make sure these are properly fas‐ tened, and then move on to the front in the next step. ...
- Page 25 QUICK START GUIDE Insert the An ‐Tipping Wheels Take the smaller wheels provided and push the small metal bu on closer to the top of it, and insert it into the frame housing along the back of the chair. The metal bu on will pop out of the drilled hole in the frame part, se‐ curing the An ‐Tipping Wheel in place. ...
- Page 26 QUICK START GUIDE Put Ba ery in the Fi ed Carry Case Your EZ Lite Cruiser ba ery comes with a fi ed (small) carrying case designed specifically for the ba ery, so you can easily disconnect it and carry it with you. You shall store the ba ery in this fi ed case for convenience, and the ba ery can be kept in this fi ed case at all ...
- Page 27 QUICK START GUIDE Charging the Ba ery On–Board The charger that comes with your EZ Lite Cruiser by default ONLY charges the ba ery while it is on‐board, connected to the chair. To charge the ba ery, make sure the ba ery is connected un‐ derneath the seat. Then, plug the round metal p of the charger into the front of the joys ck. ...
- Page 28 QUICK START GUIDE Folding the EZ Lite Cruiser To fold the EZ Lite Cruiser Deluxe Mod‐ els, simply push the two folding clamps (located near the base of the chair) together with one hand, and push for‐ ward on the top of the back support, un l the chair folds down all the way. The ...
-
Page 29: Helpful Links Online
QUICK START GUIDE Emergency Ba ery Connector Cable Included with your Toolkit is a Red and Black colored connector. This can be used in an emergency situa on when you need to use a ba ery from a differ‐ ent supplier. (Although it looks similar, this is not a Dual Ba ery Connector cable.) Please ... -
Page 30: Joys Ck Informa On
JOYSTICK INFORMATION Func on Descrip on of Func onality 1 Power On Bu on Pressing this bu on will power on the EZ Lite Cruiser 2 Power Off Bu on Pressing this bu on will power off the EZ Lite Cruiser 3 Speed Increase Pressing this bu on will increase the speed of the chair, and Bu on illuminate the Speed Indicator LEDs un l all 5 lights are illumi‐ nated (top speed.) 4 Speed Decrease Pressing this bu on will decrease the speed of the chair, and Bu on turn off each light of the Speed Indicator LEDs un l only one light is illuminated (lowest speed.) 5 Horn Pressing this bu on will sound the horn. 6 ... -
Page 31: Fault Indicators
FAULT INDICATORS Aside from indica ng the speed se ng of the EZ Lite Cruiser, the Speed Indicator LEDs (number 8 on the figure shown on the previous page) acts as an indicator of common faults in the controller system. When these LEDs flash with the following Display as indicated below, the most com‐ mon problems and their respec ve possible solu ons are iden fied: Display Problem Solution Ba ery power is low. You must recharge or replace the ba ery. Joys ck cannot deliver signals to Check to see that all cable connec ons are the control module (CPU) firmly a ached. If they are, this would indi‐ cate a problem with the joys ck, and it may need to be replaced with a working joys ck. Joys ck wire could be cut. An electronic drive locking func‐ Disconnect the 3‐pin Charger cable from the on is engaged to prevent the front of the Joys ck component. If it is dis‐ EZ Lite Cruiser from being oper‐ connected, this would indicate a problem ated. Also acts to indicate that with the Joys ck’s Charger connector I/O ... -
Page 32: Troubleshoo Ng Guide
TROUBLESHOOTING GUIDE A. PROBLEM: The Power Won't Turn On POSSIBLE REASONS: 1. The Ba ery is not properly connected. 2. The Joys ck is not connected to the CPU. 3. The Ba ery power is too low. POSSIBLE SOLUTIONS: 1. Connect or Reconnect the ba ery. 2. If previous disconnected, reconnect the Joys ck to the CPU. 3. Charge the Ba ery. B. PROBLEM: All 5 Lights Flashing on Joys ck Speed Indicator Panel POSSIBLE REASONS: 1. Joys ck can't deliver signals to the control model (CPU.) POSSIBLE SOLUTIONS: 1. Replace CPU. C. PROBLEM: Chair Loses Power When Joys ck Thro le Pushed POSSIBLE REASONS: 1. Short circuit between Joys ck, CPU and Ba ery. 2. Faulty BMS (Ba ery Management System) or lithium cell inside Ba ery pack. ... - Page 33 TROUBLESHOOTING GUIDE E. PROBLEM: Charger light doesn't go on. POSSIBLE REASONS: 1. The charger is not plugged in to a wall outlet, or wall outlet has no electricity. 2. The charger cable that plugs into outlet is loosely connected to the charger base. POSSIBLE SOLUTIONS: 1. Plug in the Charger, or check wall outlet for electricity. 2. Check the Charger cable connec ons. F. PROBLEM: Charger light is always Green. POSSIBLE REASONS: 1. If you are charging the Ba ery "On‐Board", the Ba ery is not plugged in to the chair, or the connec on is loose. 2. If you are charging the Ba ery "Off‐Board", the Charger is not connected to the Ba ery (directly), or the connec on is loose. POSSIBLE SOLUTIONS: 1. Check the connec on of the Ba ery square plug to the chair's Power Input square plug. See Page 23 "Disconnec ng the Ba ery" and "Connec ng the Ba ery" sec ons. 2. Check the connec on of the Ba ery circular plug to the Charger plug. See Page 24 "Charging the Ba ery Off Board" sec on. ...
-
Page 34: Specifica Ons
SPECIFICATIONS Parameter Deluxe Models Device Weight ~56 — ~62 lbs (without battery) Max Capacity ~280 — ~330 lbs Unfolded Dimensions ~37" x ~23.5/26" x ~39" (L x W x H) Folded Dimensions ~32" x ~26" x ~14" (L x W x H) Seat Dimensions ~17"... -
Page 35: Service History
Please contact us to verify your warranty information. All records of ownership are kept electronically & warranty information is stored with it. For full terms of the warranty, or if you need to use the war- ranty service, please visit the EZ Lite Cruiser website & navigate to the warranty page in the menu. -
Page 36: Back Cover
User Manual: revision 3.01 Website: www.EZLiteCruiser.com E‐mail: support@ezlitecruiser.com Phone (Toll Free): 1‐(888) 544‐6054 The informa on provided in this user manual is copyright © 2015 by EZ Lite Cruiser. Any use of this informa on for any purposes outside of . demonstra ng the use of the EZ Lite Cruiser is strictly prohibited ...
Need help?
Do you have a question about the Slim and is the answer not in the manual?
Questions and answers