
Subscribe to Our Youtube Channel
Related Manuals for Spectrum RAC2V1A


Summary of Contents for Spectrum RAC2V1A
-
Page 1: User Guide
User Guide M o d e l N u m b e r R A C 2 V 1 A 8 0 2 . 1 1 a c W a v e 2 R o u t e r C2V1A Router User Guide... -
Page 2: Table Of Contents
Enabling or Disabling the Wireless Network......16 5.2.2. Changing the Administrator Password ........16 5.2.3. Changing the Default Wi-Fi Network Name (SSID) and Password ....................17 5.2.4. Configuring Wi-Fi Protected Setup (WPS) ......18 5.2.5. Setting Up the Internet/WAN Connection ....... 18 RAC2V1A Router User Guide... - Page 3 7.4.1. Basic Setup ..................46 7.4.2. Advanced Settings................50 7.4.3. Associated Stats ................53 7.4.4. Airtime Fairness ................54 7.4.5. QoS Classification ................56 7.4.6. Log ......................58 7.5. Firewall ......................59 7.5.1. Firewall Settings ................59 RAC2V1A Router User Guide...
- Page 4 8.5. My wireless Internet connection stops working sometimes ..90 8.6. I can get on the Internet, but everything is slow ......90 9. Safety Requirements ........91 9.1.1. Federal Communication Commission Interference Statement ..................... 91 RAC2V1A Router User Guide...
-
Page 5: Overview
Get ready to experience the Internet’s express lane! Whether you’re checking out streaming media, downloading new software, or checking your email, the RAC2V1A router brings it all to you faster and more reliably. The RAC2V1A router provides four Ethernet connections for use as the hub of your home/office Local Area Network (LAN). -
Page 6: Product Overview
Product Overview About The Router The RAC2V1A router is a dual-band 802.11ac router that allows users to connect to the Internet through a separate modem. The RAC2V1A router has the following features: • Remote management capability: allows Spectrum to make changes to the router's configuration •... -
Page 7: About This Manual
Product Overview About This Manual This manual covers the RAC2V1A router. You can find product information on the security label affixed to the back of the router. 1. MAC address 2. Wi-Fi Network Name (SSID). The XX here represents the last octet of the MAC address. -
Page 8: System Requirements
To use the router, you need high-speed Internet service from Spectrum. Recommended Hardware The following hardware configuration is recommended. Computers not meeting this configuration can still work with the router, but may not be able to make maximum use of available throughput. -
Page 9: Installing The Router
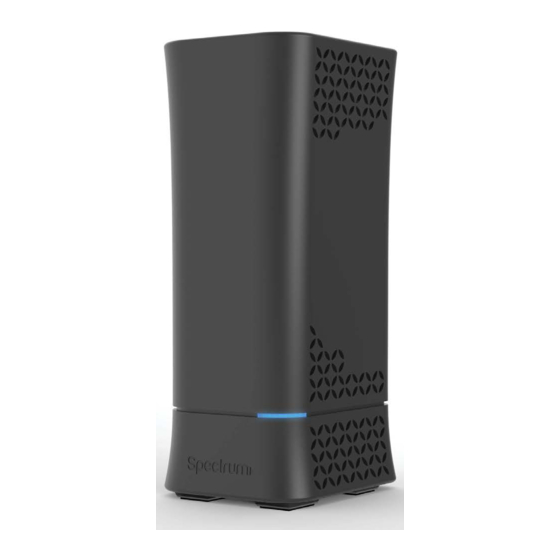
• A solid blue light indicates that the router is working normally or that it has not yet begun to boot up. • A flashing blue light indicates that the router is booting up and trying to establish a connection to the Internet. RAC2V1A Router User Guide... -
Page 10: Rear Panel
• A flashing red light indicates that the router is not able to establish an Internet connection. • A solid red light indicates that the device was not able to achieve a normal operating state. Rear Panel The rear of the router has the following connectors and controls: RAC2V1A Router User Guide... -
Page 11: Selecting An Installation Location
3. Ethernet (1 - 4): connectors for use with a computer LAN port or another Ethernet-connected device. 4. Internet: connector to the Spectrum modem. 5. USB: USB host connector for use with external USB devices. 6. Power: connector for the power cord. -
Page 12: Desktop Mounting Instructions
By limiting the network’s range, you reduce interference with other networks and make it harder for unwanted users to find and connect to the network. RAC2V1A Router User Guide... -
Page 13: Ethernet Or Wireless
Ethernet cable is yellow to match the Internet port on the back of the router, because this cable is primarily intended to connect the router to the Spectrum modem. You can purchase more cables if necessary at a computer retailer. If you are connecting the router directly to a computer, or to an Ethernet switch with a cross-over switch, ask for Category 5e (CAT5e) straight-through cable. -
Page 14: Connecting The Router
You can sign in to the router and configure additional wireless settings. Configuring the Wireless Network (page 16) for complete instructions on configuring the wireless connection. Getting Support Please contact Spectrum if you need assistance. RAC2V1A Router User Guide... -
Page 15: Basic Configuration
Note: If you cannot access the wireless LAN, you must first establish a wired Ethernet connection between the computer and the router. 2. In the web browser, open the page http://192.168.1.1/ to access the router setup. The sign-in screen for the router displays. RAC2V1A Router User Guide... -
Page 16: Configuring The Wireless Network
“admin”. Both are in lower case letters. Perform the following steps to change the administrator password. Accessing the 1. Access and sign in to the configuration interface. See Configuration Interface (page 15) for more information. 2. Click the Utilities tab. RAC2V1A Router User Guide... -
Page 17: Changing The Default Wi-Fi Network Name (Ssid) And Password
5. Click Apply at the bottom of the screen. 6. Record the new network names and passwords here: 2.4 GHz Wi-Fi Network name (SSID): __________________________ 2.4 GHz Password: ______________________________ 5 GHz Wi-Fi Network name (SSID): ___________________________ 5 GHz Password: _______________________________ RAC2V1A Router User Guide... -
Page 18: Configuring Wi-Fi Protected Setup (Wps)
A Dynamic or DHCP (Dynamic Host Configuration Protocol) connection is the most commonly used WAN connection type. Note: Do not change this setting unless Spectrum tells you to use another connection type. Perform the following steps to change the connection type. - Page 19 (IPv6) in the side menu to display the appropriate screen for configuring that type of WAN connection. 4. Set the required configuration parameters for the connection type you selected as provided by Spectrum. Router Configuration Screen Note: Refer to WAN Setup in...
-
Page 20: Advanced Configuration Options
1. Access and sign in to the configuration interface. 2. Click the LAN Setup tab. 3. Click LAN Settings (IPv4) in the side menu to display the LAN Settings screen. 4. Click the Enable DHCP Server checkbox under DHCP Server Settings. RAC2V1A Router User Guide... -
Page 21: Configuring Dhcp For Ipv6
Perform the following steps to configure the DHCP Clients. 1. Access and sign in to the configuration interface. 2. Click the LAN Setup tab. RAC2V1A Router User Guide... -
Page 22: Selecting The Nat Mode
820.11g, 802.11n or 802.11ac). Select the proper mode to support all of the wireless devices that will connect to the router. Perform the following steps to set the wireless mode. 1. Access and sign in to the configuration interface. 2. Click the Wireless tab. RAC2V1A Router User Guide... -
Page 23: General Firewall Configuration Settings
3. Click Firewall Settings in the side menu to display the Firewall Settings screen. 4. Check the Enable Firewall checkbox to enable the firewall on the network. 5. Click Apply at the bottom of the screen. RAC2V1A Router User Guide... -
Page 24: Port Forwarding
Inbound Port Enter the inbound port range for the port you want to forward. It should be the same range as the local port. Type Sets the format for the port. Options are TCP, UDP, or BOTH. RAC2V1A Router User Guide... -
Page 25: Configuring Dmz For Gaming Or Conferencing Applications
DMZ, all ports on the computer are open to the Internet and not protected. 5. Click Apply at the bottom of the screen. Note: To remove the computer from the DMZ, uncheck the Enable checkbox and then click Apply. RAC2V1A Router User Guide... -
Page 26: Viewing Network System Information
Setting Up DDNS DDNS (Dynamic DNS) allows you to provide Internet users with a fixed domain name (instead of an IP address which may periodically change). This allows various locations on the Internet to access the gateway and RAC2V1A Router User Guide... -
Page 27: Requirements
4. Click the DDNS Enable checkbox. DDNS Note: Refer to (page 85) for specific instructions on setting the various DDNS configuration parameters. 5. After setting the necessary configuration parameters, click Apply at the bottom of the screen. RAC2V1A Router User Guide... -
Page 28: Router Configuration Screen Descriptions
Each of the following tabs in the GUI and their individual sub-menus and configuration parameters are explained in detail: • Basic Setup • WAN Setup • LAN Setup • Wireless • Firewall • USB • Utilities RAC2V1A Router User Guide... -
Page 29: Basic Setup
Wi-Fi Network Enter a user-friendly name to identify the wireless Name (SSID) network. This name is also referred to as the Service Set Identifier (SSID). The name can be up to 32 characters long. RAC2V1A Router User Guide... - Page 30 Valid characters are the numbers 0 to 9, the letters a through z and A through Z and printable special characters (such as $, !, ?, &, #, @ and others). You must click Apply to save the new Wi-Fi password. RAC2V1A Router User Guide...
-
Page 31: Wps Settings
WPS can be added to the network using the traditional manual configuration method. WPS Enable/Disable Wireless 2.4 Click the frequency for which you want to enable GHz/ Wireless 5 WPS. WPS Enable Click this checkbox to enable WPS on the system. RAC2V1A Router User Guide... -
Page 32: Wan Setup
Enter this code on the computer if requested during connection. PBC Method Start PBC Click to start the PBC connection process. This is equivalent to pressing the WPS button on the back of the router. WAN Setup Dynamic Configuration Settings (IPv4) RAC2V1A Router User Guide... - Page 33 Router Configuration Screen Descriptions A dynamic connection type is the most common type of connection. The router gets its IP address from a Spectrum DHCP server. If you are not sure of the connection type, use a dynamic connection. For changes to take effect, you must click Apply.
-
Page 34: Static Ip Connection Type (Ipv4)
Static IP Connection Type (IPv4) A static IP address connection type is less common than others and uses a permanent IP address to connect to the Internet. If Spectrum provides an IP address that never changes, then use this option. For changes to take effect, you must click Apply. -
Page 35: Dns Settings
You should not change this field unless specifically directed to do so by Charter. Click here to If Spectrum gave you specific DNS settings, click enter your DNS here to go to the DNS Settings screen to enter Settings those settings. -
Page 36: Dynamic Configuration Settings (Ipv6)
This screen enables a DHCPv6 configured IPv6 stack. A dynamic connection type is the most common type of connection. The router gets its IP address from a Spectrum DHCP server. Unless Spectrum directs you to do choose a Static address, you should choose a dynamic address. -
Page 37: Static Ip Connection Type (Ipv6)
This screen enables a statically configured IPv6 address. A static IP address connection type is less common than others and uses a permanent IPv6 address to connect to the Internet. If Spectrum provides an IP address that never changes, then use this option. For changes to take effect, you must click Apply. - Page 38 IP Address v6 Enter the IPv6 address assigned to you by Spectrum or static IP operation. An IPv6 address has eight groups of four hexadecimal digits (0-9, a-f). The groups are separated by colons, for example, 2001:0db8:85a3:0000:0000:8a2e:0370:7334.
-
Page 39: Lan Setup
LAN Settings (IPv4) You can make changes to the Local Area Network (LAN) configuration here. For changes to take effect, you must click Apply. LAN IP Settings IP Address This field displays the IP address of the LAN. RAC2V1A Router User Guide... - Page 40 Using very short leases, DHCP can dynamically reconfigure networks where there are more computers than available IP addresses, such as educational environments. Domain Name Enter the domain name that you want to display on client devices. RAC2V1A Router User Guide...
- Page 41 The default value is 4, which should be acceptable for most home networks. IGMP Proxy Enable IGMP Click this checkbox to enable the IGMP (Internet Proxy Group Management Protocol) proxy on the system. RAC2V1A Router User Guide...
-
Page 42: Lan Settings (Ipv6)
When you enable IPv6 in the LAN, a different IPv6- based subnet is recognized on the LAN, and the local DHCPv6 server will hand out stateless and stateful addresses based on the prefix information broken down from the WAN side delegated prefix. RAC2V1A Router User Guide... - Page 43 Using very short leases, DHCP can dynamically reconfigure networks where there are more computers than available IP addresses, such as educational environments. Enable DHCP Click the checkbox to enable DHCP Relay Relay (IPv6) functionality on the system. RAC2V1A Router User Guide...
-
Page 44: Client List
Host Name Enter a host name for the client. MAC Address Enter the client’s MAC address. Click Add to create a new fixed client lease. Complete the necessary fields in the pop-up window, and then click Apply. RAC2V1A Router User Guide... - Page 45 Attached Client List IP Address The IP address of a connected client. Host Name The host name of a connected client. MAC Address The MAC address of a connected client. Click Refresh to update the client list. RAC2V1A Router User Guide...
-
Page 46: Wireless
Router Configuration Screen Descriptions Wireless Basic Setup RAC2V1A Router User Guide... - Page 47 Wi-Fi Network Enter a user-friendly name to identify the wireless Name (SSID) network. This name is also referred to as the Service Set Identifier (SSID). The name can be up to 32 characters long. RAC2V1A Router User Guide...
- Page 48 This may be useful if you have many guests using the network. Enable WMM Click this checkbox to enable Wi-Fi Multimedia (WMM) functionality. Enabling WMM can help RAC2V1A Router User Guide...
- Page 49 8 and 63 characters. You can use any alphanumeric characters (digits 0-9 and letters A-Z, either upper- or lower-case) and printable special characters (such as $, !, ?, &, #, @ and others). RAC2V1A Router User Guide...
-
Page 50: Advanced Settings
The Advanced Settings page is used to set up the router’s advanced wireless functions. These settings should only be adjusted by an expert administrator since incorrect settings can reduce wireless performance. For changes to take effect, you must click Apply. RAC2V1A Router User Guide... - Page 51 Selection periodically monitor the frequency band for channels that have less traffic than the one in use. If a less congested channel is available, Dynamic Channel Selection allows the radio to make an unsolicited channel change. RAC2V1A Router User Guide...
- Page 52 Wireless Network Management also supports network-assisted power saving and network- assisted roaming. Radio Resource Click the checkbox if you want Spectrum to Management manage the radio channel and transmit power used on this specific radio. Radio Resource Management lets Spectrum use its knowledge of surrounding...
-
Page 53: Associated Stats
The average Received Signal Strength Indicator (RSSI) level of the connected client. TX Rate (bps) The transmission rate that is being reported by the associated client. RX Rate (bps) The receive rate that is being reported by the associated client. RAC2V1A Router User Guide... -
Page 54: Airtime Fairness
Click the checkbox to enable Airtime Fairness. Wireless 2.4 GHz Use these fields to specify what percentage of the SSID Percentage 2.4 GHz band you wish to allocate to each wireless network, based on network name (SSID). RAC2V1A Router User Guide... - Page 55 Wireless 5 GHz Use these fields to specify what percentage of the Client 5 GHz band you wish to allocate to each device, Percentage based on MAC address. You can enter up to 16 MAC addresses. RAC2V1A Router User Guide...
-
Page 56: Qos Classification
Router Configuration Screen Descriptions QoS Classification RAC2V1A Router User Guide... - Page 57 Access Category BE. • 2 maps to Layer 2 CoS value 4 and 802.11e WMM Access Category VI. • 3 maps to Layer 2 CoS value 6 and 802.11e WMM Access Category VO. This is the highest priority. RAC2V1A Router User Guide...
-
Page 58: Log
Wireless Tos The wireless type of service. Larger values indicate a higher priority. This screen shows a log of communication statistics for your wireless connections. This information may be helpful in troubleshooting issues with your wireless network. RAC2V1A Router User Guide... -
Page 59: Firewall
Doing so allows for more flexibility and reliability for transparent applications that require clients to be contacted mode inside the home while minimizing the impact on security. RAC2V1A Router User Guide... -
Page 60: Port Forwarding
When you are finished, click Apply. Clear Entry To remove the rule from a table and stop forwarding that port, select the entry that you want to clear and click Clear. RAC2V1A Router User Guide... -
Page 61: Port Triggers
Enter the IP address of the machine on the LAN Address where you want the connections to go. Private Port Enter the private port range for port you want to forward. It should be the same range as the inbound port. Port Triggers RAC2V1A Router User Guide... -
Page 62: Dmz
Enter a description for the trigger you want to set Outbound Port Specify the range of outbound port numbers. Type Specify the type of port. Options are TCP, UDP, and BOTH. Inboud Port Specify the range of inbound port numbers. RAC2V1A Router User Guide... - Page 63 DMZ. Be sure that the address is not in the range of addresses delivered by the DHCP server if enabled. Once you place the computer in the DMZ, all ports on the computer are open to the Internet and not protected. RAC2V1A Router User Guide...
-
Page 64: Wan Ping Blocking
You can configure the router not to respond to an ICMP Ping (ping to the WAN port). This offers a heightened level of security. Block ICMP Ping Block ICMP Ping Click this checkbox to enable WAN Ping Blocking. Enable Application Layer Gateway Settings RAC2V1A Router User Guide... -
Page 65: Mac Filter
You can choose to allow (whitelist) or deny (blacklist) MAC addresses. Whenever a device tries to access your network, the router checks the MAC filter settings to determine whether the device should be allowed to access your network. RAC2V1A Router User Guide... -
Page 66: Parental Controls
Parental Control lets you block access to the Internet (or certain sites on the Internet) at various times that you specify. You can block sites based on keywords, URL, or custom filters that you set up. RAC2V1A Router User Guide... - Page 67 Use this screen to block access to websites based on their URLs (web addresses). The IP address resolved by the fully qualified domain name (FQDN) will also be blocked. Description Type a description for the filter you are creating. RAC2V1A Router User Guide...
- Page 68 If you want to edit an existing filter, click Edit. If you want to delete an existing filter, select the filter and click Delete. If you want to remove all of your filters, click Remove All. RAC2V1A Router User Guide...
- Page 69 If you want the filter to apply to multiple clients, you must enter the MAC addresses one by one. If you do not specify a MAC address, the filter will apply to all clients. RAC2V1A Router User Guide...
- Page 70 If you want to edit an existing filter, click Edit. If you want to delete an existing filter, select the filter and click Delete. If you want to remove all of your filters, click Remove All. RAC2V1A Router User Guide...
- Page 71 Router Configuration Screen Descriptions Parental Controls - Custom Use this screen to block access to websites based on custom filters that you define. Description Use this field to type a description for the filter you are creating. RAC2V1A Router User Guide...
- Page 72 If you want to edit an existing filter, click Edit. If you want to delete an existing filter, select the filter and click Delete. If you want to remove all of your filters, click Remove All. RAC2V1A Router User Guide...
-
Page 73: Ipv6 Client Filter
IPv6 firewall (Allow+Incoming) or blocked from accessing the Internet (Deny+Outgoing). Client IP Address Enter the client IPv6 address for which this rule applies. You can enter a single address or a range of addresses. RAC2V1A Router User Guide... -
Page 74: Usb
Available Volumes Volume Name The volume name of a connected USB device. Total Space The total space available on the associated USB device. Free Space The amount of free space available on the associated USB device. RAC2V1A Router User Guide... -
Page 75: File Sharing
File sharing lets you configure folders on the USB device so that you can share files with other devices. An FTP server makes the folder available for remote users over the Internet. Shared folders are available to users on your local network. RAC2V1A Router User Guide... - Page 76 Click this box to enable AFP on your USB device. Share Folders Use this field to specify the folder that you want to Access make available for AFP. Available Share Folders: Use this section to add, edit, or delete shared folders on the USB device. RAC2V1A Router User Guide...
-
Page 77: Media Sharing
Media Sharing Settings Enable Media Click this box to enable media sharing on your USB Sharing device. Media Sharing Use this field to specify the folder that you want to Name make available for media sharing. RAC2V1A Router User Guide... -
Page 78: Usb Access Control
If you want to restrict a device so that it cannot access your network, select the device and click Delete. Attached USB Device This section shows the USB devices which are attached to your router. RAC2V1A Router User Guide... -
Page 79: Utilities
Router Configuration Screen Descriptions Utilities System Information This page shows a summary of the system’s status. RAC2V1A Router User Guide... - Page 80 This field indicates whether the firewall settings are enabled or disabled. SSID This field indicates the network name (SSID). Security This field indicates the security mode. UPNP This field indicates whether the UPnP feature is enabled or disabled. RAC2V1A Router User Guide...
-
Page 81: Restart Router
Restarting the router will not delete any of the configuration settings. To restart the router, click Restart. Note: A dialog box prompts you to confirm that you want to restart the router. Click OK to restart now or click Cancel to restart later. RAC2V1A Router User Guide... -
Page 82: Factory Defaults
Note: A dialog box prompts you to confirm that you want to restore the factory default settings. Click OK to restore now or click Cancel if you do not want to restore now. RAC2V1A Router User Guide... -
Page 83: System Settings
Apply. Administrator Login Current Enter the old password to change the administrator Password password. New Password/ Enter the new password in both fields to change Confirm New the administrator password. Password RAC2V1A Router User Guide... -
Page 84: System Logs
The host name or IP addresses of the NTP servers that you want to use. 1-4 allow you to select a server from a drop-down list. 5 allows you to type in a server name. System Logs RAC2V1A Router User Guide... -
Page 85: Ddns
Click this checkbox to enable DDNS on the system. DDNS Service Sets the DDNS provider that the account uses. Available options are No-IP, DuckDNS and Dynu. User Name Enter the user name for the DDNS account. RAC2V1A Router User Guide... -
Page 86: Blocked Device
USB access control has been set up on the USB: USB Access Control page. File System The file system method (such as FAT, NFTS and so on) of a USB device for which an explicit USB RAC2V1A Router User Guide... -
Page 87: Qos
Quality of Service (QoS) refers to the overall performance of your network. This screen allows you to prioritize certain applications such as online gaming while minimizing the effects on network performance during busy periods. Enable QoS Click this checkbox to enable QoS Prioritization. RAC2V1A Router User Guide... - Page 88 Enter a name for the client device that will be affected by this policy. Priority Choose the priority for this policy. In the event of conflicting policies, this priority will be used to determine which policy takes precedent. RAC2V1A Router User Guide...
-
Page 89: Troubleshooting
Check the light on the front. It should be blue. Does the connection utility discover your wireless LAN? If you turned off “Broadcast Wi-Fi Network Name (SSID)” you need to manually enter the name of the wireless LAN in the connection utility. RAC2V1A Router User Guide... -
Page 90: My Wireless Internet Connection Stops Working Sometimes
If other sites download quickly, wait for a few minutes and try again. Web site traffic during peak hours may also affect the connection speed. Other communications on the LAN, or interference with wireless connections, may slow down the connection. RAC2V1A Router User Guide... -
Page 91: Safety Requirements
Safety Requirements The RAC2V1A router complies with the applicable requirements for performance, construction, labeling and information when used as outlined below: • Do not use product near water (i.e. wet basement, bathtub, sink or near a swimming pool, etc.), to avoid risk of electrocution. - Page 92 This transmitter must not be co-located or operating in conjunction with any other antenna or transmitter. Country Code selection feature to be disabled for products marketed to the US/CANADA Operation of this device is restricted to indoor use only RAC2V1A Router User Guide...
- Page 93 © 2017 ARRIS Enterprises LLC. All Rights Reserved. No part of this publication may be reproduced in any form or by any means or used to make any derivative work (such as translation, transformation, or adaptation) without written permission from ARRIS Enterprises LLC. (“ARRIS”). ARRIS reserves the right to revise this publication and to make changes in content from time to time without obligation on the part of ARRIS to provide notification of such revision or change.
Need help?
Do you have a question about the RAC2V1A and is the answer not in the manual?
Questions and answers