Table of Contents
Advertisement
Quick Links
Advertisement
Table of Contents

Subscribe to Our Youtube Channel
Related Manuals for Eurotherm 6100A


Summary of Contents for Eurotherm 6100A
- Page 1 E U ROT H E R M User guide...
-
Page 2: Declaration Of Conformity
Eurotherm Limited reserves the right to alter the specification of its products from time to time without prior notice. Although every effort has been made to ensure the accuracy of the information contained in this manual, it is not warranted or represented by Eurotherm Limited to be a complete or up-to-date de- scription of the product. - Page 3 100/180 MM PAPERLESS GRAPHIC RECORDER: USER GUIDE PAPERLESS GRAPHIC RECORDER USER GUIDE LIST OF SECTIONS Section Page 1 INTRODUCTION ................... 2 INSTALLATION ..................3 PROCESS VARIABLE DISPLAY ..............4 SETTING UP THE RECORDER ..............5 FILE ..................... 6 BRIDGE ....................7 SCREEN BUILDER ..................
-
Page 4: Table Of Contents
100/180 MM PAPERLESS GRAPHIC RECORDER: USER GUIDE PAPERLESS GRAPHICS RECORDER USER GUIDE LIST OF CONTENTS Section Page Safety Notes ....................... SYMBOLS USED ON THE RECORDER LABELLING ..........1 INTRODUCTION ................. 1.1 UNPACKING THE RECORDER ............... 2 INSTALLATION ................... 2.1 MECHANICAL INSTALLATION ..............2.2 ELECTRICAL INSTALLATION ................ - Page 5 100/180 MM PAPERLESS GRAPHIC RECORDER: USER GUIDE LIST OF CONTENTS (Cont.) Section Page 3.4.2 Horizontal Trend display ..................3.4.3 Circular Trend ....................TREND MODES ....................NORMAL VIEW ....................NORMAL VIEW FEATURES ................FULL SCREEN DISPLAY ..................FULL SCREEN FEATURES ..................TIMESTAMPS ....................
- Page 6 100/180 MM PAPERLESS GRAPHIC RECORDER: USER GUIDE LIST OF CONTENTS (Cont.) Section Page 4.3.2 Group configuration (Cont.) ALARM MESSAGE .................... ACK MESSAGE ....................POINT TYPE/SELECTION ................... 4.3.3 Channel/Alarm configuration ................CHANNEL NUMBER ..................VALUE ......................INPUT TYPE ...................... LIN TYPE ......................INPUT LOW .....................
- Page 7 100/180 MM PAPERLESS GRAPHIC RECORDER: USER GUIDE LIST OF CONTENTS (Cont.) Section Page 4.3.5 Archive configuration ..................COMPRESSION ....................FLASH SIZE ...................... SHORTEST TREND HISTORY / DURATION ............CSV CHECK BOXES, DATE/TIME FORMAT ............SHOW ......................MEDIA ......................ARCHIVE TO MEDIA ..................MEDIA FILE FORMAT/FTP FILE FORMAT ..............
- Page 8 100/180 MM PAPERLESS GRAPHIC RECORDER: USER GUIDE LIST OF CONTENTS (Cont.) Section Page 4.3.15 Connections ..................... INTRODUCTION ....................INSTALLATION ....................TERMINATION AND BIASSING (Not EIA232) ............. CONFIGURATION .................... CONFIGURATION PARAMETERS ............... MESSAGING INFORMATION ................MODBUS ADDRESS ..................4.3.16 Master comms ....................INTRODUCTION ....................
- Page 9 100/180 MM PAPERLESS GRAPHIC RECORDER: USER GUIDE LIST OF CONTENTS (Cont.) Section Page 4.4 SECURITY ....................4.4.1 Access levels ...................... SETTING PERMISSIONS ..................ACCESS WHEN: ....................NEW PASSWORD/RETYPE PASSWORD ............. CONNECT FROM REMOTE ................REMOTE USER NAME/REMOTE PASSWORD ............. LOGIN DISABLED ..................... EDIT OWN PASSWORD ..................
- Page 10 100/180 MM PAPERLESS GRAPHIC RECORDER: USER GUIDE LIST OF CONTENTS (Cont.) Section Page 4.6 SYSTEM ...................... 4.6.1 Clock ........................ 4.6.2 Locale ....................... LONG DATE FORMAT ..................4.6.3 Upgrade ......................4.6.4 Input adjust ......................ADJUST PROCEDURE ..................4.6.5 Output Adjust ..................... 4.6.6 Master Comms Diagnostics .................
- Page 11 100/180 MM PAPERLESS GRAPHIC RECORDER: USER GUIDE LIST OF CONTENTS (Cont.) Section Page 6 BRIDGE (REMOTE VIEWER) ..............6.1 INTRODUCTION ..................6.1.1 Minimum PC requirements ................... SUPPORTED PDA CONFIGURATION ..............6.2 CONNECTION DETAILS ................6.2.1 Direct PC connection ..................6.2.2 PC To remote recorder ..................6.2.3 Networked systems .....................
- Page 12 100/180 MM PAPERLESS GRAPHIC RECORDER: USER GUIDE LIST OF CONTENTS (Cont.) Section Page 7.4 COMPONENT DEFINITIONS ................ 7.4.1 Group Vertical/Horizontal Trend ................7.4.2 Group vertical bargraph ..................7.4.3 Group horizontal bargraph ................. 7.4.4 Group numeric display ..................7.4.5 Channel vertical/horizontal bargraph ..............7.4.6 Channel Numeric ....................
- Page 13 100/180 MM PAPERLESS GRAPHIC RECORDER: USER GUIDE LIST OF CONTENTS (Cont.) Section Page 8.4.3 Channel Run-Time data ..................CHANNEL 1 ....................CHANNEL 2 ....................CHANNEL 3 ....................CHANNEL 4 ....................CHANNEL 5 ....................CHANNEL 6 ....................CHANNEL 7 ....................CHANNEL 8 ....................CHANNEL 9 ....................
- Page 14 100/180 MM PAPERLESS GRAPHIC RECORDER: USER GUIDE LIST OF CONTENTS (Cont.) Section Page 8.5.4 Function code 08 ....................8.5.5 Function code 16 (Hex 10) ................. REQUEST ......................RESPONSE ....................... EXCEPTION RESPONSES ................... 9 ANALOGUE OUTPUT OPTION ............9.1 SIGNAL WIRING ..................9.2 SPECIFICATION ...................
- Page 15 100/180 MM PAPERLESS GRAPHIC RECORDER: USER GUIDE LIST OF CONTENTS (Cont.) Section Page 12.5.2 Channel configuration ..................CHANNEL 1 ....................CHANNEL 2 ....................CHANNEL 3 ....................CHANNEL 4 ....................12.5.3 Event Configuration ..................EVENT NUMBER 1 .................... 12.5.4 Report Configuration ..................12.5.5 Serial Communications Configuration ..............
- Page 16 100/180 MM PAPERLESS GRAPHIC RECORDER: USER GUIDE LIST OF CONTENTS (Cont.) Section Page Annex B: REFERENCE ................B1 DIAGNOSTICS DISPLAY ................B1.1 Main diagnostic display ................B1.2 SPECIAL MODES ..................B1.3 DISPLAY TEST ..................... B1.4 TOUCH CALIBRATION ................B1.4.1 Touch screen calibrate ..................B1.4.2 Touch screen verify ...................
- Page 17 100/180MM PAPERLESS GRAPHIC RECORDER: USER GUIDE SAFETY NOTES WARNING Any interruption of the protective conductor inside or outside the apparatus, or disconnection of the protective earth terminal is likely to make the apparatus dangerous under some fault conditions. Intentional interruption is prohibited.
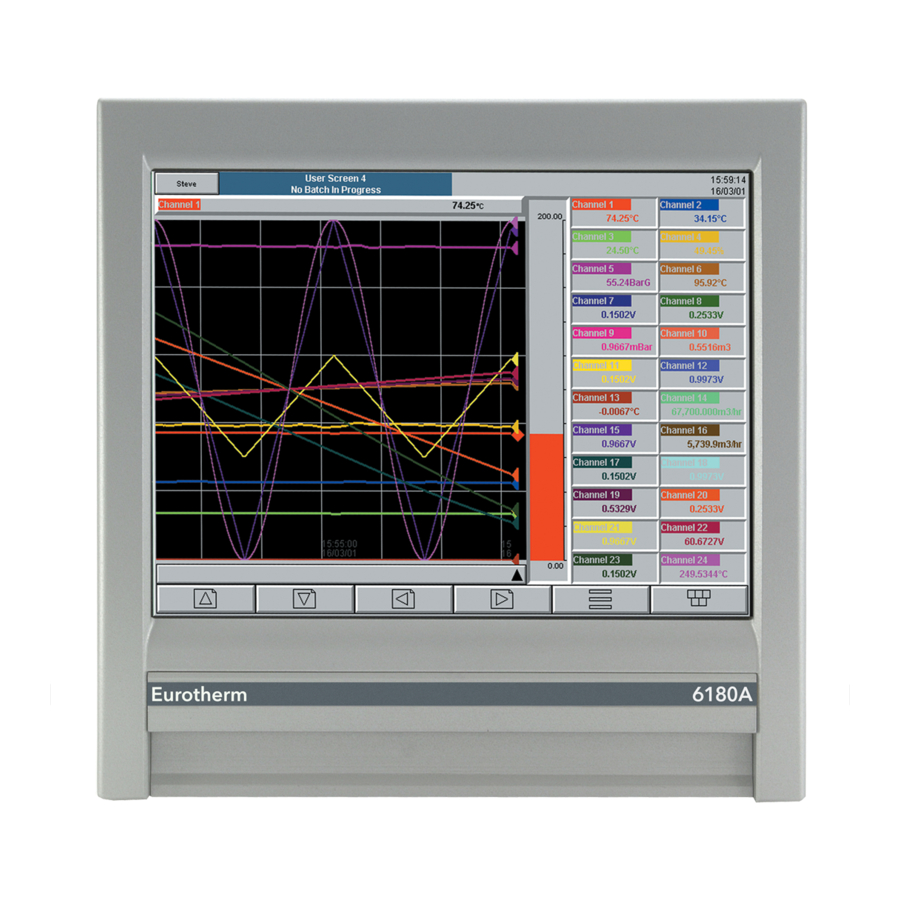
- Page 18 100/180MM PAPERLESS GRAPHIC RECORDER: USER GUIDE USER GUIDE 1 INTRODUCTION This document describes the installation, operation and configuration of a paperless graphic recorder. The recorder comes in two versions, which differ in physical size, and in the number of I/O channels and options available, but oth- erwise are identical (i.e.
- Page 19 100/180MM PAPERLESS GRAPHIC RECORDER: USER GUIDE 2 INSTALLATION (Cont.) Standard terminal cover: 246.5 mm Long terminal cover: 288 (closed); 415mm (open) 24.75 211.5 mm 144 mm Safety Earth Side elevation Front view (RHS) Access Flap Panel thickness = 3 to 25 mm. Optimum thickness depends on panel material Panel cutout 138mm x 138mm (+1 - 0)
- Page 20 100/180MM PAPERLESS GRAPHIC RECORDER: USER GUIDE 2 INSTALLATION (Cont.) 260.90 mm 292 mm 211 mm 28.34 Safety Earth Front view Side elevation Access Flap Panel thickness range = 6 to 25 mm. Optimum thickness depends on panel material Panel cutout 281mm x 281mm (+1 - 0) 11.07 x 11.07 inches (+0.04 - 0.00)
-
Page 21: Installation
100/180MM PAPERLESS GRAPHIC RECORDER: USER GUIDE 2.2 ELECTRICAL INSTALLATION 2.2.1 Signal wiring Figures 2.2.1a and 2.2.1b show connector locations for the small and large-frame recorders respectively. The figures are not to the same scale. Figure 2.2.1c shows details of universal input board wiring and figure 2.2.1d gives the pinouts for option boards. - Page 22 100/180MM PAPERLESS GRAPHIC RECORDER: USER GUIDE 2.2.1 SIGNAL WIRING (Cont.) USB Ports (option) USB1 USB2 Port 1 Port 2 Safety Earth Ethernet Mains (supply) (M4) RJ45 connection Serial comms (option) Option board 5 Option board 6 Option board 1 Option board 2 Option board 7 Option board 8 Option board 3...
- Page 23 100/180MM PAPERLESS GRAPHIC RECORDER: USER GUIDE 2.2.1 SIGNAL WIRING (Cont.) Input board pinouts 9 10 11 12 13 14 15 16 17 18 19 20 21 22 Channels Channels Channels Channels Channels Channels 1, 7, 13, 19, 25, 2, 8, 14, 20, 26, 3, 9, 15, 21, 27, 4, 10, 16, 22, 28, 5, 11, 17, 23, 29,...
- Page 24 100/180MM PAPERLESS GRAPHIC RECORDER: USER GUIDE 2.2.1 SIGNAL WIRING (Cont.) Relay outputs Max number of boards = 4 for small frame or 9 for large frame 1 2 3 4 5 6 7 8 9 10 11 12 13 14 15 16 17 18 19 20 21 22 Relay 1 Relay 2 Relay 3...
- Page 25 100/180MM PAPERLESS GRAPHIC RECORDER: USER GUIDE 2.2.1 SIGNAL WIRING (Cont.) View on solder-bucket face of user socket EIA232C EIA485 (5-wire) EIA485 (3-wire) Signal Signal Signal Link to pin 7 Signal ground Signal ground Signal ground Link to pin 8 TxA/RxA TxB/RxB 5V via 1500Ω...
-
Page 26: Stylus
100/180MM PAPERLESS GRAPHIC RECORDER: USER GUIDE 2.3 ACCESS FLAP Note: See also section 2.4 if the lockable flap option is fitted. Lockable flaps are identified by means of a padlock symbol printed towards the right hand end of the flap label. Stylus storage USBFront Door lock (option) -
Page 27: Card Slot
100/180MM PAPERLESS GRAPHIC RECORDER: USER GUIDE 2.3.1 Stylus A stylus suitable for use on the touch screen is located in a storage area to the left of the Compact Flash/SD Card slot. 2.3.2 Card slot The slot for the Compact Flash or SD card is located centrally behind the flap. If an SD card is already fitted, it is removed by pressing on the card, to unlatch it, then pulling the card out of the slot. -
Page 28: File
100/180MM PAPERLESS GRAPHIC RECORDER: USER GUIDE 2.4 LOCKABLE FLAP OPTION This option allows the access flap below the display screen to be locked against unauthorized access to the Compact Flash/SD card. It also provides some protection (in the form of a warning message) against the inadvertent removal of such a card whilst archive data is being written to it. -
Page 29: Archive Active
100/180MM PAPERLESS GRAPHIC RECORDER: USER GUIDE 2.4.1 FLAP LOCK OPERATION (Cont.) ARCHIVE ACTIVE 1. Touch the root menu key or alarm status area at the top of the screen. 2. Touch the ‘Unlock Flap’ key (figure 2.4.1a). 3. The flap unlocks for 5 seconds in the normal way (to allow access to the stylus and the usbfront port), but a warn- ing message appears on the screen (figure 2.4.1c). -
Page 30: Process Variable Display
100/180MM PAPERLESS GRAPHIC RECORDER: USER GUIDE 3 PROCESS VARIABLE DISPLAY The operator interface consists of a touch-sensitive screen, showing either process variable values in one of a number of formats, or, showing configuration or operational details for use in setting up the recorder. This section (3) describes the process variable displays. -
Page 31: Current Trace Alarm Icons
100/180MM PAPERLESS GRAPHIC RECORDER: USER GUIDE 3 PROCESS VARIABLE DISPLAY (Cont.) CURRENT TRACE ALARM ICONS In each of the different types of PV display, each channel's faceplate gives the status of the channel's alarms. The status of each alarm is shown by one of the icons depicted in table 3, either flashing (if it is active and unacknowledged) or on continuously (if it is active and acknowledged). -
Page 32: Alarm Indication
100/180MM PAPERLESS GRAPHIC RECORDER: USER GUIDE 3.1.3 Alarm indication This area of the display can contain a number of status icons: Instrument alarm, Channel alarm, Battery change, Disk status, FTP in progress, Configuration locked, and so on. Pressing this area of the screen calls the 'Summary menu' - (section 3.1.4) allowing the user to view active instrument alarms, to acknowledge all channel alarms, to display the Alarm Summary or Message Log page. - Page 33 100/180MM PAPERLESS GRAPHIC RECORDER: USER GUIDE 3.1.3 ALARM INDICATION (INSTRUMENT ALARMS) (Cont.) Paper Low/Paper Out Warning messages from the ASCII printer (if fitted). Printer not responding There is a fault in the serial comms link with the ASCII printer (if fitted). Recording failure - (message) Message explains recording failure - due to file error, internal overflow etc.
-
Page 34: Channel Alarm
100/180MM PAPERLESS GRAPHIC RECORDER: USER GUIDE 3.1.3 ALARM INDICATION (Cont.) CHANNEL ALARM This red 'bell' indicator appears if any channel is in alarm. The symbol is illuminated continuously if all alarms are acknowledged or flashes if any active alarm is unacknowledged. Refer to 'ALARM ACKNOWLEDGEMENT' below, for details of how to acknowledge alarms. -
Page 35: Summary Menu
100/180MM PAPERLESS GRAPHIC RECORDER: USER GUIDE 3.1.4 Summary menu This pop-up display appears if the Alarm Indication area at the top of the display is touched. Figure 3.1.4 shows the display. Touch Alarm area (e.g. channel alarm symbol) Summary Instrument Alarm Summary Ack all Alarms Note: For recorders fitted with the Lockable Alarm Summary... - Page 36 100/180MM PAPERLESS GRAPHIC RECORDER: USER GUIDE 3.1.4 SUMMARY MENU (Cont.) ALARM SUMMARY PAGE As shown in figure 3.1.4d, below, the alarm summary page contains the following information for the current group: 1. Alarm identifier. This appears as a point ID, followed by the relevant alarm number in parentheses. For example, Alarm 1 on maths channel 6 would appear as: D6 (1).
-
Page 37: Alarm Acknowledgement
100/180MM PAPERLESS GRAPHIC RECORDER: USER GUIDE 3.1.4 SUMMARY MENU (Cont.) ALARM ACKNOWLEDGEMENT Alarms can be acknowledged individually, on a group basis, or globally (all alarms). INDIVIDUAL ALARMS Individual alarms are acknowledged from the alarm summary page by touching the relevant item (highlights yellow), then touching 'Yes' in the resulting pop-up confirmation box. -
Page 38: Batch Summary
100/180MM PAPERLESS GRAPHIC RECORDER: USER GUIDE 3.1.4 SUMMARY MENU (Cont.) BATCH SUMMARY If the Batch option is fitted (section 4.3.10) a ‘Batch Summary’ key appears in the Summary menu. Note: The following description shows the situation where batch ‘Scope’ is configured as ‘Group’. The description is similar when ‘Scope’... - Page 39 100/180MM PAPERLESS GRAPHIC RECORDER: USER GUIDE 3.1.4 SUMMARY MENU (Cont.) BATCH SUMMARY (Cont.) FULL DETAILS Touching this key calls the Batch Details page showing the group name, batch status and batch field details. BATCH CONTROL This calls a page similar to the Full Details page, but including a ‘NEW’ key to allow the operator to start a new batch. If the batch is configured as ‘Start/Stop’...
-
Page 40: Message Log
100/180MM PAPERLESS GRAPHIC RECORDER: USER GUIDE 3.1.4 SUMMARY MENU (Cont.) MESSAGE LOG Note: Message log can also be selected using the Root menu/Goto View/Message log key. This goes immedi- ately to the first Message Log page for the current group to the screen (i.e. the 'Goto Group' menu does not appear). - Page 41 100/180MM PAPERLESS GRAPHIC RECORDER: USER GUIDE 3.1.4 SUMMARY MENU (Cont.) MESSAGE LOG (Cont.) MESSAGE TYPE FILTER All Messages All messages are displayed System Only System messages and instrument alarms are listed Alarms Only alarm on/off and acknowledgement messages appear. Power Up Displays power up messages only including Config Revision and Security revision are included.
- Page 42 100/180MM PAPERLESS GRAPHIC RECORDER: USER GUIDE 3.1.4 SUMMARY MENU (Cont.) MESSAGE LOG (Cont.) OPTION MENU Touching a message (highlights yellow) calls the Option Menu* as shown in figure 3.1.4h, below. Group name 09:06:22 Engineer Batch number:050405A12 05/04/05 All Messages All History Message Log: Group name 05/04/05 09:06:18 Alarm(s) on 1(1) 05/04/05 09:06:18 Operator's name: Andrew...
- Page 43 100/180MM PAPERLESS GRAPHIC RECORDER: USER GUIDE 3.1.4 SUMMARY MENU (Cont.) REMOVE MEDIA Note: See section 2.4 if the 'Lockable Door Flap' option is fitted. This key is provided to help ensure that any local memory storage device is removed only when it is 'safe' to do so. Touching the key results in either an 'OK to remove archive media', or a 'DO NOT REMOVE Archive Media! message, as appropriate.
-
Page 44: Navigation Keys
100/180MM PAPERLESS GRAPHIC RECORDER: USER GUIDE 3.2 NAVIGATION KEYS Above the lower edge of the display screen are six keys (as shown below, for the small frame unit) which allow the user to perform various context-related tasks such as to change the display mode (section 3.4), to access the recorder... -
Page 45: Alarm Summary
100/180MM PAPERLESS GRAPHIC RECORDER: USER GUIDE 3.2.1 KEY FUNCTIONS (Cont.) ROOT MENU KEYS (Cont.) Goto Group Allows a group to be selected for display. Groups which are not 'display enabled' in the Config/Views page (section 4.3.4) are greyed. An alarm icon appears (as shown for groups 1 and 4, in figure 3.2.1b, be- low) for any group containing one or more points in alarm. - Page 46 100/180MM PAPERLESS GRAPHIC RECORDER: USER GUIDE 3.2.1 KEY FUNCTIONS (Cont.) ALARM SUMMARY The Root menu/Goto View/Alarm summary key calls the Alarm summary page for the current group to the screen. Alternatively, Alarm summary can be selected from the Alarm, Message and Media menu, but in this case, the user must select an alarm summary group from a pop-up (Goto Group) menu.
-
Page 47: First Switch-On
100/180MM PAPERLESS GRAPHIC RECORDER: USER GUIDE 3.3 FIRST SWITCH-ON When power is applied the recorder initialises, and once this process is complete, the home page is displayed. It is unlikely that this will contain any useful information because the input channels will not, as yet, have been configured to suit the type of input signals being applied to them, as described in section Notes:... -
Page 48: Access To Configuration
100/180MM PAPERLESS GRAPHIC RECORDER: USER GUIDE 3.3.1 Access to Configuration As shown in figure 3.3.1a, once the recorder has initialised, touch the current access level key Touch the 'Logged out' field and then touch 'Engineer' from the resulting picklist. Touch the blank Password area to call the keyboard display (see figure 3.3.1b). Touch <Numeric><1><0><0><OK>... -
Page 49: Text String Entry
100/180MM PAPERLESS GRAPHIC RECORDER: USER GUIDE 3.3.1 ACCESS TO CONFIGURATION (Cont.) TEXT STRING ENTRY The keyboard which appears when the password area is touched is the same as that which appears when any non-nu- meric text string entry is required (e.g. channel descriptor). Figures 3.3.1b and 3.3.1c below are an attempt, within the limitations of the illustrating process, to depict the available keyboards and thus the available character set. - Page 50 100/180MM PAPERLESS GRAPHIC RECORDER: USER GUIDE 3.3.1 ACCESS TO CONFIGURATION (Cont.) TEXT STRING ENTRY (Cont.) Text String Ä Å Á À Æ Ç É È Ë Ê Í Ì Ï Î Ó Ò Ô Ö º α β Γ δ Ü...
-
Page 51: Display Modes
100/180MM PAPERLESS GRAPHIC RECORDER: USER GUIDE 3.4 DISPLAY MODES The display modes described below allow the currently displayed group's process values (channels, totalisers etc.- known collectively as points) to be displayed as vertical, horizontal or circular 'chart' traces, as vertical or horizontal bargraphs or as numeric values. -
Page 52: Time Change Records
100/180MM PAPERLESS GRAPHIC RECORDER: USER GUIDE 3.4.1 VERTICAL TREND DISPLAY (Cont.) TIME CHANGE RECORDS For vertical trend mode only, a line is drawn across the width of the chart whenever a time discontinuity in the record occurs. These lines are volatile in real-time i.e. they disappear if the display mode is changed, or if a configuration page is called etc. - Page 53 100/180MM PAPERLESS GRAPHIC RECORDER: USER GUIDE VERTICAL TREND DISPLAY (Cont.) Home Group faceplates (appear only if Faceplates selected On from option menu). If there are too many faceplates to fit across the Trend display mode screen, they appear down the G r o u p n a m e 11:52:59 E n g i n e e r...
- Page 54 100/180MM PAPERLESS GRAPHIC RECORDER: USER GUIDE 3.4 DISPLAY MODES (Cont.) 3.4.2 Horizontal Trend display Entered from the Vertical Trend display by means of the down arrow key, or selected via the Root Menu 'Goto View' key, this display mode (figure 3.4.2a) is similar to the Vertical Trend display described in section 3.4.1 above, except that the traces are produced horizontally rather than vertically.
-
Page 55: Circular Trend
100/180MM PAPERLESS GRAPHIC RECORDER: USER GUIDE 3.4.2 HORIZONTAL TREND MODE (Cont.) Below the 'chart' is a message bar, containing the latest message. If there is more than one message, an arrow head icon appears near the right-hand end of the message bar. If this arrow head appears, then touching the message bar calls a pop-up box (figure 3.4.2b) which displays the latest messages. -
Page 56: Normal View
100/180MM PAPERLESS GRAPHIC RECORDER: USER GUIDE 3.4.3 Circular Trend This allows up to 12 points to be traced as though on a circular chart. More than 12 points can be included in the group, but only the first 12 traces and their associated faceplates are included in the real-time display. Entering Trend History mode (by using the Options button or by continuously touching the screen for a few seconds), allows all the points to be reviewed, but only in vertical trend history mode, described in section... - Page 57 100/180MM PAPERLESS GRAPHIC RECORDER: USER GUIDE 3.4.3 CIRCULAR TREND (Cont.) 06/04/05 10:00 10:05 10:55 10:50 10:10 10:45 10:15 10:40 10:20 10:35 10:25 10:30 Figure 3.4.3a Circular trend - New chart mode NORMAL VIEW Normal view is available only for large frame recorders (also small frame recorders when viewed via Bridge software). As shown in figure 3.4.6b, below, this provides a view of the chart, together with scale, chart speed, message bar and navigation keys.
-
Page 58: Normal View Features
100/180MM PAPERLESS GRAPHIC RECORDER: USER GUIDE 3.4.3 CIRCULAR TREND (Cont.) NORMAL VIEW FEATURES Scales Two scales are provided, one for the left hand side of the chart, the other for the right hand side. Channel scaling is a part of channel configuration, as described in section 4.3.3, below. -
Page 59: Timestamps
100/180MM PAPERLESS GRAPHIC RECORDER: USER GUIDE 3.4.3 CIRCULAR TREND (Cont.) TIMESTAMPS Time and/or date are displayed at every major chart division. The following rules apply: 1. For chart durations of a week or more, only the date is displayed 2. For chart durations of less than a week, both time and date appear, with the following exception: In 'New Chart' mode (unless the chart 'bridges' midnight), the date appears only at top centre of the chart. -
Page 60: Vertical Bargraph
100/180MM PAPERLESS GRAPHIC RECORDER: USER GUIDE 3.4 DISPLAY MODES (Cont.) 3.4.4 Vertical bargraph Entered from Circular Trend mode by means of the down arrow key, or selected from the Root Menu 'Goto View' key, this display mode shows the Process Variable (PV) values as vertical bars with faceplates containing digital values and alarm data. - Page 61 100/180MM PAPERLESS GRAPHIC RECORDER: USER GUIDE 3.4.4 VERTICAL BARGRAPH (Cont.) Group name 11:48:56 Logged out 06/04/05 Channel 1 Channel 2 Channel 3 Channel 4 Channel 5 700.87˚C 487.39˚C 235.68˚C 378.99˚C 0.49V 800.00 800.00 400.00 400.00 1.00 400.00 400.00 0.00 0.00 0.00 Figure 3.4.4a Vertical bargraph display (1 to 6 channels) Group name...
-
Page 62: Horizontal Bargraph
100/180MM PAPERLESS GRAPHIC RECORDER: USER GUIDE 3.4 DISPLAY MODES (Cont.) 3.4.5 Horizontal bargraph Entered from Vertical bargraph by means of the down arrow key, or selected using the Root Menu 'Goto View' key, this display mode shows the Process Variable (PV) values as horizontal bars with digital values and alarm data displayed, as shown in figures 3.4.5a and 3.4.5b. - Page 63 100/180MM PAPERLESS GRAPHIC RECORDER: USER GUIDE 3.4.5 HORIZONTAL BARGRAPH (Cont.) Group name 11:58:08 Logged out 06/04/05 Channel 1 700.87˚C 400.00 800.00 Channel 2 487.39˚C 400.00 800.00 Channel 3 235.68˚C 400.00 0.00 Channel 4 378.99˚C 0.00 400.00 Channel 5 0.49V 0.00 1.00 Figure 3.4.5a Horizontal bargraph display (single column example) Group name...
-
Page 64: Numeric
100/180MM PAPERLESS GRAPHIC RECORDER: USER GUIDE 3.4 DISPLAY MODES (Cont.) 3.4.6 Numeric Entered from Horizontal bargraph mode by means of the down arrow key, or selected using the Root Menu 'Goto View' key, this display mode shows the Process Variable (PV) values as digital values. The format (which is automatically selected) is based on the number of channels in the display group. - Page 65 100/180MM PAPERLESS GRAPHIC RECORDER: USER GUIDE 3.4.6 NUMERIC DISPLAY MODES (Cont.) Group name 12:02:27 Logged out 06/04/05 Channel 1 Channel 2 700.87 487.39 ˚C ˚C Channel 3 Channel 4 235.68 378.99 ˚C ˚C Channel 5 Channel 6 0.49 0.85 Figure 3.4.6b Numeric display mode example (6 channels) Group name 12:04:13 Logged out...
-
Page 66: Operator Notes
100/180MM PAPERLESS GRAPHIC RECORDER: USER GUIDE 3.5 OPERATOR NOTES Note: Operator notes should not be confused with similar messages, (described in section 4.3.8), which appear as a result of job action. It is possible for the user to enter a note, of up to 120 characters, at any time, from any display page (not from configu- ration pages). -
Page 67: Setting Up The Recorder
100/180MM PAPERLESS GRAPHIC RECORDER: USER GUIDE 4 SETTING UP THE RECORDER As described in the 'Access to Configuration' (section 3.3.1) above, the setting-up of the recorder is divided into the following areas: Archive Section 4.1 - Allows manual archiving of data to a memory device or to a remote host (FTP... -
Page 68: Local Archive
100/180MM PAPERLESS GRAPHIC RECORDER: USER GUIDE 4.1 ARCHIVE Notes: The archiving functions described below can also be initiated by job action - see section 4.7.15. Archiving is carried out on a group by group basis, with a message being sent to each group when its ar- chive is finished. -
Page 69: Archiving With The Lockable Flap Option
100/180MM PAPERLESS GRAPHIC RECORDER: USER GUIDE 4.1.1 LOCAL ARCHIVE (Cont.) BRING ARCHIVE UP TO DATE This causes the recorder to archive all history files created since the last manual or automatic (section 4.3.5) archive. ARCHIVE ALL This causes the recorder to archive all its history files. If the memory device becomes full before archiving is complete, archiving pauses and a pop-up request appears, asking for a replacement. -
Page 70: Remote Archiving (Ftp Transfer)
100/180MM PAPERLESS GRAPHIC RECORDER: USER GUIDE 4.1.2 Remote archiving (FTP transfer) This allows archiving of recorder files, for all groups with 'Archive via FTP' enabled, to a remote computer, connected (using the RJ45 telephone type connector at the rear of the recorder) either directly, or via a network . 'Archive via FTP' is enabled/disabled as part of Group configuration - section 4.3.2. -
Page 71: Save
As shown in figure 4.2a, touching the 'Save/Restore' key calls the picklist: Save, Restore, New, Text, Import/Export Screen, Import/Export User Linearisation, Import Printer Driver. Import/Export Screen choices appear only if the User screens option is fitted. Archive Save/Restore Config Security Network System 6100A Save as Configuration Data File Name config Save... - Page 72 100/180MM PAPERLESS GRAPHIC RECORDER: USER GUIDE 4.2.1 Save Touching this item allows the current configuration to be saved in the recorder's memory. Files saved in this way are not in a 'readable' format and are used only for archive /security purposes or for transfer to another, similar, recorder. SAVE AS This selection box allows a configuration to be saved, if required, in a format suitable for importing into previous re- corder models.
-
Page 73: Export Screen
100/180MM PAPERLESS GRAPHIC RECORDER: USER GUIDE 4.2.6 Export screen This field appears only if the User Screens option (section 7) is fitted, and allows a User Screen to be exported to a removable memory device or to the internal Flash memory. The exported screen can subsequently be imported either into this recorder or into a different recorder. -
Page 74: Config Key
100/180MM PAPERLESS GRAPHIC RECORDER: USER GUIDE 4.3 CONFIG KEY Touching this key calls the top level configuration pick list: Instrument, Messages, Connections, Groups, User Linearisations, Master Comms, Channels, Batch, Output Channels, Views, Maths, Demand Writes, Archive, Totalisers, Emails, Events, Counters, Reports. -
Page 79: Instrument Name
100/180MM PAPERLESS GRAPHIC RECORDER: USER GUIDE 4.3.1 Instrument configuration Instrument Name Instrument Normal Display Saver Display Minutes Save After Modbus Address = Disabled Modbus Security Disabled Comms Channel Timeout Preset Hour Preset Minute Disable Warning Dialogs Show Operator Notes List 00:0A:8D:00:20:A0 MAC Address These fields appear... - Page 80 100/180MM PAPERLESS GRAPHIC RECORDER: USER GUIDE 4.3.1 INSTRUMENT CONFIGURATION (Cont.) PRESET HOUR Enter an hours number between 0 and 23 for use with Clock Job - Preset clock. PRESET MINUTE Enter a minutes number between 0 and 59 for use with Clock Job - Preset clock. Note: See section 4.7 for a description of recorder jobs, and...
-
Page 81: Group Configuration
100/180MM PAPERLESS GRAPHIC RECORDER: USER GUIDE 4.3.2 Group configuration Note: Groups 1 to 6 is a standard recorder feature. The supply of groups seven to twelve is an optional extra. Group configuration allows the user to define the following: Group trend speed/interval Group recording speed/interval Group descriptor Group content... - Page 82 100/180MM PAPERLESS GRAPHIC RECORDER: USER GUIDE 4.3.2 GROUP CONFIGURATION (Cont.) GROUP NUMBER Allows a particular group to be selected for configuration. TREND UNITS Allows mm/hr or inches per hour to be selected for the 'chart' speed. Automatically converts the trend speed field be- low.
-
Page 83: A/B Switching
100/180MM PAPERLESS GRAPHIC RECORDER: USER GUIDE 4.3.2 GROUP CONFIGURATION (Cont.) A/B SWITCHING If enabled, this function allows alternative values for Trend speed/interval and Recording speed/interval to be entered. 'A' values are used during normal operation. 'B' values are switched-to by job action, as described in section 4.7. -
Page 84: Grid Type
100/180MM PAPERLESS GRAPHIC RECORDER: USER GUIDE 4.3.2 GROUP CONFIGURATION (Cont.) GRID TYPE Grid type allows the chart grid type to be defined for the group being configured. This is not necessarily related to channel scale (section 4.3.3), unless 'From point' is selected, when the grid matches the scale of the selected point. NONE No chart grid is traced. -
Page 85: Recording Speed/Recording Interval
100/180MM PAPERLESS GRAPHIC RECORDER: USER GUIDE 4.3.2 GROUP CONFIGURATION (Cont.) RECORDING SPEED/RECORDING INTERVAL If recording is enabled, these fields are as for trend speed/interval but define the rate at which data is saved to Flash memory. This value also affects how much trace history appears per screen height in trend history mode (section 3.4.1). -
Page 86: Point Type/Selection
100/180MM PAPERLESS GRAPHIC RECORDER: USER GUIDE 4.3.2 GROUP CONFIGURATION (Cont.) POINT TYPE/SELECTION The 'Point Type' box, together with the 'Selection' box immediately below, offers a quick way of editing the contents of a group, as follows: 1. Select the type of point (Channel, Maths, Totaliser or Counter) to be edited from the Point Type drop down menu. 2. -
Page 87: Channel/Alarm Configuration
100/180MM PAPERLESS GRAPHIC RECORDER: USER GUIDE 4.3.3 Channel/Alarm configuration Figure 4.3.3a below, shows a typical configuration menu for an input channel. (For maths channels see section 4.3.11.) The actual fields that appear depend on what input type is selected, what linearisation type is selected, and so on. Channel Number 1) Channel 1 Select channel number... -
Page 88: Input High
100/180MM PAPERLESS GRAPHIC RECORDER: USER GUIDE 4.3.3 CHANNEL/ALARM CONFIGURATION (Cont.) Example: A type J thermocouple is used to measure a temperature range of 100 to 200 degrees Celsius. This thermo- couple output is transmitted to the recorder by a 4 to 20 mA transmitter, for display as an efficiency value between 0 and 100%. -
Page 89: Offset
100/180MM PAPERLESS GRAPHIC RECORDER: USER GUIDE 4.3.3 CHANNEL/ALARM CONFIGURATION (Cont.) SHUNT Allows a shunt resistor value to be entered for input type = mA. Commonly used values are 100 ohms and 250 ohms. Note that shunt resistors are connected to the input connector. The recorder cannot detect whether a shunt is fitted, or if one is, what value it has. -
Page 90: Scale Type
100/180MM PAPERLESS GRAPHIC RECORDER: USER GUIDE 4.3.3 CHANNEL/ALARM CONFIGURATION (Cont.) SCALE TYPE This field allows 'None', 'Linear' or 'Log' to be selected as scale type. For linear scales, the number of major/minor scale divisions can be selected. This does not affect the 'chart' grid divisions, which is set up as a part of Group con- figuration (section 4.3.2). -
Page 91: Filter
100/180MM PAPERLESS GRAPHIC RECORDER: USER GUIDE 4.3.3 CHANNEL/ALARM CONFIGURATION (Cont.) Scale = Linear: Major divisions = 10; Minor divisions = 1 (Standard for 180mm recorders ) Channel 2 388.33V 0.00 1000.00 Scale = Linear: Major divisions = 10; Minor divisions = 5 Intermediate scale values displayed only if room permits. -
Page 92: Break Response
100/180MM PAPERLESS GRAPHIC RECORDER: USER GUIDE 4.3.3 CHANNEL/ALARM CONFIGURATION (Cont.) Input FILTER Recorder For 'noisy' slowly changing signals, damping can be used to filter noise so response that the underlying trend can be seen more clearly. None, 2, 4, 8, 16, 32, 64, 128 or 256 seconds can be selected. -
Page 93: Spanned
100/180MM PAPERLESS GRAPHIC RECORDER: USER GUIDE 4.3.3 CHANNEL/ALARM CONFIGURATION (Cont.) SPANNED This box, when selected, allows span low and high values to be entered. For example, in an input range of 0 to 600 deg C, it may be that the temperature range between 500 and 600 degrees is of most interest. In such a case, setting span low to 500 and span high to 600 will cause the recorder to display only that part of the input range, and this will fill the zone width which is selected next, effectively magnifying the area of interest. -
Page 94: Type
100/180MM PAPERLESS GRAPHIC RECORDER: USER GUIDE 4.3.3 CHANNEL/ALARM CONFIGURATION (Cont.) ENABLE Allows the alarm to be defined as Off, Unlatched, Latched or Trigger. Alarm is disabled and the remainder of the alarm configuration is hidden. Unlatched Unlatched alarms become active when the trigger source becomes active and remain active until the source returns to a non-active state. -
Page 95: Parameters
100/180MM PAPERLESS GRAPHIC RECORDER: USER GUIDE 4.3.3 CHANNEL/ALARM CONFIGURATION (Cont.) PARAMETERS Figures 4.3.3d, e and f illustrate the following terms for the different alarm types. Threshold For Absolute alarms, this defines the value (in engineering units) at which an alarm is triggered. The alarm also returns to its non-active state at this value (unless a hysteresis value has been set). - Page 96 100/180MM PAPERLESS GRAPHIC RECORDER: USER GUIDE 4.3.3 CHANNEL/ALARM CONFIGURATION (Cont.) Absolute high alarm definitions Absolute low alarm definitions symbol symbol Input signal Threshold Hysteresis Hysteresis Input signal Threshold Hysteresis: no Hysteresis: no Dwell: 0 secs Dwell: 0 secs Hysteresis: no Hysteresis: no Dwell: D secs Dwell: D secs...
-
Page 97: Job Number
100/180MM PAPERLESS GRAPHIC RECORDER: USER GUIDE 4.3.3 CHANNEL/ALARM CONFIGURATION (Cont.) JOB NUMBER Select the required job number. CATEGORY Select the required job to be carried out when the channel is in alarm (e.g. Drive relay) See section 4.7 for a descrip- tion of job categories. -
Page 98: Views Configuration
100/180MM PAPERLESS GRAPHIC RECORDER: USER GUIDE 4.3.4 Views Configuration This part of the recorder's configuration allows groups to be set up (either individually, or globally) to include the vari- ous display modes described in section 3.4, above, and user screens (if fitted). When enabled, a display mode is added to the Group's 'Goto View' menu and to the up/down arrow scroll list. -
Page 99: Display Mode Enabling
100/180MM PAPERLESS GRAPHIC RECORDER: USER GUIDE 4.3.4 VIEWS CONFIGURATION (Cont.) GROUP This field appears only if 'Scope' is set to 'Group', and allows each group to be selected for display configuration. For other items of Group configuration, see Section 4.3.2. DISPLAY ENABLE This field appears only if 'Scope' is set to 'Group', and allows the selected group to be enabled or disabled for display. - Page 100 100/180MM PAPERLESS GRAPHIC RECORDER: USER GUIDE 4.3.4 VIEWS CONFIGURATION (Cont.) USER SCREENS 1 to N This field appears only for recorders with the Screen Builder option (fully described in section 7). Up to 24 user screens can be included in the up/down arrow scroll list and to be active in the Root menu 'Goto View' menu (figure 4.3.4b).
-
Page 101: Archive Configuration
100/180MM PAPERLESS GRAPHIC RECORDER: USER GUIDE 4.3.5 Archive configuration Notes: For the sake of brevity, the phrase 'memory device' is used for whatever mass-storage medium is fitted to the recorder (integral or via a USB port). CSV format files are not as secure as Packed Binary format files. This allows an archive strategy to be set up for saving data to a local memory device or to a remote PC. -
Page 102: Csv Check Boxes, Date/Time Format
100/180MM PAPERLESS GRAPHIC RECORDER: USER GUIDE 4.3.5 ARCHIVE CONFIGURATION (Cont.) COMPRESSION Select Normal or High compression. 'Normal' compresses the data but still provides an exact copy. 'High' compresses more, but channel values are saved only to 1 part in 10 resolution. -
Page 103: Media File Format/Ftp File Format
100/180MM PAPERLESS GRAPHIC RECORDER: USER GUIDE 4.3.5 ARCHIVE CONFIGURATION (Cont.) MEDIA FILE FORMAT/FTP FILE FORMAT Allows 'Binary' (.uhh) files, 'CSV' (.csv) files or 'Binary and CSV' to be chosen for FTP transfer. For further details of CVS archiving, see description at the end of this subsection (4.3.5). ON MEDIA FULL For 'Local' setting only: Overwrite Oldest data is replaced with latest data when storage medium is full. -
Page 104: Primary Remote Host
100/180MM PAPERLESS GRAPHIC RECORDER: USER GUIDE 4.3.5 ARCHIVE CONFIGURATION (Cont.) PRIMARY REMOTE HOST For 'Remote' setting only: If a Domain Name Server (DNS) is specified in the Network key ‘Name’ page (fig 4.5.2), then the Primary Remote Host is the server name. If DNS is not selected, then the Primary Remote Host is the IP address of the remote host, set up in the host’s Control Panel\Network. - Page 105 100/180MM PAPERLESS GRAPHIC RECORDER: USER GUIDE 4.3.5 ARCHIVE CONFIGURATION (Cont.) MEDIA FILE FORMAT (Cont.) If 'CSV' or 'Binary and CSV' is selected, a number of extra check boxes appear. Figure 4.3.5c above, shows a typical menu page. Figure 4.3.5d below, shows the effects of enabling the CSV check boxes, with the exception of 'CSV use Tab delimiter' the use of which is as follows: CSV USE TAB DELIMITER Despite its name, CSV does not always use commas as separators.
-
Page 106: Event Number
100/180MM PAPERLESS GRAPHIC RECORDER: USER GUIDE 4.3.6 Event configuration A number of internal and external (Event input option) triggers are available for use in initiating Events which will then run job lists. Events can have up to two sources each, but can themselves be used as sources allowing a large number of inputs to be used. - Page 107 100/180MM PAPERLESS GRAPHIC RECORDER: USER GUIDE 4.3.6 EVENT CONFIGURATION (Cont.) EVENT SOURCES (Cont.) Unack'd Alarm on Group Triggered if any alarm in the specified group becomes active. The event remains active until the alarm is acknowledged. Instrument alarm This source triggers an event if any of the following becomes active: Any, Input channel failure, Removable media failure, Removable media full, No removable media fitted, FTP primary server failure, FTP secondary server failure, Maths channel failure, Clock failure, Unrecognised PCCard, Recording failure -...
-
Page 108: Operator
100/180MM PAPERLESS GRAPHIC RECORDER: USER GUIDE 4.3.6 EVENT CONFIGURATION (Cont.) OPERATOR This allows a logical combination of input sources to be used to trigger an event. The selections and their definitions are shown in table 4.3.6, below. Operator Event active when: Event not active when: Only S1 Active... -
Page 109: Event Buttons
100/180MM PAPERLESS GRAPHIC RECORDER: USER GUIDE 4.3.7 Event Buttons This configuration item appears only if the Screen Builder Option is fitted (section 7). The Event Button configuration menu allows a number of 'Push-Buttons' to be set up for use as event sources. Buttons can be defined as 'Unlatched' (push = on;... -
Page 110: Message Entry
100/180MM PAPERLESS GRAPHIC RECORDER: USER GUIDE 4.3.8 Messages This feature allows messages to be sent, by job action (section 4.7), to the display, to a specified group or to all groups. Messages can also be included in e-mails (section 4.3.19). The messages are of the form: Date, Time, Message. The message can be just text (up to 80 characters), or it can include up to nine embedded items which are typed into the message as {1} to {9}. -
Page 111: Example
100/180MM PAPERLESS GRAPHIC RECORDER: USER GUIDE 4.3.8 MESSAGES (Cont.) Replace {n} with (Cont.) Specified Descriptor, Specified Value, Specified Alarm data: Produces a further field ‘{n} source’, described below. Batch Status: Causes the status ('Active' or 'Inactive') of the current batch to be embedded. See Section 4.3.10 for details of the Batch option. - Page 112 100/180MM PAPERLESS GRAPHIC RECORDER: USER GUIDE 4.3.8 MESSAGES (Cont.) EXAMPLE To configure Message 2 to read “The value of Chan two = (Value channel 2) & Tot one = (Value totaliser 1)” Before configuring the message: In channel configuration: Set channel 2 descriptor to: Chan two Set Channel 2 alarm job to: Category:...
-
Page 113: User Linearisation Tables
100/180MM PAPERLESS GRAPHIC RECORDER: USER GUIDE 4.3.9 User Linearisation Tables The Channel configuration item 'Lin Type' includes four linearisation tables called, initially, UserLin1 to UserLin4. This User Linearisation part of the instrument configuration allows the user to enter a linearisation look-up table of between two and 66 pairs of points. - Page 114 100/180MM PAPERLESS GRAPHIC RECORDER: USER GUIDE 4.3.9 USER LINEARISATION TABLES (Cont.) CONFIGURATION PARAMETERS (Cont.) Number of points This is used to enter the total number of point pairs in the table. The following XY fields increase in number up to the entered value. (A scroll bar appears if there are more points than can be displayed in the available screen height.) X1 to XN The input values to the table, where N is the 'Number of Points' entered above.
-
Page 115: Batch Recording Option
100/180MM PAPERLESS GRAPHIC RECORDER: USER GUIDE 4.3.10 Batch recording option Batch records form a part of recording history and are included in the normal archiving process to a removable SD or Compact Flash card or to a remote PC (sections 4.1 and 4.3.5). - Page 116 100/180MM PAPERLESS GRAPHIC RECORDER: USER GUIDE 4.3.10 BATCH OPTION (Cont.) CONFIGURATION Select Group Scope Instrument or Group 1) Group 1 Group Show Batch Entry List 00:0A:8D:00:20:A0 MAC Address These fields appear FishesRus Predefined Entry 1 only if 'Show Batch Entry List' is enabled Predefined Entry 12 Enable Select...
- Page 117 100/180MM PAPERLESS GRAPHIC RECORDER: USER GUIDE 4.3.10 BATCH CONFIGURATION (Cont.) BATCH FIELDS Allows the number of messages to be printed at batch start/stop to be selected between one and six. FIELD 1 This field is the first of up to six which can be used as headings for batch information. Headings can be up to 20 char- acters long (including spaces).
- Page 118 100/180MM PAPERLESS GRAPHIC RECORDER: USER GUIDE 4.3.10 BATCH CONFIGURATION (Cont.) NAME FILES BY BATCH As an aid to identification, if ‘Name Files by Batch’ is selected, the Batch Name, as entered by the operator, is inserted into the history file name. For example, if a batch name of 060511.001 is amongst the items archived to disk, then this file will appear in the form: Group Name~060511.001~YYYYMMDD_HHHHHHHHHHHHHHHH, Where YYYYMMDD is the date (e.g.20060511 = 11th May 2006) and HH----HH is a 16 digit hex code* used by the...
- Page 119 100/180MM PAPERLESS GRAPHIC RECORDER: USER GUIDE 4.3.10 BATCH CONFIGURATION (Cont.) OPERATOR INITIATION (Cont.) ‘Values’ can now be entered for these headings by entering strings of up to 60 characters (including spaces). This may be done done by touching the empty field and using the resulting pop-up keyboard to type-in the entry, or by touching the field continuously for two seconds or more and then selecting one of the predefined Batch Entry messages previously entered in the configuration...
- Page 120 100/180MM PAPERLESS GRAPHIC RECORDER: USER GUIDE 4.3.10 BATCH INITIATION (Cont.) Batch - Group 1 Status Batch in progress Batch Number: 050822.001 Customer Name: FishesRus Operator Name: Marvin Supervisor: Fred Stop Close Figure 4.3.10c Status page (Batch running) BATCH MESSAGE DISPLAY The messages are displayed on the Graph Trend display as shown in figure 4.3.10d, below.
-
Page 121: Event Sources
100/180MM PAPERLESS GRAPHIC RECORDER: USER GUIDE 4.3.10 BATCH INITIATION (Cont.) NON OPERATOR INITIATION Batch start/stop can be initiated by job, by counter or via MODBUS/TCP JOB INITIATION As described in section 4.7.9, a job can be set up to initiate a batch whenever the job source becomes active. If 'Scope' is set to 'Group' a specific group can be selected (default = Group 1) and the job will act only on the batch associated with this group. -
Page 122: Maths
100/180MM PAPERLESS GRAPHIC RECORDER: USER GUIDE 4.3.11 Maths CONFIGURATION This feature allows a range of mathematical functions to be performed. Figure 4.3.11a shows a typical configuration page - the selected maths function determines which configuration fields actually appear. Select maths Maths Number channel number 1) Fo 1... -
Page 123: Totalisers
100/180MM PAPERLESS GRAPHIC RECORDER: USER GUIDE 4.3.11 MATHS CONFIGURATION (Cont.) Function This picklist allows the relevant maths function to be selected. In the following description, the word 'channel' is used as an umbrella term for input channels, maths channels, totalisers etc. Allows the function to be disabled. - Page 124 100/180MM PAPERLESS GRAPHIC RECORDER: USER GUIDE 4.3.11 FUNCTION (Cont.) Copy Copies the value of a selected point to the maths channel being configured. Allows extra alarms to be set up for the copied point. Polynomial Provides a polynomial curve fit for the specified point, using up to 8 orders, Fvalue This function calculates ‘equivalent time at sterilizing temperature’...
-
Page 125: Configuration
100/180MM PAPERLESS GRAPHIC RECORDER: USER GUIDE 4.3.11 FUNCTION (Cont.) Log Base 10 Takes log 10 of selected input. (For example: Input = 2 gives maths function value = 0.3010) Log Base e Takes log e of selected input. (For example: Input = 2 gives maths function value = 0.6931) e to the power Takes natural antilog of input. -
Page 126: Configuration
100/180MM PAPERLESS GRAPHIC RECORDER: USER GUIDE 4.3.11 FUNCTION (Cont.) PV FORMAT Numeric Provides a decimal value for the maths channel. Elapsed time Shows the maths channel value in HH:MM:SS (hours minutes, seconds) format. Normally used only for time functions. For other functions, elapsed time counts in milliseconds e.g. a PV of 10000 would be displayed as 00:00:10;... - Page 127 100/180MM PAPERLESS GRAPHIC RECORDER: USER GUIDE 4.3.11 FUNCTION (Cont.) FVALUE To calculate the equivalent time at Sterilizing Temperature (for temperatures below, at and above Sterilizing Tempera- ture) both in dry (F ) and steam (F ) sterilizing environments, using the following equation: −...
-
Page 128: Installation
100/180MM PAPERLESS GRAPHIC RECORDER: USER GUIDE 4.3.11 FUNCTION (Cont.) LINEAR MASS FLOW Note: The overall accuracy of a flow measurement installation depends on a number of factors outside the control of the recorder manufacturer. For this reason, the recorder manufacturer takes no responsibility for the accuracy of the results obtained using the mass flow equations implemented in the maths pack. - Page 129 100/180MM PAPERLESS GRAPHIC RECORDER: USER GUIDE 4.3.11 FUNCTION (Cont.) LINEAR MASS FLOW (Cont.) COMPRESSIBILITY FACTOR (Z-FACTOR) Compressibility factor is a density-related measure of how far a particular gas deviates from a ‘perfect’ gas under any set of temperature and pressure conditions, and is give by the equation: ×...
- Page 130 100/180MM PAPERLESS GRAPHIC RECORDER: USER GUIDE 4.3.11 FUNCTION (Cont.) ROOT MASS FLOW Note: The overall accuracy of a flow measurement installation depends on a number of factors outside the control of the recorder manufacturer. For this reason, the recorder manufacturer takes no responsi- bility for the accuracy of the results obtained using the mass flow equations implemented in the maths pack.
- Page 131 100/180MM PAPERLESS GRAPHIC RECORDER: USER GUIDE 4.3.11 FUNCTION (Cont.) ROOT MASS FLOW (Cont.) CONFIGURABLE PARAMETERS Figure 4.3.11e shows the relevant part of the configuration menu for a maths channel with ‘Root Mass Flow’ function selected. Maths Number 1) Math 1 Value 123.4567 Units...
- Page 132 100/180MM PAPERLESS GRAPHIC RECORDER: USER GUIDE 4.3.11 FUNCTION (Cont.) ROLLING AVERAGE This calculates the average value of the last R samples of a channel, taken at N second intervals, where R and N can be defined by the user. At initiation, up to the time of the first sample reading, the displayed value is the average of the channel sampled every iteration (i.e.
- Page 133 100/180MM PAPERLESS GRAPHIC RECORDER: USER GUIDE 4.3.11 FUNCTION (Cont.) MEAN KINETIC TEMPERATURE (Cont.) CONFIGURABLE ITEMS Figure 4.3.11g shows the configurable items for the MKT function. Maths Number 1) Math 1 Value 0.0000 Units Function Mean Kinetic Temperature of Math 2 Number of samples Sample interval 604800...
- Page 134 100/180MM PAPERLESS GRAPHIC RECORDER: USER GUIDE 4.3.11 FUNCTION (Cont.) SATURATED STEAM MASS FLOW Note: The overall accuracy of a flow measurement installation depends on a number of factors outside the control of the recorder manufacturer. For this reason, the recorder manufacturer takes no responsi- bility for the accuracy of the results obtained using the mass flow equations implemented in the maths pack.
- Page 135 100/180MM PAPERLESS GRAPHIC RECORDER: USER GUIDE 4.3.11 FUNCTION (Cont.) SATURATED STEAM MASS FLOW (Cont.) PRESSURE UNITS CONVERSION There is a wide range of pressure measuring units in use throughout the world. The following table gives a multiplica- tion factor for converting some common units to MPa (MegaPascals), to four significant figures. Further conversion factors can be found at the websites given on the previous page.
- Page 136 100/180MM PAPERLESS GRAPHIC RECORDER: USER GUIDE 4.3.11 FUNCTION (Cont.) SATURATED STEAM HEAT FLOW Note: The overall accuracy of a flow measurement installation depends on a number of factors outside the control of the recorder manufacturer. For this reason, the recorder manufacturer takes no responsi- bility for the accuracy of the results obtained using the mass flow equations implemented in the maths pack.
- Page 137 100/180MM PAPERLESS GRAPHIC RECORDER: USER GUIDE 4.3.11 FUNCTION (Cont.) SATURATED STEAM HEAT CONSUMED Note: The following assumptions are made with regard to this implementation: The condensate return is 100% wet saturated water. No flash steam component is included. The same mass leaves the system as enters it. Note: The overall accuracy of a flow measurement installation depends on a number of factors outside the control of the recorder manufacturer.
- Page 138 100/180MM PAPERLESS GRAPHIC RECORDER: USER GUIDE 4.3.11 FUNCTION (Cont.) SATURATED STEAM HEAT CONSUMED (Cont.) Maths Number 2) Math 2 Value 987.6543 Units Saturated Steam Heat Consumed Function Inlet Flow Channel 1 Pressure Inlet Pressure Channel 2 Inlet Dryness 23.8 Return Temperature Channel 3 Units Units...
- Page 139 100/180MM PAPERLESS GRAPHIC RECORDER: USER GUIDE 4.3.11 FUNCTION (Cont.) RATE-OF-CHANGE The equation solved is: − − × Where: dPV/dt = Rate of change of PV with time = Input value ‘this time’ = Input value ‘last time’ (i.e. ‘this time’ - P) t - P P = Sample period (i.e.
- Page 140 100/180MM PAPERLESS GRAPHIC RECORDER: USER GUIDE 4.3.11 FUNCTION (Cont.) OXYGEN (O2) CORRECTION This function carries out O correction of gas measurements for use in Continuous Emissions Monitoring applications. The equation calculated is: − 20 9 Specified O × Correction Measured Gas −...
- Page 141 100/180MM PAPERLESS GRAPHIC RECORDER: USER GUIDE 4.3.11 FUNCTION (Cont.) RELATIVE HUMIDITY This determines the percentage relative humidity from wet and dry temperature and atmospheric pressure inputs. Standard temperature and pressure at sea level are defined as 1.01325 Bar, and 15˚C. Pressure varies with height as indicated in table 4.3.11c.
- Page 142 100/180MM PAPERLESS GRAPHIC RECORDER: USER GUIDE 4.3.11 FUNCTION (Cont.) ZIRCONIA PROBE A zirconia (oxygen) probe consists of two platinum electrodes bonded to a pellet or cylinder of zirconia. At elevated temperatures, such a probe develops an emf across it which is proportional to probe temperature and to the log of the difference in oxygen partial pressure between its two ends.
- Page 143 100/180MM PAPERLESS GRAPHIC RECORDER: USER GUIDE 4.3.11 FUNCTION (Cont.) ZIRCONIA PROBE (Cont.) 0.01 Probe EMF (mV) Figure 4.3.11s Probe emf versus temperature HA028910 Page 127 Issue 3 Jun 06...
- Page 144 100/180MM PAPERLESS GRAPHIC RECORDER: USER GUIDE 4.3.11 FUNCTION (Cont.) ZIRCONIA PROBE (Cont.) OXYGEN POTENTIAL The oxygen potential of an atmosphere is a measurement of its ability to oxidise or reduce. For any element, a value of oxygen potential (free energy of formation) is known. Above this value, the material will oxidise, below it, no oxidisa- tion will occur.
- Page 145 100/180MM PAPERLESS GRAPHIC RECORDER: USER GUIDE 4.3.11 FUNCTION (Cont.) ZIRCONIA PROBE (Cont.) 6FeO + O 2 → 2Fe 3 O 4 C + O 2 → CO 2 1000 -100 1100 1200 1300 1400 1500 1600 -150 1700 1800 1900 2000 2100 -200...
- Page 146 100/180MM PAPERLESS GRAPHIC RECORDER: USER GUIDE 4.3.11 FUNCTION (Cont.) GROUP MINIMUM The following description assumes a group name of ‘Furnace 1’, which contains four channels with descriptors ‘Temp 1’, ‘Temp 2’, ‘Temp 3’ and ‘Temp 4’ The output of the Group Minimum function is the current lowest value of any of the points in the source group. The required source group is selected by picklist.
- Page 147 100/180MM PAPERLESS GRAPHIC RECORDER: USER GUIDE 4.3.11 FUNCTION (Cont.) GROUP MINIMUM (Cont.) A typical message entry would be: Message: Lowest temperature is {1} at chan {2} Replace {1} with: Specified Value {1} source: Group 1 minimum Replace {2} with: Specified Descriptor {2} source: Group 1 Minimum resulting in a message such as: 22/08/05 14:22:06...
- Page 148 100/180MM PAPERLESS GRAPHIC RECORDER: USER GUIDE 4.3.11 MATHS OPTION (Cont.) MODBUS ADDRESSING For units fitted with the Modbus TCP comms option, the following table gives hex addresses for maths channel 1 Generally: Maths channel N parameter address = maths channel 1 parameter address + 162 (N-1) (decimal). For full details of the Modbus TCP implementation, see section 8.
- Page 149 100/180MM PAPERLESS GRAPHIC RECORDER: USER GUIDE 4.3.11 MATHS OPTION (Cont.) MATHS CHANNEL RUN-TIME DATA This table show addresses for maths channel 1 run-time data. Generally: channel N address = channel 1 address + 3(N-1) (decimal) CHANNEL 1 Parameter Description Type Access Start Addr.
- Page 150 100/180MM PAPERLESS GRAPHIC RECORDER: USER GUIDE 4.3.11 MATHS OPTION (Cont.) IEEE Area Maths Channel run-time data The following table gives addresses for the specified 32-bit floating-point values, for maths channel 1. Generally, Parameter address for channel N = Parameter address for channel 1 + 4(N-1) (decimal). CHANNEL 1 Parameter Description...
- Page 151 100/180MM PAPERLESS GRAPHIC RECORDER: USER GUIDE 4.3.12 Totalisers INTRODUCTION Each totaliser allows the user to maintain a running total of any input channel, or of any maths channel. Using the maths functions, it is possible to totalise combinations of input channels, so the value of two channels added together, or the difference between two channels could be totalised if required.
- Page 152 100/180MM PAPERLESS GRAPHIC RECORDER: USER GUIDE 4.3.12 TOTALISER CONFIGURATION (Cont.) Select totaliser Totaliser Number 1) Totaliser 1 number Enable Value Units (totaliser) 123456 Total of Channel 1 Select channel etc. to be totalised Low cut off ch units Units of channel being totalised High cut off 999999...
- Page 153 100/180MM PAPERLESS GRAPHIC RECORDER: USER GUIDE 4.3.12 (Cont.) TOTALISER MODBUS ADDRESSING For units fitted with the Modbus TCP comms option, the following table gives addresses for totaliser 1 configuration data Generally: Totaliser N parameter address = totaliser 1 parameter address + 162 (N-1) (decimal). For full details of the Modbus TCP implementation, see section 8.
- Page 154 100/180MM PAPERLESS GRAPHIC RECORDER: USER GUIDE 4.3.12 (Cont.) TOTALISER MODBUS ADDRESSING RUN-TIME DATA This table shows addresses for totaliser 1. Generally: totaliser N address = totaliser 1 address + 3(N-1) (decimal) TOTALISER 1 Parameter Description Type Access Start Addr. Register Name Hex (Dec) Length...
- Page 155 100/180MM PAPERLESS GRAPHIC RECORDER: USER GUIDE 4.3.12 (Cont.) TOTALISER MODBUS ADDRESSING IEEE AREA TOTALISER RUN-TIME DATA The following table gives addresses for the specified 32-bit floating-point values, for totaliser 1. Generally, Parameter address for totaliser N = Parameter address for totaliser 1 + 4(N-1) (decimal). TOTALISER 1 Parameter Description...
- Page 156 100/180MM PAPERLESS GRAPHIC RECORDER: USER GUIDE 4.3.13 Counters INTRODUCTION The virtual channels option introduces a user-configurable number of counters, which can be preset, disabled, incremented or decremented by Job action. If access is permitted, the user can preset the counter to a selected value, as and when required, from the configuration page.
- Page 157 100/180MM PAPERLESS GRAPHIC RECORDER: USER GUIDE 4.3.13 COUNTERS (Cont.) COUNTER MODBUS ADDRESSING For units fitted with the Modbus TCP comms option, the table below gives addresses for counter 1 configuration data. Generally: Counter N parameter address = counter 1 parameter address + 162 (N-1) (decimal). For full details of the Modbus implementation, see section 8.
- Page 158 100/180MM PAPERLESS GRAPHIC RECORDER: USER GUIDE 4.3.13 COUNTERS (Cont.) RUN-TIME DATA This table shows addresses for counter 1. Generally: Counter N address = counter 1 address + 3(N-1) (decimal) COUNTER 1 Parameter Description Type Access Start Addr. Register Name Hex (Dec) Length Value Current process value (PV)
- Page 159 100/180MM PAPERLESS GRAPHIC RECORDER: USER GUIDE 4.3.13 COUNTERS (Cont.) IEEE AREA COUNTER RUN-TIME DATA The following table gives addresses for the specified 32-bit floating-point values, for counter 1. Generally, Parameter address for counter N = Parameter address for counter 1 + 4(N-1) (decimal). COUNTER 1 Parameter Description...
- Page 160 100/180MM PAPERLESS GRAPHIC RECORDER: USER GUIDE 4.3.14 Timers INTRODUCTION This feature supplies 12 count-down timers which can be used for general timing purposes. The timers can be either one-shot or repeating, and can be initiated in the following ways: 1. directly by the operator from the configuration page (if access permission is granted), 2.
- Page 161 100/180MM PAPERLESS GRAPHIC RECORDER: USER GUIDE 4.3.14 TIMERS (Cont.) Configurable parameters Timer number Allows a specific timer to be selected for configuration Enable Allows the user to enable/disable the selected timer Remaining This is a dynamic display showing the time remaining in hours:minutes:seconds format. Repeat in For repeat timers, shows the time remaining before the repeat is initiated.
-
Page 162: Configuration
100/180MM PAPERLESS GRAPHIC RECORDER: USER GUIDE 4.3.15 Connections INTRODUCTION ASCII (INPUT) Note: See Section 12 for details of the ASCII Printer Output option. This mode allows the recorder to receive simple ASCII messages from, for example, barcode readers, Programmable Logic Controllers (PLCs), Global Positioning Systems (GPSs) (NMEA-0183 protocol) etc. Messages are sent to as many groups as are set up to receive them, and become a part of these groups’... - Page 163 100/180MM PAPERLESS GRAPHIC RECORDER: USER GUIDE 4.3.15 CONNECTIONS (Cont.) CONFIGURATION The default (ASCII) Serial comms configuration menu is as shown in figure 4.3.15b below. Figures 4.3.15c and 4.3.15d show the alternative menus for Modbus slave and Modbus master selections, respectively. If the ASCII Printer Output option is fitted, a fourth Protocol choice (ASCII Printer) appears - see section 12 for details.
-
Page 164: Configuration Parameters
100/180MM PAPERLESS GRAPHIC RECORDER: USER GUIDE 4.3.15 CONNECTIONS (Cont.) CONFIGURATION PARAMETERS SERIAL PORT Allows the user to select the port to be used for serial communications. LINK ERROR COUNT A Link error count is provided for every slave. The count is incremented every time there is a framing error, a parity error or a Cyclic redundancy check (CRC) error. -
Page 165: Messaging Information
100/180MM PAPERLESS GRAPHIC RECORDER: USER GUIDE 4.3.15 CONFIGURATION PARAMETERS (Cont.) ENABLE ERROR CODE B For Modbus Master only. If enabled, this causes an error code B to be generated in the event of a timeout or a Cyclic Redundancy Check (CRC) error. -
Page 166: Master Comms
100/180MM PAPERLESS GRAPHIC RECORDER: USER GUIDE 4.3.16 Master comms INTRODUCTION This option allows the unit to be used as a Modbus Master unit, as well as a Modbus Slave. The instrument can com- municate using the Ethernet (RJ45) connection, or by means of one of the serial communications ports (if fitted - see section 4.3.15 for details) or both simultaneously. -
Page 167: Master Comms Configuration Menu
100/180MM PAPERLESS GRAPHIC RECORDER: USER GUIDE 4.3.16 MASTER COMMS (Cont.) MASTER COMMS CONFIGURATION MENU A typical master comms configuration page is shown in figure 4.3.16a, below. Note: For the sake of completeness, the figure below shows all possible fields, even though some are actually mutually exclusive (e.g. - Page 168 100/180MM PAPERLESS GRAPHIC RECORDER: USER GUIDE 4.3.16 MASTER COMMS (Cont.) CONFIGURABLE PARAMETERS (Cont.) Enable If this window is not selected, none of the following fields appears, and the Remote Device cannot be accessed. Online If enabled, normal communications with the slave are carried out. When disabled, the connec- tion with the slave is terminated.
-
Page 169: Detect All Slaves
100/180MM PAPERLESS GRAPHIC RECORDER: USER GUIDE 4.3.16 MASTER COMMS (Cont.) DETECT ALL SLAVES Network Ethernet Overwrite existing slaves Timeout From Node 149.121.130.200 Node(s) Modbus Address Abort Start Discard Apply Re-Scan Figure 4.3.16b Detect all slaves set-up menu The ‘Detect All Slaves’ key is used to detect any slaves connected to the system, within certain search parameters. Operation of the button calls a display page (figure 4.3.16b) which allows the entry of a start IP address, a range of IP addresses, and a range of Modbus addresses. - Page 170 100/180MM PAPERLESS GRAPHIC RECORDER: USER GUIDE 4.3.16 MASTER COMMS (Cont.) AUTO DETECT PAGE The ‘Autodetect’ page displays the progress of the search. Once the search is complete, the results are displayed as shown in figure 4.3.16c, below. For example, the top two lines show that devices with Modbus addresses 1 and 2 were detected at IP address 149.121.130.211.
-
Page 171: Share Socket
100/180MM PAPERLESS GRAPHIC RECORDER: USER GUIDE 4.3.16 MASTER COMMS (Cont.) SHARE SOCKET This advanced configuration feature is used to improve communications performance, to take advantage of the higher speed of Ethernet links compared with ‘Serial’ links. It is recommended that the default value (enabled or disabled according to type) be left as despatched from the factory, unless there is good reason to change it. -
Page 172: Master Comms Channel Configuration
100/180MM PAPERLESS GRAPHIC RECORDER: USER GUIDE 4.3.16 MASTER COMMS (Cont.) MASTER COMMS CHANNEL CONFIGURATION This display page, shown below, is called from the Operator/Config/Channels as described in section 4.3.3. A similar page appears in the Operator/Config/Maths configuration described in section 4.3.11. - Page 173 100/180MM PAPERLESS GRAPHIC RECORDER: USER GUIDE 4.3.16 MASTER COMMS (Cont.) RECORDER/DAQ CONFIGURABLE PARAMETERS (Cont.) TYPICAL RECORDER PARAMETERS The following parameters may be accessible from a recorder or data acquisition unit, depending on model number. Figure 4.3.16e, above, refers Notes: Items such as Scale, Zone and descriptor may be editable (white background) or not (grey background), depending on model.
- Page 174 100/180MM PAPERLESS GRAPHIC RECORDER: USER GUIDE 4.3.16 MASTER COMMS (Cont.) CONTROLLER PARAMETERS The following parameters may be accessible from a controller, depending on type. Note: Figure 4.3.16f is a typical page and may show more or fewer items than appear on the actual screen for a particular controller Reflects descriptor entry Channel Number...
- Page 175 100/180MM PAPERLESS GRAPHIC RECORDER: USER GUIDE 4.3.16 MASTER COMMS (Cont.) TYPICAL CONTROLLER PARAMETERS Channel Number Allows the user to select the number of the channel to be configured. As soon as Modbus Master is selected as input type, this changes from ‘Channel 1’ (for example) to ‘Read 1’. Once communication with the slave is established, this will change to the descriptor of the remote channel (unless the controller type does not support this item, in which case a suitable descriptor can be entered later in the configuration).
- Page 176 100/180MM PAPERLESS GRAPHIC RECORDER: USER GUIDE 4.3.16 MASTER COMMS (Cont.) USER DEFINED REGISTERS As previously mentioned, ‘User Defined’ can be selected for all slaves and for some slave types it is the only way of accessing some or all parameters. The number of the register holding the required parameter is to be found in the user documentation supplied with the slave.
- Page 177 100/180MM PAPERLESS GRAPHIC RECORDER: USER GUIDE 4.3.16 MASTER COMMS (Cont.) CONFIGURABLE PARAMETERS This section defines those parameters which are unique to user defined registers. Value Shows the value returned from the selected register, as modified by the scaling factor (if any). Function Code Allows Modbus function code 03 or 04 to be selected.
- Page 178 100/180MM PAPERLESS GRAPHIC RECORDER: USER GUIDE 4.3.16 MASTER COMMS (Cont.) READING DIGITAL VALUES Digital values can either be the open/closed status of a discrete input, or it can be a status string showing, for example Instrument Status, if ‘User Defined’ is selected as Parameter Type, OPEN/CLOSED STRINGS The text strings for the open and closed statuses of a digital input channel can be read by ‘Enabling’...
- Page 179 100/180MM PAPERLESS GRAPHIC RECORDER: USER GUIDE 4.3.16 MASTER COMMS (Cont.) READING DIGITAL VALUES EXAMPLE (Cont.) Channel Number 1) Card in? Value Card in Input Type Master Comms Slave 1) Recorder Digital Parameter User Defined Function Code Read input reg (4) Register Data Type Bit (from register)
- Page 180 100/180MM PAPERLESS GRAPHIC RECORDER: USER GUIDE 4.3.16 MASTER COMMS (Cont.) MASTER COMMS CHANNEL CONFIGURATION EXAMPLE This example describes a recorder (Furn1 Master) acting as a master to two other recorders (Furn1 Record and Furn2 Record) and a controller (Furn1 Control). This example shows only the configuration pages necessary to set up the master input/output channels and the slave Comms channel.
- Page 181 100/180MM PAPERLESS GRAPHIC RECORDER: USER GUIDE 4.3.16 MASTER COMMS (Cont.) MASTER CHANNEL 1 SETUP Master channel 1 setup, to read the Loop1 PV from ‘Furn1 Control’ into channel 1, is shown in figure 4.3.16k, below. Note that, for this example that a Span High of 100 and Descriptor ‘Furn1 PV1’ have been entered. The span zero and span high values should match those of the PV being read.
-
Page 182: Master Channel 2 Setup
100/180MM PAPERLESS GRAPHIC RECORDER: USER GUIDE 4.3.16 MASTER COMMS (Cont.) MASTER CHANNEL 2 SETUP Master channel 2 setup, to read the Channel 1 PV from ‘Furn1 record into channel 2’, is shown in figure 4.3.16l, below. Channel Number 2) Furn1 Temp1 Value 658.3654 Unadjusted... -
Page 183: Master Output 1 Setup
100/180MM PAPERLESS GRAPHIC RECORDER: USER GUIDE 4.3.16 MASTER COMMS (Cont.) MASTER OUTPUT 1 SETUP This shows the setup required in order to output the master’s channel 2 (Furn1 Temp1) to Furn2 Record channel 1. The Descriptor Furn1 Temp1 has been entered as the Output Name. This happens to be the same as the channel descriptor, but could be any required text string. -
Page 184: Master Comms Diagnostics
100/180MM PAPERLESS GRAPHIC RECORDER: USER GUIDE 4.3.16 MASTER COMMS (Cont.) MASTER COMMS DIAGNOSTICS Master Comms Diagnostics appears as an additional item on the System Menu. For details of the other items see sec- tion 4.6. Most items are self-evident. The Total requests and Bad requests totals both exclude retries. The numbers in parentheses are exception code num- bers as described in table 8.2.1b. -
Page 185: Output Channels
100/180MM PAPERLESS GRAPHIC RECORDER: USER GUIDE 4.3.17 Output channels 'Output Channels' appears as a configuration item only if either or both of the Master Comms or Analogue outputs op- tions is fitted. MASTER COMMS For Master Comms, this feature allows a Master Unit to write one (or more) of its points to one (or more) slaves’ chan- nels. -
Page 186: Analogue Outputs (Retransmission)
100/180MM PAPERLESS GRAPHIC RECORDER: USER GUIDE 4.3.17 OUTPUT CHANNELS (Cont.) ANALOGUE OUTPUTS (RETRANSMISSION) For Analogue outputs, this feature allows the user to direct any recorder point to a pair of rear panel terminals (figure 2.2.1d), either as a voltage signal or as a current signal, as required. Figure 4.3.17 shows a typical configuration page. See section 9 for Output Adjust details. -
Page 187: Demand Writes
100/180MM PAPERLESS GRAPHIC RECORDER: USER GUIDE 4.3.18 Demand Writes DEMAND WRITE CONFIGURATION Demand writes allow slave values to be written from the master by operator action (from the configuration page), by job action, or (if the Screen Builder option is fitted - section 7) by operation of a suitably configured Operator key. Figure 4.3.18a shows a typical configuration page. - Page 188 100/180MM PAPERLESS GRAPHIC RECORDER: USER GUIDE 4.3.18 DEMAND WRITES (Cont.) CONFIGURABLE ITEMS Write number Allows the user to select the Demand Write number to be configured Enable Allows the user to enable/disable the write. Demand Type Select ‘Master Comms’ or ‘Off’ Status Shows the status of the transaction.
-
Page 189: Writing To A Specific Register
100/180MM PAPERLESS GRAPHIC RECORDER: USER GUIDE 4.3.18 DEMAND WRITES (Cont.) WRITING TO A SPECIFIC REGISTER When ‘User Defined’ is selected , or if the slave device is ‘Unknown’, then a register can be defined which can be writ- ten-to directly. The register addresses must be found from the documentation supplied with the slave device. Select the Write to 1) Write 1 Write number... - Page 190 100/180MM PAPERLESS GRAPHIC RECORDER: USER GUIDE 4.3.18 DEMAND WRITES (Cont.) WRITING TO A SPECIFIC REGISTER (Cont.) CONFIGURABLE PARAMETERS (Cont.) Scaling Whether Scaling appears or not is Model and Parameter dependent. If scaling is required, the choice may be ‘Decimal Places, or High/Low, again according to Model. ‘Decimal Places’...
-
Page 191: E-Mails
100/180MM PAPERLESS GRAPHIC RECORDER: USER GUIDE 4.3.19 E-mails E-mails can be sent by the instrument to one or more recipients. The user can enter 10 recipient e-mail addresses in each of five mailing lists, giving a maximum of 50 addresses, 10 of which can be sent to at any one time. A Recipient can appear in as many lists as required. -
Page 192: Configurable Parameters
100/180MM PAPERLESS GRAPHIC RECORDER: USER GUIDE 4.3.19 EMAILS (Cont.) CONFIGURABLE PARAMETERS This subsection contains details of the parameters that appear in the E-mail configuration page (figure 4.3.19a above). Figure 4.3.19b (below) may also be referred-to for further explanation. Mail Server Enter the name (note 1) of the mail server or IP address here. -
Page 193: E-Mail Details
100/180MM PAPERLESS GRAPHIC RECORDER: USER GUIDE 4.3.19 EMAILS (Cont.) E-MAIL DETAILS Figure 4.3.19b depicts an e-mail using fictitious entries. Instrument's Local Host address (or IP address, if fixed) First valid recipient address Header Further valid recipients 'Subject' entry 'Text' entry (body text) Body Message... -
Page 194: Operation
100/180MM PAPERLESS GRAPHIC RECORDER: USER GUIDE 4.3.19 EMAILS (Cont.) THE BODY AREA This contains the body text, along with any appended messages. In the example above the message has the embedded values of Instrument name, Instrument number, channel 1 alarm 1 status, as implied by the body text. OPERATION 1. -
Page 195: Reports Configuration
100/180MM PAPERLESS GRAPHIC RECORDER: USER GUIDE 4.3.20 Reports configuration This allows the user to configure up to 10 ‘reports’ for output to the chart or for printing by an ASCII printer (option) as a result of job action. Figure 4.3.20a shows a typical configuration page, accessed from the CONFIG button ‘Reports’ item. - Page 196 100/180MM PAPERLESS GRAPHIC RECORDER: USER GUIDE 4.3.20 REPORTS CONFIGURATION (Cont.) Note: The Style, Point and Line feed settings described below apply only to printed outputs and have no effect when presented on the 'chart' or in the message log. STYLE See figure 4.3.20b for examples of ‘Normal’, ‘Bold’, ‘Emphasised’...
-
Page 197: Options
100/180MM PAPERLESS GRAPHIC RECORDER: USER GUIDE 4.3.21 Options Trial Mode Disabled Trial Time Remaining 30 day(s) Fitted channels Virtual channels Maths Totalisers Counters Groups Batch Enabled Security Manager Disabled Auditor 21CFR11 Screen Builder Full Bridge Level Full Master Comms Devices Simulation Enabled (currently 1) -
Page 198: Simulation Option
100/180MM PAPERLESS GRAPHIC RECORDER: USER GUIDE 4.3.21 OPTIONS (Cont.) TRIAL MODE Enabling 'Trial Mode' allows the user to enable, temporarily, the various software options that are available. Once the user has made the required choices, the 'Set Trial Options' key at the bottom of the screen, must be operated, followed by an 'Autoconfigure' procedure. -
Page 199: Security
100/180MM PAPERLESS GRAPHIC RECORDER: USER GUIDE 4.4 SECURITY Touching this key allows the operator to select 'Login' (described in section 3.3.1), 'Management', 'Access' or 'Add/ Remove User' for configuration. Selecting 'Access' displays the current user level. Touching this area allows the user to select 'Logged out', 'Operator', 'Engineer' or any of the added users. -
Page 200: Setting Permissions
100/180MM PAPERLESS GRAPHIC RECORDER: USER GUIDE 4.4.1 Access levels There are essentially three levels of security associated with the recorder viz: Engineer, Operator and Logged out. (The fourth level - Service - is available only to service engineers). When logged-in at engineer level, the user can set ac- cess permissions for other levels, and can enter or edit passwords for Operator and Engineer levels. - Page 201 100/180MM PAPERLESS GRAPHIC RECORDER: USER GUIDE 4.4.1 ACCESS LEVELS (Cont.) ACCESS WHEN: Allows an access level or an individual user name to be selected from a pick list. NEW PASSWORD/RETYPE PASSWORD For all levels except Logged Out, these fields allow a new password to be entered for the selected access level or User. The password must also be entered in the 'Re-type Password' field.
-
Page 202: Acknowledge Alarms
100/180MM PAPERLESS GRAPHIC RECORDER: USER GUIDE 4.4.1 ACCESS LEVELS (Cont.) ACKNOWLEDGE ALARMS Allows each user with this permssion enabled to acknowledge alarms (section 3.1.4) EDIT MATHS CONSTANT For recorders fitted with the Maths option only. If one or more maths channels are configured with function 'Constant', then with this permission set, the user may edit the constant value(s). -
Page 203: Can Sign
100/180MM PAPERLESS GRAPHIC RECORDER: USER GUIDE 4.4.1 ACCESS LEVELS (Cont.) CAN SIGN This appears only if the Auditor 21CFR11 option is fitted. If the field is enabled it allows the user to change the con- figuration of the recorder (according to the other permissions set for the login), providing the security management system 'Require Authorization' is not enabled. -
Page 204: Force Change Of Password
100/180MM PAPERLESS GRAPHIC RECORDER: USER GUIDE 4.4.1 ACCESS LEVELS (Cont.) FORCE CHANGE OF PASSWORD When this checkbox is enabled for a user, it means that that user will have to change password at his/her next login. At next log in, a pop-up dialogue box requests that a new password be entered. If a new password is not entered, login is denied. -
Page 205: Management (Option)
100/180MM PAPERLESS GRAPHIC RECORDER: USER GUIDE 4.4.2 Management (option) This menu selection appears only if the Audit Trail option, 21CFR11 option and/or Security Management option is fitted. Which configuration fields appear depends on the option(s) fitted. Figure 4.4.2a, below, shows the configuration menus for the various combinations. -
Page 206: Configurable Parameters
100/180MM PAPERLESS GRAPHIC RECORDER: USER GUIDE 4.4.2 MANAGEMENT (Cont.) CONFIGURABLE PARAMETERS Notes: Unless otherwise indicated, the following parameters appear only if the Auditor 21CFR11 option is fitted. If Centralised Security is enabled, none of the other parameters in this menu can be edited at the recorder. Changes can be made only using Security Management software. - Page 207 100/180MM PAPERLESS GRAPHIC RECORDER: USER GUIDE 4.4.2 MANAGEMENT (Cont.) CONFIGURABLE PARAMETERS (Cont.) Require Authorization This field appears only if 'Require Signing' is enabled. If Require Authorization is enabled, then changes to the recorder operation, configuration (or any other item included in the history file) can be made only by those users whose 'Can Authorize' permission is enabled in the 'Access' menu described in section 4.4.1 above.
-
Page 208: Add User
100/180MM PAPERLESS GRAPHIC RECORDER: USER GUIDE 4.4.2 MANAGEMENT (Cont.) CONFIGURABLE PARAMETERS (Cont.) Notes: The Configuration Revision (and for changes in the Security menus - the Security Revision) are incremented every time the recorder configuration (security configuration) is changed. The current values can be viewed in the System/About menu (section 4.6.11). - Page 209 100/180MM PAPERLESS GRAPHIC RECORDER: USER GUIDE 4.4.2 MANAGEMENT (Cont.) CONFIGURABLE PARAMETERS (Cont.) Login by User List This checkbox appears if either of the Auditor options and/or the Security management option is fitted. When enabled, the normal login window appears, with a pull down list of users. Once a user has been selected the correct password for that user must be entered in order to log in.
-
Page 210: New Full User Name
100/180MM PAPERLESS GRAPHIC RECORDER: USER GUIDE 4.4.3 Add user Figure 4.4.3 shows that the selecting of 'Add User' from the SECURITY picklist allows new user IDs to be entered, together with passwords, and a chosen set of access permissions, which can subsequently be edited under Security/ Access. -
Page 211: Network Key
100/180MM PAPERLESS GRAPHIC RECORDER: USER GUIDE 4.5 NETWORK KEY Note: This manual does not describe network setup in detail, as each network is different. In most cases, the help of the network administrator or supervisor will be required, for example, in the allocation of valid ad- dresses and passwords. - Page 212 100/180MM PAPERLESS GRAPHIC RECORDER: USER GUIDE 4.5.1 NETWORK ADDRESS (Cont.) SUBNET MASK This field is editable only if ‘Specify an IP address’ is selected in the ‘IP address lookup’ picklist above. The subnet mask is the network address plus the bits in the host address reserved for sub-network identification. By convention, all the network address bits are set to 1.
-
Page 213: Name
100/180MM PAPERLESS GRAPHIC RECORDER: USER GUIDE 4.5.2 Name Figure 4.5.2 shows the ‘Name’ fields Archive Save/Restore Config Security Network System Andy136-4 Local Host Address Domain FishesRus.co.uk Name Domain Name Service Primary DNS Server 149.121.164.11 Secondary DNS Server 149.121.165.14 Apply Discard Figure 4.5.2 network name fields LOCAL HOST English language name for the recorder. -
Page 216: Locale
100/180MM PAPERLESS GRAPHIC RECORDER: USER GUIDE 4.6 SYSTEM (Cont.) Touching the System key calls the pick list: Clock, Locale, Upgrade, Input adjust, Master Comms Diagnostics (if op- tion fitted), Ethernet diagnostics, Copy, Job search, About. Figures 4.6a 4.6b above, give an overview of the System Menus. 4.6.1 Clock Selecting 'clock' causes the recorder's date and time to be displayed. - Page 217 100/180MM PAPERLESS GRAPHIC RECORDER: USER GUIDE 4.6.3 Upgrade This allows 1. New options to be enabled (by the entering of a 'Key Code') and/or 2. The recorder operating software to be upgraded by reading a file from Compact Flash, SD card or other local or remote source.
-
Page 218: Input Adjust
100/180MM PAPERLESS GRAPHIC RECORDER: USER GUIDE 4.6.4 Input adjust Notes Input adjust cannot be applied to input channels with input type of 'Digital', 'Test' or 'comms'. Input adjustments can be carried out only by users with 'Adjust I/O' permission (see section 4.4.1). -
Page 219: Adjust Procedure
100/180MM PAPERLESS GRAPHIC RECORDER: USER GUIDE 4.6.4 INPUT ADJUST (Cont.) ADJUST PROCEDURE Operation of the Adjust Channels key calls the low-end adjust page, as shown in figure 4.6.4b. Archive Save/Restore Config Security Network System Specify the sensor low point and connect the c o r r e s p o n d i n g i n p u t . -
Page 220: Output Adjust
100/180MM PAPERLESS GRAPHIC RECORDER: USER GUIDE 4.6.5 Output Adjust Applies only to units with Analogue output option boards fitted. See section 9 for details. 4.6.6 Master Comms Diagnostics This menu item is concerned only with Master comms diagnostics, and is fully described in Section 4.3.16. 4.6.7 Ethernet Diagnostics This screen (figure 4.6.7) allows the user to test the status of the connection with a host computer, and if Modbus comms is enabled, the connections with local and remote Modbus slaves. -
Page 221: Copy
100/180MM PAPERLESS GRAPHIC RECORDER: USER GUIDE 4.6.8 Copy This facility allows the user to copy a point or group configuration from one point, group etc. to one or more others. The user may choose whether or not to include alarm and (if applicable) job data when copying point configurations. Descriptors and colour selections are not copied. -
Page 222: Copy Rules
100/180MM PAPERLESS GRAPHIC RECORDER: USER GUIDE 4.6.8 COPY (Cont.) Once the copy is complete, the user should enter the configuration area of the items that have been copied, and edit/ apply the changes etc. COPY RULES 1. The first channel on any input card may not be a digital input type. 2. -
Page 223: Job Search
100/180MM PAPERLESS GRAPHIC RECORDER: USER GUIDE 4.6.9 Job search With multiple job sources, it can sometimes be difficult to discover what the trigger for a particular job is, particularly if the recorder has been configured by more than one operator. The 'Job Search' facility allows the user to define a job type, and the recorder then produces a list of relevant triggers. -
Page 224: Customise
100/180MM PAPERLESS GRAPHIC RECORDER: USER GUIDE 4.6.10 Customise ‘Customise’ allows: 1. the background and foreground colours for various screen items to be selected 2. the size of the text font to be varied. Figure 4.6.10a shows the display page with the settings used for most of the screen drawings in this manual. Desktop Data Entry Background Selection... - Page 225 100/180MM PAPERLESS GRAPHIC RECORDER: USER GUIDE 4.6.10 CUSTOMISE (Cont.) FONT SIZE EXAMPLES The following figures give examples, drawn to the same scale, for all of the different font sizes available, except 'Auto' which picks a font size considered appropriate for the size of screen. Very small Archive Save/Restore Config Security Network System...
-
Page 226: About
Selecting 'About' from the System key menu gives details of the version numbers of different aspects of the recorder, and details of the amount of memory fitted. Figure 4.6.11 shows a typical 'About' display page. 6100A Instrument Variant: Config Revision:... - Page 227 100/180MM PAPERLESS GRAPHIC RECORDER: USER GUIDE 4.6.11 ABOUT (Cont.) SECURITY REVISION Whenever a change is made to an item within the Security menus, the Security revision is incremented. Security Revi- sion is printed on the 'chart' at power up, and if either of the Auditor options or if the Batch option is fitted, Security Revision is included in the messages associated with these options.
-
Page 228: Jobs
100/180MM PAPERLESS GRAPHIC RECORDER: USER GUIDE 4.7 JOBS A number of sources (e.g. channel, event, totaliser) can be set up to trigger one or more jobs. The following description includes all possible job categories, but which jobs are available on any particular recorder depends on the options fit- ted to that recorder. -
Page 229: Message Category
100/180MM PAPERLESS GRAPHIC RECORDER: USER GUIDE 4.7.4 Message category One or more messages (section 4.3.8) can be directed to the display, to 'All groups' or to a 'Specified Group'. The mes- sages must be contiguous - e.g. messages 2, 3 and 4 may be sent, but messages 1, 3 and 4 cannot be sent, without mes- sage 2 as well. -
Page 230: Clock Category
100/180MM PAPERLESS GRAPHIC RECORDER: USER GUIDE 4.7.6 Clock category This job causes the System Clock to be Preset to the value entered in Instrument Configuration (Preset Hour, Preset Minute) (Section 4.3.1). This job can be used to synchronise a number of recorders as follows: a. -
Page 231: Timer Category
100/180MM PAPERLESS GRAPHIC RECORDER: USER GUIDE 4.7.8 Timer category The following jobs are available: 1. Reset timer - sets the timer to zero 2. Start timer - causes the timer to start. 3. Disable timer - stops the timer. Job Number Category Timer Select 'Reset', 'Start' or 'Disable'... -
Page 232: Recording Category
100/180MM PAPERLESS GRAPHIC RECORDER: USER GUIDE 4.7.10 Recording category The following ‘Recording jobs’ are available: Enable This enables recording to the group's history file, ‘while active’, ‘while inactive’ or ‘while unac- knowledged’. This allows, for example, recording to be enabled (job 2) only whilst a Trend Freeze job (job 1) is inactive (i.e recording is disabled for the duration of a Trend Freeze job). -
Page 233: Trend Category
100/180MM PAPERLESS GRAPHIC RECORDER: USER GUIDE 4.7.11 Trend category Trend jobs allow the following actions to occur: Span B Switches the point being configured to span B and zone B, for as long as the job is active. Span B Group Switches all the points in the selected group to their individual spans and zones B, for as long as the job is active. -
Page 234: Output Category
100/180MM PAPERLESS GRAPHIC RECORDER: USER GUIDE 4.7.12 Output category Applies only to recorders with Modbus master option fitted. As described in section 4.3.16, when Modbus Master is enabled, a number of 'Output channels' become available for configuration. This feature allows any specified recorder point to be copied to a destination instrument's input channel, if this is set to Input Type = Slave comms. -
Page 235: Alarm Category
100/180MM PAPERLESS GRAPHIC RECORDER: USER GUIDE 4.7.14 Alarm category This allows the user to set up a job to acknowledge or disable point alarms as follows: Acknowledge All Alarms Acknowledges all alarms Acknowledge Alarms on Group Acknowledges all alarms in the specified group Acknowledge Alarms on Point Acknowledges all alarms associated with the specified point Acknowledge Alarm... -
Page 236: Email Category
100/180MM PAPERLESS GRAPHIC RECORDER: USER GUIDE 4.7.16 Email category Allows the user to send a specified e-mail to the recipients set up in e-mail configuration (see section 4.3.19). A system message is generated, and displayed in all recording groups whenever an e-mail is sent. 4.7.17 Report category Category Report... -
Page 237: File
100/180MM PAPERLESS GRAPHIC RECORDER: USER GUIDE 5 FILE Figure 5, below, gives an overview of the File Menus. The area is entered by touching the 'File' key of the root menu, and can be used to display the contents of directories stored both in the user area of flash memory and on any bulk stor- age device inserted or connected. - Page 238 100/180MM PAPERLESS GRAPHIC RECORDER: USER GUIDE Root 5 FILE (Cont.) Open K e y Folder 13:35:29 Engineer Root Menu 06/10/05 No batch In Progress Home Operator Hide Name Type Size (Bytes) Free (Bytes) File Remove Media \mediacard\ Remov.. 125894656 124715008 Goto View Goto Group \user\...
-
Page 239: File Structure
100/180MM PAPERLESS GRAPHIC RECORDER: USER GUIDE 5.3 FILE STRUCTURE The file structure on the archive medium, is as depicted below in figure 5.3 for a six-group instrument. Each subdirectory contains a maximum of 32 files, there being sufficient subdirectories created, to contain all the group's history files. -
Page 240: Bridge
100/180MM PAPERLESS GRAPHIC RECORDER: USER GUIDE 6 BRIDGE (REMOTE VIEWER) INTRODUCTION This feature comes in two levels, called 'Full' (option) and 'Lite' (supplied as standard). The 'Full' option allows full operation and configuration of the recorder, simultaneously, from up to ten PCs which meet or exceed the minimum requirements listed below. -
Page 241: Minimum Pc Requirements
100/180MM PAPERLESS GRAPHIC RECORDER: USER GUIDE 6.1.1 Minimum PC requirements 1. P90 running Windows NT/2000/XP Home/XP Pro/Server 2003. 2. 32MB RAM 3. 50MB free hard disk space 4. Graphics drive capable of displaying > 256 colours (recommended) 5. Sound card required for audible alarms feature (section 6.5) SUPPORTED PDA CONFIGURATION... -
Page 242: Connection Details
100/180MM PAPERLESS GRAPHIC RECORDER: USER GUIDE 6.2 CONNECTION DETAILS The connection to the recorder is terminated at the RJ45 connector located as shown in figures 2.2.1a, 2.2.1b). The other end of the cable may be terminated, for example, at a hub, a dial-up router or a PC, and it is up to the user to ob- tain a suitable cable (normally available from a computer supplier or electronic component distributor.) Note: For direct connection between a PC and the recorder, a crossover cable is required. -
Page 243: Software Installation
100/180MM PAPERLESS GRAPHIC RECORDER: USER GUIDE 6.3 SOFTWARE INSTALLATION Please refer to the CD box insert for details of software installation. RECORDER CONFIGURATION The recorder configuration is in three areas: Network, Options and Access, 6.4.1 Network The Network key fields are fully described in Section 4.5. 6.4.2 Options In order to make the ‘Full’... -
Page 244: Access
100/180MM PAPERLESS GRAPHIC RECORDER: USER GUIDE 6.4.3 Access Each of the access levels and user IDs can have ‘Connect from Remote’ access enabled. When this box is checked, password entry fields appear as shown in figure 6.4.3. Initially, the Remote User Name is the same as the login name or access level. -
Page 245: Running The Program
100/180MM PAPERLESS GRAPHIC RECORDER: USER GUIDE 6.5 RUNNING THE PROGRAM Initiate the program using the START button in the normal way. Once the program starts, a Host name and User name will be requested as depicted in figure 6.5a. Enter the Local host name (e.g. Andy136-4) found in the recorder Network/Name area, followed by a dot (full stop, period) followed by the domain name (e.g. -
Page 246: Channel Alarm Sound
100/180MM PAPERLESS GRAPHIC RECORDER: USER GUIDE 6.5 RUNNING THE PROGRAM (Cont.) CHANNEL ALARM SOUND If the host PC is fitted with a sound card (enabled), bridge can cause sounds to be played on point alarm (not system alarms). The sound is selected on a connection-by-connection basis via the profile (uhv) file (see figure6.5a). This allows each user to choose a sound (including none) suited to the local environment. -
Page 247: Operation
100/180MM PAPERLESS GRAPHIC RECORDER: USER GUIDE 6.6 OPERATION 6.6.1 Display Modes When the program starts, the Home page, as set up in Configuration\Views (section 4.3.4) is displayed on the computer screen. By click-dragging on the bottom right hand corner of the display, the page size can be edited as required. It is thus possible for the computer to log on to, say four, different recorders and to display their values simultaneously in different parts of the screen. -
Page 248: Error Messages
100/180MM PAPERLESS GRAPHIC RECORDER: USER GUIDE 6.6.4 Error messages A number of error conditions may occur to prevent Bridge from ‘viewing’ the recorder. Such conditions result in the appearance of one of the pop-up messages listed below: NETWORK CONNECTION HAS TIMED OUT This message appears when no connection can be established between the host pc and the instrument. -
Page 249: Screen Builder
100/180MM PAPERLESS GRAPHIC RECORDER: USER GUIDE 7 SCREEN BUILDER INTRODUCTION This option allows the user to create screen layouts using recorder data, simple drawing tools, text and/or imported image files. 24 user screens are editable directly from the operator interface. A further 100 extra screens (25 to 124) which can be created/edited etc. -
Page 250: Display Access
100/180MM PAPERLESS GRAPHIC RECORDER: USER GUIDE 7.1.1 Display Access As shown in figure 7.1.1, the user screens can be included in the display modes, described in section 3.4, and a User screen can be selected as the 'Home page'. Note: Circular Trend option displays are not supported in User screens with this release of software. Home Time-out Minutes Home Group... -
Page 251: Importing Screens
100/180MM PAPERLESS GRAPHIC RECORDER: USER GUIDE 7.1.2 IMPORTING/EXPORTING SCREENS (Cont.) IMPORTING SCREENS Touching the filename area, allows a previously created user screen to be selected either from the Flash memory or from disk to be imported. The User Screen picklist allows the user to define which User screen is to be 'replaced' by the imported file. -
Page 252: Screen Components
100/180MM PAPERLESS GRAPHIC RECORDER: USER GUIDE 7.2.2 Screen components Table 7.2.2 shows the selectable screen components, their default top-left corner positions, widths/heights and draw order. All these components are described in section 7.4 below. Draw Component Width Height Order Channel data Channel horizontal bargraph Channel numeric Channel vertical bargraph... -
Page 253: The Properties
100/180MM PAPERLESS GRAPHIC RECORDER: USER GUIDE 7.2.3 The properties page 1. Ensure that one or more user screens is enabled in views Configuration (section 7.1.2). If necessary, call the required User screen to the display using the Root menu 'Goto View' menu. 2. -
Page 254: Key Descriptions (Lower Keys)
100/180MM PAPERLESS GRAPHIC RECORDER: USER GUIDE 7.2.3 THE PROPERTIES PAGE (Cont.) KEY DESCRIPTIONS (LOWER KEYS) Which keys appear at the bottom of the properties page depends on whether the user screen is being viewed at the re- corder’s user interface, or via Bridge software. Figure 7.2.3b show the recorder key arrangement; figure 7.2.3c the Bridge keys. -
Page 255: Options Page Items
100/180MM PAPERLESS GRAPHIC RECORDER: USER GUIDE 7.2.3 THE PROPERTIES PAGE (Cont.) OPTIONS PAGE ITEMS Edit level Allows Basic or Advanced edit level to be selected for further use. Component info on screen Enabling this box causes a component description to appear at the top left corner of each component. This descrip- tion is in the form: Identifier(X,Y)+[∂X,∂Y], where X and Y defines the top left corner position in pixels, and ∂X and ∂Y are the width and height of the component in pixels. -
Page 256: Screen Creation Example
100/180MM PAPERLESS GRAPHIC RECORDER: USER GUIDE 7.2.4 Screen creation example To produce a new display screen with channels one to four inclusive each displayed as an independent bar graph across the width of the screen, with Group 1 vertical trend display below. To achieve the above, the following items will be required: 1. - Page 257 100/180MM PAPERLESS GRAPHIC RECORDER: USER GUIDE 7.2.4 SCREEN CREATION EXAMPLE (Cont.) 12 Touch the component picklist field, and highlight Component Property Editor - Screen 1 the topmost ch_hor_bar... field. ch_hor_bar_2.2 Copy Paste Identifier Bar 1 13. In the Identifier field, enter the name ‘Bar 1’ using Last Error the pop-up keyboard.
- Page 258 100/180MM PAPERLESS GRAPHIC RECORDER: USER GUIDE 7.2.4 SCREEN CREATION PROCEDURE (Cont.) In order to provide a degree of contrast, the background colour of the ‘Main’ page can be changed to a darker colour as shown for colour 22 in figure 7.2.3e, below. Figure 7.2.3f on the next page, shows the relevant component property pages.
- Page 259 100/180MM PAPERLESS GRAPHIC RECORDER: USER GUIDE 7.2.4 SCREEN CREATION PROCEDURE (Cont.) Component Property Editor - Screen 1 main_1.2 Copy Paste Identifier main_1.2 Last Error Page Title X Position Y Position Width Height Background Colour Touch background colour field Draw Order Component Type Main Goto Canvas...
-
Page 260: Parameter Definitions
100/180MM PAPERLESS GRAPHIC RECORDER: USER GUIDE 7.3 PARAMETER DEFINITIONS The following parameters are associated with the components listed in table 7.2.2, above. The list is divided into basic and advanced. 7.3.1 Basic parameters Notes: Not all components have all the following parameters associated with them. The component definitions in section 7.4 define each component’s parameters. - Page 261 100/180MM PAPERLESS GRAPHIC RECORDER: USER GUIDE 7.3.1 BASIC PARAMETERS (Cont.) Parameter Description Group number Allows a group to be selected for group trend, bargraph and numeric displays, and for Dialogue action buttons. Select specific group, or '0' to follow current display group. Height Height of a component, measured downwards from the component’s ‘Y position’.
-
Page 262: Advanced Parameters
100/180MM PAPERLESS GRAPHIC RECORDER: USER GUIDE 7.3.2 Advanced parameters The selection of the Advanced properties set, is carried out from the Properties Options page as described in section 7.2.3, above. Advanced properties are in addition to the basic properties described above, not a replacement for them. Parameter Pick list content Description... - Page 263 100/180MM PAPERLESS GRAPHIC RECORDER: USER GUIDE 7.3.2 ADVANCED PARAMETERS (Cont.) Parameter Pick list content Description Colour foregrounds None Used only if Colour style = ‘Channel Alarms’ or ‘Channel thresholds’. A semicolon-separated list of foreground colours for the component being configured. The number of colours entered must match the number of alarms or threshold values as appropriate.
- Page 264 100/180MM PAPERLESS GRAPHIC RECORDER: USER GUIDE 7.3.2 ADVANCED PARAMETERS (Cont.) Parameter Pick list content Description Display Bargraph None If selected, a vertical bargraph is drawn at the right hand edge of Horizon- tal Trend displays. Display Descriptor Enable/Disable For Channel Numeric displays only, if Faceplate Style is set to ‘Custom’, this selection determines whether or not the channel descriptor appears at the top of the display.
- Page 265 100/180MM PAPERLESS GRAPHIC RECORDER: USER GUIDE 7.3.2 ADVANCED PARAMETERS (Cont.) Parameter Pick list content Description Line thickness Allows a pixel value to be entered for the line thickness of some compo- nents. It should be noted that the nature of the screen and of the drawing method means that curved lines of multi-pixel thickness can suffer from Moiré...
- Page 266 100/180MM PAPERLESS GRAPHIC RECORDER: USER GUIDE 7.3.2 ADVANCED PARAMETERS (Cont.) Parameter Pick list content Description Scale Divisions - Minor None For channel bargraphs, allows the number of minor scale divisions to be specified for the channel. Overwrites the Scale Divisions-Minor setting in the Channel’s configuration.
- Page 267 100/180MM PAPERLESS GRAPHIC RECORDER: USER GUIDE 7.3.2 ADVANCED PARAMETERS (Cont.) Parameter Pick list content Description Vertical Grid Total Default Number of vertical divisions for trend chart. If left at default uses the value entered in Group Configuration (section 4.3.2). Any other setting overrides Group Configuration entry Vertical Minor Divs Default...
-
Page 268: Component Definitions
100/180MM PAPERLESS GRAPHIC RECORDER: USER GUIDE COMPONENT DEFINITIONS This section defines all the available components listed in table 7.2.2 in terms of their parameters. The components occur in the order in which they appear in the list. 7.4.1 Group Vertical/Horizontal Trend This produces a display which mimics a recorder chart, for a selected group. -
Page 269: Group Numeric Display
100/180MM PAPERLESS GRAPHIC RECORDER: USER GUIDE 7.4.4 Group numeric display This produces a display of a selected group's numeric values, in one of a number of formats, as described in ‘Faceplate Style’ in table 7.3.2 above. The number of columns can also be defined by the user, according to the overall size of the display, number of channels etc. -
Page 270: Operator Button
100/180MM PAPERLESS GRAPHIC RECORDER: USER GUIDE 7.4.10 Operator button This displays a user pushbutton. The legend on the pushbutton, and the task it is to carry out, are defined in the button configuration. If the text is too long for the width of the button, the text is truncated (e.g. Reset Ave...). Possible tasks are as follows (assuming that the relevant options are fitted): 1 Edit the threshold (setpoint) setting for alarms 1 to 4 for point N 2 Reset Maths channel N... -
Page 271: Text
100/180MM PAPERLESS GRAPHIC RECORDER: USER GUIDE 7.4.13 Text If width and height are left with the default values of zero, the text will start at the specified start point and fit in the space between there and the right edge of the screen, in a single line (left justified (ranged) as a default). If the text string is too long, it is truncated. -
Page 272: Polyline - Series Of Points
100/180MM PAPERLESS GRAPHIC RECORDER: USER GUIDE 7.4.16 Polyline - series of points Similar to closed polygons, described in section 7.4.17 below, but the first and last points are not automatically joined, and the drawn item cannot be filled and the line width cannot be specified - it is always one pixel. Note: When working in percentage units, it should be remembered that vertical percentage units are only 2/3 the size of horizontal percentage units - this affecting the appearance of the drawn item. -
Page 273: Polygon - Closed Area
100/180MM PAPERLESS GRAPHIC RECORDER: USER GUIDE 7.4.17 Polygon - closed area This allows a number of pairs of points to be entered, which, if valid, will then be joined by straight lines. The first and last points are automatically joined, by the recorder. The shape, drawn in the specified foreground colour, with the specified line width, can be filled with the specified background colour. -
Page 274: Oval
100/180MM PAPERLESS GRAPHIC RECORDER: USER GUIDE 7.4.18 Oval Similar to an arc (section 7.4.20) with an arc angle of 360 degrees, but arcs cannot be filled, If the height and width of the oval are defined in the default ‘percentage units’, then entering equal values for height and width will result in an oval with the same aspect ratio as that of the screen, not a circle as might be expected. -
Page 275: Example
100/180MM PAPERLESS GRAPHIC RECORDER: USER GUIDE 7.4.20 Arc This causes a curved line of user-definable thickness to be drawn anti-clockwise between start angle and (start angle + arc angle). The origin (‘centre’) of the arc is (X position + 1/2 Width) ; (Y position + 1/2 Height). Arcs cannot be filled. -
Page 276: Measuring Unit Comparisons
100/180MM PAPERLESS GRAPHIC RECORDER: USER GUIDE MEASURING UNIT COMPARISONS Note: All the following figures are approximate. 7.5.1 XGA screen The physical display screen area available for user screens is approximately 245 mm across and 164 mm high. This area can be divided into a 100 x 100 array for percentage measurement or into a pixel array, 1024 across by 700 verti- cally. -
Page 277: Modbus Tcp Slave Comms
100/180MM PAPERLESS GRAPHIC RECORDER: USER GUIDE 8 MODBUS TCP SLAVE COMMS INSTALLATION The installation of the Modbus link consists of connecting a standard Ethernet cable between the RJ45 connector at the rear of the recorder either: 1. Directly to a host computer, using a crossover cable 2. -
Page 278: Exception Codes
100/180MM PAPERLESS GRAPHIC RECORDER: USER GUIDE 8.2.1 FUNCTION CODES (Cont.) EXCEPTION CODES MODBUS TCP provides reserved codes used for exceptions. These codes provide error information relating to failed requests. Exceptions are signalled by hex 80 being added to the function code of the request, followed by one of the codes listed in table 8.2.1b, below. - Page 279 100/180MM PAPERLESS GRAPHIC RECORDER: USER GUIDE 8.2.4 SECURITY (Cont.) The following C++ code is intended for use in creating a suitable 16-bit encrypted register using an IP address and password: /*--------------------------------------------------------------------------- FUNCTION : MB_Driver::encrypt DESCRIPTION : Create an encrypted value from a password string ARGUMENTS : pswd : Pointer to password from network file eKey : Pointer to eKey, usually I.P.
- Page 280 100/180MM PAPERLESS GRAPHIC RECORDER: USER GUIDE 8.2.4 SECURITY (Cont.) // Compare the next byte with key2 if(ibyte < dataLen) encryptedData[ibyte++] ^= key2; /* Now EXOR each byte to the next byte until no more are available if all goes well the last byte in the array should never change */ for(ibyte=0;...
-
Page 281: To Send A Login Request
100/180MM PAPERLESS GRAPHIC RECORDER: USER GUIDE 8.2.4 SECURITY (Cont.) TO SEND A LOGIN REQUEST Request Figure 8.2.4a shows data transmission sequence for sending a login request using the Ethernet network connection. Figure 8.2.4b is the same message for use with serial communications Byte 9 Byte 10 Byte 11... - Page 282 100/180MM PAPERLESS GRAPHIC RECORDER: USER GUIDE 8.2.4 SECURITY (Cont.) TO SEND A LOGIN REQUEST (Cont.) Response Figures 8.2.4c and 8.2.4d show response messages for successful and non-successful login attempts. Byte 0 Byte 1 Byte 2 Byte 3 Byte 4 Byte 5 Byte 6 Byte 7 Byte 8...
-
Page 283: Text Messages
100/180MM PAPERLESS GRAPHIC RECORDER: USER GUIDE 8.2.5 Text messages In order to increase efficiency, it is possible to set the system to transmit screen messages (e.g. alarm on/off) only when a new message occurs. This is done by continuously polling the ‘Text Length’ parameter (in group data - section 8.4.4) to see if its value is non-zero. - Page 284 100/180MM PAPERLESS GRAPHIC RECORDER: USER GUIDE 8.2.5 TEXT MESSAGES (Cont.) Example 3 Message of more than 60 but less than 120 characters 10 11 12 13 14 15 16 17 19 20 21 22 23 25 26 27 28 29 30 31 33 34 35 36 37 38 39 41 42 44 45 46 47...
-
Page 285: Address Map
100/180MM PAPERLESS GRAPHIC RECORDER: USER GUIDE 8.3 ADDRESS MAP Figure 8.3 shows the range of addresses allocated to various recorder functions. Each of these functions is described in detail in later sections. FFFF Addresses FC47 to FCBE: Counters Addresses FFF5 to FFFF: Not used FFF5 Addresses FB7F to FC46: Totalisers FFF4... - Page 286 100/180MM PAPERLESS GRAPHIC RECORDER: USER GUIDE 8.3 ADDRESS MAP (Cont.) The contents of each group can be determined by reading the relevant register number, as shown in section 8.4.4, be- low. The table below is a decoder for the results. For example, if a group has channels 1 to 6, maths channel 1 and totaliser three fitted, the results would be: Register 1 = 63 (32 + 16 + 8 + 4 + 2 + 1) (channels 1 to 6) Register 5 = 2048 (maths channel 1)
-
Page 287: Address Allocation
100/180MM PAPERLESS GRAPHIC RECORDER: USER GUIDE 8.4 ADDRESS ALLOCATION This section consists of a number of tables showing how the address space within the memory map is allocated. For full details of configuration parameters, refer to section 4. For convenience, the word ‘channel’ is used as an umbrella term for measuring points in general (i.e. -
Page 288: Channel Configuration Data
100/180MM PAPERLESS GRAPHIC RECORDER: USER GUIDE Note: A/B Switching: 8.4.2 Channel configuration data B values are not accessible via modbus for this software version. Span, Zone, Colour etc. are therefore all setting A The following tables give hex addresses for channels 1 to 12, inclusive. Generally: channel N parameter address = channel 1 parameter address + 162 (N-1) (decimal). -
Page 289: Channel 2
100/180MM PAPERLESS GRAPHIC RECORDER: USER GUIDE 8.4.2 CHANNEL CONFIGURATION DATA (Cont.) CHANNEL 2 Parameter Description Type Access Start Addr. Register Name Hex (Dec) Length Ch2 Span high Upper span value (display full scale) Scaled Read only 011D (285) Ch2 Span low Lower span value (display ‘zero’) Scaled Read only... -
Page 290: Channel 3
100/180MM PAPERLESS GRAPHIC RECORDER: USER GUIDE 8.4.2 CHANNEL CONFIGURATION DATA (Cont.) CHANNEL 3 Parameter Description Type Access Start Addr. Register Name Hex (Dec) Length Ch3 Span high Upper span value (display full scale) Scaled Read only 01BF (447) Ch3 Span low Lower span value (display ‘zero’) Scaled Read only... -
Page 291: Channel 4
100/180MM PAPERLESS GRAPHIC RECORDER: USER GUIDE 8.4.2 CHANNEL CONFIGURATION DATA (Cont.) CHANNEL 4 Parameter Description Type Access Start Addr. Register Name Hex (Dec) Length Ch4 Span high Upper span value (display full scale) Scaled Read only 0261 (609) Ch4 Span low Lower span value (display ‘zero’) Scaled Read only... -
Page 292: Channel 5
100/180MM PAPERLESS GRAPHIC RECORDER: USER GUIDE 8.4.2 CHANNEL CONFIGURATION DATA (Cont.) CHANNEL 5 Parameter Description Type Access Start Addr. Register Name Hex (Dec) Length Ch5 Span high Upper span value (display full scale) Scaled Read only 0303 (771) Ch5 Span low Lower span value (display ‘zero’) Scaled Read only... -
Page 293: Channel 6
100/180MM PAPERLESS GRAPHIC RECORDER: USER GUIDE 8.4.2 CHANNEL CONFIGURATION DATA (Cont.) CHANNEL 6 Parameter Description Type Access Start Addr. Register Name Hex (Dec) Length Ch6 Span high Upper span value (display full scale) Scaled Read only 03A5 (933) Ch6 Span low Lower span value (display ‘zero’) Scaled Read only... -
Page 294: Channel 7
100/180MM PAPERLESS GRAPHIC RECORDER: USER GUIDE 8.4.2 CHANNEL CONFIGURATION DATA (Cont.) CHANNEL 7 Parameter Description Type Access Start Addr. Register Name Hex (Dec) Length Ch7 Span high Upper span value (display full scale) Scaled Read only 0447 (1095) Ch7 Span low Lower span value (display ‘zero’) Scaled Read only... -
Page 295: Channel 8
100/180MM PAPERLESS GRAPHIC RECORDER: USER GUIDE 8.4.2 CHANNEL CONFIGURATION DATA (Cont.) CHANNEL 8 Parameter Description Type Access Start Addr. Register Name Hex (Dec) Length Ch8 Span high Upper span value (display full scale) Scaled Read only 04E9 (1257) Ch8 Span low Lower span value (display ‘zero’) Scaled Read only... -
Page 296: Channel 9
100/180MM PAPERLESS GRAPHIC RECORDER: USER GUIDE 8.4.2 CHANNEL CONFIGURATION DATA (Cont.) CHANNEL 9 Parameter Description Type Access Start Addr. Register Name Hex (Dec) Length Ch9 Span high Upper span value (display full scale) Scaled Read only 058B (1419) Ch9 Span low Lower span value (display ‘zero’) Scaled Read only... -
Page 297: Channel 10
100/180MM PAPERLESS GRAPHIC RECORDER: USER GUIDE 8.4.2 CHANNEL CONFIGURATION DATA (Cont.) CHANNEL 10 Parameter Description Type Access Start Addr. Register Name Hex (Dec) Length Ch10 Span high Upper span value (display full scale) Scaled Read only 062D (1581) Ch10 Span low Lower span value (display ‘zero’) Scaled Read only... -
Page 298: Channel 11
100/180MM PAPERLESS GRAPHIC RECORDER: USER GUIDE 8.4.2 CHANNEL CONFIGURATION DATA (Cont.) CHANNEL 11 Parameter Description Type Access Start Addr. Register Name Hex (Dec) Length Ch11 Span high Upper span value (display full scale) Scaled Read only 06CF (1743) Ch11 Span low Lower span value (display ‘zero’) Scaled Read only... -
Page 299: Channel 12
100/180MM PAPERLESS GRAPHIC RECORDER: USER GUIDE 8.4.2 CHANNEL CONFIGURATION DATA (Cont.) CHANNEL 12 Parameter Description Type Access Start Addr. Register Name Hex (Dec) Length Ch12 Span high Upper span value (display full scale) Scaled Read only 0771 (1905) Ch12 Span low Lower span value (display ‘zero’) Scaled Read only... -
Page 300: Channel Run-Time Data
100/180MM PAPERLESS GRAPHIC RECORDER: USER GUIDE 8.4.3 Channel Run-Time data These tables show addresses for channel input values for channels 1 to 12 inclusive. Generally: channel N address = channel 1 address + 3(N-1) (decimal) CHANNEL 1 Parameter Description Type Access Start Addr. -
Page 301: Channel 3
100/180MM PAPERLESS GRAPHIC RECORDER: USER GUIDE 8.4.3 CHANNEL RUN TIME DATA (Cont.) CHANNEL 3 Parameter Description Type Access Start Addr. Register Name Hex (Dec) Length Ch3 value Current process value (PV) Scaled See note 1 A1DF (41439) Ch3 status Channel status Enum Read only A1E0 (41440) 0 = Good PV... -
Page 302: Channel 5
100/180MM PAPERLESS GRAPHIC RECORDER: USER GUIDE 8.4.3 CHANNEL RUN TIME DATA (Cont.) CHANNEL 5 Parameter Description Type Access Start Addr. Register Name Hex (Dec) Length Ch5 value Current process value (PV) Scaled See note 1 A1E5 (41445) Ch5 status Channel status Enum Read only A1E6 (41446) 0 = Good PV... -
Page 303: Channel 7
100/180MM PAPERLESS GRAPHIC RECORDER: USER GUIDE 8.4.3 CHANNEL RUN TIME DATA (Cont.) CHANNEL 7 Parameter Description Type Access Start Addr. Register Name Hex (Dec) Length Ch7 value Current process value (PV) Scaled See note 1 A1EB (41451) Ch7 status Channel status Enum Read only A1EC (41452) 0 = Good PV... -
Page 304: Channel 9
100/180MM PAPERLESS GRAPHIC RECORDER: USER GUIDE 8.4.3 CHANNEL RUN TIME DATA (Cont.) CHANNEL 9 Parameter Description Type Access Start Addr. Register Name Hex (Dec) Length Ch9 value Current process value (PV) Scaled See note 1 A1F1 (41457) Ch9 status Channel status Enum Read only A1F2 (41458) 0 = Good PV... -
Page 305: Channel 11
100/180MM PAPERLESS GRAPHIC RECORDER: USER GUIDE 8.4.3 CHANNEL RUN TIME DATA (Cont.) CHANNEL 11 Parameter Description Type Access Start Addr. Register Name Hex (Dec) Length Ch11 value Current process value (PV) Scaled See note 1 A1F7 (41463) Ch11 status Channel status Enum Read only A1F8 (41464) 0 = Good PV... -
Page 306: Group Data
100/180MM PAPERLESS GRAPHIC RECORDER: USER GUIDE 8.4.4 Group data Generally: Parameter address for group N = Parameter address for group 1 + 629(N-1) (decimal) GROUP 1 Parameter Description Type Access Start Addr. Register Name Hex (Dec) Length Grp1 Trend type Trend enhancements Enum Read only A4D6 (42198) -
Page 307: Group
100/180MM PAPERLESS GRAPHIC RECORDER: USER GUIDE 8.4.4 GROUP DATA (Cont.) GROUP 2 Parameter Description Type Access Start Addr. Register Name Hex (Dec) Length Grp2 Trend type Trend enhancements Enum Read only A74B (42827) 0 = Interpolation enabled 1 = Adaptive recording enabled Grp2 Trend rate Trend update rate in milliseconds Uint32... -
Page 308: Group
100/180MM PAPERLESS GRAPHIC RECORDER: USER GUIDE 8.4.4 GROUP DATA (Cont.) GROUP 3 Parameter Description Type Access Start Addr. Register Name Hex (Dec) Length Grp3 Trend type Trend enhancements Enum Read only A9C0 (43456) 0 = Interpolation enabled 1 = Adaptive recording enabled Grp3 Trend rate Trend update rate in milliseconds Uint32... -
Page 309: Group
100/180MM PAPERLESS GRAPHIC RECORDER: USER GUIDE 8.4.4 GROUP DATA (Cont.) GROUP 4 Parameter Description Type Access Start Addr. Register Name Hex (Dec) Length Grp4 Trend type Trend enhancements Enum Read only AC35 (44085) 0 = Interpolation enabled 1 = Adaptive recording enabled Grp4 Trend rate Trend update rate in milliseconds Uint32... -
Page 310: Group
100/180MM PAPERLESS GRAPHIC RECORDER: USER GUIDE 8.4.4 GROUP DATA (Cont.) GROUP 5 Parameter Description Type Access Start Addr. Register Name Hex (Dec) Length Grp5 Trend type Trend enhancements Enum Read only AEAA (44714) 0 = Interpolation enabled 1 = Adaptive recording enabled Grp5 Trend rate Trend update rate in milliseconds Uint32... -
Page 311: Group
100/180MM PAPERLESS GRAPHIC RECORDER: USER GUIDE 8.4.4 GROUP DATA (Cont.) GROUP 6 Parameter Description Type Access Start Addr. Register Name Hex (Dec) Length Grp6 Trend type Trend enhancements Enum Read only B11F (45343) 0 = Interpolation enabled 1 = Adaptive recording enabled Grp6 Trend rate Trend update rate in milliseconds Uint32... -
Page 312: Feature Identification Table (Fit)
100/180MM PAPERLESS GRAPHIC RECORDER: USER GUIDE 8.4.5 Feature identification table (FIT) This table allows the host to identify which features are available at the recorder. Parameter Description Value Access Start Addr. Register Name Hex (Dec) Length Number of features Number of supported features Read only CC26 (52262) Feature 1 Indirection Table... - Page 313 100/180MM PAPERLESS GRAPHIC RECORDER: USER GUIDE 8.4.6 INDIRECTION TABLES (CONT.) Table 8.4.6a shows the overall arrangement of the indirection table area. Figures 8.4.6b and 8.4.6c show simple examples of Read only and Read/Write addressing for tables with 6 entries. D4E6 Read/Write data area D2E7...
- Page 314 100/180MM PAPERLESS GRAPHIC RECORDER: USER GUIDE 8.4.6 INDIRECTION TABLES (CONT.) Alarms chan 1 CEEB PV chan 1 CEEA PV chan 1 CEE9 Read values from here (address + hex 200) Archive rate CEE8 Trend rate CEE7 Instrument type CEE6 A1DB CCEB Channel 1 Alarm status F8C4...
-
Page 315: Ieee 32-Bit Channel Configuration Data
100/180MM PAPERLESS GRAPHIC RECORDER: USER GUIDE 8.4.7 IEEE 32-bit channel configuration data Note: A/B Switching: B values are not accessible via modbus for this software version. Span, Zone, Colour The following tables show the hexadecimal addresses for the specified 32-bit etc. -
Page 316: Channel 4
100/180MM PAPERLESS GRAPHIC RECORDER: USER GUIDE 8.4.7 IEEE 32-BIT CHANNEL CONFIGURATION DATA (Cont.) CHANNEL 4 Parameter Description Type Access Start Addr. Register Name Hex (Dec) Length Ch4 span high Upper span value (display full scale) Float Read only D553 (54611) Ch4 span low Lower span value (display ‘zero’) Float... -
Page 317: Channel 7
100/180MM PAPERLESS GRAPHIC RECORDER: USER GUIDE 8.4.7 IEEE 32-BIT CHANNEL CONFIGURATION DATA (Cont.) CHANNEL 7 Parameter Description Type Access Start Addr. Register Name Hex (Dec) Length Ch7 span high Upper span value (display full scale) Float Read only D5BF (54719) Ch7 span low Lower span value (display ‘zero’) Float... -
Page 318: Channel 10
100/180MM PAPERLESS GRAPHIC RECORDER: USER GUIDE 8.4.7 IEEE 32-BIT CHANNEL CONFIGURATION DATA (Cont.) CHANNEL 10 Parameter Description Type Access Start Addr. Register Name Hex (Dec) Length Ch10 span high Upper span value (display full scale) Float Read only D62B (54827) Ch10 span low Lower span value (display ‘zero’) Float... -
Page 319: Ieee Area Channel Run-Time Data
100/180MM PAPERLESS GRAPHIC RECORDER: USER GUIDE 8.4.8 IEEE Area Channel run-time data The following tables show the hexadecimal addresses for the specified 32-bit floating-point values, for channels 1 to 12. Generally, Parameter address for channel N = Parameter address for channel 1 + 4(N-1) (decimal). CHANNEL 1 Parameter Description... -
Page 320: Channel 3
100/180MM PAPERLESS GRAPHIC RECORDER: USER GUIDE 8.4.8 IEEE AREA CHANNEL RUN-TIME DATA (Cont.) CHANNEL 3 Parameter Description Type Access Start Addr. Register Name Hex (Dec) Length Channel 3 value Current process value (PV) Float See note 1 F8CB (63691) Channel 3 status Channel status Enum Read only F8CD (63693) -
Page 321: Channel 5
100/180MM PAPERLESS GRAPHIC RECORDER: USER GUIDE 8.4.8 IEEE AREA CHANNEL RUN-TIME DATA (Cont.) CHANNEL 5 Parameter Description Type Access Start Addr. Register Name Hex (Dec) Length Channel 5 value Current process value (PV) Float See note 1 F8D3 (63699) Channel 5 status Channel status Enum Read only F8D5 (63701) -
Page 322: Channel 7
100/180MM PAPERLESS GRAPHIC RECORDER: USER GUIDE 8.4.8 IEEE AREA CHANNEL RUN-TIME DATA (Cont.) CHANNEL 7 Parameter Description Type Access Start Addr. Register Name Hex (Dec) Length Channel 7 value Current process value (PV) Float See note 1 F8DB (63707) Channel 7 status Channel status Enum Read only F8DD (63709) -
Page 323: Channel 9
100/180MM PAPERLESS GRAPHIC RECORDER: USER GUIDE 8.4.8 IEEE AREA CHANNEL RUN-TIME DATA (Cont.) CHANNEL 9 Parameter Description Type Access Start Addr. Register Name Hex (Dec) Length Channel 9 value Current process value (PV) Float See note 1 F8E3 (63715) Channel 9 status Channel status Enum Read only... -
Page 324: Channel 11
100/180MM PAPERLESS GRAPHIC RECORDER: USER GUIDE 8.4.8 IEEE AREA CHANNEL RUN-TIME DATA (Cont.) CHANNEL 11 Parameter Description Type Access Start Addr. Register Name Hex (Dec) Length Channel 11 value Current process value (PV) Float See note 1 F8EB (63723) Channel 11 status Channel status Enum Read only F8ED (63725) -
Page 325: Permanent Id Table
100/180MM PAPERLESS GRAPHIC RECORDER: USER GUIDE 8.4.9 Permanent ID table This table contains information relating to the recorder, and also gives the start address of the feature identification table (FIT). FFF4 HHHH Checksum CC26 FFF3 FIT start address 0001 FFF2 Version ID 6100 or 6180 FFF1... -
Page 326: Function Code 03
100/180MM PAPERLESS GRAPHIC RECORDER: USER GUIDE 8.5.1 Function code 03 REQUEST The bytes after the 7-byte prefix described above are: Function code (03) (1 byte) Register start address (2 bytes) Word count (Total number of registers) (1 to 125 decimal; 1 to 7D hex) (2 bytes) Thus to read Channel 5 descriptor (start address 031F - 10 registers altogether) the following request (as described in figure 8.5.1a) would be transmitted: 0000000000060003031F000A... -
Page 327: Function Code 04
100/180MM PAPERLESS GRAPHIC RECORDER: USER GUIDE 8.5.2 Function code 04 This is identical with function code 03, except that 04 must be used as the function code and the exception response Function code is 84 (hex) not 83. 8.5.3 Function code 06 REQUEST This is used to write a value to a single register. -
Page 328: Function Code 16 (Hex 10)
100/180MM PAPERLESS GRAPHIC RECORDER: USER GUIDE 8.5.5 Function code 16 (Hex 10) REQUEST This is used to write values to multiple registers. The bytes after the 7-byte prefix described in section 8.5, above are: Function code (10) (1 byte) Register Start address (2 bytes) Word count (Total number of registers to be written) (1 to 100 decimal;... -
Page 329: Analogue Outputs
100/180MM PAPERLESS GRAPHIC RECORDER: USER GUIDE ANALOGUE OUTPUT OPTION Up to four analogue output boards can be fitted, each of which supplies two outputs. This allows any of the recorder points to be output as a voltage or current signal, as configured. Any part of the source point’s span can be mapped to the output range, and the outputs can be adjusted (as described below) to compensate for errors in the monitoring sys- tem. - Page 330 100/180MM PAPERLESS GRAPHIC RECORDER: USER GUIDE 9.4 OUTPUT ADJUST (Cont.) Archive Save/Restore Config Security Network System Clock Locale Upgrade Input Adjust Output adjust Channel Adjust Channel Remove Adjust Specify the low output and then the low reading 10.690 13/10/05 15:22:54 Low Output 20.960 13/10/05 16:03:09...
-
Page 331: Event Inputs
100/180MM PAPERLESS GRAPHIC RECORDER: USER GUIDE EVENT INPUT OPTION 10.1 INTRODUCTION Each Event input option board offers six isolated input circuits. Inputs can be either switch closures or voltage levels. Section 4.3.6 (Event configuration) describes the use of events and how they can be combined to perform logic func- tions, if required. -
Page 332: Transmitter Power Supply
100/180MM PAPERLESS GRAPHIC RECORDER: USER GUIDE 11 TRANSMITTER POWER SUPPLY 11.1 INTRODUCTION WARNING! Transmitter power supplies must not be used with dc supply voltages. Notes: Transmitter power supplies are not suitable for use with dc or low-voltage ac supplies. The transmitter power supply is available only with 100 mm. recorders. This option consists of a circuit board, terminal block and suitable wiring inside a long terminal cover at the rear of a 100mm recorder. - Page 333 100/180MM PAPERLESS GRAPHIC RECORDER: USER GUIDE 11.2.2 ACCESS TO THE USER CONNECTIONS/FUSE (Cont.) Open the cover (figure 11.2.2b) to reveal the circuit board, user connections etc. (figure 11.2.2c) Swing rear cover down for access Recorder Connector Body clip access Figure 11.2.2b Opening the rear cover The fuse is located as shown in figure 11.2.2c.
-
Page 334: User Wiring
100/180MM PAPERLESS GRAPHIC RECORDER: USER GUIDE 11.2.3 User wiring Figure 11.2.3a shows the terminal block pinout, and figure 11.2.3b shows typical applications wiring. O/P 1 O/P 2 O/P 3 – – – User terminal block Figure 11.2.3a Terminal block wiring Long terminal cover Recorder rear terminal panel... -
Page 335: Ascii Printer
100/180MM PAPERLESS GRAPHIC RECORDER: USER GUIDE ASCII PRINTER OUTPUT OPTION 12.1 INTRODUCTION If the Serial Communications option is fitted, this allows the printing of messages, as and when they occur, or the print- ing of configurable reports as a result of job action. The recorder is set up to drive a number of recommended printers. As more printers become available, printer drivers can be imported as described in section 12.4, below. -
Page 336: Configuration
100/180MM PAPERLESS GRAPHIC RECORDER: USER GUIDE 12.3 CONFIGURATION Configuration takes place in two areas viz: ‘Connections’ and ‘Reports’ (section 12.3.2). 12.3.1 Connections Figure 12.3.1a shows the default configuration page for ASCII printer protocol. See section 4.3.15 for other protocols. Port Serial 1 Online Link Error Count... -
Page 337: Protocol
100/180MM PAPERLESS GRAPHIC RECORDER: USER GUIDE 12.3.1 SERIAL COMMUNICATIONS CONFIGURATION (Cont.) PROTOCOL Select ASCII Printer. BAUD RATE Select Baud Rate setting to match that set at the Printer. STOP BITS Selectable as 1 or 2. PARITY Allows Parity to be chosen from a pick list of: None, Odd, Even. For reliable communications with the printer, it is recommended that the default parity be used. -
Page 338: Reports Configuration
100/180MM PAPERLESS GRAPHIC RECORDER: USER GUIDE 12.3.2 Reports configuration This allows the user to configure up to 10 ‘reports’ for printing by the ASCII printer as a result of job action. Figure 12.3.2a shows a typical configuration page, accessed from the CONFIG button ‘Reports’ item. Report 1) Report 1 Descriptor... -
Page 339: Style
100/180MM PAPERLESS GRAPHIC RECORDER: USER GUIDE 12.3.2 REPORTS CONFIGURATION (Cont.) STYLE See figure 12.3.2b for examples of ‘Normal’, ‘Bold’, ‘Emphasised’ and ‘Banner’ print styles. For all styles, if the text is too long to fit on one line it ‘wraps round’ as shown (for normal style) in figure 12.3.2b, below. Figure 12.3.2b Text style examples POINT Allows a point to be chosen when ‘Process value’... -
Page 340: Importing Printer Drivers
100/180MM PAPERLESS GRAPHIC RECORDER: USER GUIDE 12.4 IMPORTING PRINTER DRIVERS The importing of new printer drivers is carried out from the SAVE/RESTORE button menu, fully described in section 4.2. Before a printer driver can be ‘imported’, it must be available from the recorder’s Flash memory, from an SD or Flash card, from a USB memory stick or, for Bridge users, from the host PC. -
Page 341: Report Example
100/180MM PAPERLESS GRAPHIC RECORDER: USER GUIDE 12.5 REPORT EXAMPLE This example shows how to configure a report to be printed if any of channel 1 to channel 4 go into alarm. It is as- sumed that the Serial comms link with the printer has been successfully established. The report is to include the process values of channels 1 to 4 and the time and date. -
Page 342: Event Configuration
100/180MM PAPERLESS GRAPHIC RECORDER: USER GUIDE 12.5.3 Event Configuration Refer to section 4.3.6 as necessary EVENT NUMBER 1 Source 1 = Unack’d Alarm on Group Descriptor = Paint low Job number 1 Category = Report Send Report to = Select required printer Report = 1) report 1 On = Active 12.5.4 Report Configuration... -
Page 343: Serial Communications Configuration
100/180MM PAPERLESS GRAPHIC RECORDER: USER GUIDE 12.5.5 Serial Communications Configuration Enable ‘Alarms’ in the ‘Messages To Print’ area. Press ‘Apply’. A sample Printout is shown in figure 12.5.5, in which it can be seen that it was the Orange channel which triggered the warning. -
Page 344: Tsp600 Switch Settings
100/180MM PAPERLESS GRAPHIC RECORDER: USER GUIDE 12.6 TSP600 SWITCH SETTINGS This section applies only to the Star TSP600 Printer. The DIP switches are revealed by removing the access panel located on the underside of the printer. The two switches appear as shown in figure 12.6a, and their elements should be configured as shown in figure 12.6b. See SW1/SW2 details in the TSP600 ‘User’s guide’... -
Page 345: Portable Case Options
100/180MM PAPERLESS GRAPHIC RECORDER: USER GUIDE 13 PORTABLE CASE OPTIONS Note: Portable case options are available only for the small frame recorder. The various options described below come provided in a rugged carrying case as depicted in figure 13, below, It is possible that input/output circuits can carry high voltages, and this might prove dangerous if the safety earth con- nection to the recorder is not in place (e.g. -
Page 346: Basic Option
100/180MM PAPERLESS GRAPHIC RECORDER: USER GUIDE 13.1 BASIC OPTION 13.1.1 Introduction The basic portable case option provides 6 or 12 input channels with up to four option boards, or 18 input channels and up to two option boards. 13.1.2 Wiring Figure 13.1.2a, below, gives alternative back panel connector layouts for the 12-input and 18-input recorder options. - Page 347 100/180MM PAPERLESS GRAPHIC RECORDER: USER GUIDE 13.1.2 WIRING (Cont.) Portable case Recorder back panel Brown Power supply unit Line supply Blue (100 to 240V) Green/Yellow (50/60 Hz) Chassis ground Earth (Safety earth) Ethernet connector Option board 1 Note: For the sake of clarity, the Serial Communications and USB option wiring are not shown.
-
Page 348: Transmitter Power Supply (Trs) Option
100/180MM PAPERLESS GRAPHIC RECORDER: USER GUIDE 13.2 TRANSMITTER POWER SUPPLY (TRS) OPTION This option is identical with the 6/12 channel basic option described in section 13.1, above except that one of the option slots is used for TRS output. The TRS pinout is given in figure 13.2, below. Note: Only one transmitter power supply can be fitted in the portable case, and may be terminated only at option slot 2 OR option slot 4 (if available). - Page 349 100/180MM PAPERLESS GRAPHIC RECORDER: USER GUIDE 13.2 TRS OPTION (Cont.) Portable case Recorder back panel Brown Power supply unit Line supply Blue (100 to 240V) (50/60 Hz) Green/Yellow Chassis ground Earth (Safety earth) Ethernet connector Note: For the sake of clarity, the Serial Option board 1 Communications and USB option wiring are not shown.
-
Page 350: Htm2010 Quarterly Test Kit
100/180MM PAPERLESS GRAPHIC RECORDER: USER GUIDE 13.3 HTM2010 QUARTERLY TEST KIT 13.3.1 Introduction This option is supplied as a six-channel, 100 mm recorder in a rugged portable case, configured for five type-T thermo- couples and one pressure transducer. The option comes complete with pressure transducer, insertion tubes and mini- ature plugs for type T thermocouples. -
Page 351: Internal Wiring
100/180MM PAPERLESS GRAPHIC RECORDER: USER GUIDE 13.3.2 WIRING (Cont.) INTERNAL WIRING Figure 13.3.2c shows the internal wiring between the portable case connectors and the recorder rear panel for a 6 input option.. Recorder back panel Brown Line supply Blue (100 to 240V) (50/60 Hz) Chassis ground Green/Yellow... -
Page 352: Thermocouple Option
100/180MM PAPERLESS GRAPHIC RECORDER: USER GUIDE 13.4 THERMOCOUPLE OPTION 13.4.1 Introduction This option allows the connection of up to 12 type J, K or T thermocouples together with up to two option boards, or up to 18 thermocouples with no option boards. Transmitter power supply is not available with this option. The type of thermocouple (the same for all channels) must be specified at time of order. -
Page 353: Thermocouple Wiring
100/180MM PAPERLESS GRAPHIC RECORDER: USER GUIDE 13.4.2 WIRING (Cont.) THERMOCOUPLE WIRING + wire — wire T/C type J colours T/C type K colours T/C type T colours BS4937:1993 BS4937:1993 BS4937:1993 BS1843:1952 BS1843:1952 BS1843:1952 IEC584-3:1989 IEC584-3:1989 IEC584-3:1989 (Superseded) (Superseded) (Superseded) (Current) (Current) (Current) Black... -
Page 354: Specification
100/180MM PAPERLESS GRAPHIC RECORDER: USER GUIDE 13.4.2 WIRING (Cont.) Portable case Recorder back panel Brown Power supply unit Line supply Blue (100 to 240V) (50/60 Hz) Green/Yellow Chassis ground Earth (Safety earth) Ethernet connector Note: For the sake of clarity, the Serial Option board 1 Communications and USB option wiring are not shown. -
Page 355: Low Supply Voltage Option
100/180MM PAPERLESS GRAPHIC RECORDER: USER GUIDE 13.5 LOW SUPPLY VOLTAGE OPTION Some of the portable case options described in this manual can be ordered for use with 24V (nom.) supply voltages. In such cases, the supply voltage part of the wiring diagrams is replaced with that shown in figure 13.5a unless otherwise stated. -
Page 356: Annex A: Specification
100/180 MM PAPERLESS GRAPHIC RECORDER: USER GUIDE ANNEX A: SPECIFICATION INSTALLATION CATEGORY AND POLLUTION DEGREE This product has been designed to conform to BS EN61010 installation category II and pollution degree 2. These are defined as follows: Installation category II The rated impulse voltage for equipment on nominal 230V ac mains is 2500V. -
Page 357: Technical Specification (Recorder)
100/180 MM PAPERLESS GRAPHIC RECORDER: USER GUIDE TECHNICAL SPECIFICATION (Recorder) Board types (I/O) Universal input board Relay output boards (3 change-over, 4 normally closed or 4 normally open relays per board) 6 - event input board Serial communications board 2 - channel analogue output (retransmission) board Standard features Bridge ‘Lite’... - Page 358 100/180 MM PAPERLESS GRAPHIC RECORDER: USER GUIDE TECHNICAL SPECIFICATION (RECORDER) (Cont.) Physical Panel mounting DIN 43700 Bezel size Small frame: 144mm x 144mm Note: For portable case dimensions - see section 13. Large frame: 292mm x 292mm Panel cutout Small frame: 138mm x 138mm (-0.0 + 1.0) mm Large frame;...
- Page 359 100/180 MM PAPERLESS GRAPHIC RECORDER: USER GUIDE TECHNICAL SPECIFICATION (RECORDER) (Cont.) Ethernet Communications Type 10/100 base T (IEEE802.3) Protocols TCP/IP, FTP, DHCP, BootP, SNTP, Modbus, SMTP, ICMP. Cable Type: CAT5 Maximum length: 100 metres Termination: RJ45 RJ45 LED indicators Green: Indicates a 100MB link Yellow: Indicates Ethernet activity...
-
Page 360: Technical Specification (Universal Input Board)
100/180 MM PAPERLESS GRAPHIC RECORDER: USER GUIDE TECHNICAL SPECIFICATION (Universal input board) For small frame recorders only: General* For 6 input recorders, up to four option boards may be fitted. Termination Edge connector/terminal block For 12 input recorders up to four option boards may be fitted Max. - Page 361 0.01˚C Ni120 -50 to + 170 DIN43760:1987 0.01˚C -200 to + 850 Pt100 IEC751 0.01˚C Pt100A -200 to + 600 Eurotherm Recorders SA 0.09˚C Pt1000 -200 to + 850 IEC751 0.01˚C Thermocouple data Temperature scale ITS90 Bias current 0.05nA Cold junction compensation types...
-
Page 362: Technical Specification (Relay Output Board)
100/180 MM PAPERLESS GRAPHIC RECORDER: USER GUIDE TECHNICAL SPECIFICATION (Relay output board) General Maximum number of relay boards Small-frame unit Four Large-frame unit Nine Number of relays per board Changeover relays: Three Normally open relays: Four Normally closed relays: Four Estimated mechanical life 30,000,000 operations Update rate... -
Page 363: Technical Specification (Event Input Board)
100/180 MM PAPERLESS GRAPHIC RECORDER: USER GUIDE TECHNICAL SPECIFICATION (Event input board) General Maximum number of event input boards Four Number of inputs per board Type of input Contact closure (active closed) or voltage level (active low) Recognition levels (input to ‘C’ terminal) (R = contact resistance) Active: -30V to + 0.8V or switch contacts closed (R <... -
Page 364: Annex B: Reference
100/180 MM PAPERLESS GRAPHIC RECORDER: USER GUIDE ANNEX B: REFERENCE B1 DIAGNOSTICS DISPLAY B1.1 MAIN DIAGNOSTIC DISPLAY At power-up, continuously hold a finger in contact with the screen until the main diagnostic display appears as shown in figure B1.1 Special Modes Display Test Touch Calibration System Summary... -
Page 365: B1.2 Special Modes
100/180 MM PAPERLESS GRAPHIC RECORDER: USER GUIDE B1.2 SPECIAL MODES For factory use only, selecting 'Special Modes' allows the enabling and disabling of the Sales Demo mode of operation. An 'S' symbol is displayed at the top of the screen whilst the recorder is in sales demo mode. B1.3 DISPLAY TEST Selecting this option, allows the user to check the display by flooding the screen with single colours. -
Page 366: B1.4.1 Touch Screen Calibrate
100/180 MM PAPERLESS GRAPHIC RECORDER: USER GUIDE B1.4.1 Touch screen calibrate This key initiates the display calibration (offset correction) procedure. This procedure ensures that the display screen image is positioned correctly compared with the touch screen (so that 'what you touch is what you get'). The procedure, is necessary only rarely, if at all, and is included here only for the sake of completeness. -
Page 367: B1.5 System Summary
100/180 MM PAPERLESS GRAPHIC RECORDER: USER GUIDE B1.5 SYSTEM SUMMARY This key calls a system summary display, as shown for a typical small-frame recorder, in figure B1.5. SYSTEM SUMMARY Variant: 6100A Software: 4.0 DRAM: 67108864 SRAM: 32768 FLASH: 134217728 MAC address: 000A8D002026... -
Page 368: B1.6.3 Serial 1/Serial 2
100/180 MM PAPERLESS GRAPHIC RECORDER: USER GUIDE B1.6.3 Serial 1/Serial 2 9-way D-type socket (solder bucket side) Touching one of these keys performs a loopback test on the relevant Serial port. In order for the test to be successful, a 9-way D-type socket, wired as in figure B1.6.3, must be fitted to the relevant serial port at the rear of the recorder. -
Page 369: B1.6.8 Main Menu
100/180 MM PAPERLESS GRAPHIC RECORDER: USER GUIDE B1.6.8 Main menu To return to the main diagnostics display, touch the 'Main Menu' key. B1.7 QUIT Allows the user to quit diagnostics (after confirmation). The recorder restarts in normal operating mode. B2 PREVENTIVE MAINTENANCE B2.1 TOUCH SCREEN CLEANING CAUTION The touch-sensitive screen used in this product is designed for use by hand or by the stylus supplied only. -
Page 370: B2.2 Maintenance Schedule
100/180 MM PAPERLESS GRAPHIC RECORDER: USER GUIDE B2.2 MAINTENANCE SCHEDULE Battery replacement - Every three years B2.2.1 Battery replacement procedure WARNING In order to eliminate the risk of user contact with hazardous voltages, the recorder must be isolated from line power before its top cover is removed. - Page 371 100/180 MM PAPERLESS GRAPHIC RECORDER: USER GUIDE B2.2.1 BATTERY REPLACEMENT (Cont.) 3. With the cover removed, the battery board is accessible, allowing the exhausted battery to be slid out of its holder and the replacement battery to be inserted (+ up). Small Frame Battery type BR2330 Disconnect connector for access to battery...
-
Page 372: B2.3 Flap Release
100/180 MM PAPERLESS GRAPHIC RECORDER: USER GUIDE B2.3 FLAP RELEASE For recorders fitted with the lockable flap option (section 2.4), it is possible to unlatch the flap from inside the recorder as follows: 1. Remove the recorder cover as described in section 2.2.1, above. -
Page 373: B3 Option Enabling
100/180 MM PAPERLESS GRAPHIC RECORDER: USER GUIDE B3 OPTION ENABLING See 'Upgrade' in section 4.6.3. B4 COLOUR SELECTION The following table, gives RGB values and decimal and hex numbers for the available channel colours. Normally, this table is necessary only when communicating over the Modbus link. Note: Colour representation varies from screen to screen. - Page 374 100/180 MM PAPERLESS GRAPHIC RECORDER: USER GUIDE B4 COLOUR SELECTION (Cont.) Colour Red Green Blue Decimal Blue Green Honey Violet Russet Dark Blue Jade Magenta Dusky Rose Yellow Powder Blue Dark Red Avocado Indigo Dark Brown Ægean Cyan Aubergine Dark Orange Pale Yellow Hyacinth Dark Green...
- Page 375 100/180 MM PAPERLESS GRAPHIC RECORDER: USER GUIDE B4 COLOUR SELECTION (Cont.) Colour Red Green Blue Decimal Terracotta Blue Babe Lime Blue Jive Cucumber EuroGreen Wheatgerm Sea Blue Ginger Aqua Pool Pale Red Pale Blue Lilac Sky Blue Wild Moss Turquoise Pale Green Coffee Wicker...
-
Page 376: B5 Tcp Port Numbers
100/180 MM PAPERLESS GRAPHIC RECORDER: USER GUIDE B5 TCP PORT NUMBERS The following TCP ports are made use of by the recorder. (This information would be needed by anyone involved in setting up 'firewalls', which may be used selectively to block incoming or outgoing access to specific ports.) PORT Usage File Transfer Protocol - data... -
Page 377: B6 Ascii Characters For Serial Comms
100/180 MM PAPERLESS GRAPHIC RECORDER: USER GUIDE B6 ASCII CHARACTERS FOR SERIAL COMMS This section contains details of the ASCII characters that may be used with the Serial Comms option. All the ASCII characters listed can be used as Start or End-of-message characters, but only characters with decimal codes 32 to 127 can be used in messages, as decimal codes 0 to 31 are replaced by Question marks in messages. -
Page 378: B7 Time Zone Information
100/180 MM PAPERLESS GRAPHIC RECORDER: USER GUIDE B7 TIME ZONE INFORMATION This section gives an explanation of the time zone abbreviations listed in the System/Locale/Time Zone pick list. The list starts at GMT, travelling Eastwards round the world. Abbre- Full title Time at Hours of viation... -
Page 379: B8 History Maintenance Option
100/180 MM PAPERLESS GRAPHIC RECORDER: USER GUIDE B8 HISTORY MAINTENANCE OPTION This option, which must be specified at time of order, is intended for use by hire companies etc. who have a require- ment to remove all customer data from recorders which are not fitted with the 'Simulator' option (which includes an 'Erase all history' job). -
Page 380: B9 Menu Structure
100/180 MM PAPERLESS GRAPHIC RECORDER: USER GUIDE B9 MENU STRUCTURE Section 4 Root Menu 1 8 : 1 0 : 3 9 E n g i n e e r G r o u p n a m e 0 5 / 1 0 / 0 5 A r c h i v e Save/Restore C o n f i g S e c u r i t y... - Page 381 100/180 MM PAPERLESS GRAPHIC RECORDER: USER GUIDE B9 MENU STRUCTURE (Cont.) Archive Save/Restore Config Security Network System Figure Figures Figure Figure Figure B9d to B9l/m Archive Last Archive 23/08/05 11:32:18 (section 4.1) Local Local Select Media card, or Media mediacard USB port Remote Bring Archive Up To Date...
- Page 382 100/180 MM PAPERLESS GRAPHIC RECORDER: USER GUIDE B9 MENU STRUCTURE (Cont.) Archive Save/Restore Config Security Network System 6100 Save as Save Figure Figures Figure Figure Figure File Name B9d to B9l/m Save Configuration Data Restore Save/Restore Security Data (section 4.2) Network Data Screens Data Save...
- Page 383 100/180 MM PAPERLESS GRAPHIC RECORDER: USER GUIDE B9 MENU STRUCTURE (Cont.) Archive Save/Restore Config Security Network System Instrument Name Instrument Fig B9j Figure Normal Display Figure Figure Figure Instrument (Section 4.3.1) Saver Display B9l/m Instrument Save After Minutes Modbus Address Groups Channels (Section 4.3.3) Modbus Security Disabled...
- Page 384 100/180 MM PAPERLESS GRAPHIC RECORDER: USER GUIDE B9 MENU STRUCTURE (Cont.) Archive Save/Restore Config Security Network System Compression Normal Remote Fig B9j Figure Flash Size Figure Figure Figure 9 6 . 2 5 Archive Shortest Trend History G r o u p 1 B9l/m (Section 4.3.5) Instrument...
- Page 385 100/180 MM PAPERLESS GRAPHIC RECORDER: USER GUIDE B9 MENU STRUCTURE (Cont.) Archive Save/Restore Config Security Network System Group Fig B9j Figure Scope Figure Figure Figure B9l/m Group 1) Group1 Instrument Maths Number 1) Fo 1 Show Batch Entry List Value 32.65 Mins Groups...
- Page 386 100/180 MM PAPERLESS GRAPHIC RECORDER: USER GUIDE B9 MENU STRUCTURE (Cont.) Archive Save/Restore Config Security Network System Port Serial 1 Select port Port Serial 1 Select port Fig B9j Figure Figure Figure Figure Link Error Count Online B9l/m Reset Error Count Link Error Count Protocol ASCII (input)
- Page 387 100/180 MM PAPERLESS GRAPHIC RECORDER: USER GUIDE B9 MENU STRUCTURE (Cont.) Archive Save/Restore Config Security Network System 0.125 Seconds High Priority interval Figure Figure Fig B9j Figure Figure Seconds Medium priority interval B9l/m Seconds Low priority interval Instrument Store diagnostics Groups 1) Remote Device 1 Slave...
- Page 388 100/180 MM PAPERLESS GRAPHIC RECORDER: USER GUIDE B9 MENU STRUCTURE (Cont.) Archive Save/Restore Config Security Network System Mail Server Fig B9j Figure Figure Figure Figure Port Number B9l/m Instrument Sender Recorder IP address Groups Errors To Figure B9d Retry Time Seconds Channels Recipient List...
- Page 389 100/180 MM PAPERLESS GRAPHIC RECORDER: USER GUIDE B9 MENU STRUCTURE (Cont.) Archive Save/Restore Config Security Network System Select the required access level and enter the password if required Figs B9d Figure Figure Figure Figure to B9i B9l/m User Engineer Password expires in Days Login (section 3.3.1) Logout...
- Page 390 100/180 MM PAPERLESS GRAPHIC RECORDER: USER GUIDE B9 MENU STRUCTURE (Cont.) Archive Save/Restore Config Security Network System Figure Figure Figure B9c Figures Figure B9l/m to B9i Network (Section 4.5) Address Instrument number Address MAC address 08:00:48:80:00:F0 IP address lookup Obtain from a BootP Server Name BootP timeout IP address...
- Page 391 100/180 MM PAPERLESS GRAPHIC RECORDER: USER GUIDE B9 MENU STRUCTURE (Cont.) Archive Save/Restore Config Security Network System Figure B9c Figures Figure Figure Figure Current date DD/MM/YYYY System B9d to Current time HH:MM:SS (Section 4.6) Clock (section 4.6.1) Apply Discard Clock Output adjust Locale (section 4.6.2) Locale...
- Page 392 Job Action Preset About Customise Search Now (section 4.6.10) Desktop About Data Entry Background (section 4.6.11) Selection 6100A Instrument Variant: Fixed Text Config Revision: 310908 Active Text 25 April 2006 10:41:35 Last Updated: Disabled Text At Version: Title Bar Background...
-
Page 393: C1.2.1 Instrument
Instrument Trends Message Logs History About Eurotherm Home Page Recorder Downloads Document Library Search Figure C1 Home page As can be seen there are two sets of 'controls' viz the internet links and the instrument access tabs. C1.1 INTERNET LINKS These three links take the user to various areas of the manufacturer's web site. - Page 394 100/180 MM PAPERLESS GRAPHIC RECORDER: USER GUIDE C1.2.2 Trends Clicking on the 'Trends' tab displays a screen allowing the user to select a refresh rate and one of Horizontal trend, Ver- tical Trend or Numeric as the display format. Both the horizontal and vertical trend modes include the numeric display table.
-
Page 395: C1.2.2 Trends
100/180 MM PAPERLESS GRAPHIC RECORDER: USER GUIDE C1.2.2 TRENDS (Cont.) VERTICAL TREND This viewing mode is identical in operation to the Horizontal Trend mode described above, except that the 'chart' is vertical, with the most recent sample at the top, and the oldest at the bottom. The 'Vertical scale' (i.e the amount of trend history displayed within the height of the chart) is edited as described for 'Horizontal scale' in the Horizontal Trend description above. -
Page 396: C1.2.4 History
100/180 MM PAPERLESS GRAPHIC RECORDER: USER GUIDE C1.2.4 History This produces a list of all the .uhh files held in the instrument archive. The files can be saved to a user-specified loca- tion, for use in Review or Quickchart applications. Figure C1.2.4 shows part of a typical page. Home Instrument Trends... -
Page 397: Index
100/180 MM PAPERLESS GRAPHIC RECORDER: USER GUIDE INDEX Symbols Alarm (Cont) .uhq file ................211 Message enable/disable ..........69 ????? in message ............94, 95 Messages ............... 81 {n} source ................94 On Group (Event source) ..........90 10 to the power maths function ........108 Sounds ................. - Page 398 100/180 MM PAPERLESS GRAPHIC RECORDER: USER GUIDE Background colour ..........208, 245 Cable Bargraph Signal, Max/min sizes ............. 5 Channel ................ 254 Supply voltage (min. size) ..........9 Displays ..............44, 46 Can Authorize ..............187 Group Can Sign ................187 Horizontal ..............
- Page 399 100/180 MM PAPERLESS GRAPHIC RECORDER: USER GUIDE C (Cont.) Configuration (Cont.) Close ................239 Linearisation type ............72 Cold junction compensation ..........76 Locked indicator ............18 Colour Management ..............189 Alarms ................247 Master comms ............. 151 Background ..............208 Maths channels ............
- Page 400 100/180 MM PAPERLESS GRAPHIC RECORDER: USER GUIDE C (Cont.) D (Cont.) Cut key ................221 Diagnostics Cutoff (High/Low) ............. 135 Comms ................. 204 Cycle channels on/off ............35 Display ................. 349 Ethernet ............... 204 Dialogue action ..............254 Digital ..............157, 159 Damping ................
- Page 401 100/180 MM PAPERLESS GRAPHIC RECORDER: USER GUIDE E (Cont.) Export ................239 e to the power maths function ......... 109 Key ..............238, 239 E-mail Screen ................57 Access ................. 178 User linearisation ............57 Appearance ..............177 User screens ..............235 Configuration menu .............
- Page 402 100/180 MM PAPERLESS GRAPHIC RECORDER: USER GUIDE H (Cont.) HTM2010 Quarterly Test kit ..........335 Gas constant ............112, 114 Hysteresis ................79 Global Alarm Event Source ..........90 Global channel alarm ............379 Global Unack'd Alarm Event Source ......... 90 Goto Identifier ................
- Page 403 100/180 MM PAPERLESS GRAPHIC RECORDER: USER GUIDE L (Cont.) Logout key ............... 183 Jobs ................. 212 Long messages ............... 268 Alarm ................219 Loop number ............159, 172 Archive ................. 219 Batch ................215 Priority interval ............. 151 Clock ................214 Select ................
- Page 404 100/180 MM PAPERLESS GRAPHIC RECORDER: USER GUIDE Menu structure (Cont.) Network (Cont.) Security key menu ............374 Key menu ..............375 System key ..............376 Name ................197 Messages ............94 to 223, 323 Scanning tool ............... 196 Alarm ................81 Specification ..............
- Page 405 100/180 MM PAPERLESS GRAPHIC RECORDER: USER GUIDE Output channel (Cont.) P (Cont.) Master Comms ............169 Pressure unit conversion ..........119 Copy ................205 Preventive maintenance ..........354 Jobs ................218 Primary Oval .................. 259 DNS Server ..............197 Ovr ..................33 Login Name ..............
- Page 406 100/180 MM PAPERLESS GRAPHIC RECORDER: USER GUIDE R (Cont.) Saturated Steam Heat Consumed ............121 Recording failed - internal overflow ......69, 192 Heat Flow ..............120 Rectangle ................. 256 Mass flow ..............118 Red line across the chart ........... 36 Save ................56, 239 Reference value ..............
- Page 407 100/180 MM PAPERLESS GRAPHIC RECORDER: USER GUIDE S (Cont.) S (Cont.) Show Timer Batch Entry list ............. 100 Job ................215 Disk settings ..............86 Permission ............... 186 Operator Notes list ............64 Status Title Bar ................ 246 Bar ................. 15 Shunt value entry ...............
- Page 408 100/180 MM PAPERLESS GRAPHIC RECORDER: USER GUIDE T(Cont.) Timeout ................82 Unable to connect to host ..........233 Comms ................. 148 Unable to resolve hostname ..........233 Comms channel ............. 63 Unack'd Modbus slave ............... 152 Alarm on group .............. 91 Timer Point alarm ..............
- Page 409 100/180 MM PAPERLESS GRAPHIC RECORDER: USER GUIDE Value X points ................246 Changes ............... 251 X position ................. 246 Entry ................33 Xon/Xoff ................329 Font ................251 XOR ................... 92 Version numbers .............. 210 Vertical Alignment ..............251 Y points ................246 Bargraph ..............
- Page 410 E-mail sales@eurotherm.nl E-mail info@regler.eurotherm.co.uk E U ROT H E R M EUROTHERM LIMITED Faraday Close, Durrington, Worthing, West Sussex, BN13 3PL Telephone: 01903 695888 Facsimile: 01903 695666 e-mail: info@eurotherm.co.uk Website: http://www.eurotherm.co.uk Specification subject to change without notice. ©Eurotherm Limited. HA028910/3 (CN22332)
Need help?
Do you have a question about the 6100A and is the answer not in the manual?
Questions and answers