
Related Manuals for RepRap X500


Summary of Contents for RepRap X500
- Page 1 5 0 0 X500 3D Printer Manual Congratulations on your purchase of your personal X500 3D printer German RepRap...
-
Page 2: Table Of Contents
8. Tipps & Tricks 8.1 How to determine the X500s MAC address............... 38 8.2 How to update Repetier-Server ................... 38 8.3 PVA solution for enhanced adhesion ................. 39 8.5 PET-foil for printing bed coating ..................39 X500 02/45 3D printer manual... - Page 3 Humidity, solar radiation, heat, open flames ................41 Ventilation ............................41 Long absence, tempest, power plug reachability ..............41 Installation site ............................ 42 Disposal ..............................42 12. Legal disclaimers Software modifications/ use of applications ................42 rev.nr. 0.1 X500 03/45 3D printer manual...
-
Page 4: General Information
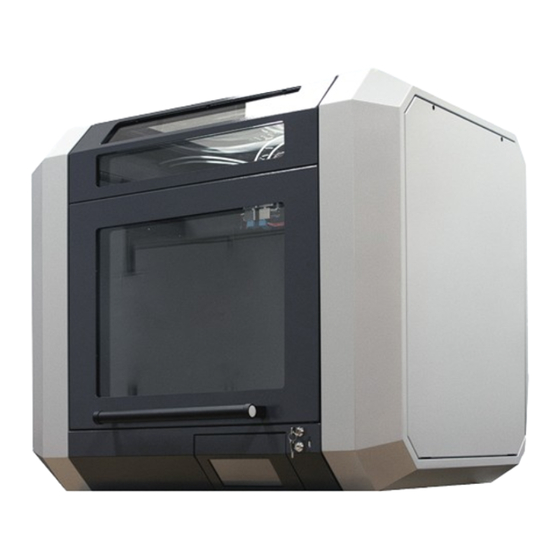
RepRap X500 3D Printer The X500 is the answer to the current demand on the market and offers in addition to the large construction volume of 500 x 400 x 475 (XxYxZ) millimeters further innovations which are the focus of the requirements of industrial use. With its steel frame and a total weight of approx. -
Page 5: System Requirements
• Mac OS X 10.6 or newer • Ubuntu/Debian Linux • OpenGL 2.0 Please note that you must use one of the following browsers to establish a connection with your X500 3D printer. • Chrome • Firefox Microsoft´s Internet Explorer is not supported 1.3 Additional options... -
Page 6: Operating Mode Of The X 500
X500 tuned off x500 operating mode x500 maintenance mode You only need the operating key to start your X500 3D printer (lower slot). The provided key is coded for your personal X500, GermanRepRap can not provide any spare keys. You can duplicate your key at your local key service. -
Page 7: Operating Mode
RepRap 2.1 Operating mode When the X500 is connected to the power supply you can start your printer by using the main switch at the back and the key at the fron of the printer. After a short initialization phase the startup screen appears on the display and the printer is ready to use. -
Page 8: Setup Routine
In the first step, you chose the language of the installation assistant Setup routine step one Step 2: Please contact the support if an error message occurs during the second step or if not all bullet points are checked with the result “OK”. https://www.germanreprap.com/support/ X500 08/45 3D printer manual... - Page 9 In the fourth step, you set the time and the date. You can get them set automatically over the internet. If you do not have an internet connection, you can also set them both manually. For some devices, there is a real-time module available. For an inquiry please contact the support via: https://www.germanreprap.com/support/ X500 09/45 3D printer manual...
- Page 10 Here you can connect your printer to a WLAN. Please press the button “Scan Wifi” to have all available wireless networks displayed. Here you can also choose between a static ip address or the use of DHCP. Setup routine step five Tip: Create a screenshot of these settings for later reference. X500 10/45 3D printer manual...
- Page 11 Step 7: Here you can activate the checkboxes at “Grafische Oberfläche” and “Filamentüberwachung”, depending on your configuration, for single - or double extruder. Setup routine step seven X500 11/45 3D printer manual...
- Page 12 Start the device using the key and wait until it is completely booted. Then shut it down and repeat the procedure. Setup routine step nine X500 12/45 3D printer manual...
-
Page 13: How To Activate The Printer And Establish A Connection
3.4 How to activate the printer and establish a connection After customizing the network settings and completing the setup routine you are now ready to establish the connection to the X500 3D printer. To do this enter the printer´s ip address in your browser (e.g. 192.168.1.2) You will be presented the start screen (dashboard) of the Repetier-Server. - Page 14 German RepRap Under the tab “Verbindung” chose /dev/serial/by-id/usb-FTID form the “Geräte/Port” dropdown menu. Also, ensure that the baud rate is set to 15200 and the “Communica- tion-timeout” is enabled. General printer settings X500 X500 14/45 3D printer manual...
-
Page 15: Workflow And Operation
One integrated software suite contains everything you need to print high quality parts • Customizable settings and advanced processes put the controls into your hands • Support for dual-extruders, multi-part printing and even multiple processes within one part X500 15/45 3D printer manual... -
Page 16: Quick Start Guide
file and launch the .run installation package. It is recommended to launch this program as super-user by openingTerminal cd‘ing to the directory where you unzipped the file, and then typing: sudo ./Simplify3D*installer.run and entering the administrator password. X500 16/45 3D printer manual... - Page 17 To import the downloaded profile, follow these steps: • Click on menu “File” “Import FFF-Profile” and choose the downloaded file. • Open the FFF settings window and check if the profile is visible. Select profile Import profile X500 17/45 3D printer manual...
-
Page 18: The Interface Layout
5. Toolbar • This toolbar contains quick access buttons for frequently used tools. You can move the toolbar anywhere you wish by clicking and dragging the top dotted line. Interface Layout X500 18/45 3D printer manual... - Page 19 Move Model – Ctrl-left-click and drag (or Command-left-click on Mac) • Scale Model – Ctrl-right-click and drag up or down (or Command-right-click on Mac) • Rotate Model – Alt-left-click and drag right or left (or Option-Left Click on Mac) X500 19/45 3D printer manual...
- Page 20 To make adjustments to your Process, double-click on the Process or click Edit Process Settings. This will open the FFF (Fused Filament Fabrication) Settings window. Processes X500 20/45 3D printer manual...
- Page 21 The animated Preview Mode in the Simplify3D™ Software allows you to inspect all aspects of your print ope- ration prior to execution. The software takes your generated G-Code and virtually displays line by line how your model will be constructed. X500 21/45 3D printer manual...
- Page 22 This saves your print file to a user-defined location, such as a folder on your computer or an SD card. Congratulations! You have now completed your first 3D print using Simplify3D™ Software. You’ll soon be ready to explore other options and create many exciting models. X500 22/45 3D printer manual...
-
Page 23: Repetier Server
5.1 Web interface The web interface provides full control of the X500, no matter if you work via a computer, a tablet or even a smartphone. To access the web interface, enter the following adress into your web browser: •... -
Page 24: Dashboard
In the bottom area under the heading of “Netzwerk” you can see the printer´s IP address and MAC address. There are also an URL and a QR code shown which you can use to connect another device to the 3D printer like a Smartphone or a tablet. X500 24/45 3D printer manual... -
Page 25: Device Panel
You can use this menu item to manually operate your 3D printer. You can manually traverse the axis or regulate the heating bed. The controls are separated into 3 categories: • General working area • Extruder and temperature curves • Macros, to define your own commands Categories, Repetier-Server X500 25/45 3D printer manual... - Page 26 Under the tab “bewegen” you can manually traverse the printer`s axis. This is either done by clicking on the corresponding arrow or via the slide controls, which are arranged around the virtual print bed, by pulling them to the required position. X500 26/45 3D printer manual...
- Page 27 As well as all the functions previously motioned here you also get to see tempe- rature cures for all heating elements. This view is especially useful to exclude mal- functions of the heating elements. Extruder and temperature curves, Repetier-Server X500 27/45 3D printer manual...
-
Page 28: Eeprom
I the EEPROM arena you have direct access to the printer´s firmware, therefor care should be taken when changing values. You should generally only modify these settings after consulting the support. Incorrectly registered values can lead to a malfunctioning device or could even damage the 3D printer. X500 28/45 3D printer manual... -
Page 29: Log-Files
To record a 3D print you just must check the two boxes It is not possible to log already started print jobs. You must restart your 3D printer if you want to record a specific print job. Log-files, Repetier-Server X500 29/45 3D printer manual... -
Page 30: Firmwareupdate
Make sure that under “Durckerboard Art” the Arduino 2560 Borad is chosen • Under “Firmware Abbild hochladen” you can select the path of the HEX file • The upload and installation will then be executed Firmware Upload X500, Repetier-Server X500 30/45 3D printer manual... -
Page 31: Tool Heads And Cosumables
GRR fila- ments. As a result, very brittle as well as very flexible materials can be processed without further knowledge. This enables the X500 to process future material deve- lopments precisely. The cooling circuit allows a stable process even at maximum room temperature. - Page 32 German RepRap DD4 dual extruder, features X500 32/45 3D printer manual...
-
Page 33: Material Storage
RepRap 6.3 Material Storage On the left hand side you can find the material storage of the X500. It is designed for storing one big spool and three small ones. It also contains the filament surveillance system (fs). This prevents your printer from failing due to a lack of filament while printing. -
Page 34: Fs Activates While Printing
While printing very large objects this might cause an error because the hotends get deactiveted immedi- ately, please see the next chapter for a workaround. Attention: Don‘t open the main lid while changing the filament, other- wise the printer will shut down and the current print is lost. X500 34/45 3D printer manual... -
Page 35: Fs Workaround
Use the front display to extruder a few centimeters of filament. Finally press „Proceed Print“ on the display and the X500 continues the printjob. 6.5 FS Workaround The following workaround will be implemented in furhter releases and needs to be manual adjusted for the first series of machines. -
Page 36: Cooling System
24 months, exchange hoses cooling system, x500 The cooling system is located on the right side of the x500, it starts automatically when the printer is turned on. If you are printing without using the heated chamber, please increase the temperature by 20°C (68°F). -
Page 37: Heated Chamber
From here a value is measured called the „Z-MAX length“. This value determins how high the printbed can go. Your X500 is already calibrated, but in case any changes are made to the hot-end, e.g. changing the nozzle, there might be a need for small adjustments. -
Page 38: Tipps & Tricks
To do this choose your 3D printer from the tab “settings”. Then click on “Network”. The IP address as well as the MAC address are displayed here. You are also shown an URL that enables access to the X500´s web interface. The also displayed QR code can be used to access the web interface via mobile device. -
Page 39: Pva Solution For Enhanced Adhesion
Remove the excess fluid with a squeegee. Work from the center outwards. Use a rag to absorb the excess water. Please make sure that there is no humidity at or under the heated bed before restarting the machine. X500 39/45 3D printer manual... -
Page 40: Return Shipment/ Original Package
If there should be a new software available for your device that has consequences for this manual (like changes in the menus or functions), we will provide an updated version of the manual under http://german-reprap.com if we feel that it is necessary. Toxic threat Depending on the processed filaments an overheating of the material can pose a toxic threat. -
Page 41: Power Supply
In case of long term absence or tempest you should unplug the device as a precaution. We recom- mend this for all devices that are plugged to the printer, even via USB. X500 41/45 3D printer manual... -
Page 42: Installation Site
Only use the software packages provided by German RepRap GmbH via download at their website at http:// www.germanreprap.com. German RepRap GmbH cannot be held liable for the loss of data on any external or internal storages. The device has been preinstalled with software and works as can be reasonably expected. It cannot be guaran- teed that the software is error free. - Page 43 You must take measures for fire protection that are not included into the device. (Provi- sion of fire extinguishers and fire blankets, ban on smoking) Risk assessment in accordance with EN ISO 19353. X500 43/45 3D printer manual...
- Page 44 The wear and tear on the gas chamber can lead to uncontrolled movement. Daily visual and functionality tests are prerequisites for a safe operation. Transport 7.1 The transport is carried out by German RepRap GmbH. The device can by moved by the assembled wheels. Packed delivery: Machine weight: 400 Kg Local requirements for the delivery: forklift, lift truck when a transport via the assembled wheels is not possible.
- Page 45 The incurred process waste must be separated into recyclable material and hazardous substances in accor- dance with local laws and practices. The device itself must also be separated into recyclable material and hazardous substances in accordance with local laws and practices. X500 45/45 3D printer manual...
Need help?
Do you have a question about the X500 and is the answer not in the manual?
Questions and answers