Advertisement
Quick Links
Advertisement

Subscribe to Our Youtube Channel
Related Manuals for Raptor OW1.7-VS-CL-LP-640

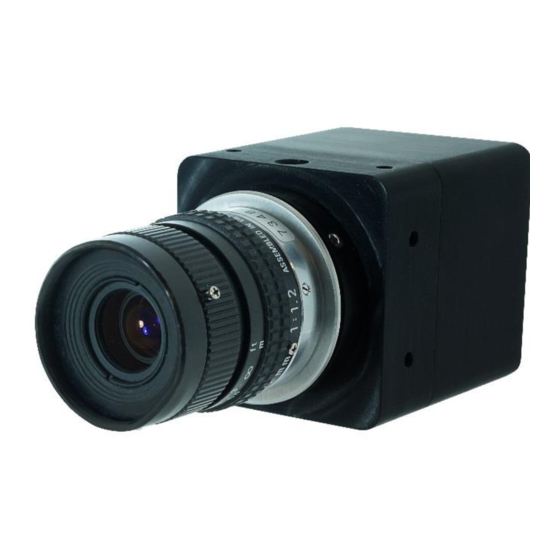
Summary of Contents for Raptor OW1.7-VS-CL-LP-640
- Page 1 OWL Mini Model: OW1.7-VS-CL-LP-640 USER MANUAL...
-
Page 2: Table Of Contents
CONTENT CONTENT ..............................2 INTRODUCTION ........................... 3 SPECIFICATION ..........................4 GETTING STARTED ........................6 EPIX XCAP ............................ 9 MICRO-MANAGER ........................19 OW1.7-VS-CL-LP-640 / USER MANUAL REV1 November 2017... -
Page 3: Introduction
INTRODUCTION Scope This manual covers the Owl Mini digital camera and all applicable components. Raptor recommends that this manual be used to optimize camera operation. Camera Care Raptor cameras require no regular maintenance except occasional external cleaning of the sensor window (the glass window between the camera sensor and the microscope or lens). -
Page 4: Specification
Gamma, Pk/Av, TEC, ROI Camera Power Consumption < 2.5W Operating Case Temperature -20°C to +55°C Storage Temperature -30°C to +60°C Dimensions & Weight 42mm x 42mm x 67mm / 170g Latest version available on www.raptorphotonics.com OW1.7-VS-CL-LP-640 / USER MANUAL REV1 November 2017... - Page 5 Mechanical Outline 3D drawings (STEP) are available upon request. OW1.7-VS-CL-LP-640 / USER MANUAL REV1 November 2017...
-
Page 6: Getting Started
The camera has a ¼-20 BSW (Whitworth), threaded hole to mount to a tripod or an optical table. The image below shows an optical table mount with the ¼-20 BSW thread. ¼-20 BSW OW1.7-VS-CL-LP-640 / USER MANUAL REV1 November 2017... - Page 7 PARTY SOFTWARE Raptor supports a range of 3 party software packages as per the matrix below. Micro- Genika Astro XCAP XCLIB Labview Manager StreamPix Astro Audela Control Kite ...
- Page 8 Connect the 12V power supply to the camera. The Owl 640 camera is compatible with all types of Camera Link frame grabber. However, our cameras are extensively tested using Epix Inc. equipment’s XCAP, for this reason we recommend XCAP software. OW1.7-VS-CL-LP-640 / USER MANUAL REV1 November 2017...
-
Page 9: Epix Xcap
Figure 1: Open / Close 3. Select Close, and then Click on the Camera & Format button. 4. Using the dropdown menu scroll down and select Raptor Photonics OWL-CL-640 from the list (Figure 2). Selecting OK when done. Figure 2: Camera Selection OW1.7-VS-CL-LP-640 / USER MANUAL REV1... - Page 10 6. The camera controls are pre-configured in EPIX. 7. The control window on the right should reflect your chosen camera. For example, for the Owl 640, it should read - EPIX PIXCI E8DB: Raptor Photonics OWL-CL-640. If not, you need to select a different camera.
- Page 11 12. You should now see an image. On the bottom of the screen, you should see something similar to the following: Frame: 0 Size: 640 x 512 Resize 0.7x0.7 Video: 26.0fps Capture: 26.0 fps Display: 25.1fps. Figure 6: Live Image Capture Window OW1.7-VS-CL-LP-640 / USER MANUAL REV1 November 2017...
- Page 12 It is recommended to start with auto gain on to get an image, then turning it off to fine-tune your image. Figure 7: Gain Tab OW1.7-VS-CL-LP-640 / USER MANUAL REV1 November 2017...
- Page 13 In this mode, the FPGA of the camera will automatically adapt the exposure time and digital gain within the given frame rate to optimise the image quality. Figure 9: Auto Tab OW1.7-VS-CL-LP-640 / USER MANUAL REV1 November 2017...
- Page 14 In Figure 11, the ROI is contained within the small white box, and as such when centred on the black case we can see the minor scratches but the sun light on the carpet has saturated the image. OW1.7-VS-CL-LP-640 / USER MANUAL REV1 November 2017...
- Page 15 On this tab, you can select the parameters for the on-board Non Uniformity Correction (NUC); select the 3point NUC Offset, Gain & Dark shown in Figure 13. Figure 14 and Figure 15 show the effect of the NUC off and on. Figure 13: Controlling the NUC Status OW1.7-VS-CL-LP-640 / USER MANUAL REV1 November 2017...
- Page 16 Thermoelectric Cooling (TEC). Use this tab to set and read back the sensor temperature. The optimum temperature should be set on start-up, for the OWL 640 should be 15°C. Figure 16: TEC Control OW1.7-VS-CL-LP-640 / USER MANUAL REV1 November 2017...
- Page 17 Output video can be digitally processed to provide image sharpening by checking the Active image enhancement box as shown in Figure 17. The Info tab can be used to view the cameras manufacturer data, for example Build date and serial number. Figure 18: Information Tab OW1.7-VS-CL-LP-640 / USER MANUAL REV1 November 2017...
- Page 18 2. Select “Stretch Contrast, Histogram Percentile Endpoints” and “Preview” Figure 20: Stretch Contrast. 3. Adjust the “Low Percentile Endpoint” and “High Percentile Endpoint” to optimize the image display, defaults should be acceptable for most applications. Figure 19: Contrast Modification Figure 20: Stretch Contrast OW1.7-VS-CL-LP-640 / USER MANUAL REV1 November 2017...
-
Page 19: Micro-Manager
Micro-Manager has been developed at UCSF since the beginning of the project. Starting on October 1, 2015, Micro-Manager is developed and maintained by Open Imaging, a company founded by the Micro- Manager development team. OW1.7-VS-CL-LP-640 / USER MANUAL REV1 November 2017... - Page 20 ‘Download Nightly Builds’ section. This will open a direct link to the Micro Manger FTP site where you can download most recently modified file. Figure 21: Micro-Manager Nightly Builds OW1.7-VS-CL-LP-640 / USER MANUAL REV1 November 2017...
- Page 21 (none) is selected then click Ok. Figure 22: Hardware Configuration 1. Start the Hardware Configuration Wizard by going to tools then Hardware Configuration Wizard. Figure 23: Hardware Configuration Wizard OW1.7-VS-CL-LP-640 / USER MANUAL REV1 November 2017...
- Page 22 3. Continue to click Next until you are faced with the screen shown in Figure 24. 4. Rename and save new configuration (e.g. “OWL 640” as shown in Figure 25). Figure 25: Save Configuration OW1.7-VS-CL-LP-640 / USER MANUAL REV1 November 2017...
- Page 23 The connected camera should now be recognized. Next time you open Micro-Manager you can simply select the saved Raptor Owl 640.cfg from the drop down menu (figure 26) then click Ok. Figure 26: Selecting Saved Camera Configurations OW1.7-VS-CL-LP-640 / USER MANUAL REV1...
- Page 24 Operating your camera using Micro-Manager Figure 27: Opening Screen 1. Click on snap (Figure 27) for Micro-Manager to open the viewing window as shown in Figure 28 Figure 28: Viewing Window OW1.7-VS-CL-LP-640 / USER MANUAL REV1 November 2017...
- Page 25 All of the camera parameters are controlled within the Device/Property Browser; this can be accessed by selecting Tools from the menu bar then Device Property Browser… Figure 29: Camera Control Options From here, you can access all the camera settings. OW1.7-VS-CL-LP-640 / USER MANUAL REV1 November 2017...
- Page 26 CORPORATE HEADQUARTERS Raptor Photonics LTD Willowbank Business Park Larne, Co Antrim BT40 2SF Northern Ireland PH: +44 2828 270141 www.raptorphotonics.com OW1.7-VS-CL-LP-640 / USER MANUAL REV1 November 2017...
Need help?
Do you have a question about the OW1.7-VS-CL-LP-640 and is the answer not in the manual?
Questions and answers