Table of Contents
Advertisement
Advertisement
Table of Contents

Summary of Contents for Safeplace Magna 800C
- Page 1 TQM Technical Manual & Handheld Unit Manual For models: M800 - C,C4,SL,W,MS,E T800 - C,C4,SL,W,MS,E M500 - C,C4,SL,W,MS,E T500 - C,C4,SL,W,MS,E T300 - C,C4,SL,W,MS,E Q300 - C,C4,SL,W,MS,E M300 - C,C4,SL,W,MS,E IMPACT - C,C4,SL,W,MS,E 590.1060.001 Version 05 – 2.09...
- Page 3 Registration Form Please fill in this form and fax it to the following number: +972 8 85 73 962 or email to sales@safeplace.co.il Property name:__________________________________ Chain/Group:___________________________________ Address:__________________________________________________________ _________________________________________________________________ _________________________________________________________________ Contact persons:____________________________________________________ _________________________________________________________________ Telephone number:______________________________ Fax number:___________________________________ Email:________________________________________ Safe model________________ Quantity __________________...
-
Page 5: Table Of Contents
Table of Contents General Description and Guidelines Page 7 Safety Instructions Page 8 Safe Models Page 10 Anchoring the Safe Page 11 Emergency Opening Procedure Page 12 Emergency Opening with EOT 300 Page 13 Emergency Opening with BiMax Handheld Unit Page 14 Emergency with Master Key/Card Page 15... -
Page 7: General Description And Guidelines
If you have any questions or need assistance, please call your local distributor. If for any reason you cannot reach your local distributor, you can always contact us at fax number: ++972-8- 8573962, or e-mail: service@safeplace.co.il... -
Page 8: Safety Instructions
Safety Instructions For safes with power outlet (recharge socket) The safe model you have purchased is equipped with a 220V or 110V power (USA Rating : 110V 5A 60Hz) outlet for laptop recharging. Please follow the safety instructions carefully before hooking up the power outlet. - Page 9 Safety Instructions For safes with AC power hook-up (Adaptor) Adaptor specifications AC-DC: Output – 9V DC, 500mA max. built in thermal fuse. 1. Only a certified electrician should handle this equipment. 2. Pay attention to wire marks (+ / -) and assemble them properly.
-
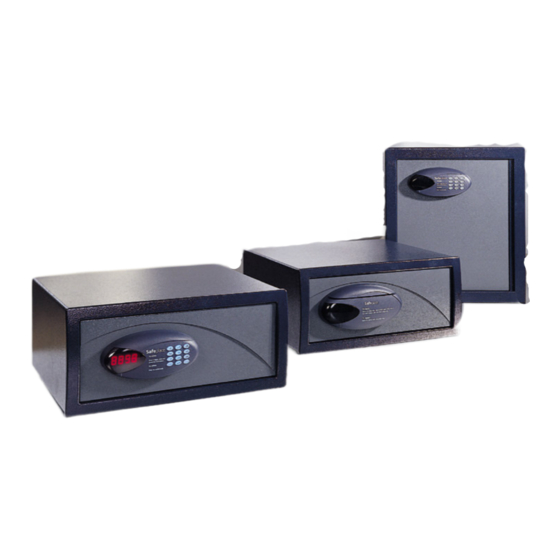
Page 10: Safe Models
Safe Models Biometric Impact Digital Safes Combination Magna 800 Titan 500 Card Safe Titan 800 Magna 500 Smart Key Quantor 300 Tiara-M Top Open Magna 300 C - Small C4 - Laptop SL – Super Laptop W – Wall MS – Medium E –... -
Page 11: Anchoring The Safe
Anchoring The Safe Anchoring Bolts should be - 10*1”... -
Page 12: Emergency Opening Procedure
Emergency Opening Procedure In case the safe is locked and the guest is unable to open it, observe the following procedure: Perform the override procedure with the BiMax Handheld Unit or Emergency Opening Tool T300 (see details on following pages). If the safe does not open, go to step 2. -
Page 13: Emergency Opening With Eot 300
Override Procedure With EOT 300 (Emergency Override Tool) Plug-in the EOT – The green led will light up. Place the Master (red) iButton on the rounded reader within 6 seconds. If you have an error (red light) press Clear button and try again. -
Page 14: Emergency Opening With Bimax Handheld Unit
Override Procedure With BiMax Handheld Unit Please Also See Page 7 of Override and Audit Handheld Unit Manual in this Booklet Turn the Handheld on by pressing the ON button, enter your password and put your finger on the reader. Select Override Safe and press ENTER. -
Page 15: Emergency With Master Key/Card
Override Procedure With Master Key/Card Titan 300/800/500 models: Slide the Master card from left to right with magnetic stripe up. The safe will open! Quantor 300 model: Place the Master (red) iButton on the iButton reader. A green light will blink and safe will open! -
Page 16: Mechanical Emergency Opening For C, C4, Sl, W
Mechanical Emergency Opening For C, C4, SL & W Models THE DRILLING PROCEDURE IS THE LAST OPTION FOR OPENING THE SAFE. PLEASE MAKE SURE YOU TRY ALL OTHER OPTIONS BEFORE DRILLING! Place the drilling template on the left bottom corner of the safe door. 1a. - Page 17 Mechanical Emergency Opening For E4 & MS4 Models THE DRILLING PROCEDURE IS THE LAST OPTION FOR OPENING THE SAFE. PLEASE MAKE SURE YOU TRY ALL OTHER OPTIONS BEFORE DRILLING! Place the drilling template on the left bottom corner of the safe door. Drill a 4 mm hole through the template.
-
Page 18: Trouble-Shooting 1
Trouble-Shooting 1 For Magna 800, Titan 800 and Titan 500 Models: Safe series 500 and 800 have a built in diagnostic system which shows error numbers on the display if there is any problem with the safe. The following list is available in the Tools Menu of the HHU. Display Problem Description Operation Instructions... - Page 19 Trouble-Shooting 2 Display Problem Description Operation Instructions Override Problems Er30 Unit disabled Use different type of override Er31 Master disabled Use override unit or code Er32 Wrong master Use iButton or code Er35 Wrong master Use card or code Er36 Master disabled Use different type of override Er37...
- Page 20 Trouble-Shooting 3 Anti-Tamper Problems Er90 Motor tampered Override safe. Check lock assembly. Er91 Motor tampered Override safe. Check lock assembly. Er92 Motor tampered Override safe. Check lock assembly. Er93 Motor tampered Override safe. Check lock assembly. Er94 Motor tampered Override safe. Check lock assembly. Er95 Motor tampered Override safe.
-
Page 21: Trouble-Shooting For Magna 500
Trouble-Shooting for Magna 500 • Safe clock is not initialized. Use the Handheld Unit to initialize it. (INIT. SAFE DATA) • The locking bolt won’t eject all the way to lock. Make sure the door is properly closed and nothing stops the bolt from moving smoothly. Check the lock assembly. -
Page 22: Battery Replacement
Battery Replacement C, C4, SL W, Special Sizes E, MS Unscrew the cover bolts and remove the door cover. Remove the old batteries and install the new batteries. Make sure the batteries point in the right direction. For safes with Audit function – you must set safe clock by using the HHU after replacing batteries. -
Page 23: Parts Replacement
Parts Replacement After trouble-shooting the safe, the next step is replacing the defective part. The safe mechanism is made up of four components: Electronic Board Battery Housing Lock Assembly Panel Assembly The Elimination Method If you are still not sure where the safe problem lies after the trouble-shooting process, you should replace the four components, one after the other, until you discover the defective component. -
Page 24: Electronic Board
Electronic Board Replacement C, C4, SL Unscrew the 3 electronic board screws. Carefully disconnect all the connectors from the W, Special Sizes panel assembly, locking assembly, and battery housing assembly. Replace the new board carefully, and connect it in the same order. After checking that the door is functioning properly, E, MS... -
Page 25: Battery Housing
Battery Housing Replacement C, C4, SL Disconnect the battery housing connector. Unscrew the two battery housing screws. W, Special Sizes Replace the new battery housing. Replace the plastic base. E, MS The Universal Kit used in W & special size safes has built- in battery housing. -
Page 26: Lock Assembly
Lock Assembly Replacement C, C4, SL E, MS For MS & E - remove the electronic board & the battery housing. Unscrew the 4 (E4) or 6 (MS4) nuts. For C, C4, & SL - unplug the lock assembly connector from the electronic board. - Page 27 Lock Assembly Replacement Universal Kit - W, Special Sizes Remove the electronic board. Unscrew the 4 nuts which attach the Universal Kit. Unscrew the 3 bolts which attach the motor base to the Universal Kit (from the back). Make sure the spring that pulls back the motor base is in place...
-
Page 28: Panel Assembly
Panel Assembly Replacement C, C4, SL C, C4, SL C, C4, SL C, C4, SL Remove the electronic board. Unscrew the 4 keypad panel screws. Replace the new panel carefully. Make sure the flat cable runs freely from the panel into the door and is connected to the electronic board... - Page 29 Panel Assembly Replacement Universal Kit - W, Special Sizes Remove the electronic board. Unscrew the 4 nuts which connect the Universal Kit to the door. Unscrew the 4 keypad panel screws. Replace the new panel carefully. Make sure the flat cable runs freely from the panel into the door and is connected to the electronic board...
-
Page 30: Door Replacement
Door Replacement Replacing the Door: Unscrew the two screws. Extract the two hinges from the hinge housing. Keep the washers from the bottom connection in a safe place. Replace the defective door with a new one. Insert the top hinge through the top hinge housing and through the hole in the top frame. -
Page 31: Safe Place Components
Safe Place Components Models C, C4, SL, W Please Specify Safe Color When Ordering Parts Part Name Catalog Number Right Hand Left Hand Painted Box C 314.0030.250 314.0040.250 Painted Box C4 314.0030.400 314.0040.400 Painted Box SL 315.0030.380 315.0032.380 Painted Box W 316.1010.002 316.1020.002 M800... - Page 32 Safe Place Components Models MS, E Please Specify Safe Color When Ordering Parts Part Name Catalog Number Right Hand Painted Box E 311.0050.010 Painted Box MS 312.0050.010 M800 M500 M300 T800 T300 T500 Impact Q300 Assembled Door E 211.2800.001 211.1101.001 211.2300.001 211.3800.001 211.3300.001...
-
Page 33: Assembled Door C,C4,Sl
Safe Place Components Assembled Door C,C4,SL Please Specify Safe Color When Ordering Parts Part Name Catalog Number Right Hand Left Hand Painted Door C, C4 333.1300.020 333.1300.020 Painted Door SL 333.1300.030 333.1300.030 Painted Door W 335.1010.002 335.1020.002 Panel M800 370.2800.001 Battery Housing 556.0400.010 Panel M500... -
Page 34: Assembled Door
Safe Place Components Assembled Door MS, E Please Specify Safe Color When Ordering Parts Part Name Catalog Number Painted Door E 331.0010.033 Painted Door MS 331.0010.023 Lock Assembly MS 362.1000.003 Lock Assembly E 362.1000.005 Battery Housing 556.0400.010 Door Hinge 522.2100.001 Nut #M 6 535.3120.007 Panels...
Need help?
Do you have a question about the Magna 800C and is the answer not in the manual?
Questions and answers
How to change the four digit code and the model 800 SL serial number 050-3084