AJA Ki Pro Ultra Plus Installation And Operation Manual
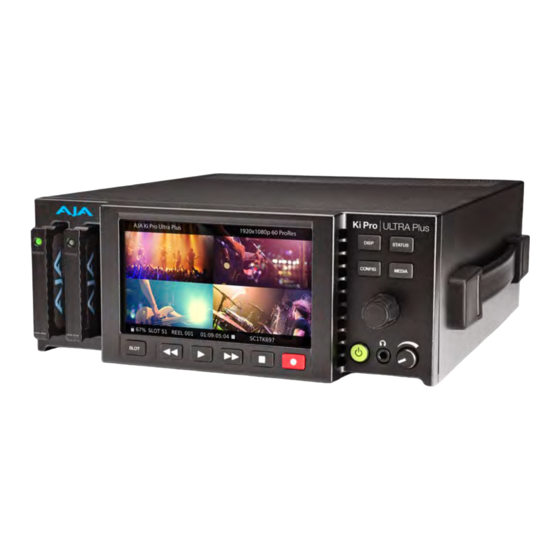
File based recorder/player
Hide thumbs
Also See for Ki Pro Ultra Plus:
- Control manual (25 pages) ,
- Machine control manual (24 pages)

Related Manuals for AJA Ki Pro Ultra Plus


Summary of Contents for AJA Ki Pro Ultra Plus
- Page 1 Ki Pro Ultra Plus File Based Recorder/Player Installation and Operation Guide Version 1.0r3 Published July 17, 2017...
-
Page 2: Notices
AJA® and Because it matters.® are registered trademarks of AJA Video Systems, Inc. for use with most AJA products. AJA™ is a trademark of AJA Video Systems, Inc. for use with recorder, router, software and camera products. Because it matters.™ is a trademark of AJA Video Systems, Inc. -
Page 3: Table Of Contents
Ki Pro Ultra Plus Options ........ - Page 4 Ki Pro Ultra Plus Handle ........75...
-
Page 5: Chapter 1 - Introduction
Record 1, 2, 3 or 4-Channels of beautiful HD up to 1080p 50/60 in Apple ProRes simultaneously with Ki Pro Ultra Plus. Simplify your multi-camera productions by running up to four cameras per Ki Pro Ultra Plus and save power, space, time and effort on set, in the studio and when setting up OB trucks. -
Page 6: Ki Protect
Ki Protect Ki Pro Ultra Plus includes Ki Protect, a feature that helps to ensure data integrity if a media drive is accidentally removed or loses power during recording. The Ki Protect feature automatically pre-allocates recording space on the media drive for video, audio and timecode when the record button is pressed. -
Page 7: Software
PCs using 3rd-party software that can read HFS+ formatted drives (MediaFour’s MacDrive for example). Ki Pro Ultra Plus can also store files on media using the ExFAT file system, for native PC operation. Ki Pro Ultra Plus Options... -
Page 8: Aja Pak-Adapt-Esata
Pak-Adapt-eSATA is a Pak media sized eSATA adapter that lets you attach qualified RAID or single volume storage to Ki Pro Ultra Plus and use that media as a record drive. Simply connect a high quality eSATA cable to the Pak-Adapt-eSATA port, and once the green LED is lit your media is mounted. -
Page 9: Apple Prores 422 And Apple Prores 444 Advantages
Ki Pro Ultra Plus units can record and monitor eight HD signals in only two rack units of space. Apple ProRes 422 and Apple ProRes 444 Advantages Captured media using Apple ProRes 422 or Apple ProRes 444 is virtually indistinguishable from uncompressed HD/2K/4K sources. -
Page 10: In This Manual
Chapter 1 is the introduction you’re reading, provides an overview of hardware and software features, options, box contents, and system requirements. Chapter 2 gets you started with Ki Pro Ultra Plus, introducing the front panel controls and rear connector features. -
Page 11: Chapter 2 - Ki Pro Ultra Plus At A Glance
Controls system power ON/OFF and shows when power is ON (when illuminated) or OFF. NOTE: When power is first applied to Ki Pro Ultra Plus, the unit powers up immediately (without pressing the button. This facilitates a quick return to operation if there is a power interruption. - Page 12 A second push of STOP completely stops the playback and directs Ki Pro Ultra Plus’s outputs into an “E to E” mode (the currently selected inputs bypass to the outputs). To determine at a glance if the STOP button is in a “pause”...
- Page 13 The display button can be used to hide the Config or Status overlay if it is active. User Control Knob The User Control Knob on the right side of the Ki Pro Ultra Plus front panel is used to scroll through and select menu items. After scrolling to, and high-lighting a menu item of interest, push the knob to select.
-
Page 14: Rear Panel Connectors
The functions of Ki Pro Ultra Plus’s inputs and outputs depend on the operational mode. Ki Pro Ultra Plus’s active input (the one to be recorded) is selected by front panel or web browser control. Ki Pro Ultra Plus’s outputs are active all the time. -
Page 15: Connections
The 2 BNCs are a passive loop: one BNC is for the Input, and the remaining BNC can be connected to another piece of equipment in the reference chain or terminated. Ki Pro Ultra Plus File Based Recorder/Player v1.0r3 www.aja.com... - Page 16 HDCP is not supported on the input. The HDMI input supports standard HDMI cables only. NOTE: When using the Ki Pro Ultra Plus HDMI connection and attaching it to any HDMI audio or video accessory, you must use a ferrite-beaded HDMI cable, HH-28F-06, between the HDMI output port of the Ki Pro Ultra Plus and the HDMI accessory to maintain regulatory compliance.
-
Page 17: Power Connector
Ki Pro Ultra Plus offers a 9-pin serial port that may be used with compatible RS-422 devices. IMPORTANT: Not all RS-422 devices have been tested with Ki Pro Ultra Plus, so AJA cannot definitively say which devices may or may not communicate as expected with Ki Pro Ultra Plus when operated under RS-422 remote control. -
Page 18: Using Pak Ki Pro Ultra Plus Media With Final Cut Pro And Premier Pro
Reel NAME parameter is the name of the media that will appear when the media is mounted. Once the media is mounted, each clip recorded by Ki Pro Ultra Plus will be a file on its file system, which can be opened in non-linear editors such as Final Cut Pro, Adobe Premiere Pro, etc. - Page 19 CLCP track if present and insert/embed closed captioning data on the SDI 1 output (BNC or Fiber) VANC. When in EtoE or record mode, the Ki Pro Ultra Plus Status display indicates when closed captioning data is present on the input signal. In playback mode, the Status display indicates if CC data is being inserted.
-
Page 20: Chapter 3 - Ki Pro Ultra Plus Installation
Ki Pro Ultra Plus. A standard North American line cord with 3-prong plug is included. • Handle Installation Kit Please save all packaging for shipping the Ki Pro Ultra Plus should you need to do Applying Power The following Warnings are provided as good practices and should always be considered when Ki Pro Ultra Plus is used in a desktop application. -
Page 21: Using Ac Power
To begin using Ki Pro Ultra Plus, plug the 4-pin XLR on the supplied AC adapter into the XLR power socket on the rear of Ki Pro Ultra Plus. Then plug the AC adapter line cord into 110 VAC or 230 VAC (the supply is auto sensing). Two power supplies can be used for redundancy. -
Page 22: Remote Network Control
IP address. As long as your network has a DHCP server (usually part of your router), you need to do nothing other than plug the Ki Pro Ultra Plus into the Ki Pro Ultra Plus File Based Recorder/Player v1.0r3... -
Page 23: Networking Via Dhcp
You should now see Ki Pro Ultra Plus’s browser status screen. NOTE: If Ki Pro Ultra Plus fails to find a DHCP server via its network connection, it will fall back to using the factory default static IP of 192.168.0.2—or whatever IP address you’ve previously defined. - Page 24 Figure 6. Configuring Ki Pro Ultra Plus with a Static IP Address Use the User Control Knob to navigate to Con g item 50.1 Use the User Control Knob to navigate to Con g item 50.2 Use the User Control Knob to navigate to Con g item 50.3...
-
Page 25: Networking Ki Pro Ultra Plus Using The Factory Default Ip
Networking Ki Pro Ultra Plus Using the Factory Default IP If you don’t want to use DHCP to network Ki Pro Ultra Plus and also don’t want to set your own static IP address, you can simply use a Default setting to use a factory setting of 10.65.74.65. -
Page 26: Chapter 4 - Front Panel Operation
Chapter 4 – Front Panel Operation Overview There are two ways to control Ki Pro Ultra Plus—from the front panel or remotely from a web browser connected via the Ethernet RJ-45 connector. This chapter discusses controlling Ki Pro Ultra Plus from its front panel. See "Chapter 5 Browser... -
Page 27: Overlay Display Content
Display Mode Operations In Status, Config, and Media modes, you use the User Control Knob to scroll through menu items (rotating) and make selections (pressing the knob). Figure 8. Ki Pro Ultra Plus User Control Knob User Control Knob Overlay Display Content Initial Overlay The figure below shows the initial overlay display with video content behind. - Page 28 (yellow outline indicates the field is active). When entering a menu, the system remembers and returns to the last selected parameter. The following figure shows the displays for the Config and Media menus. Ki Pro Ultra Plus File Based Recorder/Player v1.0r3 www.aja.com...
-
Page 29: Transport Mode (Default)
Transport mode is the default mode for Ki Pro Ultra Plus operation. Transport functions are always functional except during some basic configuration operations as noted below. When you power up Ki Pro Ultra Plus, the first level overlay display will provide information for any clip that previously was recorded and it can be played. -
Page 30: Recording A Clip
Recording a Clip There is more than one way to record a clip since you can control Ki Pro Ultra Plus in various ways.Here is an example of just how simple a recording can be: 1. -
Page 31: Playing Back A Clip
Recording Notes Ki Pro Ultra Plus alerts you when the media is nearly full with a “Media Low” prompt at 15% of the remaining capacity. At 10% of the total capacity of the media, the “Media Full” prompt will appear. Any recordings that have been started will stop once 10% is reached and no further recordings can be performed using this media until it is formatted again or a MEDIA>Delete Clips>DELETE ALL... -
Page 32: Deleting Clips
Control Knob to confirm deletion. Pressing any other button, will abort the deletion. NOTE: When deleting large clips, Ki Pro Ultra Plus will display a progress status window on the front panel and the WEB UI. Large clips can take up to 30 seconds to delete. - Page 33 Examples of ALARM displays are shown below. Figure 14. Warning Examples Once there is a Ki Pro Ultra Plus alarm active, the STATUS button light will blink for as long as the alarm is present. This alerts you so you’ll know the reasons for the alarm condition are still active—you can then check the ALARMS display...
- Page 34 May appear if a format or frame rate that is not supported is supplied to the Ki Pro Ultra Plus or a link of a multi-link signal (dual link or quad link) is missing; no recordings will be produced if this alarm appears.
-
Page 35: Media Menus
For normal video operation, select Record-Play. For data transfer using an Ethernet LAN, choose Data-LAN. The Data Media State allows valid media to be copied to or from the Ki Pro Ultra Plus. Valid media files for copy to Ki Pro Ultra Plus are the following: •... - Page 36 Files must be Ki Pro Ultra Plus supported frame rates and must use 24-bit 48kHz audio (2 or 8 channel), if audio is included. Files copied to Ki Pro Ultra Plus that do not meet these criteria may not appear in the web UI or front panel UI when you review clips.
- Page 37 The clip naming convention is the same as Rollover record (appending +n to the file name). During playback, Ki Pro Ultra Plus will play the clips as if they are one continuous recording. When these clips are imported into a NLE, they can be seamlessly combined into a single clip without audio or video drop out.
- Page 38 All/Playlist—Plays the current clip and then continues playing Playlist the next clip on the Ki Pro Ultra Plus media or the playlist. Note that with this setting, Ki Pro Ultra Plus will play all clips back regardless of format or framerate—but you may notice the video monitor reset for format/framerate changes.
-
Page 39: Format Media
Press Control Knob and CONFIRM ACTION to Delete all clips on the storage device Ki Pro Ultra Plus media can be used to hold data other than QuickTime recordings. If other files are saved to the Pak media, they should be placed outside of the “AJA”... - Page 40 TK value (which can be manually overridden via parameter 17.8 Take). Ki Pro Ultra Plus offers these parameter choices for easy identification of the QuickTime files, so that the names can logically match the shooting script, and are acceptable when imported into various non-linear editors such as Final Cut Pro 7’s Browser window, Final Cut Pro X’s Events, Avid Media Composer’s Bins, etc.
-
Page 41: Custom Clip Naming
1 to 999, if you want a value other than the automatically generated value. Ki Pro Ultra Plus follows these Clip and Take rules when using standard naming conventions: • Ki Pro Ultra Plus will not overwrite an existing clip. - Page 42 • If the number is at “999”, Ki Pro Ultra Plus will record a clip with take 999, but then cannot auto advance so the second attempt to record will generate a “Name In Use” alarm. This prompts you to select a new Clip Name, Clip Number, Clip Append, Alpha Append, and/or Take settings so that a new unique “prefix”...
- Page 43 This parameter is used to capture of CEA-708 Closed Captioning data as QuickTime movie tracks. On recording, Ki Pro Ultra Plus extracts CEA-708 (including 608 within 708) packets contained in the vertical ANC data embedded in the SDI input (BNC or Fiber) signal.
-
Page 44: Config Menus
As in the Media menus already presented, pressing the User Control Knob and scrolling changes the current Config parameter’s value to a new one from the Ki Pro Ultra Plus’s list of choices—repeating the list if you continue to scroll—or adjusting a numerical value up or down. - Page 45 1920x1080P, the Ki Pro Ultra Plus outputs 1080 HD on the SDI and HDMI Monitor outputs. Also, if the 4K Crop to UltraHD “In Convert” selection is used, the Ki Pro Ultra Plus will output 1080 HD on the SDI and HDMI Monitor outputs.
- Page 46 NOTE: SDI 1 RGB and SDI 1 YCbCr high frame rates (in excess of 29.97fps) are supported by 3G-SDI. Be sure to connect the AJA Ki Pro Ultra Plus to a 3G-SDI capable device in these cases. If a 3G-SDI capable device is not available, RGB and high frame rate YCbCr may be output via SDI 1 and SDI 2 as “dual link”...
- Page 47 • 8-bit RGB – Configures the HDMI output for 8-bit RGB • 4K 4:2:0 (High FR) NOTE: Typically, you will want to simply leave the selection configured for Auto so that the negotiation between the devices is handled automatically. Ki Pro Ultra Plus File Based Recorder/Player v1.0r3 www.aja.com...
- Page 48 Fiber 1-2 RGB Sets Fiber 1-2 to RGB input Fiber 1-4 YCbCr Sets Fiber 1-4 to YCbCr input Fiber 1-4 RGB Sets Fiber 1-4 to RGB input HDMI Sets input to HDMI connector Ki Pro Ultra Plus File Based Recorder/Player v1.0r3 www.aja.com...
- Page 49 Division or Two Sample Interleave input format (4K and UltraHD signals only). Ki Pro Ultra Plus can be set to use VPID to determine the input format. However, external equipment does not always report the correct VPID. Therefore, it may be necessary to force the input to Square Division or 2SI.
- Page 50 8- or 16-channel audio may be the appropriate choice in such situations. Ki Pro Ultra Plus only allows for the selection of either 2 channels or 8 channels of audio to be written to the QuickTime file that is recorded. Therefore, if the source has more than 2 channels of audio, but less than 8 channels of audio that need to be preserved, the Config Menu parameter 2.3 Audio Channels would...
- Page 51 6. 1 Genlock This parameter selects the source of reference to genlock to during playback. NOTE: Ki Pro Ultra Plus always genlocks to the selected video input during capture; genlock may only be needed during some playback configurations (such as in a facility with a variety of other equipment).
- Page 52 9.0 Interval Record The Ki Pro Ultra Plus can be used to create timelapse recordings via the 9.0 Interval Record, 9.1 Interval Frames and 9.2 Interval Time selections.
-
Page 53: Remote Control
Ki Pro Ultra Plus. NOTE: While the Ki Pro Ultra Plus may be configured for a YCbCr or RGB signal generator, the output is ultimately determined by the selection made in the 1.6 SDI Out menu parameter. - Page 54 This parameter determines the video signal output from Ki Pro Ultra Plus’s internal test signal generator. This parameter is used with parameter 41.1 to determine the type of video test signal output by Ki Pro Ultra Plus. OFF (default) Turn test signal output OFF.
- Page 55 NOTE: With parameters 50.1, 50.2 and 50.3, there is no timeout when editing—changes made while in these menus will be saved and activated when the menu is exited. 50.2 IP Address This parameter determines the static IP address used by Ki Pro Ultra Plus for TCP/ IP networking. variable Using the User Control Knob, enter an IP address compatible with your LAN (if you have one).
- Page 56 NOTE: Without a properly configured default gateway (whether you have a router/ gateway or not), Ki Pro Ultra Plus will be unable to see other Ki Pros on the network, although you may still be able to control the Ki Pro Ultra Plus via a web browser.
- Page 57 55.4 Date/Time This parameter manually sets the calendar date of the internal Ki Pro Ultra Plus clock. The value is defined as month/day/year/hour/minute. variable Using the User Control Knob, enter a calendar date for Ki Pro Ultra Plus.
- Page 58 99. 1 Factory Reset Selecting this parameter and then pressing the User Control Knob brings up the Confirm Action screen. Press on OK to recall Ki Pro Ultra Plus’s factory default settings. Selecting this parameter and recalling factory defaults overwrites the...
-
Page 59: Signal Routing Examples
Subnet Mask Signal Routing Examples Since the Ki Pro Ultra Plus can receive a variety of signals via quad, dual or single link SDI, what follows are examples of how the In Convert, Out Convert, SDI Output and Video Input work in combination with each other. - Page 60 No In Convert has been selected so the signal that is recorded on the Ki Pro Ultra Plus media is the same as what is output by the camera. An Out Convert selection has also not been made because the parameter does not allow conversion if the incoming video signal is 1080;...
-
Page 61: Chapter 5 - Browser Remote Control
Chapter 5 – Browser Remote Control Overview An optimized web server running on Ki Pro Ultra Plus allows you to remotely monitor and adjust parameter settings via a browser client running on a network wired computer. The network can be a closed local area network, a straight computer-to-Ki Pro Ultra Plus cable connection, or even exposed through a firewall to a broadband WAN. - Page 62 LAN connector, an RJ-45 socket, via a CAT5 Ethernet cable. To access Ki Pro Ultra Plus, enter its URL in the web browser. The URL will be the IP address defined in Ki Pro Ultra Plus’s Network parameter menus (Note that Config menu parameters 50.1 through 50.4 must all be configured correctly to...
- Page 63 IP address. NOTE: If you change the Static IP address of the Ki Pro Ultra Plus camera, you may need to power cycle the Ki Pro Ultra Plus so that the host computer correctly identifies the new IP address.
- Page 64 Additionally, a pulldown menu above the emulation of the Ki Pro Ultra Plus user interface area allows you to turn on tooltips for the buttons in this area. ...
-
Page 65: Operations Unique To The Web Ui
Clicking on the blue arrow icon on the top right of the screen opens and closes a Transport pane. A graphical representation of the Ki Pro Ultra Plus front panel is shown, with operational transport buttons. Simply click on a button to rewind, play, fast forward, stop, or a loaded clip, or record a new clip. -
Page 66: Playlists
Figure 23. All Clips Playlist Screen The default state of the Playlists is to list All Clips available. All Clips represents all of the recordings made on the Ki Pro Ultra Plus or valid files transferred to the Ki Pro Ultra Plus. -
Page 67: Gang Recording With Multiple Ki Pro Ultra Plus
You may create multiple playlists. Playlists are stored as a simple file on the Ki Pro Ultra Plus media alongside the clips. If you want to play a playlist you have created, first select Play Media>Playlist in the Media menu parameters. - Page 68 IP addresses configured under a common network and subnet mask and are connected via their LAN connections to an Ethernet switch or hub to a host computer. AJA recommends that all Ki Pro Ultra units in a gang use the same firmware version.
-
Page 69: Data Transfer Via Lan
Data Transfer via LAN There are two ways to access Data Transfer mode: • Use the Ki Pro Ultra Plus front panel UI to set Media State to Data-LAN (see "12.1 Media State" on page 35). - Page 70 Figure 25. Toggle to Data-LAN Media Transfer Mode Appropriately encoded QuickTime files may be uploaded to the Ki Pro Ultra Plus or downloaded from the Ki Pro Ultra Plus. (For clip encoding requirements, see "Appropriately Encoded Clips" on page 70.) Figure 26.
-
Page 71: Presets
This screen also includes Export and Import functions that allow exporting one or all presets to your computer as files and importing exported preset files from your computer. A displayed message indicates successful or failed saves, recalls, exports, and imports. Ki Pro Ultra Plus File Based Recorder/Player v1.0r3 www.aja.com... -
Page 72: Updating Firmware
IP Address, are not affected. Updating Firmware The Update Firmware screen allows you to update your Ki Pro Ultra Plus to later versions of software as they are issued by AJA and posted on the website. When software updates are released, they often contain new features, improvements, and bulletins that may be very useful. - Page 73 In some cases, these files may “decompress” automatically, such as when using Safari and Mac OS X. The firmware image that you’ll install on Ki Pro Ultra Plus is a file with a name like Ki ProUltra_1.0.0.153.bin or similar.
- Page 74 9. AJA strongly recommends performing a factory reset after updating Ki Pro Ultra Plus firmware. NOTE: You may ensure the new software is running by bringing up the Ki Pro Ultra Plus web page again. The software version is displayed at the top of all web screens. If for some rare reason it didn’t update, you can then run through the update steps...
-
Page 75: Chapter 6 - Ki Pro Ultra Plus Accessories
Chapter 6 – Ki Pro Ultra Plus Accessories Overview Ki Pro Ultra Plus’s design allows a variety of accessories to be used with the device. AJA provides some of these accessories as optional items that may be purchased separately. The Ki Pro Ultra Plus’s handle and desktop feet are included with the unit and, if wanted, are easily installed. -
Page 76: Ki Pro Ultra Plus Shelf
7. Snap the Caps over the Clamps and tear away the Spacer from the Shield. Ki Pro Ultra Plus Shelf AJA offers this rackmount shelf accepting two Ki Pro Ultra Plus units in a 2RU footprint. Figure 31. Ki Pro Ultra Plus in Rackmount Shelf... -
Page 77: Appendix A - Specifications
• Apple ProRes 422 (HQ) • Apple ProRes 422 • Apple ProRes 422 (LT) • Apple ProRes 422 (Proxy) Codec Container • Apple ProRes .MOV • AVID DNX MXF or .MOV Ki Pro Ultra Plus File Based Recorder/Player v1.0r3 www.aja.com... - Page 78 Removable Storage • 2 x slots, AJA Pak SSD media Pak256, Pak512, Pak1000 • Pak-Adapt-eSATA*, Pak-Adapt-CFast* *Only with AJA qualified media Video Input Digital • 4x 3G-SDI, SMPTE-292/296/424, 10-bit (12-bit input supported) • 4x Fiber LC*,3G-SDI, SMPTE-297, 10-bit • 4K/UltraHD 4:2:2 or 4:4:4 (4 x BNC or Fiber LC*) •...
- Page 79 • SDI RP188/SMPTE 12M via SDI BNC • LTC input (1 x BNC) • LTC output (1 x BNC) Reference Input • External, 2 x BNC • Looping, nonterminating • Blackburst or tri-level sync Ki Pro Ultra Plus File Based Recorder/Player v1.0r3 www.aja.com...
- Page 80 • Safe Operating Temperature: 0 to 40 degrees C (32 to 104 degrees F) • Safe Storage Temperature (Power OFF): -40 to 60 degrees C (-40 to 140 degrees F) • Operating Relative Humidity: 10-90% noncondensing • Operating Altitude: <3,000 meters (<10,000 feet) Ki Pro Ultra Plus File Based Recorder/Player v1.0r3 www.aja.com...
- Page 81 Dimensions Dimensions in millimeters 219.41 8.76 51.40 23.06 Front View 219.41 84.13 Rear View Ki Pro Ultra Plus File Based Recorder/Player v1.0r3 www.aja.com...
- Page 82 163.67 80.64 37.17 11.64 253.80 237.30 222.83 Top View 25.98 12.90 15.10 17.46 32.54 46.15 173.25 Ki Pro Ultra Plus File Based Recorder/Player v1.0r3 www.aja.com...
- Page 83 192.50 164.70 54.70 26.90 54.85 203.35 Bottom View 19.05 Handle 84.13 73.42 44.74 45.52 35.98 30.28 10.53 7.14 Right View Ki Pro Ultra Plus File Based Recorder/Player v1.0r3 www.aja.com...
-
Page 84: Appendix B - Safety And Compliance
AUSTRIA, BELGIUM, BULGARIA, CYPRUS, CZECH REPUBLIC, DENMARK, ESTONIA, FINLAND, FRANCE, GERMANY, GREECE, HUNGARY, IRELAND, ITALY, LATVIA, LITHUANIA, LUXEMBOURG, MALTA, NETHERLANDS, POLAND, PORTUGAL, ROMANIA, SLOVAKIA, SLOVENIA, SPAIN, SWEDEN, UNITED KINGDOM, ICELAND, LICHTENSTEIN, NORWAY, SWITZERLAND Ki Pro Ultra Plus File Based Recorder/Player v1.0r3 www.aja.com... -
Page 85: Declaration Of Conformity
For more information about where you can drop off your waste for recycling, please contact your local authority, or where you purchased your product. Ki Pro Ultra Plus File Based Recorder/Player v1.0r3 www.aja.com... - Page 86 Translated Warning and Caution Messages The following caution statements, warning conventions, and warning messages apply to this product and manual. Ki Pro Ultra Plus File Based Recorder/Player v1.0r3 www.aja.com...
-
Page 87: Index
Interval Frames 52 Import 72 Constant Bit-Rate Encoding 9 Interval Record 51 Recall 58 Create Clip Playlist 66 Interval Time 52 Recall Factory Setting 72 Cue Clip 66 IP Address 55 Save 72 Ki Pro Ultra Plus File Based Recorder/Player v1.0r3 www.aja.com... - Page 88 TC In 51 TC Type 51 TC Value 51 Technical Support 2 Time Zone 57 Transport Control Buttons 12 Transport Mode 29 Two Sample Interleave 48 Unit Designation 39 Update Firmware 72 Ki Pro Ultra Plus File Based Recorder/Player v1.0r3 www.aja.com...
Need help?
Do you have a question about the Ki Pro Ultra Plus and is the answer not in the manual?
Questions and answers