Table of Contents
Advertisement
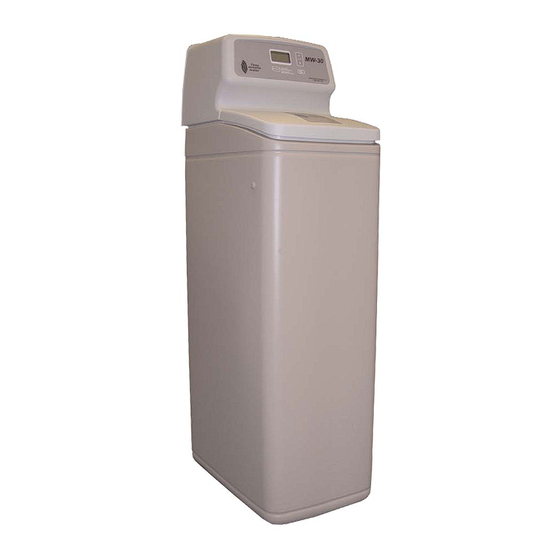
Model MW-30
How to maintain and operate
your Demand Controlled
Water Softener
DO NOT RETURN TO STORE
If you have questions or concerns when
installing, operating or maintaining your
softener, visit www.leaumiraclewater.ca
or call our toll free number:
1-800-356-7851
System tested and certified by NSF International
against NSF/ANSI Standard 44
for water softener performance.
System tested and certified by the Water Quality
Association against CSA B483.1.
7301415 (Rev. D 10/14/08)
Advertisement
Table of Contents

Related Manuals for Miracle Water MW-30

Summary of Contents for Miracle Water MW-30
- Page 1 Model MW-30 How to maintain and operate your Demand Controlled Water Softener DO NOT RETURN TO STORE If you have questions or concerns when installing, operating or maintaining your softener, visit www.leaumiraclewater.ca or call our toll free number: 1-800-356-7851 System tested and certified by NSF International against NSF/ANSI Standard 44 for water softener performance.
-
Page 2: Table Of Contents
Warranty ................30 Miracle Water Installation & Operation Manual... -
Page 3: Unpacking And Inspection
WATER HARDNESS _ _ _ _ _ _ _ _ _ _ _ _ _GPG IRON CONTENT _ _ _ _ _ _ _ _ _ _ _ _ _ _ _ _ _ _ _ _ _PPM on registration decal on shipping carton Miracle Water Installation & Operation Manual... -
Page 4: Dimensions/Specifications
Dimensions/ Specifications MODEL NOMINAL RESIN TANK SIZE MW-30 9” DIA. X 35” 37” 33” 42” Wiring Schematic Miracle Water Installation & Operation Manual... -
Page 5: Miscellaneous Service Information
This system conform to NSF/ANSI 44 for the specific performance claims as verified and substantiated by test data. The efficiency rating is only valid at the minimum stated salt dose. This soften- er is efficiency rated according to NSF/ANSI Standard 44. Miracle Water Installation & Operation Manual... -
Page 6: Safety Guides
Hard water affects living in general. Hardness minerals combine with soap to make a soap curd. The curd greatly reduces the cleaning action of soap. Precipitated hardness minerals form a crust on cooking utensils, appliances, and plumbing fixtures. Even the tastes of foods are affect- Miracle Water Installation & Operation Manual... - Page 7 4. SEDIMENT is fine, foreign material particles suspended in water. This material is most often clay or silt. Extreme amounts of sediment may give the water a cloudy appearance. A sediment fil- ter installed ahead of the water softener normally corrects this situation. Miracle Water Installation & Operation Manual...
-
Page 8: Assembly
Assembly 1. Miracle Water models are factory assembled. During installation, remove the Salt Hole Cover. Set aside to prevent damage. Check the brinewell to be sure it is secured and vertical (see Figure 1). Slide Faceplate Cover forward to expose back valve assembly. -
Page 9: Planning Installation
NOTE: The bypass valve allows the water to *Do not tee these Floor Drain be turned off to the softener for 1---1/2” Airgap drain lines together servicing, but still have water in the house pipes. Figure 2 Miracle Water Installation & Operation Manual... -
Page 10: Other Requirements
• Misc. fittings CPVC Plastic • Pipe cutter • Solvent cement • Hacksaw • Primer • Adjustable wrench • Misc. fittings NOTE: The salt storage tank drain elbow accepts either 1/2” or 3/8” I. D. hose. Miracle Water Installation & Operation Manual... -
Page 11: Select Installation Location
120-60 Hz household electrical power. Provide an approved, grounded outlet within 10’ of the unit. • Always install the unit BEFORE the water heater and after all other installed water condition- ing equipment (see Figure 5 below). Miracle Water Installation & Operation Manual... -
Page 12: Optional Weather Protection
Figure7. CAUTION: DO NOT PLACE SHIMS DIRECTLY UNDER THE SALT STORAGE TANK. The weight of the tank, when full of water and salt, may cause the tank to fracture at the shim. Miracle Water Installation & Operation Manual... -
Page 13: Step 3. Assemble Inlet And Outlet Plumbing
Apply pipe joint compound to all outside pipe threads. b. Tighten all threaded joints. 3. PVC PLASTIC PIPE a. Clean, prime and cement all joints, following the manufacturer’s instructions supplied with the plastic pipe and fittings. Miracle Water Installation & Operation Manual... -
Page 14: Step 5. Cold Water Pipe Grounding
NOTE: Route the tubing neatly out of the way and cut it to the desired length. DO NOT connect the valve drain tubing from step 6 to the salt storage tank over flow hose. Miracle Water Installation & Operation Manual... -
Page 15: Step 8. Pressure Testing For Leaks
2. The final step in the sanitizing procedure is done as you complete the following steps, including timer programming on page 18. 3. This process will flush out all sanitizing solution and condition the unit. Miracle Water Installation & Operation Manual... -
Page 16: Step 11. Connect Transformer
In a few days, the hot water will be fully conditioned. To have fully conditioned hot water immediately, wait until the recharge (Step 13) is over. Then, drain the water heater until water runs cold. Miracle Water Installation & Operation Manual... -
Page 17: Programming The Faceplate Timer
DOWN M moves the time backward. Be sure AM or PM, is correct. NOTE: Press buttons and quickly release to slowly advance the display. Hold for fast advance. This procedure applies for all following settings. Miracle Water Installation & Operation Manual... -
Page 18: Step 2. Set Water Hardness Number
MENU TIME. If no change is desired, go to Step 4. If you want to change the recharge start time, press the UP L or DOWN M buttons until the desired starting time shows. Miracle Water Installation & Operation Manual... -
Page 19: Step 4. Set Salt Efficiency
1-800-356-7851 Salt Efficiency Feature Your Miracle Water Softener has a “High Efficiency” feature with an “ON” or “OFF” setting. This softener setting is shipped in the “OFF” position, which utilizes the maximum rated capacity while most often achieving maximum salt efficiencies. Turning this setting to the “ON” position may ini- tiate more frequent recharges, however it will operate at 4000 grains per pound of salt or higher. -
Page 20: Customizing Features/Options
NOTE: If the unit was regenerating when power was lost, it will now finish the cycle. Miracle Water Installation & Operation Manual... -
Page 21: Adjustable Backwash
(Select/Menu) button until the following display is shown. MENU 2. Press the UP L or DOWN M buttons to change the backwash time from 0 to 60 minutes. 3. Press the (Select/Menu) to return to the normal run display. SELECT MENU Miracle Water Installation & Operation Manual... -
Page 22: Routine Maintenance
SALT WITH IRON REMOVING ADDITIVES: Some salts have an additive to help a water condi- tioner handle iron in a water supply. These are not recommended for Miracle Water units. Breaking A Salt Bridge Sometimes, a hard crust or salt bridge forms in the brine tank. -
Page 23: Cleaning The Nozzle And Venturi
Carefully replace all parts in the correct order. Lubricate the o-ring seal with silicone grease and locate in position. Install and tighten the cap, by hand only. Do not overtighten and break the cap or housing. If you have questions about routine maintenance... call 1-800-356-7851 Miracle Water Installation & Operation Manual... -
Page 24: Protect The Water Softener From Freezing
8. Tip the bottom of the softener up a few inches and hold until all water has drained. Leave the softener laying like this until you are ready to use it. Plug the inlet and outlet with rags to keep dirt, bugs, etc. out. floor wood block drain Figure 15 Miracle Water Installation & Operation Manual... -
Page 25: Troubleshooting Guide
1. Unplug transformer from outlet- - - - 2. Correct defect- - - - 3. Plug in transformer- - - - 4. Wait for 6 minutes. The error code will return if the defect was not corrected. Need help troubleshooting? Call 1-800-356-7851 Miracle Water Installation & Operation Manual... -
Page 26: Automatic Electronic Diagnostics
3. The letter (P) and dash (or dashes) indicate POSITION switch operation. If the letter appears, the switch is closed. If the dash shows, the switch is open. 4. Use the Recharge button to manually advance the valve into each cycle and check RECHARGE correct switch operation. Miracle Water Installation & Operation Manual... -
Page 27: Manual Advance Regeneration Check
- Obstruction in brine valve or brine tubing - Inner valve failure (obstructed outlet disc, wave washer defective, etc.) NOTE: If water system pressure is low, an elevated drain hose may cause back pressure, stopping brine draw. Miracle Water Installation & Operation Manual... - Page 28 Allow the softener to rinse for a few minutes to flush out any brine that may remain in the resin tank from the brining cycle test. 5. To return the softener to service, press the (Recharge) button. RECHARGE Miracle Water Installation & Operation Manual...
-
Page 29: Softener Components
Softener Components Miracle Water Installation & Operation Manual... -
Page 30: Warranty
If, during such respective period, a part proves to be defective, Miracle Water will ship a replacement part, directly to your home, without charge. Labor necessary to maintain this product is not covered by the product warranty.
Need help?
Do you have a question about the MW-30 and is the answer not in the manual?
Questions and answers