
Related Manuals for CentriPro AQUAVAR CPC


Summary of Contents for CentriPro AQUAVAR CPC
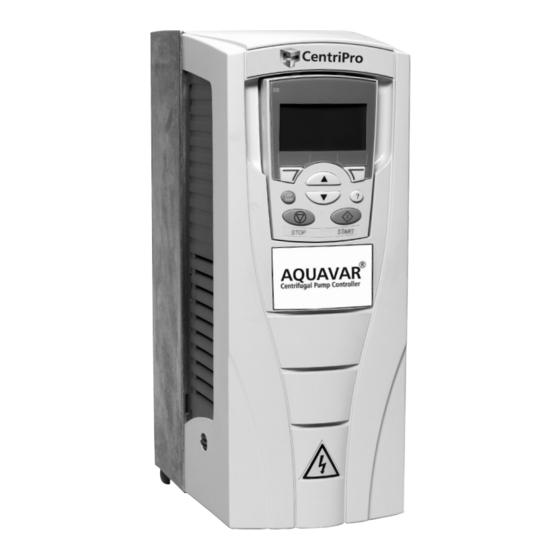
- Page 1 INSTRUCTION MANUAL IM167R08 AQUAVAR ® (Centrifugal Pump Control) INSTALLATION AND OPERATION MANUAL...
- Page 4 FEATURES Quick Reference Guide Analog Output, 102 Auto Restart, 102 Energy Savings Information, 103 Fieldbus Control, 103 Keypad (Control Panel), 104 Language, 104 Locking,104 Low Water Protection, 108 Manual Override, 104 Minimum Speed Options, 105 Priming Delay, 106 Pump Protect Control, 107 Ramp Hysteresis, 113 Ramp Settings, 113 Regulation Mode, 107...
-
Page 5: Table Of Contents
Single Phase Connection ............................10 Section 3 INTRODUCTION Input Power and Line Transformer Requirements ....................11 Issues for Drive Input Isolation Transformers ......................11 Installation Flow Chart ...............................13 Aquavar CPC Product Numbering ...........................14 Preparing for Installation; Drive Identification ......................15 Section 4 INSTALLATION (Frames R1-R6) Supply Connection ..............................19... - Page 6 TABLE OF CONTENTS Fieldbus Control ..............................103 Language, Locking ..............................104 Minimum Speed Options ............................105 Priming Delay, Pump Protect Ctrl, Regulation Mode .................. 106-107 Relay Outputs; Restart Options; Low Water (Suction) Protection .............. 107-108 Keypad Failure ................................. 109 Set Points, Dual with example ..........................
-
Page 7: Section 1 Safety
WARNING! The AQUAVAR CPC wall mount version is not a field repairable unit. Never attempt to repair a malfunctioning unit; contact the factory or your local Authorized Service Center for replacement. - Page 8 TYPICAL DRIVE LABEL ACS550-U1-046A-2 ACS550-U1-046A-2 V.2.06B V.2.06B 2053901277 2053901277 2053901277 2053901277 Made in USA of foreign parts Input 3 PH 48…63 1 PH 48…63 Hz Voltage (U1) 208…240 Vac 208…240 Vac LISTED 45Y1 Current (11n) 46.2 A 46.2 A ® ®...
-
Page 9: Section 2 Power Distribution Systems
POWER DISTRIBUTION SYSTEMS The type of transformer and the connection configuration feeding a drive plays an important role in its performance and safety. The following is a brief description of some of the more common configurations and a discussion of their virtues and shortcomings. Always ask what type of power system the site has before sizing the drive. -
Page 10: Resistance Grounding And Ground Fault Protection
POWER DISTRIBUTION SYSTEMS Resistance grounding and ground fault protection: Connecting the Wye secondary neutral to ground through a resistor is an acceptable method of grounding. Under a short circuit secondary condition, any of the output phases to ground will not exceed the normal line to line voltage. This is within the rating of the MOV input protection devices on the drive. -
Page 11: Section 3 Introduction
INTRODUCTION Input Power and Line Transformer Requirements The Aquavar CPC™ requires that the input line voltage and transformer power that meet certain phase and balance requirements. If you or your installing electrical contractor is in doubt of the requirements, the following provide guidelines for the Aquavar CPC. When in doubt contact the local power utility or the factory. - Page 12 2. Transient Protection: Input transformers are sometimes used to provide transient surge impedance. All the Aquavar CPC drives have capacitors and MOV’s (Metal Oxide Varistor transient protectors) providing 120 to 360 joules, line to line and line to ground transient protection.
-
Page 13: Installation Flow Chart
INTRODUCTION Study these installation instructions carefully before proceeding. Failure to observe the warnings and instructions may cause a malfunction or personal hazard. WARNING! Before you begin read “Safety” on page 7. Installation Flow Chart The installation of the AQUAVAR adjustable speed pump controller follows the outline below. The steps must be carried out in the order shown. -
Page 14: Aquavar Cpc Product Numbering
INTRODUCTION AQUAVAR CPC Product Numbering Full Load Amps Normal Duty Voltage Phase NEMA 1 Base Model Frame Size Normal Duty Horsepower CPC20071 CPC20171 CPC20241 CPC20311 15.5 CPC20461 CPC20591 29.5 CPC20881 44.0 CPC21141 57.0 CPC21431 71.5 CPC21781 89.0 CPC22481 124.0 CPC22481 124.0... -
Page 15: Preparing For Installation; Drive Identification
INTRODUCTION Preparing for Installation Drive Identification Drive Labels To determine the type of drive you are installing, refer to either: • Serial number label attached on upper part of the chokeplate between the mounting holes. ACS550-01-08A8-4 3~380…480 V 8.8 A / 6.9 A Ser. - Page 16 INTRODUCTION Ratings and Frame Size The chart in “Ratings” on page 131 lists technical specifications, and identifies the drive’s frame size – significant, since some instructions in this document, vary, depending on the drive’s frame size. To read the Ratings table, you need the “Output current rating” entry from the type code.
- Page 17 INTRODUCTION • IP 54 / UL type 12 enclosure, indoor use only. This enclosure provides protection from airborne dust and light sprays or splashing water from all directions. • UL Type 3R- Enclosures are intended for outdoor use to provide a degree of protection from falling rain.
- Page 18 INTRODUCTION Route control cables to minimize radiation to the cable: • Route as far away as possible from the input power and motor cables (at least 20 cm (8 in)). • Where control cables must cross power cables make sure they are at an angle as near 90º as possible.
-
Page 19: Section 4 Installation (Frames R1-R6) Supply Connection
INSTALLATION (Frames R1-R6) Supply Connection Disconnecting Device (Mains) Install a hand-operated input disconnecting device between the AC power source (MCC) and the drive. The disconnecting device must be of a type that can be locked to the open position for installation and maintenance work. Follow all local NEC codes. Fuses See Technical Data: Fuse Sizing/Rating on pages 133 and 134. -
Page 20: Selecting The Power Cables
• 600 VAC cable is accepted for up to 500 VAC concerning the entire AQUAVAR CPC range. For frame sizes R7 and R8, symmetrical shielded motor cable must be used (figure below). A four-conductor system used up to 30 kW motors cannot be used. -
Page 21: Installing The Drive
INSTALLATION (Frames R1-R6) Conduit Where conduits must be coupled together, bridge the joint with a ground conductor bonded to the conduit on each side of the joint. Bond the conduits also to the drive enclosure. Use separate conduits for input power, motor, brake resistors, and control wiring. Do not run motor wiring from more than one drive in the same conduit. - Page 22 INSTALLATION (Frames R1-R6) IP 54 / UL Type 12 1. If hood is present: Remove screws (2) holding hood in place. 2. If hood is present: Slide hood up and off of the cover. 3. Loosen the captive screws around the edge of the cover. 4.
- Page 23 INSTALLATION (Frames R1-R6) Install the Wiring Conduit/Gland Kit Wiring drives with the IP 21 / UL type 1 Enclosure requires a conduit/gland kit with the following items: • Conduit/gland box • Screws • Cover The kit is included with IP 21 / UL type 1 Enclosures. Overview As you install the wiring, observe the following: •...
-
Page 24: Wiring Connection Diagrams
INSTALLATION (Frames R1-R6) Three Phase Wiring/Connection Diagrams The layout of connection terminals is similar for all frame sizes (R1…R6). The only significant layout difference is in the power and ground terminals for frame sizes R5 and R6. The following diagrams show: •... - Page 25 INSTALLATION (Frames R1-R6) Three Phase Wiring/Connection Diagrams continued Not used WARNING! For floating networks remove screws at F1 and F2.
-
Page 26: Single Phase Wiring/Connection Diagram
INSTALLATION (Frames R1-R6) Single Phase Wiring/Connection Diagram Not used WARNING! For floating networks remove screws at EM1 and EM2. WARNING! For single phase wiring, derate the 3 phase nominal HP and amps 50%. -
Page 27: Wiring Ip 21 / Ul Type 1 Enclosure With Conduit
INSTALLATION (Frames R1-R6) Wiring IP 21 / UL Type 1 Enclosure with Conduit 1. Open the appropriate knockouts in the conduit/ gland box. 2. Install thin-wall conduit clamps (not supplied). 3. Install conduit/gland box. 4. Connect conduit runs to box. Always follow appropriate NEC or local electrical codes for inverter drives, motor wiring. -
Page 28: Wiring Ip 54 / Ul Type 12 Enclosure With Conduit
INSTALLATION (Frames R1-R6) Wiring IP 54 / UL Type 12 Enclosure with Conduit 1. Remove and discard the clamping plate. 2. Remove and discard the cable seals where conduit will be installed. (The cable seals are cone-shaped, rubber seals on the bottom of the drive.) 3. -
Page 29: Power Connections
INSTALLATION (Frames R1-R6) Power Connections WARNING! Ensure the motor is compatible for use with the AQUAVAR. The AQUAVAR must be installed by a competent person in accordance with the considerations defined in “Preparing for Installation” on page 15. If in doubt, contact your local AQUAVAR sales or service office. -
Page 30: Control Wiring
INSTALLATION (All Frames) Control Wiring Transducer Terminal for transducer shield. (Connected internally to chassis ground.) Screen/ Analog input channel 1, 2nd transducer. Default = frequency reference. Shield Resolution 0.1%, accuracy ±1%. J1:AI1 OFF: 0…10 V (Ri = 312 kΩ) J1:AI1 ON: 0…20 mA (Ri = 100 Ω) Switch positions listed on page 25. -
Page 31: Communications
INSTALLATION (Frames R1-R6) You can wire the digital input terminals in either a PNP or NPN configuration. PNP Connection (Source) NPN Connection (Sink) 10 +24V 10 +24V 11 GND 11 GND 12 DCOM 12 DCOM 13 DI1 13 DI1 14 DI2 14 DI2 15 DI3 15 DI3... -
Page 32: Installation Check Sheet
INSTALLATION (Frames R1-R6) Check Installation Before applying power, perform the following checks. Check √ Installation environment conforms to the drive’s specifications for ambient conditions. The drive is mounted securely. Space around the drive meets the drive’s specifications for cooling. The motor and driven equipment are ready for start (3 phase motor). For floating networks: The internal RFI filter is disconnected. -
Page 33: Reinstall Cover
INSTALLATION (Frames R1-R6) Reinstall Cover IP 21 / UL Type 1 1. Align the cover and slide it on. 2. Tighten the captive screw. 3. Reinstall the control panel. IP 54 / UL Type 12 1. Align the cover and slide it on. 2. -
Page 34: Aquavar Drive Manuals Descriptions
INSTALLATION (Frames R7-R8) AQUAVAR Drive Manuals GENERAL MANUALS AQUAVAR User’s Manual (IOM) (1…150 HP) • Safety • Diagnostics • Installation • Maintenance • Start-Up • Technical Data AQUAVAR User’s Manual (IOM) (200…550 HP) • Safety • Diagnostics • Installation • Maintenance •... -
Page 35: Introduction, Planning , Moving The Unit And Mounting
INSTALLATION (Frames R7-R8) Introduction AQUAVAR CPC drives include an extension module that is not covered in the AQUAVAR User’s Manual. The exten- sion module is attached to the drive module at the factory, which includes fusible disconnect. This supplement provides the additional extension mod- ule information required for AQUAVAR drives: •... -
Page 36: Connecting Power And Control Cables
INSTALLATION (Frames R7-R8) Connecting Power and Control Cables Additional considerations that apply with the enclosure extension: • The power cable connection diagram that applies for the AQUAVAR is: AQUAVAR Extension Module Drive Module OMIO Switch-fuse Disconnect Control Panel Control Wiring L1 L2 L3 PE Supply Motor... -
Page 37: R7 Frame Size
INSTALLATION (Frames R7-R8) • The following diagram shows the power and control connection points in the enclosure module supplied with the R7 drive module. -
Page 38: R8 Frame Size
INSTALLATION (Frames R7-R8) • The following diagram shows the power and control connection points in the enclosure module supplied with the R8 drive module. • Re-mount the high voltage shield. WARNING! Always replace all high voltage shields before applying power. •... -
Page 39: Maintenance
INSTALLATION (Frames R7-R8) Maintenance This section describes the procedure for separating the drive and extension modules, which is required to provide service access to the drive module. Safety WARNING! Read “Safety” on the first pages of this manual before performing any maintenance on the equipment. - Page 40 INSTALLATION (Frames R7-R8) 10. Remove screws fastening the drive module trolley to the pedestal. WARNING! These screws are an important step during re- assembly – the screws are required for grounding the drive. 11. R8: The front of the trolley includes support braces that fold out.
-
Page 41: Technical Data - Extension Module R7
INSTALLATION (Frames R7-R8) Technical Data Dimensional Drawings See the AQUAVAR User’s Manual for drive module dimensions. Extension Module R7 Dimensions are listed in millimeters and [inches]. 598.9 [23.58] [20.59] [7.87] [12.72] [1.14] [.00] BOTTOM PLATE HOLE Ø14 (6 pcs) [.55] [13.86] [20] [3.19]... -
Page 42: Detail R7
INSTALLATION (Frames R7-R8) Detail R7 Dimensions are listed in millimeters and [inches]. [20.47] [0.00] [0.00] PE HOLE Ø2 (4 pcs.) [.47] 133.9 [5.27] 132.5 [3.22] 125.3 [4.93] 102.5 [4.04] 52.1 U2, V2 R– [2.05] [19.21] R–, R+ 493.4 [19.43] 540.5 [21.28] [22.76] 11.1 (2 pcs.) -
Page 43: Technical Data - Extension Module R8
INSTALLATION (Frames R7-R8) Extension Module R8 Dimensions are listed in millimeters and [inches]. 152.3 [10.24] [6.00] BOTTOM PLATE HOLE Ø14 [.55] [17.56] [24.3] 491.4 21.2 393.9 [3.66] [10.24] [19.35] [0.83] [1.02] [15.51] 611.8 [24.09] 272.2 [10.72] 563.1 [22.2] [0.47] 392.5 [15.45] 554.5 [21.83]... -
Page 44: Detail R8
INSTALLATION (Frames R7-R8) Detail R8 Dimensions are listed in millimeters and [inches]. [24.3] [0.00] PE HOLE Ø11 (6 pcs.) [.43] 222.3 [8.75] 59.2 [2.33] Ø14 (6 pcs.) [.55] 730.9 [28.77] Ø14 (6 pcs.) [.55] Ø12.5 (2 pcs.) [.49]... -
Page 45: Section 5 Start-Up
See “Complete Parameter Descriptions” on page 50. Assistant Control Panel (Display) Features The AQUAVAR CPC Control Panel features: • Alphanumeric control panel with a LCD display • Language selection for the display • Drive connection that can be made or detached at any time •... - Page 46 START-UP Output mode Use the output mode to read information on the drive’s status and to operate the drive. To reach the Output Mode, press EXIT until the LCD display shows status information as de- scribed below. Status Information Top – The top line of the LCD display shows the basic status information of the drive. •...
- Page 47 START-UP Other Modes Besides the Output Mode, the Control Panel has: • Other operating modes that are available through the main menu. • A fault mode that is triggered by faults. The fault mode includes a diagnostic assistant mode. Access to Main Menu Modes MAIN MENU PARAMETERS To reach the main menu:...
-
Page 48: Start-Up Wizard
START-UP Wizard Mode When the drive is first powered up, the Start-Up Wizard guides you through the setup of a few basic parameters. For example, at the first start, the drive automatically suggests entering the first task, password. The Start-Up Wizard is divided into tasks. You may activate the tasks one after the other, as the Start-Up Wizard suggests, or independently. - Page 49 START-UP 5. Press UP/DOWN to select a new value / edit the parameter value. (Pressing both keys at the same time sets a parameter to its default value.) 6. Press SAVE to save the new parameter value. (If the new value is the default value, the pa- rameter will no longer appear on the Changed Parameters listing.) Par Backup Mode The Control Panel can store a full set of drive parameters.
-
Page 50: Section 6 Parameter Listings
PARAMETER LISTINGS Aquavar CPC Parameter List The Aquavar CPC parameter list contains all of the necessary pump, drive, fault and control parameters needed for programming this unit. Each group indicates a certain function and control for the Aquavar, in order to set up single or multipump control. - Page 51 PARAMETER LISTINGS Aquavar CPC Parameter List (continued) Group 19, ANALOG OUTPUTS – Defines the analog outputs available on the drive. Two possible analog outputs that can be used to monitor various parameters (AO1, AO2). Group 21, REGULATE – Defines type of control regulation with analog input from transducer.
- Page 52 PARAMETER LISTINGS Defaults Group Single Synch- Multi- Constant Speed VFD Signals Range Description Pump ronous Control Slave Control ➀ 0101 Motor 0.0...500.0 Hz Calculated VFD output Frequency frequency, Hz 0102 Motor Current 0...2.0*I Measured Motor Current, A 0103 Motor Power -2...2*P Motor Power, kW 0104 DC Bus Voltage...
- Page 53 PARAMETER LISTINGS Defaults Group Single Synch- Multi- Constant Speed VFD Signals Range Description Pump ronous Control Slave Control 0124 Current at Flt Motor current at the time of the latest fault. 0125 Status at Flt The drive status word at the time of the latest fault.
- Page 54 PARAMETER LISTINGS Defaults Group Status Words Single Synch- Multi- Constant Speed Range Description Pump ronous Control Slave Control 0310 AV Alarm Word — Aquavar Alarm word 0311 AV Fault Word — Aquavar Fault word 0312 Comm RO Word — 0313 Comm Value 1 —...
- Page 55 PARAMETER LISTINGS Defaults Group Locks/ Single Synch- Multi- Constant Speed Range Description Passwords Pump ronous Control Slave Control 1004 Parameter Save Save Used for manually saving Done Done Done Done Done (continued) parameters that have been altered through the fieldbus connection.
- Page 56 PARAMETER LISTINGS Defaults Group Start-Up Single Synch- Multi- Constant Speed Range Description Data Pump ronous Control Slave Control 1104 Motor Nom 11…345V/ Defines the motor voltage. 230/ 230/ 230/ 230/ 230/ Voltage 230…690V Equal to the value on the 460/ 460/ 460/ 460/...
- Page 57 PARAMETER LISTINGS Defaults Group Single Synch- Multi- Constant Speed Start/Stop Range Description Pump ronous Control Slave Control 1203 Test Run Automatic If selected and the drive has not (continued) run for the test delay (1205) the drive will start and run at 50% of maximum speed (1401) for 20 seconds and shutdown.
- Page 58 PARAMETER LISTINGS Defaults Group Spd Lim/ Single Synch- Multi- Constant Speed Range Description Strt/Lvl Pump ronous Control Slave Control 1402 Minimum 0…Max Defines the minimum speed Frequency/Speed Frequency range. Default setting is 10% of parameter 1106 Motor Nom Freq. (May want to show RPM or HZ.) 1403 Config Speed Defines the reaction of the drive...
- Page 59 PARAMETER LISTINGS Defaults Group Spd Lim/ Single Synch- Multi- Constant Speed Range Description Strt/Lvl Pump ronous Control Slave Control 1407 Priming Delay 0…6000 s When the drive is starting from 0 RPM this parameter delays pump protection faults (2404 and 2407) for the setting time. The default setting is “0”.
- Page 60 PARAMETER LISTINGS Defaults Group Transducer Single Synch- Multi- Constant Speed Range Description Pump ronous Control Slave Control 1503 Transducer Min 0…6553.5 For single pump and multipump macros this parameter defines the value (normally zero) of the 4 mA setting for the primary process transmitter at AI2.
- Page 61 PARAMETER LISTINGS Defaults Group Reference Single Synch- Multi- Constant Speed Range Description Select Pump ronous Control Slave Control 1601 SP1/SP2 Select Defines the source from which Ref 1 Ref 1 Ref 1 Ref 1 Ref 1 the drive reads the signal that selects the setpoint.
- Page 62 PARAMETER LISTINGS Defaults Group Reference Single Synch- Multi- Constant Speed Range Description Select Pump ronous Control Slave Control 1604 AI 1 Minimum Tune This parameter sets the minimum 4-20 4-20 4-20 4-20 4-20 (continued) value of the signal to be applied mA to AI1.
- Page 63 PARAMETER LISTINGS Defaults Group Relay Single Synch- Multi- Constant Speed Range Description Outputs Pump ronous Control Slave Control 1804 Relay RO2 Selects the AV status to be Run- Run- Run- Start Run- Output indicated through relay output 2 ning ning ning Slave ning...
- Page 64 PARAMETER LISTINGS Defaults Group Relay Single Synch- Multi- Constant Speed Range Description Outputs Pump ronous Control Slave Control Low Water The secondary protection warning or fault function has been activated. DI4 is low for the protection delay setting (2404). Closed = normal, Open = Secondary Protect fault function is active.
- Page 65 PARAMETER LISTINGS Defaults Group Analog Single Synch- Multi- Constant Speed Range Description Outputs Pump ronous Control Slave Control 1904 Minimum AO1 0.0…20.0 mA Defines the minimum value of AO1. Default = 4 mA. 1905 Maximum AO1 0.0…20.0 mA Defines the maximum value of AO1.
- Page 66 PARAMETER LISTINGS Defaults Group Single Synch- Multi- Constant Speed Regulate Range Description Pump ronous Control Slave Control 2102 Press Incr Speed 0…60 Hz Sets the speed for which additional pressure is added to compensate for system frictional losses at increased flow. Used for single pump and backup modes only.
- Page 67 PARAMETER LISTINGS Defaults Group Multipump Single Synch- Multi- Constant Speed Range Description Control Pump ronous Control Slave Control 2205 Sync Limit 0…60 Hz Selects the speed at which lag pump #1 (or slave #1 RO1) should be turned off. Applies to synchronous, multicontrol and slave modes.
- Page 68 PARAMETER LISTINGS Defaults Group Fault Single Synch- Multi- Constant Speed Range Description Functions Pump ronous Control Slave Control 2403 Protection Limit 0…6553.5 This is the protection limit in PSI for the process value at which Pump Protect Ctrl (2402) activates when pump is at max speed for the protection delay.
- Page 69 PARAMETER LISTINGS Defaults Group Fault Single Synch- Multi- Constant Speed Range Description Functions Pump ronous Control Slave Control 2409 Comm Fault Selects how the drive reacts in a Last Last Last Last Last Function fieldbus comm break i.e.; if the Speed Speed Speed Speed Speed...
- Page 70 PARAMETER LISTINGS Defaults Group Energy Single Synch- Multi- Constant Speed Range Description Savings Pump ronous Control Slave Control 2605 Energy Save Resets energy savings counter. Dis- Dis- Dis- Dis- Dis- Reset After resetting, parameter 2605 abled abled abled abled abled returns to disabled.
- Page 71 PARAMETER LISTINGS Defaults Group Modbus Single Synch- Multi- Constant Speed Range Description Setup Pump ronous Control Slave Control 3201 Protocol ID 0…0xFFFF This parameter configures the module type automatically by the fieldbus adapter. No action is required by the user unless changes to default settings are desired.
- Page 72 PARAMETER LISTINGS Defaults Group Modbus Single Synch- Multi- Constant Speed Range Description Setup Pump ronous Control Slave Control 3210- EFB Parameters Meaning and values of these 3220 parameters depend on the selected fieldbus protocol. Group Motor Single Synch- Multi- Constant Speed Range Description Control...
-
Page 73: Section 7 Programming
D I R MENU RECOMMENDED INSTALLATION LAYOUT SUPPLY POWER 3 PHASE OUTPUT TO MOTOR SUCTION FLOW 1 AQUAVAR CPC AIR BLADDER TANK 2 FUSIBLE DISCONNECT 3 PHASE MOTOR 3 CENTRIFUGAL PUMP GATE VALVE (BALL VALVE) 4 CHECK VALVE (NON-SLAM TYPE) PRESSURE GAUGE 5 PRESSURE TRANSDUCER (CABLE ASSEMBLY) NOTES: A. - Page 74 SAVE key. This group should appear as 1002 PASS CODE “OPEN”, if it does not you have entered the pass code 1003 LOCAL LOCK incorrectly, or it has changed. Contact your local CentriPro 1004 PARAM SAVE E X I T E D I T representative for the master code.
- Page 75 PROGRAMMING Single Pump Programming (Pressure transducer) 7. Use the down arrow until group parameter 1105 “MOTOR PARAMETERS NOM CURRENT” is highlighted, then press EDIT. Using 1101 LANGUAGE 1102 APPLIC MACRO arrows, enter your motor’s maximum allowed amp draw at full 1104 MOTOR NOM VOLT speed, or Service Factor Amps.
- Page 76 1410 UNDERVOLT CTRL 1411 PRIMING DELAY pressure transducer setting is 300 psi. Adjust this based on 1501 TRANSDUCER UNIT your maximum rating for a new transducer. NOTE: CentriPro 1502 TRANSDUCER MAX provides a 0 -300 psi transducer as standard. Select the 300.0...
- Page 77 PROGRAMMING Single Pump Programming (Pressure transducer) 16. Optional Step: To lock out access to the control panel (keypad), refer to page 109. This will prevent unauthorized users from changing programming. NOTE: If an error or fault occurs, refer to the troubleshooting/faults section of this manual, page 116.
-
Page 78: Single Pump - Submersible Pump Constant Pressure
PROGRAMMING Single Pump – Submersible Pump Constant Pressure SINGLE PUMP SUBMERSIBLE CONSTANT PRESSURE LAYOUT FLOW 1 AQUAVAR CPC 2 FUSIBLE DISCONNECT 3 LOAD REACTOR 4 AIR DIAPHRAGM TANK 5 PRESSURE TRANSDUCER 6 3 PHASE OUTPUT (ALWAYS) 7 DISCHARGE CHECK VALVE... - Page 79 Variable Frequency type drives. NOTE: THE AQUAVAR IS NOT RECOMMENDED FOR RESIDENTIAL WELL APPLICATIONS. CONSULT CENTRIPRO FOR SUITABLE VARIABLE SPEED CONTROLLERS DESIGNED FOR RESIDENTIAL WELL PUMPS (e.g. BF15 series). Service Factor Amps The submersible pump will sometimes utilize the motor service factor or MAX AMPS.
- Page 80 ✔ Standard enclosure is rated for NEMA 1 INDOOR USE ONLY. Consult Factory/ Price pages for outdoor rated enclosures. ✔ Aquavar CPC not for use on RESIDENTIAL WELL PUMP applications. Consult with factory for appropriate variable speed controller like the BF15.
- Page 81 1003 LOCAL LOCK “OPEN”, if it does not you have entered the pass code 1004 PARAM SAVE incorrectly, or it has changed. Contact your local CentriPro E X I T E D I T representative for the master code. Once your group 1001 is showing “OPEN”, you can access the entire pump and...
- Page 82 PROGRAMMING Single Pump – Submersible Pump Constant Pressure 6. Use down arrow until group parameter 1104 “MOTOR NOM PARAMETERS VOLTAGE” is highlighted, then press EDIT. Use the arrows to 1101 LANGUAGE 1102 APPLIC MACRO enter your motors nameplate voltage, then press the SAVE 1104 MOTOR NOM VOLT key.
- Page 83 1410 UNDERVOLT CTRL 1411 PRIMING DELAY pressure transducer setting is 300 psi. Adjust this based on 1501 TRANSDUCER UNIT your maximum rating for a new transducer. NOTE: CentriPro 1502 TRANSDUCER MAX 300.0 provides a 0 -300 psi transducer as standard. Select the...
- Page 84 PROGRAMMING Single Pump – Submersible Pump Constant Pressure 16. Final step is to enter your required pressure in Status the system. After above programming has been completed, press the EXIT key three (3) times, until 11.1% you arrive back to the first control display screen. 40.2 PSI Then press the UP or DOWN arrow to select the 0.0 PSI...
- Page 85 PROGRAMMING SINGLE-PUMP LEVEL CONTROL Submersible Transducer Setup PARAMETER SETTINGS QUICK LIST 1002 — Pass Code = 66 1001 — Parameter Lock = OPEN 1102 — Application Macro = SINGLE PUMP 1104 — Motor Nom. Volt. 1105 — Motor Nom. Current 1106 —...
- Page 86 PROGRAMMING MULTI-PUMP LEVEL CONTROL Submersible Transducer Setup PARAMETER SETTINGS QUICK LIST 1002 — Pass Code = 66 1001 — Parameter Lock = OPEN 1102 — Application Macro = MULTIPUMP 1104 — Motor Nom. Volt. 1105 — Motor Nom. Current 1106 — Motor Nom. Freq. 1107 —...
-
Page 87: Multipump - Constant Pressure Control
This feature may not work for excessive friction losses! Pump Sequencing The Aquavar CPC has the ability to operate in a multiple pump with lead and lag pumps. Each Aquavar will be given an address then operate as Pump 1, Pump 2, Pump 3 or Pump 4. - Page 88 The RS485 has two yellow DIP SWITCHES that must be in the ON position when that Aquavar CPC unit is the last or first in the system. Therefore, if you have 4 pumps in multi-pump configuration, Aquavar address 1 and Aquavar address 4 would have their DIP SWITCHES in the ON position (see diagram).
- Page 89 The following steps are for multi-pump, constant pressure systems, with up to four (4) Aquavar CPC. Each Aquavar CPC will have to be programmed according to this parameter guide. The parameters will not transfer over to each unit. There are two options for downloading the...
- Page 90 SAVE key. This group should appear as 1002 PASS CODE “OPEN”, if it does not you have entered the pass code 1003 LOCAL LOCK incorrectly, or it has changed. Contact your local CentriPro 1004 PARAM SAVE E X I T E D I T representative for the master code.
- Page 91 MAX” is highlighted, then press EDIT. Default pressure 1502 TRANSDUCER MAX transducer setting is 300 psi. Adjust this based on your 300.0 PSI maximum rating for a new transducer. NOTE: CentriPro 1503 TRANSDUCER MIN 1504 SENSOR provides a 0-300 psi transducer as standard. Always check...
- Page 92 PROGRAMMING MultiPump – Constant Pressure Control Use the down arrow to highlight 1503 “TRANSDUCER MIN” 0.0 , then press EDIT. Default should be 0 psi. Press CANCEL to advance to the next step. If this group needs to be changed based on another type of transducer value, press SAVE to store. Use the down arrow to highlight 1506 “SENSOR MIN”, PARAMETERS then press EDIT.
- Page 93 PROGRAMMING MultiPump – Constant Pressure Control After 2203 has been selected, press the down arrow to PARAMETERS 2201 VALUE DECREASE highlight parameter 2204 “SWITCH LEAD LAG”. Press 2202 VALUE INCREASE the EDIT key once. Using the up or down arrows, select 2203 ENABLE SEQUENCE the alternating time between lead and lag pumps.
-
Page 94: Multipump - Slave Pump Control
PROGRAMMING MultiPump – Slave Pump Control... - Page 95 MultiPump – Slave Pump Control Overview The Aquavar CPC has the ability to use up to three “dry” relay contacts for constant speed “SLAVE” or lag pump control. This is useful if the operator requires a wide range of flow rates in certain situations (i.e.
- Page 96 When the Aquavar controlled pump, starts to “run out “or cannot meet the system demand, then the first relay output will actuate based on a programmed pressure and time delay. The Aquavar CPC has up to three contacts that can be used for “SLAVE” operation. Wiring/ Connection The relays used for the SLAVE pump control are dry relay contacts, rated for a MAXIMUM 250 VAC or 30VDC, 2 Amps free from inductivity.
- Page 97 Contact your local E X I T E D I T CentriPro representative for the master code. Once your group 1001 is showing “OPEN”, you can access the entire pump and drive parameters in the Aquavar.
- Page 98 PROGRAMMING MultiPump – Slave Pump Control 5. After the SAVE key is pressed in the above group, press the PAR GROUPS EXIT key, then the down arrow to highlight the group 11 01 VFD SIGNALS 02 PUMP SIGNALS “START UP DATA”, then Press the SEL key once. Using the 03 FB ACTUAL SIGNALS arrows, highlight 1102 “APPLIC MACRO”, then press the 10 LOCKS/PASSWORDS...
- Page 99 1501 TRANSDUCER UNIT 1502 TRANSDUCER MAX transducer setting is 300 psi. Adjust this based on your 300.0 maximum rating for a new transducer. NOTE: CentriPro 1503 TRANSDUCER MIN 1504 SENSOR provides a 0 -300 psi transducer as standard. Select the...
- Page 100 PROGRAMMING MultiPump – Slave Pump Control 14. Once you have saved the parameter 1506, press the EXIT PAR GROUPS 14 SPD LIM/STRT LEVL key. Use down arrow until you highlight parameter group 18 15 XDUCER VARIABLES “RELAY OUTPUTS”. Then press the SEL key. 16 REFERENCE SELECT 18 RELAY OUTPUTS 19 ANALOG OUTPUTS...
- Page 101 PROGRAMMING MultiPump – Slave Pump Control 21. Once previous step has been saved, use the Down Arrow PARAMETERS and highlight parameter “2203 ENABLE SEQUENCE”, then 2201 VALUE DECREASE 2202 VALUE INCREASE press EDIT. Using the up or down arrow, enter the frequency 2203 ENABLE SEQUENCE in Hertz (HZ) that you wish the SLAVE pump will turn on once 59.00 HZ...
-
Page 102: Section 8 Features
FEATURES Analog Outputs The Aquavar CPC has two 4-20 mA analog outputs as standard. These outputs may be configured by the user to output from a selection of nine actual pump signals. Parameter group 19 is used to configure these outputs. Analog Outputs are found on X1 Terminal Block, # 2 and # 5 pins. -
Page 103: Fieldbus Control
Fieldbus Control The Aquavar CPC may be integrated into BMS (Building Management Systems) or existing Distributive Control Systems (DCS) via optional Fieldbus control modules. The use of Fieldbus control modules allows selected Aquavar parameters and operating signals to be accessed and modified. -
Page 104: Language, Locking
ESPANOL FRANCAIS Locking The AQUAVAR CPC has three levels of control panel (keypad) locking; LOCAL LOCK, PARAMETER LOCK and SET POINT LOCK. • PARAMETER LOCK - In parameter lock, parameters may be viewed, however they cannot be changed. Starting, Stopping, set point changes and drive fault resets may still be performed using the keypad. -
Page 105: Minimum Speed Options
• Keypad must be set in REMOTE before enabling LOCAL LOCK. Minimum Speed Options When the Aquavar CPC reaches the minimum speed that is set in parameter 14.02, it can be programmed to stay at that minimum speed indefinitely, or to shut-down after a time delay. -
Page 106: Priming Delay, Pump Protect Ctrl, Regulation Mode
FEATURES Minimum Speed Options (continued) Parameter Name Value/Range Note(s) 14.03 CONFIG SPD=MINSPD Selecting SPD=MINSPD will result in the drive SPEED MIN SPD=0 [default] staying at minimum speed until it is manually shut-off, process demand increases, a secondary protection fault is cleared, or a pump protection fault forces it to shutdown.If SPD=0 is selected, the drive will stop. -
Page 107: Relay Outputs; Restart Options; Low Water (Suction) Protection
INVERSE. As the level in the sump increased, Aquavar would respond by increasing pump speed to maintain a constant level. Relay Outputs The AQUAVAR CPC has three relay outputs that are configurable for different operating and fault conditions. Relays will revert to original states once warnings or faults are reset or cleared. - Page 108 FEATURES Parameter Name Value/Range Note(s) 18.01 RELAY R0 NOT USED Default for RO1 OUTPUT 18.04 RELAY R02 RUNNING Default for RO2 OUTPUT 18.07 RELAY R03 READY Default for RO3 OUTPUT VFD FAULT SECND PRTECT A Secondary Protect A activation. PUMP PROTECT Pump protection activation.
-
Page 109: Keypad Failure
FEATURES 2. WARNING ONLY – In this response, Aquavar will simply issue an alarm/warning displayed on the keypad screen, but continues to operate. NOTE: The WARNING ONLY mode may result in damage to the pump if a low water condition occurs. It is recommended to set this for WARN & CONTROL. Keypad Failure In the event of a keypad failure, Aquavar has been configured to fault and shut down the controller. -
Page 110: System Curve Compensation
Most parameters require you to stop the pump, before programming. System Curve Compensation The AQUAVAR CPC system can automatically compensate for system friction losses due to increased flow in single pump operation or multi-pump backup modes. Tables are available in most pump catalogs to assist in determining the amount of friction loss that can be expected for various pipe sizes and flow rates on simple systems. -
Page 111: Test Run; Tuning, System Pressure
FEATURES Parameter Name Value/Range Note(s) 21.02 PRESS INCR 0- 60 HZ This is the frequency at which system curve SPEED 20 HZ (Default) compensation begins. At speeds below this, no compensation for increased resistance is made. 21.03 PRESS INCR 0-100% This is the amount that Aquavar will have 0.0 % 0% (Default) -
Page 112: Window Setting (Reg Window)
FEATURES Set Point R1 - Ramp 1, Fast Acceleration R2 - Ramp 2, Fast Deceleration R3 - Ramp 3, Slow Acceleration R4 - Ramp 4, Slow Deceleration Time Window Setting (Reg Window) Aquavar controls the set-point within a defined window. This window, called the Regulation Window [Parameter 13.06 REG WINDOW] is automatically set based upon the operating modes and instrument type selected during programming. -
Page 113: Ramp Hysteresis
FEATURES Hysteresis -% Set Point Hysteresis -% R1 - Ramp 1, Fast Acceleration R2 - Ramp 2, Fast Deceleration R3 - Ramp 3, Slow Acceleration R4 - Ramp 4, Slow Deceleration Time RAMP HYSTERESIS Ramp hysteresis is the point at which the Aquavar controller changes over from the fast ramp to the slow ramp. - Page 114 FEATURES Ramp 2 - Fast Deceleration: This ramp is the fast run down time used when the pump is shutting down. If the setting R2 setting is too fast, the pump may oscillate, or “hunt” while it tries to attain the set point. If it is too slow, the actual process value may rise well above the set point.
-
Page 115: Section 9 Faults/Alarms
FAULTS/ALARMS Warning! Do not attempt any measurement, parts replacement or other service procedure not described in this manual. Such action will void the warranty, may endanger correct operation, and increase downtime and expense. Warning! All electrical installation and maintenance work described in this chapter should only be undertaken by qualified service personnel. -
Page 116: Correcting Faults
FAULTS/ALARMS Correcting Faults The recommended corrective action for faults is: • Use the “Fault Listing” table below to find and address the root cause of the problem. • Reset the drive. See “Fault Resetting” on page 119. * Drive not ready fault. Check supply voltage / DC Bus = 1.35 x input voltage. * Comm fault drive not responding. - Page 117 FAULTS/ALARMS Fault Fault Name Description and Recommended Corrective Action Code In Panel PANEL LOSS Panel communication is lost and either: • Drive is in local control mode (the control panel displays LOC) or • Drive is in remote control mode (REM) and is parameterized to accept start/ stop, direction or reference from the control panel.
- Page 118 FAULTS/ALARMS Fault Fault Name Description and Recommended Corrective Action Code In Panel CONFIG FILE Internal configuration file has an error. Contact your local factory representative. • Cycle power • Check Group 9902 / Drive Size Type SERIAL 1 ERR Fieldbus communication has timed out. Check for and correct: •...
-
Page 119: Fault Resetting
Fault History For reference, the last three fault codes are stored in Group 01: VFD Signals. Specifically pa- rameters 0116…0118. The Aquavar CPC stores additional fault data, which helps the operator identify operating conditions at the time of fault. (Parameters 0119…0126). -
Page 120: Correcting Alarms
FAULTS/ALARMS Correcting Alarms The recommended corrective action for alarms is: • Determine if the Alarm requires any corrective action (action is not always required). • Use “Alarm Listing” below to find and address the root cause of the problem. • Press the reset key (when available) or turn the power off for at least 5 minutes. Alarm Listing The following table lists the alarms by code number and describes each. - Page 121 FAULTS/ALARMS Alarm Display Description Code 2010 Motor is hot, based on either the drive’s estimate or on temperature feedback. OVERTEMP This alarm warns that a Motor Underload fault trip may be near. Check: • Check for overloaded motor, pump. 2011 UNDERLOAD Motor load is lower than expected.
-
Page 122: Section 10 Maintenance
WARNING! Read “Safety” on page 7 before performing any maintenance on the equipment. Ignoring the safety instructions can cause injury or death. Maintenance Intervals If installed in an appropriate environment, the drive requires very little maintenance. This table lists the routine maintenance intervals recommended by CentriPro. Maintenance Interval Instruction... -
Page 123: Internal Enclosure Fan Replacement
MAINTENANCE (Frame Sizes R1-R6) Frame Size R1…R4 To replace the fan: 1. Remove power from drive 2. Remove drive cover 3. For Frame Size: • R1, R2: Press together the retaining clips on the fan cover sides and lift. • R3, R4: Press in on the lever located on the left side of the fan mount and rotate the fan up and out. -
Page 124: Capacitors
MAINTENANCE (Frame Sizes R1-R6) Frame Size R5 and R6 To replace the internal enclosure fan in frame sizes R5 or R6: 1. Remove power from drive 2. Remove the front cover 3. Lift the fan out and disconnect the cable 4. -
Page 125: Section 10 Maintenance (Frame Sizes R7-R8) Layout
MAINTENANCE (Frame Sizes R7-R8) Layout The layout stickers of the drive are shown below. The stickers show all possible components concerning maintenance activities. Not all of them are present in each delivery. Designation Component Control Panel Motor Control and I/O Board (OMIO) Cooling Fan Capacitors... -
Page 126: Heatsink, Fan
The life span of the cooling fan of the drive is about 50,000 (R7) and 60,000 (R8) hours. The actual life span depends on the running time of the fan, ambient temperature and dust con- centration. See the appropriate Aquavar CPC User Manual for the actual signal which indi- cates the running time of the cooling fan. - Page 127 MAINTENANCE (Frame Sizes R7-R8) 3. Remove the DC capacitor pack by undoing the black fixing screws. 4. Disconnect the fan supply wires (detachable terminal). 5. Disconnect the fan capacitor wires. 6. Undo the black fixing screws of the fan cassette. 7.
-
Page 128: Capacitors
Capacitor life can be prolonged by lowering the ambient temperature. It is not possible to predict a capacitor failure. Capacitor failure is usually followed by damage to the unit and an input cable fuse failure or a fault trip. Contact your CentriPro authorized Aquavar CPC distributor or the factory. -
Page 129: Leds
MAINTENANCE (Frame Sizes R7-R8) LEDs This table describes LEDs of the drive. Where When the LED is lit OMIO Board Red (blinking) Drive in fault state. Green The power supply on the board is OK. Control Panel Drive in fault state. Mounting Platform Green The main +24 V power supply for the control... -
Page 130: Section 11 Technical Data
TECHNICAL DATA Sizing The current ratings are the same regardless of the supply voltage within one voltage range. To achieve the rated motor power given in the table, the rated current of the drive must be higher than or equal to the rated motor current. Note 1: The maximum allowed motor shaft power is limited to 1.5 ·... -
Page 131: Cable Sizing / Ratings 208-240 Volt Drives
(1) Recommended AWG Size based on NEC table 310.16, 40º C ambient, 90º C, UL type copper wire. For other wire sizes or types, consult local, state or NEC codes. (2) Frame sizes R7 and R8, the Aquavar CPC will have multiple conductor terminals for each phase. Consult technical section (CABLE TERMINALS). -
Page 132: Cable Sizing / Ratings 380-480 Volt Drives
(1) Recommended AWG Size based on NEC table 310.16, 40º C ambient, 90º C, UL type copper wire. For other wire sizes or types, consult local, state or NEC codes. (2) Frame sizes R7 and R8, the Aquavar CPC will have multiple conductor terminals for each phase. Consult technical section (CABLE TERMINALS) for maximum wire diameter and torque values. -
Page 133: Fuse Sizing / Ratings 208-240 Volt Drives
252.9 (3) UL Class T fuses are recommended for short circuit protection. Very fast acting Bussmann* T-tron type JJN and JJS are shown in the Aquavar CPC tables. Other manufaturers are acceptable if they meet fuse requirements. * Bussmann is a registered trademark of Cooper Industries Inc. -
Page 134: Fuse Sizing / Ratings 380-480 Volt Drives
CPC46021 614.0 CPC46451 658.0 (3) UL Class T fuses are recommended for short circuit protection. Very fast acting Bussmann* T-tron type JJN and JJS are shown in the Aquavar CPC tables. Other manufaturers are acceptable if they meet fuse requirements. -
Page 135: Cable Terminals (Frames R1-R6 And Frames R7-R8)
TECHNICAL DATA Cable Terminals (Frames R1-R6) Mains and motor cable maximum sizes (per phase) accepted at the cable terminals and the tightening torques are listed below. U1, V1, W1 Earthing PE Control Wire U2, V2, W2 “Ground” Frame Maximum Torque Maximum Maximum Torque Torque Size... -
Page 136: Input Power (Mains) Connection
TECHNICAL DATA Input Power (Mains) Connection Input Power (Mains) Connection Specifications 208/220/230/240 VAC 3-phase (1-phase) +10%-15% for CPC2XXXX. Voltage (U 400/415/440/460/480 VAC 3-phase +10%-15% for CPC4XXXX. Prospective Short-Circuit Maximum allowed prospective short-circuit current in the supply is Current (IEC 629) 65 kA in a second providing that the mains cable of the drive is protected with appropriate fuses. -
Page 137: Control Connection
TECHNICAL DATA Control Connection Control Connection Specifications Analog Inputs See table heading “Hardware Description” on page 29. and Outputs Digital input impedance 1.5 kΩ. Maximum voltage for digital Digital Inputs inputs is 30 V. • Maximum contact voltage: 30 V DC, 250 V AC •... -
Page 138: Cooling (Frames R7-R8); Mounting Orientations A & B
TECHNICAL DATA Cooling (Frames R7-R8) Installation Procedure Choose the mounting orientation (a, b, c or d). Lifted from above Symbols: required free space air inlet surface wall fixing point (recommended) control panel mounting slot Required Free Space Around the Unit for Frame Mounting Mounting, Maintenance, Service and Cooling* Size Orientation... -
Page 139: Air Flow 380-480 Volt Drives
TECHNICAL DATA Air Flow, 380…480 Volt Drives The following table lists heat loss and air flow data for 380…480 Volt drives. CENTRIPRO AQUAVAR CPC NEMA 1 Full NORMAL Heat Loss Frame Voltage Phase Base Load DUTY Flow Size Model Amps... -
Page 140: Air Flow 208-240 Volt Drives
TECHNICAL DATA Air Flow, 208…240 Volt Drives The following table lists heat loss and air flow data for 208…240 Volt drives. CENTRIPRO AQUAVAR CPC NEMA 1 Full NORMAL Heat Loss Frame Voltage Phase Base Load DUTY Flow Size Model Amps... -
Page 141: Dimensions And Weights (Frames R1-R6)
TECHNICAL DATA Dimensions and Weights Frames R1-R6 The dimensions and mass for the AQUAVAR depend on the frame size and enclosure type. If unsure of frame size, first, find the “Type” code on the drive labels. Then look up that type code in the “Technical Data”... - Page 142 TECHNICAL DATA Frames R1-R6 Mounting Dimensions UL Type 1 – Dimensions for each Frame Size Ref. mm in 98.0 98.0 10.4 — — — — 98.0 98.0 — — — — 12.5 16.4 473 18.6 22.8 23.2 26.6 0.25 0.25 0.25 0.35 10.0...
-
Page 143: Units With Ip 54 / Ul Type 12 Enclosures
TECHNICAL DATA Units with IP 54 / UL Type 12 Enclosures Outside Dimensions IP 54 / UL Type 12 – Dimensions for each Frame Size Ref. mm in 257 10.1 10.1 14.5 16.1 267 10.5 10.5 14.5 16.1 17.4 21.3 604 23.8 28.5 30.5... -
Page 144: Weights And Dimensions (Frames R7-R8) 460 Volt
Top View TECHNICAL DATA Weights and Dimensions Frames R7-R8 Top View NEMA 1 Enclosure Depth Weight Frame lb. mm 1503 59.17 609 23.98 495 19.49 195 3.62 9.84 2130 83.86 800 31.5 585 23.03 375 3.62 9.84 Drawing is not for engineering purposes. Degrees of Protection Available enclosures: •... -
Page 145: Ambient Conditions
TECHNICAL DATA Ambient Conditions The following table lists the AQUAVAR environmental requirements. Ambient Environment Requirements Storage and Transportation Installation Site in the protective package • 0…1000 m (0…3,300 ft) • 1000…2000 m (3,300…6,600 ft) Altitude if P and I derated 1% every 100 m above 1000 m (300 ft above 3,300 ft). -
Page 146: Materials; Applicable Standards
TECHNICAL DATA Materials Materials Specifications • PC/ABS 2.5 mm, color NCS 1502-Y (RAL 90021 / PMS 420 C and 425 C) Drive • Hot-dip zinc coated steel sheet 1.5…2 mm, thickness of coating 100 micrometers. Enclosure • Cast aluminium AlSi •... -
Page 147: Ul Markings; Liability Limits
If you have any questions concerning your product, please contact the local distributor or CentriPro. The technical data, information and specifications are valid at the time of printing. The manufacturer reserves the right to modifications without prior notice. -
Page 148: Section 12 Appendix
White Brown added 3/16” Dia sphere of silicon grease at base of terminals 1/4 MNPT Connection 0.875” HEX LABEL CentriPro www.centripro.com PART#: 9K515 LISTED 79BN PRESSURE: 0-300PSI INPUT: 10-28VDC MADE IN USA OUTPUT: 4-20mA SERIAL #: AXXXXXX YYMMDD SPECIFICATIONS Parameter... -
Page 149: Transducer Data / Specifications Drawing #A00462C
APPENDIX Transducer Data/Specifications... -
Page 150: Transducer Data / Specifications Drawing #A00436C
APPENDIX Transducer Cable Specification... -
Page 151: Spare Parts List
Control Panel Extension Cable 8 ft. CPCB01 Control Board (OMIO) fits all sizes. OFAN KIT R1 Fan Kit, R1 Frame Size, Aquavar CPC OFAN KIT R2 Fan Kit, R2 Frame Size, Aquavar CPC OFAN KIT R3 Fan Kit, R3 Frame Size, Aquavar CPC... -
Page 152: Warranty
(24) months from date of installation or thirty (30) months from date of manufacture, whichever period is shorter. A dealer who believes that a warranty claim exists must contact the authorized CentriPro distributor from whom the controller was purchased and furnish complete details regarding the claim.
Need help?
Do you have a question about the AQUAVAR CPC and is the answer not in the manual?
Questions and answers