
Subscribe to Our Youtube Channel
Related Manuals for Vingtor Stentofon ENA2060-DC1


Summary of Contents for Vingtor Stentofon ENA2060-DC1
- Page 1 Exigo Network Amplifier for Rolling Stock ENA2060-DC1 Installation & Configuration Manual A100K11689...
-
Page 2: Table Of Contents
Contents Introduction ......................3 Document Scope ........................3 Publication Log ........................3 Related Documentation ......................3 Product Features ........................3 Standards & Certifications ..................... 3 Mounting the Amplifier..................4 Amplifier Connectors ..................5 Ethernet Ports 1 & 2 ....................... 5 Status Indicators ........................ -
Page 3: Introduction
Introduction Document Scope This document describes the mounting, installation and configuration of the ENA2060-DC1 Amplifier for Rolling Stock that can be integrated with the Train Communication Network. Item Number Item Name Description 1023122061 ENA2060-DC1 Exigo Network Amplifier for Rolling Stock... -
Page 4: Mounting The Amplifier
Secure the amplifier to the mounting surface by fastening the bolts in the slots on the mounting flanges (see Figure 1: Mounting Measurements) Mount the amplifier in a position that allows the free flow of air through its cooling fins Figure 1: Mounting Measurements Exigo ENA2060-DC1 Amplifier Installation & Configuration Manual A100K11689... -
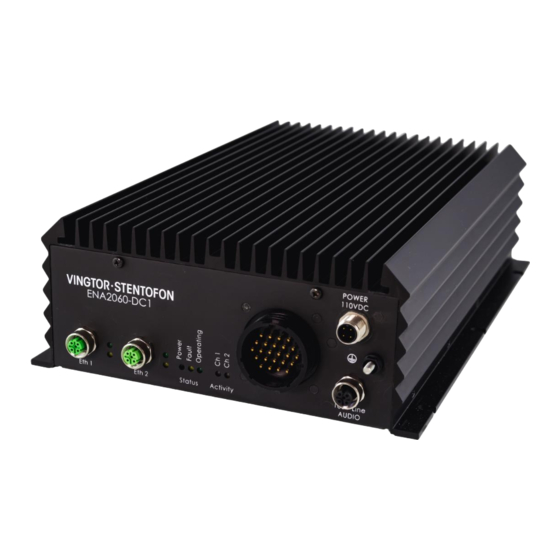
Page 5: Amplifier Connectors
Operating: Green LED is in low frequency flashing pattern to indicate CPU is running and system is OK. Activity Indicators Activity: Blue LEDs (one for each audio channel Ch1 and Ch2) that will be lit when audio is present on the audio outputs. A100K11689 Exigo ENA2060-DC1 Amplifier Installation & Configuration Manual... -
Page 6: Multi-Connector
Balanced Line Out for audio channel (inductive loop system) CH2 0dB – (OUT) MIC IN + Audio Input for Microphone (ambient noise sensing or local announcement) MIC IN - MIC IN CHASSIS SPARE/TEST Exigo ENA2060-DC1 Amplifier Installation & Configuration Manual A100K11689... -
Page 7: Audio Line Connector
Power Connector The power connector is a 4-pin M12 A-Coded male plug connector for 110 VDC power supply. The green LED indicator for Power will be lit when the amplifier is powered up. A100K11689 Exigo ENA2060-DC1 Amplifier Installation & Configuration Manual... -
Page 8: Configuration
To configure the IP address and directory number: 1. Open a web browser and enter the amplifier’s IP address 2. Log in with username: admin and password: alphaadmin 3. Select Station Main > Main Settings Exigo ENA2060-DC1 Amplifier Installation & Configuration Manual A100K11689... - Page 9 Enable NTP: Check the box to enable NTP o Hostname: 10.5.2.19 (example IP address of Hostname) o Select Region: Europe (example Region) o Select Zone: Oslo (example Zone) Click Save followed by Restart A100K11689 Exigo ENA2060-DC1 Amplifier Installation & Configuration Manual...
-
Page 10: Sip Settings
SIP Settings Select SIP Configuration > SIP Settings Exigo ENA2060-DC1 Amplifier Installation & Configuration Manual A100K11689... - Page 11 Enter the audio gain value in decibels in the range -40 to 0 dB for Channel 1/2 and 0 to 40 dB for Line In 1/2 Click Save for each Account Setting that has been completed A100K11689 Exigo ENA2060-DC1 Amplifier Installation & Configuration Manual...
-
Page 12: Station Information
Codec g729 / Codec g722 / Codec g711a / Codec g711u Options are: Unused, Low, Medium, High. Click Save Station Information To confirm that configuration has been done correctly, open the Station Information page: Select Station Main > Station Information Exigo ENA2060-DC1 Amplifier Installation & Configuration Manual A100K11689... -
Page 13: Speaker Line Monitoring
Speaker Line Monitoring The ENA2060-DC1 amplifier has the option to monitor each speaker line to detect line faults such as Open, Shorted or Ground Fault. To configure Speaker Line Monitoring: Select Advanced SIP > Monitoring This Monitoring page shows the current status for each speaker line and whether there are any System Messages reported. - Page 14 Shorted, Open or OK. Typical SLM values for a 100 m line with 15W speaker load, calibrated values and various Shorted, Open and Ground Fault situations are as follows: Exigo ENA2060-DC1 Amplifier Installation & Configuration Manual A100K11689...
-
Page 15: Firewall Settings
To be able to upload configuration data, the amplifier network port must be opened for certain protocols. Select Advanced Network > Firewall Make sure that the port for SIP, SSH, DIP, HTTP, ZAP, SNMP, TFTP server, VoIP is enabled by checking the relevant boxes as shown. A100K11689 Exigo ENA2060-DC1 Amplifier Installation & Configuration Manual... -
Page 16: Automatic Configuration Using Tftp
The value must be between 1 and 999 and the default setting is 60 7. Click Save The amplifier will then contact the TFTP server and automatically run the configuration file to carry out the configuration procedure according to the set time interval. Exigo ENA2060-DC1 Amplifier Installation & Configuration Manual A100K11689... -
Page 17: Software Upgrade
5. Enter the prefix (e.g. sti-x.x.x.x) to the software image files in the Image file field 6. Click Save settings to store the data The amplifier will now try to contact the TFTP server. If the connection cannot be established or the A100K11689 Exigo ENA2060-DC1 Amplifier Installation & Configuration Manual... - Page 18 7. Click the Upgrade button to upgrade the software on the amplifier. The upgrade procedure takes about 3 minutes. The process can be monitored by clicking the Log viewer tab in the TFTP server program. Exigo ENA2060-DC1 Amplifier Installation & Configuration Manual A100K11689...
-
Page 19: Example Configuration File
# onhook send dtmf 8 in call onhook_in_call_function=2 onhook_dtmf_on=8 # Call 301 dak1_value=0401 dak1_in_call_function=0 dak2_value=401 dak2_in_call_function=0 dak3_value=501 dak3_in_call_function=0 dak4_value=203 dak4_in_call_function=0 dak5_value=510 dak5_in_call_function=0 dak6_value=502 dak6_in_call_function=0 [relays] gpio3_dtmf_activate=2 gpio3_dtmf_deactivate=0 gpio3_dtmf_flashing_slow=1 gpio4_dtmf_activate=5 gpio4_dtmf_deactivate=3 gpio4_dtmf_flashing_slow=4 gpio5_dtmf_activate=7 gpio5_dtmf_deactivate=6 A100K11689 Exigo ENA2060-DC1 Amplifier Installation & Configuration Manual... - Page 20 www.zenitel.com Zenitel Norway AS The WEEE Directive does not legislate that Zenitel, as a ‘producer’, shall collect ‘end of life’ WEEE. This ‘end of life’ WEEE should be recycled appropriately by the owner who should use proper treatment and recycling measures. It should not be disposed to landfill. Many electrical items that we throw away can be repaired or recycled.
Need help?
Do you have a question about the ENA2060-DC1 and is the answer not in the manual?
Questions and answers