
Related Manuals for Coleman CX5HD


Summary of Contents for Coleman CX5HD
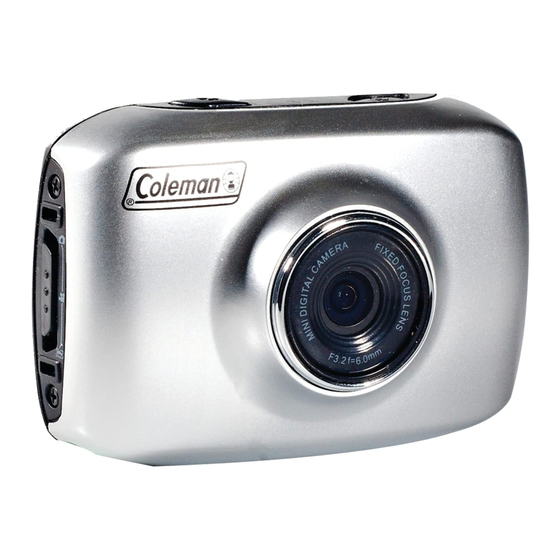
- Page 1 CX5HD USER’S MANUAL Before operating this unit, please read this manual thorougly and retain it for future reference.
-
Page 2: Table Of Contents
Contents Precautions ..........................1 System Requirements ........................ 3 Introduction to Appearance and Keypad ................. 4 Accessories ..........................6 Get Started ........................... 7 1. Charge the Built-in Lithium Battery ..................7 2. Using Memory Card ....................... 8 3. Startup/Shutdown ........................8 4. -
Page 3: Precautions
This user's manual has referred to the latest information we had when this user’s manual was made. The screen display and illustrations are used in this user's manual for the purpose of introducing details of this video camera in a more specific and direct way. Difference may arise between these displays and illustrations and the video camera actually available for you due to difference in technological development and production batch, under which case, the actual functions of this video camera shall prevail. - Page 4 If dirt or stain is accumulated on the video camera or on its lens, use soft, clean and dry rag to wipe it away gently. If the video camera or its lens is stained with sand particles, blow on the lens to get the sand articles away gently.
-
Page 5: System Requirements
System Requirements ® ® Operating System Microsoft Windows 7, Vista, XP, 2000 ® Intel Pentium III 800 MHz or other CPU with equivalent performance Internal Memory 512 MB RAM Sound Card and Sound card and display card support DirectX8 or later Display Card CD-ROM Drive Speed of 4 X or faster... -
Page 6: Introduction To Appearance And Keypad
Introduction to Appearance and Keypad... - Page 7 Memory card slot Mode switch Reset Lens USB port TFT LCD Power button Working indicator Charging indicator Shutter button...
-
Page 8: Accessories
Accessories Waterproof Casing Camera Holder Helmet Holder Suction Cup Mount Handlebar Mount Helmet Band Car Charger USB Cabel... -
Page 9: Get Started
Get Started 1. Charge the Built-in Lithium Battery Indicator Light for charging is on. USB Cable Connect the video camera with computer for charging in the shutdown state. The indicator light for charging is on at this time and will be off after charging. In general, it can be fully charged after 2-4 hours. -
Page 10: Using Memory Card
2. Using Memory Card Push the memory card into the card slot according to the concave lettering beside the slot of memory card till it is completely inserted. To take out the memory card, gently press the end of the memory card inward and it will pop up. Note: No built-in memory is available in this video camera. -
Page 11: Conversion Between Function Modes
3.2 Shutdown: Press the POWER Key and the camera will be shut down. Automatic shutdown: when the idle time of the video camera reaches the time for automatic shutdown, it will be shut down automatically to save power. The default time of this camera for automatic shutdown is 5 minutes. -
Page 12: Indicator Light
5. Indicator light Working indicator light: When the video camera is being busy (such as, recording a film, taking photos, automatic off-screen), the busy light will be on. Charging indicator light: It will be on when it is charging. The light will go off when the charging is done. -
Page 13: Picture Taking Mode
Digital zoom icon, click to enlarge. Digital zoom icon, click to minify. Click this icon to record videos. Battery icon, represents the power status of the battery. Represents the status of digital zoom. Click this icon to switch to the playback mode. Click this icon to set the date and time Press Shutter key to confirm after setting completed. - Page 14 Counter, indicating current number of photos taken / 0/1234 number of photos to be taken. Picture mode. Indicating that the device is in photo taking mode. Photo size, click to select the photo resolution 1M/ 3M/5M. Represents that the memory card has been inserted. Digital zoom icon, click to enlarge.
-
Page 15: Vehicle-Mounted Mode
8. Vehicle-Mounted Mode Turn the mode switch to vehicle-mounted mode, press the shutter button or click the center of LCD once under the preview state to begin recording. The length of each video will be 5 minutes. When the memory card is full, the earliest stored video file will be deleted to release the memory space for the new video file. -
Page 16: Playback Mode
Represents the status of digital zoom. Click this icon to switch to the playback mode. Click this icon to set the date and time Press Shutter key to confirm after setting completed. Note: the screen will be off automatically during recording process in order to save power; user can press the power button shortly to start the screen and restore display. - Page 17 Move to the previous file. Means that clicking can activate to confirm the deletion of the current file. Means that clicking can play the current video file. Means that clicking can switch back to the previous mode. 9.2 Movie Clips Playing: Click to pause playing, click to play forward, and click...
-
Page 18: Connect To Personal Computer
9.3 File Deletion: Click YES to delete the current file, or click NO to cancel the request of deletion. 10. Connect to Personal Computer The camera supports the plug and play function. Connect the device to the computer with USB cable under turning-on state, then it will be switched into the removable hard disk mode. -
Page 19: Technical Parameters
Technical Parameters Image Sensor CMOS Video taking mode, Picture taking mode, Vehicle-mounted mode, Function Mode Removable storage device Camera Lens F/3.1 f=9.3 mm Digital Zooming 4 times Shutter Electronic Shutter LCD Display 5.1cm (2.0 inch) Touch Screen Photo Resolution 5M (2592x1944), 3M (2048x1536), 1M (1280x1024) 720p: 1280x720 (30 fps) Video Resolution VGA: 640x480 (60 fps) - Page 20 Storage Media microSD card (Supporting up to 32GB) (No internal memory) USB Interface High-speed USB 2.0 interface Power Supply Built-in 3.7V Rechargeable Lithium-ion Battery Dimension 66 x 43 x 27 mm Weight Approx. 46 g EC Declaration of Conformity The product complies with the protective requirements of European Directives 2004/108/EC.
Need help?
Do you have a question about the CX5HD and is the answer not in the manual?
Questions and answers